Transcription
How to Properly Cut Out anIBC Tote for Aquaponicsby John Musser(Illustrated with pictures and a video)COPYRIGHT 2014, ALL RIGHTS RESERVED BY AQUAPONICS & EARTH SUSTAINABLE LIVING, INC.
My story I have spent many hours cutting out IBC totes and havetrained many others to do the same. I have learned that it’s best to take the time necessary tocut them out right the first time. Once you have placed gravel, fish and crops in yoursystem, its really too late for any retrofitting. Since much of our work is around children and orphans,we want the edges to be smooth and safe for allconcerned. Our units are smooth to the touch when done.COPYRIGHT 2014, ALL RIGHTS RESERVED BY AQUAPONICS & EARTH SUSTAINABLE LIVING, INC.
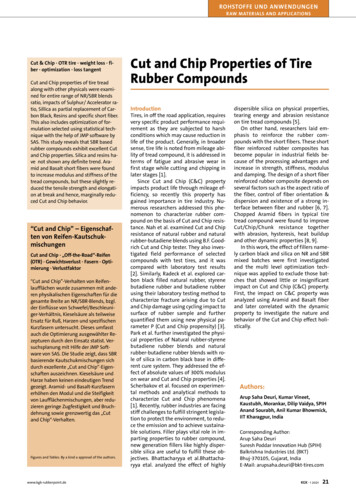
This Presentation Gets Straight to the Point, focusingONLY on Cutting an IBC Tote the Right WayFirst of all, what is an “IBC TOTE?”An IBC (which stands for “International Bulk Container”) Tote is a275-330 gallon steel-framed plastic container used worldwide forstorage and transport of liquids and building materials from onecountry to another.You want a 275 gallon-sized “foodgrade” tote that has no cracks and avalve spout that is in good workingcondition.The finished IBC tote Aquaponicssystem utilizes part of the containerfor the fish tank and the other partfor the grow bed.COPYRIGHT 2014, ALL RIGHTS RESERVED BY AQUAPONICS & EARTH SUSTAINABLE LIVING, INC.
Not All IBC Totes are the SameThere are different sizes and shapes of IBC totes and most are very similar inshape and appearance. Please observe the pictures provided in this presentationand look for a tote that is as close to them as possible. Some will have more ribs than others. Make sure you use our examples as aguide and find two totes with the same amount of metal ribs. Some IBC totes are larger than others. We use the 275 gallon [1041 liter] tote.You will need at least one or two extra totes in case of mistakes or bad valves. Some parts of the tote are more temporary than others, such as the valvespout. We want a good solid ball valve to provide many years of use. They may have wooden or aluminum frame beds.The aluminum ones work best because they lastindefinitely. Use food grade totes only. No exceptions. (Totesthat have been used for tomato sauce, pickles, etc.) They must be washed out before cutting. This canbe done with a pressure hose, or hand wash with amild soap, like Dawn dish soap. It’s important thatthere is no residue in the container to foul up theinjector or mess up the eco-system of theAquaponics system later. Make sure the tank is without cracks and the valveis in excellent working condition. You don't want todo all this work and have a bad tote.COPYRIGHT 2014, ALL RIGHTS RESERVED BY AQUAPONICS & EARTH SUSTAINABLE LIVING, INC.
BE SAFEAlways take appropriate safety precautions.Wear safety goggles and gloves when modifying IBC totes.COPYRIGHT 2014, ALL RIGHTS RESERVED BY AQUAPONICS & EARTH SUSTAINABLE LIVING, INC.
Assemble the Proper Tools for ToteModification:Assemble all the materials, suppliesand tools before beginning yourproject: Permanent marker Drill with 5/16”, 7/8” and 1” drill bits Torx bit #40 Hand grinder Metal cutting wheel Brush wheel Vice Sanding block Knife / blade for scrapingCOPYRIGHT 2014, ALL RIGHTS RESERVED BY AQUAPONICS & EARTH SUSTAINABLE LIVING, INC.
You will need to purchase: one or two IBC - 275 gallon (1041liter) food grade totes. Four 8 foot 2x4 pieces of wood(You need four boards cut at 4’6”for each tote.) olive oil for lubrication of valvesCOPYRIGHT 2014, ALL RIGHTS RESERVED BY AQUAPONICS & EARTH SUSTAINABLE LIVING, INC.
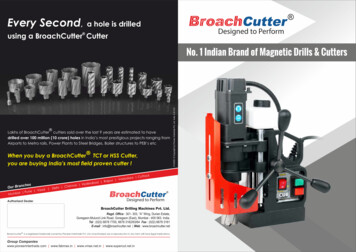
PREPARATION OF THE TOTEStep 1Mark out the 2 cutting areas, on the inside of the bars asshown, all the way around the food grade IBC tote with amarker. Make the marks straight.COPYRIGHT 2014, ALL RIGHTS RESERVED BY AQUAPONICS & EARTH SUSTAINABLE LIVING, INC.
Step 2Remove bars from the top of the tote and remove the tote fromthe cage.COPYRIGHT 2014, ALL RIGHTS RESERVED BY AQUAPONICS & EARTH SUSTAINABLE LIVING, INC.
Step 3Cut tote along marked lines using hand grinderCOPYRIGHT 2014, ALL RIGHTS RESERVED BY AQUAPONICS & EARTH SUSTAINABLE LIVING, INC.
Step 4Sand the cut edges of both the top and bottom pieceswith a medium sanding block.Take your time and do a good job.Later, rough edges can and will rip your nets.COPYRIGHT 2014, ALL RIGHTS RESERVED BY AQUAPONICS & EARTH SUSTAINABLE LIVING, INC.
Step 5Cutting Metal FrameCut out the metal framing. Cut off the excess metalpieces as seen below between the 2nd and 3rdhorizontal ribs that you marked earlier in step 1.COPYRIGHT 2014, ALL RIGHTS RESERVED BY AQUAPONICS & EARTH SUSTAINABLE LIVING, INC.
Bottom and Top After CuttingBottom After CuttingTop After CuttingCheck that your pieces look similar tothe pieces pictured here.COPYRIGHT 2014, ALL RIGHTS RESERVED BY AQUAPONICS & EARTH SUSTAINABLE LIVING, INC.
Step 6Smoothing Rough EdgesUse a file or a wire wheel with a drill for smoothing the roughmetal edges.A chainsaw file works well to clean inside of any cut metal pieces(inside the ribs).COPYRIGHT 2014, ALL RIGHTS RESERVED BY AQUAPONICS & EARTH SUSTAINABLE LIVING, INC.
Step 7Our Little Secret for a Really Nice LookOn the top metal frame, locate the rods (4) with premanufactured holes. Place the opposite end of these rods into avice and flatten.COPYRIGHT 2014, ALL RIGHTS RESERVED BY AQUAPONICS & EARTH SUSTAINABLE LIVING, INC.
Step 8In each flattened rod, using a 5/16” drill bit [.8cm], drill a newhole directly above the rail and in line with the old hole of thetop metal frame.COPYRIGHT 2014, ALL RIGHTS RESERVED BY AQUAPONICS & EARTH SUSTAINABLE LIVING, INC.
Step 9Reattach the rods back onto the top frame using the new holes.COPYRIGHT 2014, ALL RIGHTS RESERVED BY AQUAPONICS & EARTH SUSTAINABLE LIVING, INC.
Step 10Clean the Valves This is very important, so take you time. You can use Q-tips also. This will pay off for years to come. A frozen valve is no good; and if it breaks, you will have troubleon your hands.COPYRIGHT 2014, ALL RIGHTS RESERVED BY AQUAPONICS & EARTH SUSTAINABLE LIVING, INC.
Step 11Wash your tote several timesMake sure you have NOplastic particles hanging;they will plug up yourpumps.COPYRIGHT 2014, ALL RIGHTS RESERVED BY AQUAPONICS & EARTH SUSTAINABLE LIVING, INC.
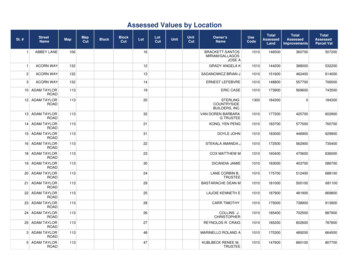
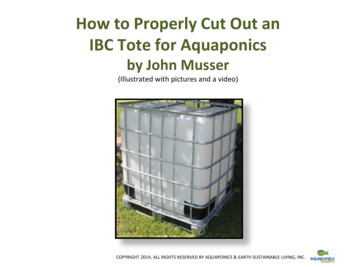
Place the plastic top and bottom of thetote back into their respective frames.BottomTopCut 2x4’s to 4’5” (134.6 cm) in length. Four boards will be needed foreach tote. (They must fit inside the underside of the grow bed frame).Place 2 boards 3” (7.6 cm) from the back of the tote.Place 2 boards 8” (20.3 cm) from the back boards towards the front.COPYRIGHT 2014, ALL RIGHTS RESERVED BY AQUAPONICS & EARTH SUSTAINABLE LIVING, INC.
Place tanks on a level surface. Place tanks 11 ½” (29.2 cm) apart as shown below. Place grow beds back 12” (30.5 cm) from the front of the tankswith the drain holes on the outside front corners.COPYRIGHT 2014, ALL RIGHTS RESERVED BY AQUAPONICS & EARTH SUSTAINABLE LIVING, INC.
Bonus Tip: Tank Drain AssemblyAttach rubber boots to ball valves. Do not glue so that it can beeasily cleaned later.Tighten clamps with a standard screwdriver or socket.COPYRIGHT 2014, ALL RIGHTS RESERVED BY AQUAPONICS & EARTH SUSTAINABLE LIVING, INC.
Make sure you watch the Video.Every step is clearly demonstrated.For more information contact: customers@aquaponicsandearth.orgCOPYRIGHT 2014, ALL RIGHTS RESERVED BY AQUAPONICS & EARTH SUSTAINABLE LIVING, INC.
tote back into their respective frames. Cut 2x4's to 4'5" (134.6 cm) in length. Four boards will be needed for each tote. (They must fit inside the underside of the grow bed frame). Place 2 boards 3" (7.6 cm) from the back of the tote. Place 2 boards 8" (20.3 cm) from the back boards towards the front. Bottom Top