Transcription
Galaxy3-48C, 3-144, 3-144C, 3-520, 3-520CProgramming ManualHoneywell Security
Galaxy 3 Series Programming ManualTable of ContentsContentsSection 1: Quick Setup . 1Section 2: System Operation . 3Menu Options . 3General . 3The Full Menu . 3The Quick Menu . 3Menu Access . 3Direct Access . 4Menu Driven Access . 4Keypad Menu Timeout . 4Engineer Mode . 4Accessing Engineer Mode . 5Exiting from Engineer Mode . 5Multi User Access . 6Section 3: Setting Options. 7Setting the System Using a PIN . 7Full Setting . 7Part Setting . 7Cancelling the Setting . 7Unsetting the System Using a PIN . 8Engineer Unsetting . 8Keyswitch Setting Options . 8Setting the System with a Keyswitch . 8Unsetting the System with a Keyswitch . 8Setting the System with Cards/Tags/Fobs . 8Unsetting the System with Proximity Cards . 9Cancelling and Resetting Alarms and Alerts . 9Resetting Using Alarm Cause Code . 10Overriding of Faults and Tampers . 10Setting Features . 10Show Set Status . 10Exit Time . 11Exit Time Reset . 11Omitted Zones . 11Expiry Warning . 11System Set Indication . 11Group Logic Setting Restriction . 11Entry Time . 12Timeout (Slow Entry) . 12i
Table of ContentsGalaxy 3 Series Programming ManualStraying from the Entry Route . 12Abort Time . 12Abort Setting Message . 12Fail to Set . 12Power Failure While System is Set. 12Section 4: Menu Options 11-19 . 13Option 11 – Omit Zones (Quick Menu Option 0). 13Option 12 – Timed Set . 15Option 13 – Part Set . 15Option 14 – Forced Set (Quick Menu Option 1) . 15Option 15 – Chime (Quick Menu Option 2) . 15Option 16 – Instant Set . 15Option 17 – Silent Part . 16Option 18 – Home Set . 16Option 19 – All Set . 16Section 5: Display Options . 17Option 21 – Display Zones (Quick Menu Option 3) . 17Option 22 – Display Log (Quick Menu Option 4). 18Option 23 – System . 19Option 24 – Print (Quick Menu Option 5) . 20Option 25 – Access Doors . 21Section 6: Test Options . 25Option 31 – Walk Test (Quick Menu Option 6) . 25Option 32 – Outputs . 26Section 7: Modify Options . 27Option 41 – Time/Date (Quick Menu Option 7) . 27Option 42 – Codes (Quick Menu Option 8) . 28Default Codes . 29Engineer Code . 29ATM User Codes . 29Escaping from Engineer Mode . 30Programming Codes . 31Option 43 – Summer (Quick Menu Option 9) . 39Option 44 – Trace . 39Option 45 – Timer Control . 40Option 46 – Group Omit. 43Option 47 – Remote Access. 44Option 48 – Access Authorization . 50ii
Galaxy 3 Series Programming ManualTable of ContentsSection 8: Engineer 1 . 51Option 51 – Parameters . 51Assigning Parameters to Groups . 51Option 52 – Program Zones. 70Selecting Zones . 70Attributes . 70System Alarms . 74Option 53 – Program Outputs. 86Selecting Outputs . 86Attributes . 87Output Functions . 90Option 54 – Links . 101Programming Links . 101Option 55 – Soak . 104Programming Soak Zones . 104Option 56 – Communications . 1051 Internal Telecoms . 1062 External RS232 Interface Module . 1183 ISDN Module . 1204 Ethernet Module . 1285 Ext Telecoms . 1396 Int RS232 Port . 140Option 57 – System Print . 143Selecting a Print Option . 143Option 58 – Keypad . 144Option 59 – Quick Menu . 146Section 9: Engineer 2 . 148Option 61 – Diagnostics . 148Option 62 – Full Test . 151Option 63 – Options . 152Option 64 – Assemble Zone. 162Programming a Custom Zone . 162Option 65 – Timers . 166Timer A and B . 167Autoset . 168Option 66 – Pre-checks . 172Testing Zones . 172Option 67 – Remote Reset . 173Option 68 – Menu Access . 174iii
Table of ContentsGalaxy 3 Series Programming ManualSection 10: Engineer 3 . 175Option 71 - SPI Key. 175Fitting the SPI Key . 175Using the SPI Key . 176Removing the SPI Key . 177Appendix A: Library . A-1Appendix B: SIA and Contact ID Event Codes . B-1Appendix C: SIA Event Structure . C-1Appendix D: Event Log Messages . D-1Appendix E: Site Data Storage .E-1Preparing for Storage Mode .E-1Enabling Storage Mode .E-1Using Storage Mode .E-2Leaving Storage Mode .E-2Index . 1iv
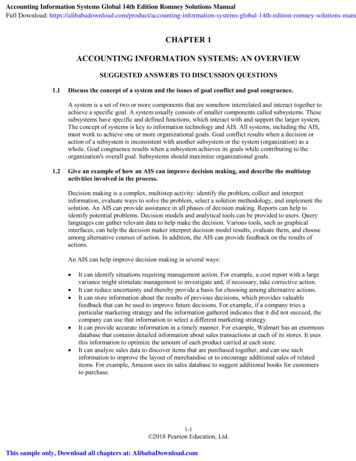
Galaxy 3 Series Programming ManualQuick SetupSection 1: Quick SetupTo quickly set up a Galaxy 3 Series control panel for programming follow these simple steps:1. Connect a 1k Ω (1%) resistor across each of the zones on the panel and any RIO’s (if connected).2. Ensure that the tamper return loop — the terminal marked as AUX TAMP on the PCB — is a completeloop.NOTE: This is factory set as a completed loop with a 0 V return.3. Connect one of the keypads to the AB LINE terminals on the control panel. The Galaxy 3-48 hasone AB line; the Galaxy 3-144 has two AB lines; the Galaxy 3-520 has four AB lines (when anRS485 Expansion Module is fitted).NOTE: G3-48 - There is one AB LINE terminal on the control panel PCB.NOTE: G3-144/G3-520 - There are two AB LINE terminals on the control panel PCB.Control PanelK eyp adB1BA1A-- Table 1. Terminal Connections4. Connect a 680 Ω End Of Line (EOL) resistor across the A and B terminals of the keypad.5. Ensure that the keypad is fitted to the wall (see Keypad Installation Procedure, Section 4).6. Connect the battery before replacing the control panel lid.7. Connect the mains wiring to the control panel. Do not switch the mains ON.8. Replace the control panel lid and secure the fastening screws.9. Switch on the mains voltage (230 Va.c. / 50 Hz).10. The following sequence of events occur: the keypad buzzer and control panel horn (if fitted) activate for 10 - 20 seconds, flashingis displayed on the keypad, the sounders stop and the keypad displays become blank, the green power LED lights and the following displays on the keypadConfiguringPlease Wait the default banner is then displayed on the keypad.GALAXY XXX VY.YY 01:01SUN 01 JANwhere:XXX is the panel typeY.YY is the panel software revision11. The system is now ready to be programmed. Refer to Galaxy 3 Series Programming Manual:IP1-0033 for programming details.1
Galaxy 3 Series Programming Manual2
Galaxy 3 Series Programming ManualMenu optionsSection 2: System OperationMenu OptionsGeneralThe Galaxy 3 Series provides various menu options for modifying the functional performance of the system.There are two menu structures:1.Full Menu — only accessed by authorized users including the master manager code and by theengineer.2.Quick Menu — a selection of options from the full menu. The quick menu is the default menuaccess for all user codes (type 2.3 and above), except master manager and engineer.The Full MenuThe full menu has a hierarchy of 5 structures contained within it. Each structure is accessible by an increasedtype of user code.The Quick MenuThe quick menu offers type 2.3 and above users a selection of up to 10 options, numbered 0 – 9. The optionsavailable from the quick menu can be modified to the user’s requirement via option 59 QUICK MENU.Quick MenuFull MenuUser (Type 2.3)User (Type 2.4)User (Type 2.5)Manager (Type 3.6)Engineer (Type 3.7)Engineer (Type 3.7)Engineer (Type 3.7)0 Omit Zones10 Setting20 Display30 Test40 Modify50 Engineer 160 Engineer 270 Engineer 31 Forced Set11 Omit Zones21 Display Zones31 Walk Test41 Time/Date51 Parameters61 Diagnostics71 Program Key2 Chime12 Timed Set22 Display Log32 Outputs42 Codes52 Program Zones62 Full Test3 Display Zones13 Part Set23 System43 Summer53 Program Outputs63 Options4 Display Log14 Forced Set24 Print44 Trace54 Links64 Assemble Zone5 Print15 Chime25 Access Doors6 Walk Test16 Instant Set45 Timer Control55 Soak65 Timers46 Group Omit56 Communication66 Pre-Check7 Time/Date17 Silent Part47 Remote Access57 System Print67 Remote Reset8 Codes18 Home Set48 Access Authorization58 Keypad68 Menu Access9 Summer19 All Set49 Datelock59 Quick MenuTable 2. Quick and Full Menu Options ReferenceMenu AccessOnly valid codes (type 2.3 and above) can access the menu options. Access to the user options is assignedby the engineer (refer to options 42 CODES and 68 MENU ACCESS). Users cannot view or accessoptions for which they are not authorized; this includes options in the Quick Menu.NOTE: Menu options 51 – 67 (ENGINEER 1 and ENGINEER 2) can be assigned additional access touser type 2.3 - 3.6, by the engineer.3
Menu AccessGalaxy 3 Series Programming ManualThere are two methods of selecting menu options:1.Direct Access:Code ent option number ent.2.Menu Driven Access:Code ent A (to select menu level) ent;A key (to select menu option) ent.Direct AccessEntering a valid menu option number while in the menu immediately moves to that option. For example, pressing 52 (type 3.7 only) when the keypad is displaying 22 DISPLAY LOG moves directly to option52 PROGRAM ZONES; Pressing 10 while accessing the PROGRAM ZONES option moves directlyto 10 Group (group mode must be first enabled in option 63.1). The option number entered must be validfor the type of the menu structure that is currently being accessed.Menu Driven AccessMenu driven access allows the engineer (and users) to enter the menu and, by using the A and B keys, navigate through the available options. The options are accessed by pressing the ent key. If you press and holdthe A key it will scroll forward through the options and if you press and hold the B key it will scroll backwardsthrough the options.Keypad Menu TimeoutOnce the user menu has been accessed (irrespective of user type), if there are no keypresses for two minutes,then the keypad timeout occurs; the system returns to the banner text.NOTE: This feature does not apply when the system is in the Walk Test option. If no zones are tested or nokeypresses occur for 20 minutes when Walk Test is selected, then the keypad timeout occurs. InMenu Option 66 (Pre-check) there is also a 20 minute timeout after the last zone has been activated.Engineer ModeTo program the Galaxy 3 Series control panel, the system must be in engineering mode. This allows access tothe engineer menu options 50 ENGINEER 1, 60 ENGINEER 2 and 70 ENGINEER 3.4
Galaxy 3 Series Programming ManualEngineer MenuAccessing Engineer ModeUser Authorized AccessEntry to the engineer mode is authorized by a user with access to menu option 48.1 ACCESS AUTH.Engineer. The user selects this option and presses key 1 to enable engineer access. The engineer code mustthen be entered within five minutes of the option being enabled. A single entry of the engineer code directlyaccesses the mode, without activating an engineer tamper alarm. If the code is not entered within the fiveminute period, the engineer code is invalid and has no effect. Once the engineer mode has been accessed,there is no time limit on the period that the engineer can remain in the mode.1. Enable Engineer Access:User Code (12345) ent 48 ent ent 1 ent (press esc to return to the banner)2. Access Engineer ModeEngineer Code (112233) entOn accessing engineering mode, any group that is set becomes inaccessible to the engineer. The set groupscannot be assigned to zones, outputs and any other functions permitting group allocation. When the engineercode is entered three things happen: All system tampers become isolated.The engineer is given access to the full menu.The banner message is changed to indicate engineer mode.Exiting from Engineer ModeTo exit from engineer mode and return to the normal banner enter, carry out the following operation:1.Return to the engineer banner2.Enter the engineer code3.Press the esc keyThe Galaxy carries out the following checks:1.That there are no module or zone tampers. If there are any module or zone tampers the escapeprocedure is aborted.2.That it is communicating with all of the attached modules.If any modules are reported as missing from the system, the Galaxy prompts the engineer toremove each of the missing modules by pressing the key. If the engineer does not remove themissing modules, the escape procedure is aborted.3.That all of the access doors (controlled by the on-line MAX) are closed. If any of the access doorsare open, then the exit procedure is halted until all of the doors are closed.4.That there are no power failures on the galaxy system, such as AC fail, fuse fail or battery fail5
User AccessGalaxy 3 Series Programming ManualAborting the Exit Engineer Mode ProcedureIf the esc key is pressed at any point while engineer mode is being exited, before the normal banner is displayed, the exit procedure is aborted and the system remains in engineering mode.Multi User AccessThe Galaxy allows multi-user access. A maximum of 4 users (3-48), 8 users (3-144) and 16 users (3-520)can simultaneously carry out tasks on the system.6
Galaxy 3 Series Programming ManualSetting the SystemSection 3: Setting OptionsSetting the System Using a PINFull SettingEnter: USER CODE AIf groups are enabled and the user code has been assigned group choice then the keypad displays the setstatus of the available groups:R ReadyF Fault (group is unset and at least 1SETA12345678zone is openGroups RRSRSSSSP Part SetS (flashing) selected for settingS (steady) already setL Group is locked out and cannot be unset.- Group is not available to the userPressing the keys for the groups toggles the R (Ready) to an S (set flashing).SETA12345678Groups SSSRR--NOTE: If using the Galaxy 3-520 system the groups are displayed in blocks of eight. Each block can beviewed by pressing the A or B keys.Once the required groups have been selected press the ent key to begin the setting procedure.If groups are not enabled or the user does not have group choice, entering the user code followed by the Akey immediately starts the setting procedure.TIMED060The keypad displays the exit time countdown. At the end of the exit time, or when the setting procedure isterminated by a FINAL or PUSH-SET zone closing, the ENTRY/EXIT HORN outputs and keypad buzzers become silent for four seconds, then emit two long tones to confirm that the system is set. The messageSYSTEM IS SET appears briefly before the keypad display changes back to the normal day banner.Part SettingEnter:CODE BPART SET060This is identical to the Full Setting procedure, except the keypad display indicates that the system is beingPart Set. Only the zones which have the Part attribute enabled (refer to option 52.5 PROGRAMZONE.Part), are included.Cancelling the SettingThe full and part setting routines can be aborted by pressing the esc key (on the keypad used to begin setting)before the system sets.7
Unsetting the SystemGalaxy 3 Series Programming ManualUnsetting the System Using a PINDuring the unsetting procedure, initiated by the opening of FINAL or ENTRY zone on a set group, thesystem is unset by entering the user code followed by the A key. If the user does not have group choice, all of the groups assigned to the code are instantly unset. If the user has group choice only the group that the FINAL or ENTRY zone is assigned to isunset; all of the other groups remain set. The system displays the set status of the remaininggroups and prompts for the required groups to be unset. To unset the required groups press therelevant number keys — the S or P (Set or Part Set) changes to flashing U — and then press theent key. When the system/group is unset three short beeps are emitted to advise the user that the system/group isunsetEngineer UnsettingThe engineer can only unset a system that was set using the engineer code. The engineer code cannot be usedto unset a system that was set by a user code.Keyswitch Setting OptionsZones programmed as KEYSWITCH can be used to full set, part set and unset the system. Refer to option52 PROGRAM ZONE.Setting the System with a KeyswitchThe KEYSWITCH starts the setting procedure of each of the groups assigned to the keyswitch zone. At theend of the exit time, or when the setting procedure is terminated by a FINAL or PUSH-SET zone closing, theENTRY/EXIT HORN outputs and keypad buzzers become silent for four seconds, then emit two long tonesto confirm that the system is set.NOTE: If the KEYSWITCH has its Part attribute enabled (refer to option 52 PROGRAM ZONE) thenthe KEYSWITCH part sets the system.Unsetting the System with a KeyswitchActivating the KEYSWITCH when the group that it is assigned to is set instantly unsets the group. All othergroups which have been “starred” to the KEYSWITCH are not affected and
Connect the battery before replacing the control panel lid. 7. Connect the mains wiring to the control panel. Do not switch the mains ON. 8. Replace the control panel lid and secure the fastening screws. 9. Switch on the mains voltage (230 Va.c. / 50 Hz). 10. The following sequence of events occur: