Transcription
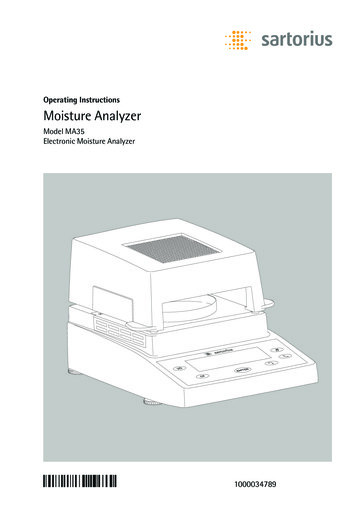
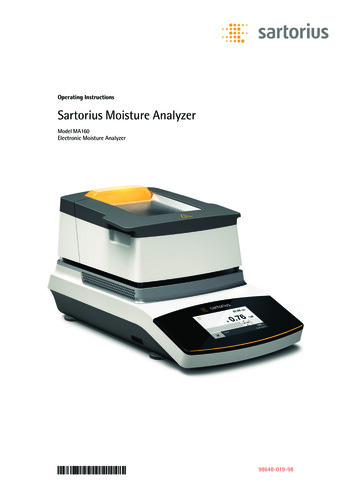
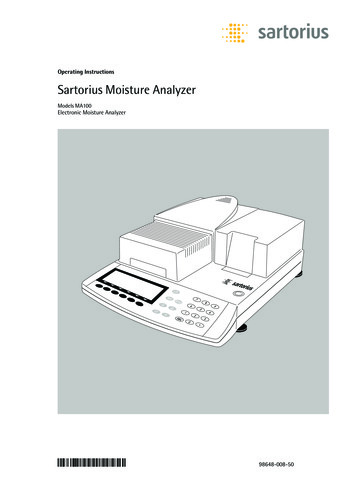
Operating InstructionsSartorius Moisture AnalyzerModels MA100Electronic Moisture Analyzer98648-008-5098648-008-50
Intended UseThe MA100 Moisture Analyzercan be used for quick and reliable determination of the moisture contentof liquid, pasty and solid substancesaccording to the method of thermogravimetry.The moisture analyzer saves workand speeds up your routine proceduresthrough the following features:– Fast analysis time, gentle and uniformsample drying due to the coiled quartzheating element (CQR) or round ceramicIR heating element– Quick determination of the dryingparameters and easy-to-set drying programs due to automatic determination of the shutoff parameters forsemi-automatic analyses (SPRM* mode)– Setting the fully automatic end-pointrecognition parameter for an analysisonly requires that you enter the dryingtemperature– Optimal adjustment of the moistureanalyzer to other methods of analysisand adaptation to difficult samplesdue to the semi-automatic end-pointrecognition– Quick drying without the risk of scorching the sample and pre heating adaptedto the sample’s heat sensitivity byselecting an adequate heating program– High flexibility for analyzing the widestvariety of samples and storable programs to save time when changing todifferent types of samples– User-definable printouts that canbe customized before moisture analysisruns– Brief instructions on the moisture analyzer provide quick answersto frequently asked questions* SPRM Swift Parameter Adjustmentto a Given Reference Method2The moisture analyzer is ideal as ameasuring and test instrument forincoming inspection, in-process control and quality control due to thefollowing features:– Convenient and reliable control ofthe accuracy of the moisture ana lyzeraccording to the DIN/ISO standards byusing the internal calibration weight– reproTEST for quick determination ofthe standard deviation– ISO/GLP-compliant recording capability;printouts can also be generated with an(optional) b uilt-in printer– Optimal process control and qualitymonitoring due to the statistical evaluation of up to 9,999 analyses/programs– Password-protected drying parametersThe moisture analyzer meets the highest requirements placed on theaccuracy and reliability of weighingresults through the following features:– High repeatability by limiting the exposure of the weighing system tovibration during the start of an analysisand better access to the sample chamber due to the motorized heating unit– Excellent readability under any lighting conditions and backlit display for minimization of reading errors– Removable sample chamber base platefor easy cleaning of the sample chamberand protection of the weighing systemfrom debrisModel designationsMA100X-0YZV1, where X may be C,H or Q. C for Ceramic Heater, H for Halogen Heater, Q for Quartz heater,rated 100 – 120 Vac or 200 – 240 Vac,50/60 Hz, 650 VA for Ceramic Heater;400 VA for Halogen Heater; 650 VA forQuartz Heater. Y may be 00 or CE; Zmay be 115 or 230 for 100 – 120 Vacand 200 – 240 Vac respectively.SymbolsThe following symbols are used inthese instructions: indicates steps you must perform indicates steps you must perform onlyunder certain c onditions describes what happens after you haveperformed a certain step– indicates an item in a list! indicates a hazard
ContentsIntended Use . . . . . . . . . . . . . . . . . . . . . . . . . 2Contents . . . . . . . . . . . . . . . . . . . . . . . . . . . . . 3Warning and Safety Information . . . . . . . . . . 4Getting StartedStorage and Shipping Conditions . . . . . . . . . . 5Unpacking . . . . . . . . . . . . . . . . . . . . . . . . . . . 5Instructions for Recycling . . . . . . . . . . . . . . . . 5Equipment Supplied . . . . . . . . . . . . . . . . . . . . 5General View of the Moisture Analyzer . . . . . . . 6Connecting the Moisture Analyzer to AC Power . 7Leveling the Moisture Analyzer . . . . . . . . . . . . 8Selecting the Brief Instructions . . . . . . . . . . . . 8Turning On the Analyzer; Opening and Closingthe Sample Chamber . . . . . . . . . . . . . . . . . . . . 8Operating DesignKeys . . . . . . . . . . . . . . . . . . . . . . . . . . . . . . . . 9Operation: Analysis and Test Functions . . . . . . 10Menu Operation and Drying Results . . . . . . . . . 11Data Output . . . . . . . . . . . . . . . . . . . . . . . . . . 11Error Codes . . . . . . . . . . . . . . . . . . . . . . . . . . . 12Saving Data . . . . . . . . . . . . . . . . . . . . . . . . . . 12Configuring the Moisture AnalyzerSetting the Language . . . . . . . . . . . . . . . . . . . 13Setting the Device Parameters . . . . . . . . . . . . . 14Entering or Changing the Password . . . . . . . . . 15Example: Setting the Time and Date . . . . . . . . 17Device Parameters (Overview) . . . . . . . . . . . . . 18Configuring the Printout . . . . . . . . . . . . . . . . . 20Device Information . . . . . . . . . . . . . . . . . . . . . 24“isoTEST” Calibration Adjustment Functions . . 51Heater Adjustment . . . . . . . . . . . . . . . . . . . . . 51Weighing System Settings . . . . . . . . . . . . . . . . 51Hardware Tests . . . . . . . . . . . . . . . . . . . . . . . . 56Adjusting the Heater . . . . . . . . . . . . . . . . . . . . 58Heating Unit Adjustment . . . . . . . . . . . . . . . . . 58Data Output . . . . . . . . . . . . . . . . . . . . . . . . . . 59Output to the Moisture Analyzer . . . . . . . . . . . 59Interface Description . . . . . . . . . . . . . . . . . . . . 61Data Output Format . . . . . . . . . . . . . . . . . . . . 62Data Input Format . . . . . . . . . . . . . . . . . . . . . 63Digital Input/Output Ports . . . . . . . . . . . . . . . . 65Pin Assignment Chart . . . . . . . . . . . . . . . . . . . 66Cabling Diagram . . . . . . . . . . . . . . . . . . . . . . . 67Error Codes . . . . . . . . . . . . . . . . . . . . . . . . . . 68Care and MaintenanceService . . . . . . . . . . . . . . . . . . . . . . . . . . . . . . 70Repairs . . . . . . . . . . . . . . . . . . . . . . . . . . . . . . 70Cleaning . . . . . . . . . . . . . . . . . . . . . . . . . . . . . 70Replacing the Fan Air Filter . . . . . . . . . . . . . . . 70Replacing the Fuses . . . . . . . . . . . . . . . . . . . . . 71Disassembling or Replacing the Heating Unit . . 71Safety Inspection . . . . . . . . . . . . . . . . . . . . . . . 71OverviewSpecifications . . . . . . . . . . . . . . . . . . . . . . . . . 72Accessories (Options) . . . . . . . . . . . . . . . . . . . . 73Declarations of Conformity . . . . . . . . . . . . . . . 74Index . . . . . . . . . . . . . . . . . . . . . . . . . . . . . . . 77AppendixEntering the General PasswordOperating the Moisture AnalyzerWeighing Function . . . . . . . . . . . . . . . . . . . . . 25Basics . . . . . . . . . . . . . . . . . . . . . . . . . . . . . . . 25Preparation . . . . . . . . . . . . . . . . . . . . . . . . . . . 27Adjustment to an Existing Measuring System . . 27Preparing a Sample . . . . . . . . . . . . . . . . . . . . . 28Setting the Drying Parameters . . . . . . . . . . . . . 30Drying Parameters (Overview) . . . . . . . . . . . . . 30Displaying Analysis Data . . . . . . . . . . . . . . . . . 35Identification Codes . . . . . . . . . . . . . . . . . . . . 35Mode . . . . . . . . . . . . . . . . . . . . . . . . . . . . . . . 36Info . . . . . . . . . . . . . . . . . . . . . . . . . . . . . . . . 36Statistics . . . . . . . . . . . . . . . . . . . . . . . . . . . . . 36Examples . . . . . . . . . . . . . . . . . . . . . . . . . . . . 373
Warning and Safety InformationThis moisture analyzer complies withthe European Council Directives aswell as international regulations andstandards for electrical equipment, electromagnetic compatibility, and thestipulated safety requirements. I mproperuse or handling, however,can result in damage and/or injury.Read these operating instructions thoroughly before using your moistureanalyzer to prevent damage to theequipment. Keep these instructions ina safe place.Follow the instructions below to ensuresafe and trouble-free operation of yourmoisture analyzer:! Use the moisture analyzer only for erforming moisture analysis of sampples. Any improper use of the analyzercan endanger persons and may resultin damage to the analyzer or othermaterial assets! Samples or containers (e.g., beakers orgraduated flasks) that are too large orbulky to permit complete closure ofthe sample chamber hood must not beplaced in the analyzer.! Do not use this moisture analyzer in ahazardous area/location; operate it onlyunder the ambient conditions specifiedin these instructions– The moisture analyzer may be operated only by qualified persons whoare f amiliar with the properties of the sample to be analyzed! Make sure before getting started thatthe voltage rating printed on the manufacturer‘s label is identical toyour local line voltage (see the sectionon “Connecting the Moisture Analyzerto AC Power” in the chapter entitled “Getting Started”)– Use only extension cords that meetthe applicable standards and have aprotective grounding conductor– Disconnecting the ground conductoris prohibited– Connect only Sartorius accessories andoptions, as these are optimally designedfor use with your moisture analyzer– Protect the moisture analyzer from contact with liquid– If there is visible damage to the moisture analyzer or power cord:unplug the equipment and lock it in asecure place to ensure that it cannotbe used for the time being! Clean your moisture analyzer accordingto the cleaning instructions only(see “Care and Maintenance”)Do not open the analyzer housing.If the seal is broken, this will resultin forfeiture of all claims under the manufacturer’s warranty.In case you have any problems withyour moisture analyzer: contact your local Sartorius office, dealer or service center Warning: Severe Burns!– When setting up the moisture analyzer,leave enough space to prevent heatfrom building up and to keep your analyzer from overheating:– leave 20 cm (about 8 inches) aroundthe moisture analyzer– 1 m (3 ft.) above the device– The device comes with a power supplythat has a grounding conductor– Do not put any flammable substanceson, under or near the moisture analyzer,because the area around the heatingunit will heat up– The only way to switch the power offcompletely is to unplug the power cord.Install the device in such a way that it iseasy to unplug the power cord.– Be careful when removing the samplefrom the chamber: the sample itself, theheating unit and the sample pan usedcan still be extremely hot– Position the power cable so that it cannot touch any hot areas of the moisture analyzer– Do not remove the heating unit duringoperation: the heating element andits protective glass panels can getextremely hot!– Prevent excess heat build-up aroundthe analyzer4Hazards for persons or equipmentposed by using specific samples:FireExplosion– Flammable or explosive substances– Substances that contain solvents– Substances that release flamm ableor explosive gases or vapors during thedrying processIn some cases, it is possible to operatethe moisture analyzer in an enclosednitrogen atmosphere to prevent thevapor released during drying from coming in contact with oxygen in thesurrounding atmos phere. Check on acase-to-case basis whether this methodcan be used, because installation of theanalyzer in too small an enclosed spacecan affect its functions (for instancethrough excessive heat build-up withinthe analyzer). When in doubt, perform arisk analysis.The user shall be liable and responsiblefor any damage that arises in connection with this moisture analyzer.PoisoningCaustic burns– Substances containing toxic or causticor corrosive substances: These maybe dried only under a fume hood. Thevalue for the “lower toxic limit” in awork area must not be exceeded.Corrosion:– Substances that release aggres sivevapors during the heating process(such as acids): In this case we recommend that you work with small sample quantities. Otherwise, vapors can condense on cold housing parts andcause corrosion.The user shall be liable and respon siblefor any damage that arises in connection with this moisture analyzer.
Getting StartedThe moisture analyzer consists of aheating unit, a weighing system, a display and control unit and an optionalprinter. In addition to the socket forAC power (mains supply), it also has aninterface port for connecting peripheral devices, such as a PC, an external printer, etc.Storage and Shipping ConditionsAllowable storage temperature:0 C. 40 C 32 F. 104 FDo not expose the moisture analyzerunnecessarily to extreme tempera tures,moisture, shocks, blows or vibration.Unpacking the Moisture Analyzer§ After unpacking the moisture analyzer,check it immediately for any visibledamage as a result of rough handlingduring shipment If this is the case, proceed as directedin the chapter entitled “Care and Maintenance,” under the section on“Safety Inspection”It is a good idea to save the box andall parts of the packaging until you havesuccessfully installed your mois tureanalyzer. Only the original packagingprovides the best protection for shipment. Before packing your moistureanalyzer, unplug all connected cablesto prevent damage.Instructions for Recyclingthe PackagingTo ensure adequate protection for safeshipment, your moisture analyzer hasbeen packaged to the extent necessaryusing environmentally friendly materials. After successful installation of themoisture analyzer, you should returnthis packaging for recycling because itis a valuable source of secondary rawmaterial. For information on recyclingoptions, including recycling of oldweighing equipment, contact yourmunicipal waste disposal center or localrecycling depot.Equipment SuppliedThe equipment supplied includes thecomponents listed below:– Moisture analyzer– Power cord– Pan support– Shield disk– Dust cover for keypad– 80 disposable aluminum sample pans– Set up the moisture analyzer on a stable, even surface that is not exposedto vibrations– Avoid placing the analyzer in closeproximity to a heater or otherwiseexposing it to heat or direct sunlight– Avoid exposing the moisture analyzer toextreme temperature fluctuations– Protect the moisture analyzer fromdrafts that come from open windowsor doors– 1 pair of forceps– Keep the moisture analyzer protectedfrom dust, whenever possible– 3 cards with brief instructions in6 different languages– Protect the moisture analyzer fromaggressive chemical vaporsInstallation InstructionsThe moisture analyzer is designed toprovide reliable results under normalambient conditions in the laboratory and in industry. When choosinga location to set up your moisture analyzer, observe the following so thatyou will be able to work with addedspeed and accuracy:– Do not expose the analyzer toextreme moisture– Make sure to choose a place whereexcessive heat cannot build up. Leaveenough space between the moistureanalyzer and mate rials that are affectedby heat.Conditioning the Moisture AnalyzerMoisture in the air can condense onthe surfaces of a cold moisture analyzerwhenever it is brought into a substantially warmer place. If you transfer themoisture analyzer to a warmer area,make sure to condition it for about2 hours at room temperature, leavingit unplugged from AC power. Afterwards, if you keep the moisture analyzerconnected to AC power, the continuous positive difference in temperaturebetween the inside of the moisture analyzer and the outside will practically rule out the effects of moisture condensation.Setting up the Moisture Analyzer§ Position the components listed below inthe order given:– Dust cover over the keypad– Shield disk– Pan support; turn to the left or right,press slightly until it stops and snapsinto place– Disposable sample pan5
General View of the Moisture ignation Order no.for replacementNo.Designation Order no.for replacement12345678910Internal printer (option)Leveling footLevel indicatorBrief instructionsFusePower socketInterface portKeys for numeric inputToggle key for alphabetic inputKey for opening and closing thesample chamber by the heating unitCF key (clear function)Line feed; press the key to advancethe paper by one blank line6 function keys (soft keys)14“isoTEST” key (calibration/adjustment functions)On/off key“Setup” keyPrint keyKeypadDisplayShield diskPan supportDisposable sample pan1112136YDS01MA69MA00911516171819202122Not shown:Dust cover for keypadForceps69MA009369MA00926965542 (80 units)6960MA0169MA0072
Connecting the Moisture Analyzer to AC Power§ Check the voltage rating and the plug design The heating unit of the moisture analyzer has been factory-set to 230 or 115 volts for technical reasons. The voltage has been set as specified on your order. The voltage setting isindicated on the manufacturer’s label (see the bottom of the analyzer), for example:– 230 volts: MA.230.– 115 volts: MA.115.! If they do not match: To have the voltage setting changed, contact your local Sartoriusoffice or dealer, and do not operate your moisture analyzer in the meantime!Use only– Original power cords– Power cords approved by a certified electrician/Sartorius service technician– If you need to connect an extension cord:Use only a cable with a protective grounding conductor§ Connecting the moisture analyzer, rated to Class I, to AC power (mains supply):The device comes with a power supply that has a grounding conductor. The moisture analyzer must be plugged into a properly installed wall outlet which has a protective groundingconductor (PE). The only way to switch the power off completely is to unplug the powercord. Install the device in such a way that it is easy to unplug the power cord.Safety PrecautionsIf you use an electrical outlet that does not have a protective grounding conductor,make sure to have an equivalent protective conductor installed by a certified electrician asspecified in the applicable regulations for installation in your country.The protective effect must not be negated by using an extension cord without a protectivegrounding conductor.Information on Radio Frequency InterferenceSee EU Declaration of Conformity and FCC Supplier’s Declaration of Conformity in theappendix.Connecting Electronic Devices (Peripherals)§ Make absolutely sure to unplug the moisture analyzer from AC power before you connector disconnect a peripheral device (printer or PC) to or from the interface port.Warmup TimeTo deliver exact results, the moisture analyzer must warm up for at least 30 minutes afterinitial connection to AC power or after a relatively long power outage. Only after this timewill the moisture analyzer have reached the required operating temperature.Charging the Built-in Rechargeable BatteryBefore initial operation, leave the moisture analyzer connected to the line current(mains supply) for at least 10 hours to charge the built-in rechargeable battery. When theanalyzer is disconnected from line current, the analysis data is retained in memory forapproximately three months.7
Leveling the Moisture AnalyzerPurpose:– To compensate for unevenness at the place of installation– To achieve perfectly horizontal positioning of the moisture analyzerfor consistent repeatability– This is necessary especially for testing liquid samples that need to be at a uniform levelin the disposable sample panAlways level the moisture analyzer again any time it is moved to a different location.Only the 2 front feet are used for leveling.§ Retract the both rear feet§ Turn the 2 front feet as shown in the illustration until the air bubble is centeredwithin the circle of the level indicator Several leveling steps are usually required§ Extend the 2 rear feet until they touch the surface on which the moisture analyzer restsSelecting the Brief InstructionsThe moisture analyzer has separate cards with brief instructions on its most important functions. The following languages are included:– English/Dutch– German/Italian– French/SpanishTo exchange the brief instruction card:§ Pull out the brief instruction card on the right (you need to use a little force to overcomethe resistance which is used to keep the card in place)To insert the card:§ Slide the selected card into the slot Pull out the card on the right to remove it, if necessaryTurning On the Analyzer; Opening and Closing the Sample Chamber§ To turn on the analyzer: Press the e key§ To open or close the sample chamber: Press the k key The motor opens or closes the sample chamberSetting the Language– See the section on “Setting the Language” in the chapter entitled“Configuring the Moisture Analyzer”Setting the Date and Time– See the section on “Setting the Device Parameters” in the chapter entitled“Configuring the Moisture Analyzer”8
Operating DesignOperation of the moisture analyzer follows a standardized “philosophy” which isdescribed below.KeysThe moisture analyzer is operated eitherusing the keys on the display andcontrol unit or via a connected PC. Operation using the keys is describedin the following.Labeled KeysThese keys always have the function indicated, but are not available at all times.Availability of these functions dependson the current operating status of themoisture analyzer and its menu settings.Info Prog.F6F5Stat.F4IDModeTaraF3F2F1 The keys have the following functions:eOn/off key Turns the moisture analyzeron/off. The moisture analyzerremains in standby modeNumeric InputTo enter numbers: Press the0 1 9 . keysTo store numbers entered: Press thecorresponding soft keyTisoTEST Calibration/adjustment of the weighing system and hardwaretests can be carried outTo interrupt/cancel numeric inputdigit by digit: Press the c keys Configuring the moisture analyzer Access to the Setup menu; exitSetup§ To enter numbers: See the section entitled “Numeric Input”lLine Feed (Optional) printer advances thepaper by one linepData Output Press this key to output displayeddata via the inter face port orto g enerate printouts using the(optional) printercClear FunctionDeletes keypad input Interrupts calibration/adjustmentroutineskArrow Key Opens or closes the samplechamber0 . 9. Numeric Keys see the section entitled “NumericInput”aAlphabetic Keys see the section entitled “TextInput”Text Input§ To enter letters or characters:Press the a key Letters are displayed in the bottom linefor selection§ To select a different letter: Press thecorresponding soft key to change theletter shown§ To select the letter/character shown:Press the corresponding soft key The selected letter is shown onthe display Enter the next letter/character, ifdesired, as above To exit the letter input mode (i.e. if thelast character entered is a letter):Press the a key§ To store a word: Press the corres pondingsoft key (e.g., ID)§ To delete an input or character:Press c key§ To delete user data: Enter . “decimal point” or a space “ ” and confirm by pressing Enter9
OperationFunction Keys (Soft Keys)The current function of a soft key is indicated in the bottom line of the display(footer).Analysis and Test FunctionsThis display is divided into nine sections.Texts (as abbreviations) or symbols can bedisplayed in the example shown below.Info drying program/Test functionBar graphTexts (Examples)Measured value lineInfo:Text lineSoft key labelsInformation about the “Phase Drying” programPlus/minus signUnitStabilitySymbol for dryingindicatorSymbol for printoutProg.:Select/configure the drying programExample: Moisture AnalysisStat.:Statistics display/deleteInfo Drying Program LineID:The following information is displayedhere:Enter the ID numberMode:Change the parametersTare:Tare the sample panInfo Prog.F6F5Stat.F4IDModeTaraF3F2F1– Program name with 10 characters max.(factory setting), e.g. BUTTER or– Number of the selected drying program,e.g. P1 (shown when “Drying para meter:Mea. No. # with automatic Counter:On” is configured)– Temperature settings– End of measurement criteriaBar Graph:The bar graph indicates the percen tageby which the weighing system’s capacityis “used up” by the current sample onthe panThe function keys are numbered (F1)through (F6), from right to left.The bar graph is shown if youhave selected minimum andSymbolsThe bottom line shows the followingsymbols: aximum initialmweight or target value,tolerance in %. The following symbols may bedis played here:oo Return to Setup menuoOQql(in the Setup menu:exit the Setup program)Go back to the higherselection levelShow sub-items under theactive itemMove upward in the input/output windowMove downward in the input/output windowSet the selected menu parameterThere are two fundamentally differenttypes of display:– display for analysis and test functions– display for menu parameter settings(e.g., SETUP, Mode, ID) and final results(Info, Statistics)100%Lower load limit for initial sample weight100% Upper load limit for initial sample weightBar graph showing 10 % intervals-Minimum tolerance Target value Maximum tolerancePlus/Minus Sign:A plus or minus sign (F or H) is shownhere for a weight value (e.g., a calculatedvalue, when weighing in percent).Measured Value Line:This section shows the weighed or calculated value or alphanumeric input.Unit and Stability:When the weighing system reaches stability, the weight unit or calculationunit is displayed here.Symbol for Drying:During the drying program, the followingsymbol is displayed here:Drying in progressSymbol for Printout:During the printout of the analysis resultsand other data, the following symbolsappear in this column:SPrintText Line:Additional information is displayed here(e.g.,operating state, operator guidanceprompts, analysis tempera ture and measuring time, etc.)P20%FS80/105/120 Cd 0.01gAuto.100% A000 g0015TARE: Tare sample panInfo Prog. Stat.IDModeaHLdSTTareText line example for operator guid ance(e.g., “TARE: Tare sample pan”)Soft Key Labels:The current functions (abbreviations) ofthe arrow keys (soft keys) are indicatedhere. Please note that when we say “pressthe X soft key,” we are referring to theactual key indicated below the soft keylabel displayed.
Menu Operation and Drying ResultsThis display is divided into three sections.Line for Operating StateInput and Output WindowSoft Key LabelsLine for Operating State:The line for operating state indicates thefunction of the current screen page.In the Setup menu, the current menu pathis shown here.Example for Setup, Language:SETUPLANGUAGEParameter SettingsThe parameters are configured inmenus. These menus have several levels.Example of the Setup Menu:§ To select a parameter:Press the s key§ To move within a menu level:Press the Q or q soft keys§ To select a menu item (submenu):Press the O soft keyTo set a parameter:§ Press the Q or q soft keysrepeatedly until the desired setting isselected (displayed inversely)§ Confirm your selection by pressing thel soft keyInput and Output Window:This window contains either detailed information (e.g., on the active application) ora pick list. A selected item is displayedinversely (white letters on a black background). You can also enter informationin an active field in this window using thealphanumeric keys.Example for Setup, Parameter Settings:o Normal vibrationStrong vibrationTo change the numeric value ofa parameter:§ Press the Q or q soft keysrepeatedly until the desired setting isselected (displayed inversely)§ Enter the desired number using the0 1 . 9 . keysor the a soft key and enter thedesired letters§ Confirm your selection by pressing thel soft keyTo exit Setup: Press s or theoo soft keyData OutputYou can choose between:– internal printer (option)– interface port for:– Sartorius printer(such as the YOP03-01)– computer (PC)– process logic controller (PLC)– universal remote control switch(Internal/External) PrinterYou can configure the print functionsto meet your individual requirements byselecting the corresponding menu code inSetup. The printouts can be generated asstandard or ISO/GLP-compliant printouts.ISO: International Organizationfor StandardizationGLP: Good Laboratory PracticeYou can have printouts generated automatically, or by pressing p; printoutgeneration can be dependent on or independent of the stability or time parameters(for example, automatic when a dryingprogram starts, at specific time intervals,at the end of a drying program).See the section on “Data Output Functions” in the chapter entitled “Operatingthe Moisture Analyzer” for a detaileddescription of data output options.The following symbol in the input oroutput window indicates:d this symbol marks the savedmenu settingSoft Key Labels:See “Function Keys (Soft Keys)” on theprevious page11
Interface PortYou may choose to connect a differentperipheral device, such as one of thefollowing, to the interface port insteadof or in addition to the internal printer:Error CodesIf you press a key that has no function,or which is blocked at a certain pointin an application program, this error isindicated as follows:– status indicators with digital input ports– a double-beep is sounded asan acoustic signal if the key hasno function– process logic controller with digitalinput/output port– invalid input is indicated by anerror message– a computer (PC) with a communicationsport– incorrect operation is indicated by anerror code or error messageThe moisture analyzer can be monitoredand remote-controlled via the interfaceport.The response to an operator error isidentical for all operating modes.See the chapter entitled “Error Codes”for a detailed description.– external printerFor a detailed description, see the section on “Data Output Functions”in the chapter entitled “Operatingthe Moisture Analyzer.”Saving DataStoring Parameter SettingsThe parameter settings in the Setupmenu and for drying programs areactive when you switch on the moistureanalyzer. The parameter settings, selected with the Mode soft key during ananalysis, are not saved (exception: limitsfor the control function).
your moisture analyzer: contact your local Sartorius office, dealer or service center Warning: Severe Burns! - When setting up the moisture analyzer, leave enough space to prevent heat from building up and to keep your analyzer from overheating: - leave 20 cm (about 8 inches) around the moisture analyzer - 1 m (3 ft.) above the device