Transcription
Manager Self Service – Position ManagementMSS QUICK REFERENCE GUIDESYSTEMS CONTROL University Services Building, Rm. 401LAST UPDATE: NOVEMBER 23, 201511
Manager Self Service – Position ManagementTABLE OF CONTENTS1.Guide Overview. 31.12.Who Can Access the Request Create/Modify Position Document? . 3Create/Modify Position Requests . 42.1Navigation – Create/Modify Position . 42.2Create a New Position – From Scratch. 52.3Create a New Position – Clone from Existing Position. 162.4Create a New Position – Clone from Denied request . 172.5Create a New Position – Clone from withdrawn request . 182.6Modify An Existing Position . 193.Approve/Deny Position Management Requests. 203.1Approve Position Management Requests . 203.2Adding Ad Hoc Approvers and Reviewers. 213.3Deny Position Management Requests . 234.Return To Saved- Position Management Requests . 245.Withdraw- Position Management Requests . 246.View Submitted Requests . 256.1Requests Pending Approval - Pagelet . 256.2Manage Position Create/Modify Requests . 267.Scenarios – Workflow Paths . 278.Error/Warning Messages . 308.1Another Approver has taken action. 308.2Effective Date Warning – (Create) . 308.3Outstanding Requests Exists for this Position (Modify) . 318.4Missing Information (Create/Modify) . 318.5Position Incumbent Exists (Modify) . 318.6No Attachments have been added (create/Modify). 329.10.Contact Information. 32Revision History . 33Last Update: November 20, 2015Page 2 of 33
Manager Self Service – Position Management1. GUIDE OVERVIEWThis guide outlines the process to create a new position or modify an existing position utilizing theonline Manager Self Service (MSS) Create/Modify Position request form within UAccess Employee.Throughout the guide this is also referred to as Position Management Requests.When to Create a New Position? No vacant positions are available Create a new position for budget lines New title neededWhat can I modify on an existing position? Effective Status Alternate Title Works with Animals Work Study Split Supervisor Position Time Approver Position Encumbrance Information Risk Management/Export Control Questions1.1 WHO CAN ACCESS THE REQUEST CREATE/MODIFY POSITION DOCUMENT? Each workflow document requires a minimum of two participants: an Initiator and an Approver.o Systems Control is included as the final approver for all Create/Modify Positiontransaction requests. Systems Control reviews all Create/Modify Position requests priorto the data entering the UAccess Employee system.Initiating/Creating a DCC document request requires one of the following security roles:o MSS Position Cross Reference (UA HR WA POSNXREF MSS)o CC Create DCC Requests (UA HR WA MSS WCC CREATEDCC Documents require between one and four approvers:o Business Approvers: HR Department College Reviewer College/Division Approvero Executive/Administrative Approvers Systems ControlCollege/Divisions determine the number of approval steps required.Last Update: November 20, 2015Page 3 of 33
Manager Self Service – Position Management2. CREATE/MODIFY POSITION REQUESTSThis section outlines the process to initiate and submit a Create/Modify Position request to create a newposition or modify attributes on an existing position.2.1 NAVIGATION – CREATE/MODIFY POSITIONThe Create/Modify Document is located in UAccess Employee – www.uaccess.arizona.eduTo access the document:1. Click on the Main Menu tab2. Click on the Manager Self Service menu item3. Click on MSS Online Forms4. Click on Position5. Click on Create/Modify PositionThe Create/Modify Position Request page displays multiple options and allows a user to: Create New Positiono Create from Scratch - All fields are left blank and the user must enter all requiredfields.o Clone from Existing Position – copy an existing position’s information to use as atemplate for creating a new position number.o Clone from Denied Request – copy a position’s information from a request that hasbeen denied.o Clone from Withdrawn Request - – copy a position’s information from a requestthat has been withdrawn. Modify Existing Positiono Modify an existing position’s attributes. Return to Work in Progresso Note: This option is only available if a user has previously saved a request form. Thisoption allows users to return back to a transaction previously saved and continue.Note: Do not use the NEW position number on paperwork or for budget lines until Systems Controlhas approved your transaction.Last Update: November 20, 2015Page 4 of 33
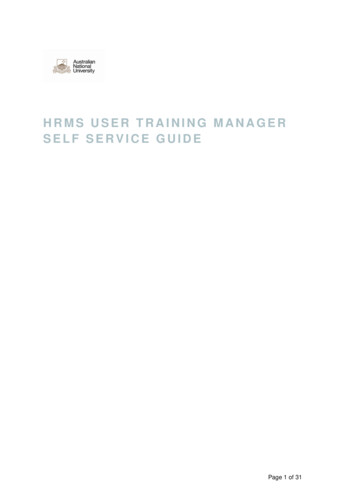
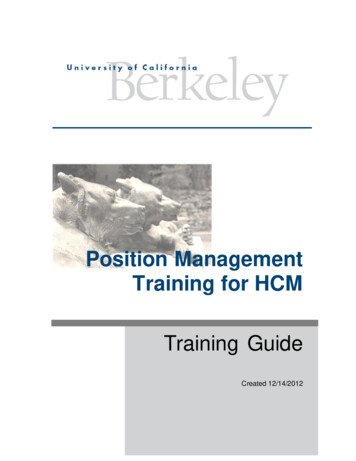
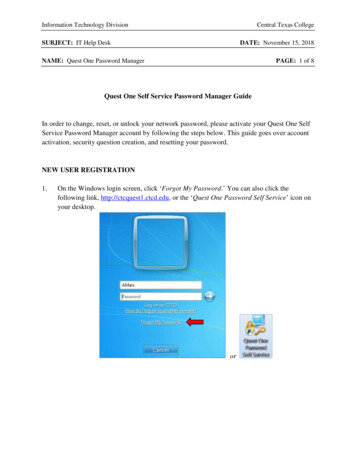
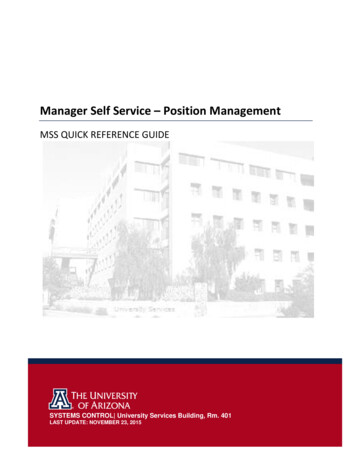
Manager Self Service – Position Management2.2 CREATE A NEW POSITION – FROM SCRATCHClick on the Create from Scratch radio button to open a request form where all fields are left blank forcreating a new position number.Note: This action moves the transaction to the next page—Create/Modify Position.EFFECTIVE DATEThe effective date on the Create/Modify Position page automatically defaults to the current date. Itcan be changed to reflect a past date within the current fiscal year—however; it will not acceptfuture dates.Note: The position effective date must be on or before the employees hire date.CLASS INDICATORThe Class Indicator determines the conditions of employment for each position. Some examples ofthese conditions include: if the position is benefits eligible, ERE rate, how the position is paid andbudgeted.The Class Indc. field displays a drop down list of position classifications. The system defaults this fieldto Unknown. Users may leave the field with default value and Systems Control will update withappropriate category upon approval.POSITION TYPE CODEThe Position Type Code field is only applicable to Classified Staff positions. This field indicatesadditional information as to the type of Classified Staff position. Some examples of this additionalindicator include: Regular, Extended Temporary Employment, etc.Last Update: November 20, 2015Page 5 of 33
Manager Self Service – Position ManagementThe system defaults this field to N/A. Users may leave the field with the default value with theexception of Classified Indicator field values for Classified Staff. An error message will displayprompting the user to put a value in for Classified Staff.ABOR CODEThe ABOR Code field determines the employment category for the position. Some examples of thesecategories include: Classified Staff, Professional, Faculty, etc. These categories are defined either bythe Arizona Board of Regents or by UA policy.The system leaves this field blank by default. Users must enter a value, however Systems Control willupdate with appropriate value if needed upon approval.WORK STUDY SPLITThe Work Study Split field is only available when the Classified Indicator value is Student Employeesor the ABOR code is Student Worker. The student work study split code defines the percent to bepaid by the federal work study and department accounts.The system leaves has the value of NONE by default. Users can click the spy glass to select one of thefollowing values: AR100 – America Reads on Campus C7525 – FWS Community Service on Campus F7525 – Federal Work Study on Campus None – Not Eligible for Work StudyLast Update: November 20, 2015Page 6 of 33
Manager Self Service – Position ManagementNote: If the position is pooled the work study split will be adjusted for all incumbents if modified.Please submit a position modify request if you need to change code for a specific employee whenposition is pooled.JOB TITLEThe Job Title field is the generic job title associated with an existing job code in the system. Click thespy glass to search for a list of available job titles based on the ABOR Code previously selected.If the user is unable to find an available job title that meets the position’s needs, they may select theNew Job Title? check box below the Job Title Field. This allows the user to enter free-form Job Titlerequest.Note: This check box is not available for the following ABOR Codes: Classified Staff, Student Workersand Graduate Assistant/Associates. Please contact Systems Control if you need assistance with jobtitle for these ABOR codes.HR DEPTThe HR Dept field is the department ID used to map the position to the home department. Click thespy glass to search for a list of available HR Dept ID’s or search by Department Description.LOCATIONThe Location field determines the location of the position. The locations associated with positionsare limted to only three campuses. Click the spyglass to select one of the following for the Location:COM PHX, TUCSON, or UA SOUTH. The system default’s this value to Tucson since majority of thepositions are located at the main campus.Last Update: November 20, 2015Page 7 of 33
Manager Self Service – Position ManagementPOSITION FTEThe Position FTE field determines the Full Time Equivalent (FTE) for the position. This is thepercentage of time an employee works represented as a decimal. A full time person is 1.00, a halftime person is .500 and a quarter time persion is .250. The system default’s this value to 0.000.POOLED POSITIONThe Pooled Position checkbox indicates whether or not the position is pooled (headcount greaterthan 1 in the same position). If this position is pooled the system defaults the Position FTE to 0.250by default.ALTERNATE TITLEThe Alternate Title field is primarily used by Time and Labor to help differentiate the position. Bydefault the Job Title is carried over into this field. However, it is available to update.WORKS WITH ANIMALSThe Works with Animals checkbox indicates whether the position requires incumbents to work withliving or deceased animals or by-products.Last Update: November 20, 2015Page 8 of 33
Manager Self Service – Position ManagementSUPERVISOR POSITIONThe Supervisor Posn field identifies the direct reporting relationship for each position within theorganization. The incumbent in the Supervisor Posn is generally responsible for directing the work,managing performance, approving time and managing UAccess Learning for at least one staff,appointed or faculty incumbent.Click the magnifying glass to search for the supervisor’s position number using additional criteriasuch as Position Number, Posn HR DeptID, UA Title, EMPLID, Last Name or First Name.Once a position is selected the Title, Emplid and Employee Name will appear next to the spy glass.TIME APPROVER POSITIONThe Time Appv Posn field identifies the position incumbent that is responsible for ensuringtimesheets submitted by direct reports are accurate and approved on time.Click the magnifying glass to search for the Time Approver’s position number using additional criteriasuch as Position Number, Posn HR DeptID, UA Title, EMPLID, Last Name or First Name.Once a position is selected the Title, Emplid and Employee Name will appear next to the spy glass.UA TITLE INFORMATIONThe UA Title field is the description for the 3 components that tie the title together called the UATitle Code. The three components consist of: the prefix, job code and specifier. The prefix generallydescribes the temporary nature of the title and is followed by the generic title or job codedescription. The specifier further describes the generic title and is usually a department, unit,committee or special project name.The user may click the spyglass to search for an existing title code.Once a UA title is selected the Request UA Title Components section is no longer available.Last Update: November 20, 2015Page 9 of 33
Manager Self Service – Position ManagementBefore selecting a UA Title:After Selecting a UA Title:If the user is unable to find an available UA title that meets the position’s needs, they may requestUA Title components. This section allows a user to select a prefix, enter a job title and Specifier.Once all fields are completed the system displays the Requested UA Title. Please see example below.ENCUMBRANCE INFORMATIONThe Enbumbrance Information Section is used for expected (predicted) expenses which will occurbetween now and the fiscal year end (June 30th). Encumbrances include prorated amounts for a payperiod which crosses the fiscal year boundary. Encrumbrances are calculated on a position-byposition basis using the planned accounting distributions for that position and the amounts obtainedfrom incumbent expected pay or override amounts a the position level. Encumber Position Indicator (checkbox)o Allows the option of excluding student and Supplemental Compensations positionsfrom encumbering.Last Update: November 20, 2015Page 10 of 33
Manager Self Service – Position Management Vacant Encumbrance Amto Provides the ability to encumber a vacant position based on a specified amount. Encumbrance Override Amto Allows the override of an encumbrance amount which would otherwise becalculated based on rate-of-pay, FTE and funding period.Encumbrance Proration Ruleo Determines the length of time for the encumbrance override. Four options areavailable: Academic Year Date Range Fiscal Year Fixed Additional information regarding setup of Vacant Positions and Encumbrance Overrides:Academic Yr Rule: Enter the full academic year amount in Position Management request. The amount will be restated each pay period to reflect the prorated amount based on thedaily rate calculation. Daily Rate Calculation full academic year amount divided by number of days in academicyear.o Current encumbrance Daily Rate times number of days reamining from the currentpay period through the end of the academic year. This encumbrance amount will continue from one academic year to another unless it isremoved in Position Management.Fiscal Yr Rule: Enter the full fiscal year amount in Position Management request. The amount will be restated each pay period to reflect the prorated amount based on thedaily rate calculation. Daily Rate calculation full fiscal year amount divided by number of days in the fiscal yearo Current encumbrance Daily Rate times number of days remaining from current payperiod through the end of the fiscal year This encumbrance amount will continue from one fiscal year to another unless it is removedin Position ManagementFixed Rule:1. Enter the fixed amount in Position Management request.Last Update: November 20, 2015Page 11 of 33
Manager Self Service – Position ManagementoThis is a set amount that will not change or recalculate over time. If 5,000 isentered with the fixed option selected, the 5,000 will remain encumbered until thedepartment submits a transaction via Position Management to either change orremove it.2. This encumbrance amount will continue from one year to the next unless it is removed inPosition Management.Date Range Rule: The amount provided in this field should coincide with the dates entered in the date rangefields. The encumbrance will be restated every pay period based on a daily rate calculation. Daily Rate calculation Amount entered divided by the total number of days within the daterange.o Current encumbrance Daily rate times the number of days remaining from start ofcurrent pay period to the end of the date range entered. This amount will be reset to zero at the beginning of the Fiscal Year.Last Update: November 20, 2015Page 12 of 33
Manager Self Service – Position ManagementRISK MANAGEMENT QUESTIONSThe questions displayed below appear for all position requests. Please see an example of allquestions that may appear in the Risk Management section. If displayed, the questions require aresponse.Users may click theicons to display additional information about that section of questions. Amessage box will appear that will include external links to websites for further review.EXPORT CONTROL QUESTIONSThe questions displayed below appear for all new position requests.Please see an example of all questions that may appear in the Export Control section. If displayed thequestions require a response.Users may click theicons to display additional information about that section of questions. Amessage box will appear that will include external links to websites for further review.Last Update: November 20, 2015Page 13 of 33
Manager Self Service – Position ManagementATTACHMENTSInitiators and Approvers may upload and remove attachments to a request. Attachments forPosition Management can be viewed by anyone who has access as an initator or approver.To Add an Attachment:1. Click the Add Attachment link.2. Click the Browse button an navigate to your saved document for uploading. Select thedocument.3. Once the document path has loaded, click Upload.4. The document will display with the description and document extension type.To View an Attachment:1. Click the link in the View Attachment column for the document you wish to view.2. The document will open up in a separate window.To Delete an Attachment:1. Select the radio button next to the attachment you want to remove.2. Click the Delete Attachment link.3. A confirmation message will say Attachment Deleted Successfully.Last Update: November 20, 2015Page 14 of 33
Manager Self Service – Position ManagementSUBMITTING REQUEST FOR APPROVALTo submit the Position Create request for approval.1. Click on the Submit buttonNote: The request can be cancelled by clicking on the Cancel button. Users may also save therequest by clicking on the Save for Later button. Requests will be saved for 30 days.*Do not use the NEW position number on paperwork or for budget lines until Systems Controlhas approved your transaction.Last Update: November 20, 2015Page 15 of 33
Manager Self Service – Position Management2.3 CREATE A NEW POSITION – CLONE FROM EXISTING POSITIONClick on the Clone from Existing Position radio button to open a request form where all fields arepopulated from an existing position number. The user is able to make changes to any of the fields prepopulated.The user may enter a Position Number/Search for Position Number and select continue.REVIEW PRE-POPULATED FIELDS & SUBMIT REQUESTAll fields are pre-populated from the existing position. The user has the option to update any of theexisting fields with new values. Once they are satisfied with field values they may add attachmentsif necessary and submit the request for approval.Please refer to the section How to Create a Position – from Scratch on page 5 for additional detailson each field that can be changed, adding attachments and submitting the request for approval.Last Update: November 20, 2015Page 16 of 33
Manager Self Service – Position Management2.4 CREATE A NEW POSITION – CLONE FROM DENIED REQUESTInitiators have the ability to clone previously denied New Position requests by accessing the specifictransaction in the Create/Modify Position page. If available, a new radio button will appear withdescription Clone from Denied Request. The user has the option to select a denied request for cloningup to 30 days after it was initially denied.To clone a previously denied New Position request:1. Select the Clone from Denied Request radio buttonA list of transactions that have been denied within the past 30 days will appear.2. Click on the link in the transaction column to select for cloning.This action moves the transaction to the next page—Create/Modify Position Form.Note: Cloning only COPIES the fields and information to a NEW request form. You will beassigned a new position number and transaction ID when cloning.3. Review the pre-populated fields. The user has the option to update any of the existing fieldswith new values. Once they are satisfied with field values they may add attachments ifnecessary and submit the request for approval.Please refer to the section How to Create a Position – from Scratch on page 5 for additionaldetails on each field that can be changed, adding attachments and submitting the request forapproval.Last Update: November 20, 2015Page 17 of 33
Manager Self Service – Position Management2.5 CREATE A NEW POSITION – CLONE FROM WITHDRAWN REQUESTInitiators have the ability to clone previously withdrawn New Position requests by accessing the specifictransaction in the Create/Modify Position page. A new radio button will appear with description Clonefrom Withdrawn Request. The user has the option to select a withdrawn request for cloning up to 30days after it was initially withdrawn.To clone a withdrawn Create New Position request:1. Select the Clone from Withdrawn Request radio buttonA list of transactions that have been withdrawn within the past 30 days will appear.2. Click on the link in the transaction column to select for cloning.This action moves the transaction to the next page—Create/Modify Position Form.Note: Cloning only COPIES the fields and information to a NEW request form. You will beassigned a new position number and transaction ID when cloning.3. Review the pre-populated fields. The user has the option to update any of the existing fieldswith new values. Once they are satisfied with field values they may add attachments ifnecessary and submit the request for approval.Please refer to the section How to Create a Position – from Scratch on page 5 for additionaldetails on each field that can be changed, adding attachments and submitting the request forapproval.Last Update: November 20, 2015Page 18 of 33
Manager Self Service – Position Management2.6 MODIFY AN EXISTING POSITIONThe Modify an Existing Position option allows the user to modify attributes on a position. The followingattributes are available for modification: Effective Status (Inactive/Active) Work Study Split Alternate Title Works with Animals Supervisor Position Time Approver Position Encumbrance Information Risk Management / Export Control Questions1. Click on the Modify Existing Position radio button to open a request form for modifications. The usercan search for a position or simply enter a Position Number and select continue.2. The Create/Modify Position page opens and the user can take the appropriate changes to the fields.Once they are satisfied with field values they may add attachments if necessary and submit the requestfor approval.Please refer to the section How to Create a Position – from Scratch on page 5 for additional details oneach field that can be changed, adding attachments and submitting the request for approval.The following field is only available when modifying a position:EFFECTIVE STATUSThe Eff Status field allows the user to make a position active or inactive. However, the positioncannot be inactivated when at least one current or future incumbent exists.If the user tries to make a position status inactive then an error message will display.Last Update: November 20, 2015Page 19 of 33
Manager Self Service – Position Management3. APPROVE/DENY POSITION MANAGEMENT REQUESTS3.1 APPROVE POSITION MANAGEMENT REQUESTSPosition Management requests pending approval can either be accessed through the pagelet or theManage Position Create/Modify page. The option to approve a request will only appear if the user hasboth the appropriate approval role and is the next step in the approval chain.To approve a position management request Click on the Approve buttonOnce the position management request is approved, a confirmation page displays the informationfrom the previous page in view only mode. The green box in the process monitor (the rectangularboxes on the bottom of the page) shows that the first approval step has been satisfied.Click on the Exit button to return to the search menu.Last Update: November 20, 2015Page 20 of 33
Manager Self Service – Position Management3.2 ADDING AD HOC APPROVERS AND REVIEWERSAd hoc approvers and reviewers can be added by HR Department, College Reviewers and CollegeApprovers at any step following an approval step in the chain. For example, the HR Department canadd an ad hoc approver or reviewer after the College Reviewer or College Approver steps. Note: theAd hoc Approver will stop the routing flow until the user takes action—the Ad hoc Reviewer notifiesthe user of the transaction and does not require approval.To add an ad hoc approver or reviewer:1. Click on the sign to the right of the approval step the ad hoc step will follow.o Do NOT add an AHDOC APPROVER after the Systems Control Step. Systems Control isthe final step in the workflow and will deny requests that include an adhoc APPROVERafter their step. **Users may however add adhoc REVIEWER’s after systems controlstep if needed.2. This will activate the Insert additional approver or reviewer window.a. Type in the user id for the ad hoc approver or reviewera. See Approver/Reviewer Search below if the user id is unknownb. Click on either the Approver or the Reviewer radio buttonc. Click on the Insert buttonDo NOT addAPPROVERSafter SystemsControl StepNote: the UserID must betyped in caps!3. Approver Reviewer SearchThe spy glass in the Insert additional approver or review window will activate theApprover/Reviewer Search option (see previous section)1. Type the user’s name or user ID2. Click on the Search buttonLast Update: November 20, 2015Page 21 of 33
Manager Self Service – Position ManagementA list of users meeting the search criteria will appear3. Select the ad hoc approver or reviewer by clicking on the individual’s name or user id.The Insert additional approver or reviewer window will reappear4. Click on either the Approver or the Reviewer radio button5. Click on the Insert buttonLast Update: November 20, 2015Page 22 of 33
Manager Self Service – Position Management3.3 DENY POSITION MANAGEMENT REQUESTSThe option to deny a request appears if the user has both the appropriate approval role and is the nextstep in the approval chain.To deny a request1. Type the reason for denial in the comments section2. Click on the Deny buttonOnce the position management is denied, a confirmation page displays the information from theprevious page in view only mode. The process monitor shows that the position funding changehas been denied. Additionally, an email is sent to the initiator notifying him/her of the deniedrequest.Click on the Exit button to return to the search menuLast Update: November 20, 2015Page 23 of 33
Manager Self Service – Position Management4. RETURN TO SAVED- POSITION MANAGEMENT REQUESTSInitiators have the ability to return to saved Position Management requests by accessing the specifictransaction in the Create/Modify Position page. A new radio button will appear with description Returnto Work in Progress. The user has the option to select a saved request for cloning up to 30 days after itwas initially saved.To return to a saved Position Management request:1. Select the Return to Work in Progress radio button A list of transactions that have been saved within the past 30 days will appear.2. Click on the link in the transaction column to return back to a request.Note: This action moves the transaction to the next page—Create/Modify Position.5. WITHDRAW- POSITION MANAGEMENT REQUESTSInitiators have the ability to withdraw Position Management requests by accessing the specifictransaction in the Manage Position Create/Modify page. Withdrawing the request essentially cancelsthe request from all pending approvers. Initiators may withdraw a request up until final approval.These requests are stored for 30 days and may be cloned to create a new request.How to withdraw a request:1. Search for the request in the Manage Position Create/Modify.2. Once transaction is selected and opened click the Withdraw button.Last Update: November 20, 2015Page 24 of 33
Manager Self Service – Position Management6. VIEW SUBMITT
The Class Indicator determines the conditions of employment for each position. Some examples of these conditions include: if the position is benefits eligible, ERE rate, how the position is paid and budgeted. The Class Indc. field displays a drop down list of position classifications. The system defaults this field to Unknown. Users may leave .