Transcription
TITLE:Passage Point Visitor Management software IntegrationAN-49 STOPwareIntegrationPRODUCTS: AXxess version 4.2.3 or later, Passage Point VisitorManagement softwareJuly 20, 2006SUMMARYThis document covers the integration between AXxessand Passage Point Visitor Management software.IntroductionThe AXxess software and Passage Point visitor management software integrates seamlesslyusing ODBC and Directory Linking. Visitors added using the Passage Point client willautomatically be added to the AXxess database. The visitor may be issued any access level toallow access to certain doors. In addition, the visitor’s photo captured from the license orpassport may also be saved into the AXxess software.Support ContactsA Brady Worldwide Business408-367-0220Maxxess Systems Inc800-926-2609Recommended configurationThe Passage Point Server and Client must be on separate computers. The AXxess Server andPassage Point Server may be on the same computer.All Passage Point Client computers will require an ODBC connection to the AXxess Server.This document will provide a step by step configuration for a successful integration betweenAXxess and Passage Point software.1
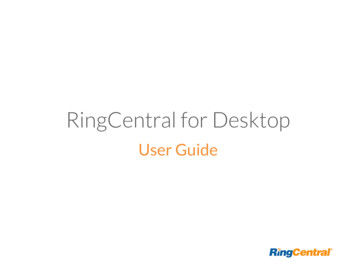
Passage Point ServerInstalling and Configuring the Passage Point ServerInstalling the Passage Point Server Insert the STOPware CD Browse to the location of your CD-Rom \Client Server\Server. Double click on setup.exe to begin the installation process. Accept the license agreement and you may take the defaults.Installing Scripts:Browse to CD \Access Control\Maxxess and copy the scripts to the AXxess 200 folder locatedon the AXxess server computer.Note: These scripts will later be copied into the Passage Point clients.Configuring the data file on the Server application:The first time the server application is initialized you will see the following screen: Click New2
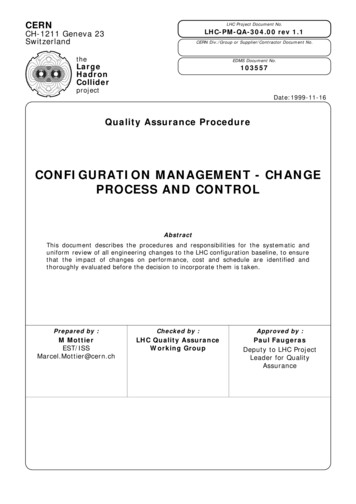
It will then auto input the file name as shown: Select Save. The loading process has not been completed until you see an Entry for Stored Procedures.The following step is only necessary if you will be using a scanning device. Navigate to C:\PassagePoint Server v45 and modify the PassagePoint.ini file to sayOfflined Images Folder Root C:\axxess 200\pictures\AC PHOTO PATH OFFLINEDIMAGES\Note: After both lines there must be a hard return3
Passage Point ClientInstalling and Configuring the Passage Point ClientClient Install Insert the STOPware CD Browse to the location of your CD \Client Server\Client.Double click on setup.exe to begin the installation process. Accept the license agreement and you may take the defaults. Click on the Passage Point icon to start the client Login with user “admin” and no passwordODBC Data SourceCreating the ODBC data source(Note: The ODBC data source MUST be duplicated on all clients) Select StartSettingsControl PanelAdministrative ToolsData Sources (ODBC)On the second tab from the left (System DSN) select Add4
From the Create New Data Source Page, scroll to the bottom and select SQL Server. From the Create a New Data Source to SQL dialog box enter in the PassageAxxess in theName box and Server (the Server name will be the name of the server that houses theAXxess database).5
Select the “With SQL Server authentication using a login ID and password entered bythe user” radial button.Check the box for “Connect to SQL Server to obtain default settings for the additionalconfiguration options”.Enter the Login ID as “sa”Enter the passwordSelect NextSelect the check box to “Change the default database to”.From the drop down menu select AXxess. Accept the remaining defaults and test your connection. 6
Configuring the ClientPlease note: You will be unable to successfully start the client software until the data file hasbeen created on the server application. Double click on the icon located on your desktop for “Passage Point Client v45” orselect Start, Program Files, Passage Point Client v45.Once the application has started you will be taken through a wizard to configure theclient software. You may accept the defaults unless you have special scanningdevices.You will then be brought into the main application screen.Select FileConfigureHighlight Access Control Integration from the left hand column.Check the box for Enable Access Control Integration and select ODBC from the dropdown menu.Fill in the Server Data Source; this will be the name of the ODBC connection createdearlier PassageAxxess.Enter UsernameEnter the system administrator passwordClick on the Script Setup button.7
Select Load Sign-In Script, you will need to browse to the location of the scripts filelocated on the AXxess Server share or browse to the CD’s Access Control\Maxxessfolder. Select the file sign in axxess.txt.Note: If integrating photos, use the sign in axxessphoto.txt for the sign in script. You will follow the same process for Sign-Out Script. The script you are looking forwill be sign out axxess.txt.Click Ok.Select Directory Link from the left hand column as shown below:8
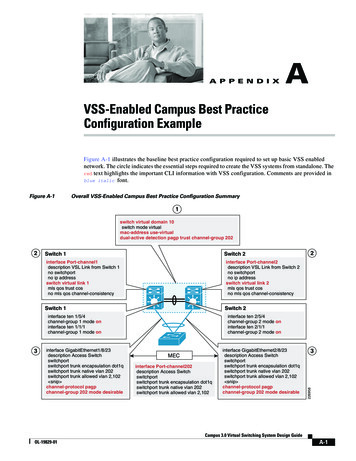
Check the boxes for “Use Directory Link for Web Directory Search”, “EnableDirectory Linking”, and “Enable Import”.Select Database Connection Type “ODBC” from the drop down list.Enter the Server Data Source (this will be the ODBC data source created earlier).Enter UsernameEnter “pub” for the Directory DBEnter “axperson” for the Directory Table.Select the Map Lookup FieldsHighlight a field from Source Database (AXxess database) and a correlating entryfrom the Passage Point. The following entries must be entered in for the applicationto insert records into the AXxess database:Source DatabasePassagePointFirstFirst NameLastLast NameIdUnique ValueSelect OkSelect Map Import Fields9
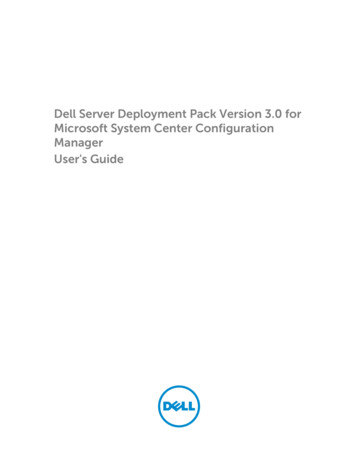
Follow the same procedures listed above for Map Import Fields.Remove “pub” from the Directory DB.Note: This next section is only needed if visitors require access to doors and will beunaccompanied. Select Definable Fields (Visits) from the column on the leftSet custom field1 Title: Access Level and make it required10
Select Definable Fields (Directory) from the column on the left.Set custom Field1 to Access Level Select OK to save your changesFrom File located on the Menu bar select Edit Lists Select user field1Select Add and add all of the access levels from the MAXxess system your visitorsmay need. This must be typed exactly as it is in the AXxess database.Select Ok to save your changes. When a new entry is entered into the PassagePoint client it will then be autopopulated into the AXxess database.Note: you need to enter in a badge number for all new visitor entries.11
Drivers License ScannerIf pictures are to be stored in another location other than on the AXxess server, create an accountthat has Read/Write ability to the AXxess 200\pictures folder and use this account for thePassage Point Server.To configure a driver’s license scanner within Passage Point you will need to complete thefollowing steps:1. Plug in the Scanning device to the USB port of the workstation where the Passage Pointclient has been installed.2. You will be prompted to install the new hardware (Note: Install the drivers located inC:\Program Files\PassagePoint Client v45\idscan drivers)3. From within the Passage Point client go to File Configure Photo Capture Select the check box “Enable Photo Capture”.4. From the Column located on the left hand side select “Definable Fields (Visits)”5. Enter in the Names of the Custom Fields, such as: Address City, State, Zip Date of Birth License Number6. From the Column located on the left hand side select “Scanner: Drivers license” Select IDScan from the pull down next to Scanner Manufacturer12
7. Drag and drop the fields you want to auto populate on the “New Visitor Form”8. Enable the check box “Extract Face Image or Extract License Image” depending onthe needs of the Organization.9. Select Ok10. Go to File Station Preferences Connected Hardware tab11. Select “I have a driver license scanner”12. Insert the calibration paper and select CalibrateFor additional information contact STOPware technical support.End13
PRODUCTS: AXxess version 4.2.3 or later, Passage Point Visitor Management software July 20, 2006 SUMMARY This document covers the integration between AXxess and Passage Point Visitor Management software. Introduction The AXxess software and Passage Point visitor management software integrates seamlessly using ODBC and Directory Linking.