Transcription
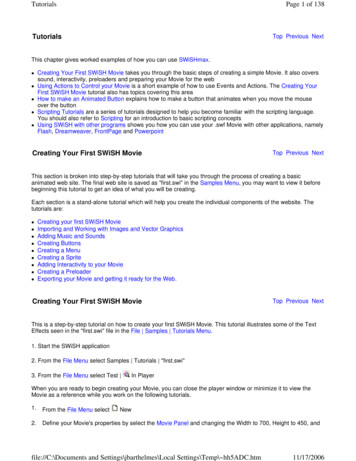
TutorialsPage 1 of 138TutorialsTop Previous NextThis chapter gives worked examples of how you can use SWiSHmax. Creating Your First SWiSH Movie takes you through the basic steps of creating a simple Movie. It also coverssound, interactivity, preloaders and preparing your Movie for the web Using Actions to Control your Movie is a short example of how to use Events and Actions. The Creating YourFirst SWiSH Movie tutorial also has topics covering this area How to make an Animated Button explains how to make a button that animates when you move the mouseover the button Scripting Tutorials are a series of tutorials designed to help you become familiar with the scripting language.You should also refer to Scripting for an introduction to basic scripting concepts Using SWiSH with other programs shows you how you can use your .swf Movie with other applications, namelyFlash, Dreamweaver, FrontPage and PowerpointCreating Your First SWiSH MovieTop Previous NextThis section is broken into step-by-step tutorials that will take you through the process of creating a basicanimated web site. The final web site is saved as "first.swi" in the Samples Menu, you may want to view it beforebeginning this tutorial to get an idea of what you will be creating.Each section is a stand-alone tutorial which will help you create the individual components of the website. Thetutorials are: Creating your first SWiSH MovieImporting and Working with Images and Vector GraphicsAdding Music and SoundsCreating ButtonsCreating a MenuCreating a SpriteAdding Interactivity to your MovieCreating a PreloaderExporting your Movie and getting it ready for the Web.Creating Your First SWiSH MovieTop Previous NextThis is a step-by-step tutorial on how to create your first SWiSH Movie. This tutorial illustrates some of the TextEffects seen in the "first.swi" file in the File Samples Tutorials Menu.1. Start the SWiSH application2. From the File Menu select Samples Tutorials "first.swi"3. From the File Menu select Test In PlayerWhen you are ready to begin creating your Movie, you can close the player window or minimize it to view theMovie as a reference while you work on the following tutorials.1.From the File Menu select2.Define your Movie's properties by select the Movie Panel and changing the Width to 700, Height to 450, andNewfile://C:\Documents and Settings\jbarthelmes\Local Settings\Temp\ hh5ADC.htm11/17/2006
TutorialsPage 2 of 138Frame Rate to 15. Make sure that the Background color is set to whiteThe 'Movie' Panel should look like this:3.4.In the Zoom Controls of the Layout Panel, click on thewithin the 'Layout' PanelZoom 100% button. This will center the stage areaEnsure Scene 1 is selected in the Outline Panel, and press theInsert Text button on the Insert Toolbar.You should see the word 'Text' appear in the center of the stage in the Layout Panel5. Select the Text Panel and change the word 'Text' to the word 'THIS' in the text window. Change the font size to48 point from the drop-down font size Menu, or by or entering 48 in the font size box of the 'Text' PanelThe 'Layout' Panel should look like this:file://C:\Documents and Settings\jbarthelmes\Local Settings\Temp\ hh5ADC.htm11/17/2006
TutorialsPage 3 of 138Note: The Anchor Point (small cross) is in the middle of the Text Object. This is defined by the last usedsetting of the Transform Panel. The anchor point should be set to 'Origin', otherwise the following Effects willappear different to those shown in the sample6.In the Timeline Panel, click on Frame 1 in the row for 'THIS'. Press the'Add Effect' button,which is on the left of the 'Timeline' Panel. Select Fade Fade In from the drop-down Menu. Double click onany Frame of the Fade In Effect in the Timeline, the Fade In Settings dialog box will appear. From the 'FadeIn Settings' dialog box, press the button labeled "More Options " then uncheck the 'Continue from previousEffect' checkbox to access the Start At tab. From the Start At tab, select X Scale Scale Factor, and enter thevalue 20 in the % edit box and press enter. Select the Motion tab, and select X Scale Resize to 100%. Pressthe 'Close' button, at the bottom right of the dialog, to close the dialog boxThe Timeline should look like this:7.8.Press thePlay Movie button on the Control Toolbar. You should see the word 'THIS' increase in scale as itfades in. This will continue to loop. Press theStop buttonClick on Frame 15 in the row for 'THIS'. Press theOut from the Menu.'Add Effect' button, and select Fade FadeNow the Timeline should look like this:9.Press the'Play Movie' button. You should see the word 'THIS' fade in, and then fade out. Press the'Stop' button10. Right-click on the Fade Out Effect in the Timeline, and select Properties from the context Menu to display the'Fade Out Settings' dialog box. Change the Duration from 10 to 4file://C:\Documents and Settings\jbarthelmes\Local Settings\Temp\ hh5ADC.htm11/17/2006
TutorialsPage 4 of 138Note: When you are finsihed, click on the 'Close' button at the bottom right or the [X] button at the top right tohide the effect properties dialog. You can do this whenever you want to hide the effect settings dialog if it gets inthe way of seeing the other panels11. Press the'Play Movie' button again. You should now see the word 'THIS' fade out faster than before,because you have shortened its duration. Press the'Stop' button12. Press the'Insert Text' button. The word 'Text' will appear directly over your first word on the stage, it willalso appear in the Timeline and the Outline Panel. In the Text Panel, change the word 'Text' to the word 'IS', thefont size should be set to 48 point13. Press the48 point'Insert Text' button to create a third word. Change this word to 'MY' and leave the font size at14. Press the'Insert Text' button again to create a fourth word, change this word to 'MESSAGE' and leavethe font size at 48 point15. From the Timeline, click on the Fade In Effect you created for the word 'THIS' and while holding the CTRLkey down, click on the Fade Out Effect next to it. Both the Fade In and the Fade Out Effects should behighlighted. Right-click and select Copy Effect from the context Menu. You may need to resize or scroll theTimeline so you can see the rows you want to work on16. On the Timeline, right-click at Frame 17 next to the word 'IS' and select Paste Effect. Paste these Effects atFrame 35 next to the word 'MY' and at Frame 52 next to the word 'MESSAGE'The Timeline should now look like this:17. Click on the Fade Out Effect for the word 'MESSAGE' to select the Effect, then Right-click on it and selectProperties from the context Menu. The 'Fade Out Settings' dialog box should appear. Select the Motion Tab, andselect X Scale Resize to Scale and enter the value 400 in the % edit box, press enter and the click on the 'Close'button18. Press the'Play Movie' button on the Toolbar. You should now see the sequence of words 'THIS', 'IS','MY', fade in while increasing in scale and then fade out. The Word 'Message' will fade in while increasing in scaleand then fade out while increasing in scale. Press the'Stop' buttonSave Movie button on the Toolbar. You should now see the 'Save As' dialog box. Type19. Now press the'myfirst' into the File name edit box and press Save. Your Movie has now been saved as a .swi file and can beopened at a later timeYou are ready to continue with the Importing and Working with Images and Vector Graphics tutorial.Importing and Working with Images and Vector GraphicsTop Previous NextThis is a step-by-step tutorial on importing and working with bitmap images and vector graphics. This tutorialillustrates some of the features seen in the "first.swi" file in the File Samples Tutorials Menu.Note:file://C:\Documents and Settings\jbarthelmes\Local Settings\Temp\ hh5ADC.htm11/17/2006
TutorialsPage 5 of 138 You can import bitmap images in .jpg, .jif, .jpeg, .gif, .png, .bmp, and .dib formats You can import vector graphics in .wmf and .emf formats, or as a static .swf fileImages1. Open the Movie you began in the last tutorial "myfirst.swi"2. Press the'Insert Image' button on the Toolbar. From the 'Open' dialog box, select JPEG from the 'FilesTypes' list, then navigate to the Samples folder within your SWiSHmax application folder, select "first.jpg", andpress Open3. The image should be displayed in the center of the stage4. Select the Shape Panel and edit the name of the image Object to be "Center Image". Select the solid linefrom the drop-down Menu. Change the width of the line from 1 to 2pt. Press the color swatch next to the 'Line'width selection box to display the color palette. Select a dark green from the palette.The 'Shape' Panel should look like this:5. Press the 'Properties' button located next to the 'Clipped image' button to display the 'Image Properties' dialogbox. Within the 'Image' dialog box, check the 'Recompress JPEG' checkbox and change the value from 84% (thequality of the imported image) to 10%.The 'Image Properties' dialog should like like this:file://C:\Documents and Settings\jbarthelmes\Local Settings\Temp\ hh5ADC.htm11/17/2006
TutorialsPage 6 of 138Press OK6. From the File Menu, select Test In Player. The image should display in the center of the stage, in front of thetext and appear distorted.7. Press the'Send to Back' button from the Standard Toolbar8. Press the Shape (image) 'Properties' button again and change the value of the JPEG quality from 10% to50%, then Press OKfile://C:\Documents and Settings\jbarthelmes\Local Settings\Temp\ hh5ADC.htm11/17/2006
TutorialsPage 7 of 1389. From the File Menu, select Test In Player again. This time the image should appear clear and behind the text10. Select the "Center Image" Object from the left column of the Timeline, then right-click and select Copy'Paste' button to paste a second image into your Scene. The copy willObject from the context Menu. Press theappear directly over the original11. To help with aligning this image, select the Guides Panel, and check the 'Snap' and 'Show' in the Gridsection. A Grid will appear in the Layout Panel. Change the horizontal and vertical values of the Grid in both the'Horiz' and 'Vert' edit boxes to 5The 'Layout' Panel should look something like this:file://C:\Documents and Settings\jbarthelmes\Local Settings\Temp\ hh5ADC.htm11/17/2006
TutorialsPage 8 of 13812. Select the Transform Panel to view the image's X and Y placement properties. With the image selected, dragthe image over towards the left side of the window, and place the image at X:140 Y:225The 'Transform' Panel should look like this:13. Rename this image object to "Left Image" in the Shape Panelfile://C:\Documents and Settings\jbarthelmes\Local Settings\Temp\ hh5ADC.htm11/17/2006
TutorialsPage 9 of 13814. With the "Left Image" selected, press the'Send to Back' button from the Toolbar, and then press the'Bring Forward' button. This image should be in the second-from-the-bottom row in the Timeline, just aboveCenter Image.15. Press the'Paste' button to create another copy of the image. Drag this one over to the right side of thewindow and place the image at X: 560, Y: 22516. Rename this "Right Image" in the Shape Panel17. Press the'Send to Back' button'Add Effect' button18. In the Timeline Panel in the LeftIImage row, click on Frame 70. Press theand select Fade Fade In from the Menu. Open the 'Fade in settings' by double clicking on the last Frame of theEffect in the Timeline. Change this Effect's duration from 10 to 4 Frames, and press Close to accept thesechanges.19. Right-click on this Effect and select Copy Effect from the context Menu20. In the Timeline Panel in the Center Image row, right-click on Frame 72 and select Paste Effect21. In the Timeline Panel in the Right Image row, right-click on Frame 74 and select Paste Effect22. Preview your Movie in the player by selecting File Test In Player. This time you will see the message andthen, the images will fade in starting with the left image first and ending with the right image23. Click on Frame 88 in the Left Image row. Press the'Add Effect' button and select Move fromthe Menu. Display the 'Move settings' by double clicking on any frame of the the effect in the timeline. From theMotion tab select X Position Move to X and change the value from 0 to 350. Change the Effect's duration from10 to 5 Frames, and press Close to accept the changes24. Click on Frame 93 in the Center Image row. Press the'Add Effect' button and select Movefrom the Menu. From the Motion tab, in the 'Move settings' dialog box, select X Position Move to X and changethe value from 0 to 560. Change the Effect's duration from 10 to 5 Frames, and press Close to accept thesechanges25. Click on Frame 98 in the Right Image row. Press the'Add Effect' button and select Placefrom the Menu. Display the 'Place settings' dialog box and Select X Position Jump to X, change the value from 0to 140, and press Close to accept the changes26. Click on Frame 85 of any row in the Timeline and press thePreview Frame button on the Control Toolbar.Drag the Play Head right and then left across the Timeline to preview the animation. "Left Image" should slideover to the center covering "Right Image"; then "Center Image" should slide right to cover "Right Image"; finally,"Right Image" will appear on the left27. Click on Frame 105 in the Left Image row. Press the'Add Effect' button and select Fade Outfrom the Menu. Display the 'Fade settings' by double clicking on any frame of the the effect in the timeline.Change the duration of this effect from 10 to 5 frames. Go in to the Motion settings (press "More Options " ifyou cannot see this tab), and change the X Scale option to "Resize to Scale" and leave the value set at 0%.Change the 'X Position' setting to "Move to X" and enter a value of "350". Press Close to accept these changes.28. Right-Click on the Fade Out effect at Frame 105 for the Left Image row, and select Copy Effect from themenu. Right-Click on Frame 106 for the Center Image row and select Paste Effect. Right-Click on Frame 106 forthe Right Image row, and select Paste Effect.29. Click on Frame 105 of any row in the Timeline and press thePreview Frame button on the ControlToolbar. Drag the Play Head right and then left across the Timeline to preview the animation. "Left Image" shouldfile://C:\Documents and Settings\jbarthelmes\Local Settings\Temp\ hh5ADC.htm11/17/2006
TutorialsPage 10 of 138slide over to the center covering "Right Image"; then "Center Image" should slide right to cover "Right Image";finally, "Right Image" will appear on the left30. Save your MovieVector Graphics1. Press the'Insert Content' button from the Toolbar. From the 'Open' dialog box, select Flash Player Movie(*.swf) from the 'Files of Type' Menu . From the Samples Folder, select "logo.swf" and press Open. From the'Import' dialog box press the "Select All" button at the bottom-left, check the 'Animated Sprite' checkbox anduncheck the 'Masked' checkbox as well as the "Include background rectangle" checkbox and press Import. Notethat the composite image is within a Sprite, and that the Sprite has been named "logo"2. The logo Sprite should appear in the center of the stage.Note: If the Sprite is shown in a different location other than the center of the stage, you can center it by doing thefollowing: Open the Transform panel; Make sure that the Anchor point of the sprite is set to 'Center'; Change theX and Y settings to X 350, Y 225.3. After importing the logo.swf as a Sprite, it will be expanded in the Outline panel. To close this Sprite (and exitits timeline), either click on the ( ) next to the name of the Sprite in the Outline panel, or click on the "Scene 1"button at the top-left of the Timeline panel (marked with a folder icon to the left of it).4. Click at Frame 110 on the Timeline in the row for logo. Press the'Add Effect' button, and selectFade Fade In from the Menu. Change the Effect's duration in the 'Fade In Settings' dialog box from 10 to 4, andfrom the Motion tab select X Scale Resize to Scale and type 60 in the % edit box. Leave the 'X Y' box checked.Press Close to accept the changes5. Click at Frame 120 on the Timeline in the row for the logo. Press the'Add Effect' button, andselect Fade Fade Out from the Menu. In the 'Fade Out settings' dialog box, change the Effect's duration from 10to 3, and press Close6. Press thePlay Movie button to preview your Movie. After your message has played and your images havefinished moving, the logo should fade in quickly and then fade out quickly. If the 'Stop playing at end of movie'file://C:\Documents and Settings\jbarthelmes\Local Settings\Temp\ hh5ADC.htm11/17/2006
TutorialsPage 11 of 138check box in the Movie Panel is not checked, your Movie will continue to loop. Press theStop button. For theremainder of the tutorial, ensure that the 'Stop playing at end of movie' check box is checked7.Press thePlay Movie button to preview your Movie. This time your Movie will play through once. Press the'Stop' button8.Save your MovieYou are ready to continue with the Adding Music and Sounds tutorial.Adding Music and SoundsTop Previous NextThis is a step-by-step tutorial for adding music and sounds to your Movie. This tutorial illustrates some of thefeatures seen in the "first.swi" file in the File Samples Tutorials Menu.With SWiSH you can import both .wav and .mp3 formats. You can control the overall volume of sounds and applysimple fade Effects. A sound can be played when a Movie reaches a selected Frame or in response to a MouseEvent. For a more detailed explanation on using sounds in your Movie please read Play Sound. This tutorial willbe limited to adding sounds to the Timeline in response to a Frame Event; adding sounds in response to MouseEvents will be discussed in the Creating Buttons tutorial.As sound files can significantly increase the overall file size of the Movie, it is best to select short tunes that canbe looped as background music for a Movie that will be playing over the Web.Note: If you are having problems importing .wav files, try downloading and installing the latest Windows MediaPlayer from fault.aspAdding Background Music1.Open "myfirst.swi" saved from the previous tutorial. Right-click on Frame 1 of the Scene row. From thecontext Menu select Sound Play Sound. A Script Action marker will appear at that Frame on the Timelinefile://C:\Documents and Settings\jbarthelmes\Local Settings\Temp\ hh5ADC.htm11/17/2006
Tutorials2.Page 12 of 138From the Actions Panel you should see the Play Sound Event highlighted in the 'Add Script' window. Notethat the Action playSound is in red. This is because the statement is currently incomplete (it does not containa sound to play). Press the 'Import' button to view the 'Import Sound' dialog box. From the Samples folder,select "88A.mp3" and press OpenNote: The "Files of Type input box" should be set to show MP3 or All Files. If not set to one of these settings, youwill not be able to see the "88A.mp3" file3.Left-click on the sound "88A.mp3" to select that as the sound to be played. The selected sound is now shownas the parameter to the playSound() Action. Note that the script marker changes to in the Scene Timelineand the Action script turns black as it is now syntactically correctfile://C:\Documents and Settings\jbarthelmes\Local Settings\Temp\ hh5ADC.htm11/17/2006
TutorialsPage 13 of 1384.Play Movie button on the 'Control' Toolbar. The tune will playSelect the 'Layout' Panel and Press theonce and then stop. Press the'Stop' button5.From the Script Panel, below the 'Import' Button, press the'Properties.' button to display the'Properties for Sound' dialog box. This dialog box, displays the file's sample rate and the length of 1x loop inseconds and Frames. Note that the quoted length (41.5 Frames) is not long enough to allow sound to beplayed through the entire Movie. Close this window by either pressing "Ok", "Cancel", or the [X] button at thetop-right.6. From the Script Panel, below the 'Import' Button, press thethe 'Sound Effect Settings' dialog box'Sound Effect.' button to displayfile://C:\Documents and Settings\jbarthelmes\Local Settings\Temp\ hh5ADC.htm11/17/2006
Tutorials7.8.Page 14 of 138In the 'Loop sound' edit box, enter 15 (this will ensure that the music will continue throughout theintroduction). You can leave the Volume setting at 100%, and select the option 'Don't play sound if it isalready playing' feature checked. Press OK to accept the changes. This will change the parameters of theplaySound() Action to: "playSound("88A.mp3",True,100,15);"Select the 'Layout' Panel and Press the'Play Movie' button on the Toolbar. The tune will start as yourMovie starts and will continue to play long after your animation has stoppedSound EffectsYou can add a Sound Effect in synchrony with the appearance of the logo.1.Right-click on Frame 110 of the Scene row. From the context Menu select Sound Play Sound. From theScript Panel press the 'Import' button and from the Samples folder, select "FX1001.wav" and press OpenNote: The "Files of Type input box" should be set to show Wave Sounds or All Files. If not set to one of thesesettings, you will not be able to see the "FX1001.wav" file2. Press thebutton to display the 'Properties' dialog box. By default, the Compression for .wav filesis set to MP3; leave this setting, as this will produce the smallest file size, compressing your .wav files up to 1/10of their original size. Leave the Preload sound set to Object or Scene default, press OK3.Click on thebutton, as you do not want this sound to loop, leave the 'Loop sound' edit boxvalue set to 1. Leave the Volume value set to 100%. Select Sound effect Pan left to right. Press OK toaccept these changes. The playSound action should change to: an Left to Right');"4. Select the 'Layout' Panel and Press the'Play Movie' button on the Toolbar. The sound will begin playingwhen your logo appears. It will begin playing in the left speaker and end playing in the right speaker. Press the'Stop' buttonStopping Sounds1.Right-click on Frame 111 and select Sound Stop Sound from the context Menu. Select "88A.mp3" and pressEnter on your keyboardNote: If you need or want to stop your background music in the middle of a loop, rather than having it stop abruptly,it may be helpful to the flow of the Movie if you stop the music while another sound is playing, as you havedone in this example There may be times when you will want to stop all sounds playing. This can be done within the Timeline byfile://C:\Documents and Settings\jbarthelmes\Local Settings\Temp\ hh5ADC.htm11/17/2006
TutorialsPage 15 of 138right-clicking on the Frame where you would like the sounds to stop and selecting Stop All Sounds from thecontext Menu2. Select the 'Layout' Panel and Press the'Play Movie' button on the Toolbar. Your background music will endjust as "FX1001.wav" begins. Press the'Stop' button3.Your introduction is complete. You may view it in your browser by pressing the4.Save your Movie'Test in Browser' buttonYou are ready to continue with the Creating Buttons tutorial.Creating ButtonsTop Previous NextThis is a step-by-step tutorial for creating a simple button. This tutorial illustrates some of the features seen in the"first.swi" file in the File Samples Tutorials Menu.The Button Object makes it easy to add mouseover Effects to your Movie without interrupting the Movie's mainTimeline.Insert Button on the Insert Toolbar, or you can choose anYou can create an empty button by pressing theexisting Object and convert it into a button by selecting Modify Convert Convert to Button or by pressing the'Convert to Button' icon from the Grouping Toolbar. The 'Grouping' Toolbar can be can be displayed by selecting'View Toolbars Grouping Toolbar'.Note: In most circumstances, it is best create your text or shape first and then use the 'Convert to Button' option(remove any Actions attached to a shape before converting it into a button). This will save you the time of addingthe text or shape for each state; you need only to go into the Button Object's 'Outline' tree to make youradjustments to the different statesTo Create a Button1. Open "myfirst.swi" saved from the previous tutorial. Your introduction has ended and the visitor will now enteryour main site. This is a good time to create a new Scene2. From the Main Menu, select Insert Scene and a new Scene, named 'Scene 2', will be created. Check thatScene 2 appears in the Scene row on the Timeline Panel3. Press the12'Insert Text' button on the Insert Toolbar. Change the word "Text" to "LINK 1", and the Font size to4. Press the'Convert to Button' button from the 'Grouping' Toolbar (if you do not have the grouping toolbarvisible, you can use the Main Menu to select Modify Convert Convert to Button). From the 'Button Object' Panelselect the 'Has separate over state', 'Has separate down state', and the 'Has separate hit state' boxes. AButton icon will appear in the Outline Panel. Click on the ( ) icon next to the Button in the Outline panel to displayits 'Object' Tree, with four child buttons indicating the button's four statesThe 'Outline' and 'Button Object' Panels should look like this:file://C:\Documents and Settings\jbarthelmes\Local Settings\Temp\ hh5ADC.htm11/17/2006
TutorialsPage 16 of 138The Up State represents the button's appearance when the mouse pointer is not over it. The Over Staterepresents the button's appearance when the mouse pointer is over it. The Down State represents thebutton's appearance when the mouse is clicked. The Hit State represents the button's active region5 From the button's 'Object' tree select LINK 1 from the button's Up State, and from the Text Panel, change thecolor from black to a dark green6. Select LINK 1 from the button's Over State, and from the 'Text' Panel, change the color to a medium gray7. Select LINK 1 from the button's Down State and change the color to a dark gray8. Select the "Hit Rectangle" from the button's Hit State. You should see a black rectangle. This rectanglerepresents the button's active region - the area that will respond to the mouse cursor. This state is not visiblewhen the Movie is playing9. Press thePlay Timeline button on the 'Control' Toolbar, and test your button. Your button should change toa gray when the mouse pointer is over it and to a dark gray when you press the button. Press the'Stop Movie'button to end your preview10. Save your MovieAdding Sounds to your Buttons1. Continue from the section above, or alternatively you can open the file "myfirst.swi".2. From the Outline Panel, select Scene 23. Select your 'LINK 1' button from the Outline Panel. Click on the minus (-) symbol to the left of the button icon,so that the button's states are not visiblefile://C:\Documents and Settings\jbarthelmes\Local Settings\Temp\ hh5ADC.htm11/17/2006
TutorialsPage 17 of 138Note: Make sure that none of the button's states are selected when you add your Actions, as you cannot addActions to the button's state. Objects inside button states are not allowed to have Actions and SWiSH will ignorethemThe 'Outline' Panel should look like this:4. Select the Script Panel and press the 'Add Script' button and select Events Button on (rollOver) from thedrop-down Menu. The On (Roll Over) Event will appear and be highlighted in the 'Script' window5. Press the 'Add Script' button (or right click on the 'on (rollOver)' function) and select Sound Play Sound fromthe drop-down Menu. Press the 'Import.' button and the 'Import Sound' dialog box will appear. Navigate to theSamples folder within your SWiSH application folder, select "Beep1.wav" and press Open. The filename"Beep1.wav" will appear at the bottom in the audio content list. Click on the filename within that list to select it forthe playSound action.The 'Script' Panel should look like this:6. Select the 'Layout' Panel tab and press the'Play Timeline' button to test your button. When your mousefile://C:\Documents and Settings\jbarthelmes\Local Settings\Temp\ hh5ADC.htm11/17/2006
Tutorialspointer rolls over the button, you should hear the sound. Press thePage 18 of 138'Stop Movie' button7. From the Script Panel, press the 'Add Script' button and select Events Button on (press)8. Press the'Add Script' button and select Sound Play Sound from the drop-down Menu. Press the'Import.' button, and select "Beep2.wav" from the Samples folder. Import, then select Beep2.wav so it is theparameter of the playSound() Action. The 'Script' Panel should be as shown below:9. Select the Button Panel. In the 'Name' text entry box, type in LINK 1, and check the Track as Menu box10. Go back in to the 'Layout' Panel and press the'Play Timeline' button to test your button. When your mousepointer rolls over the button, you should hear the first sound you imported, and when you click the button, youshould hear a second sound. Press the'Stop Movie' button to end your previewfile://C:\Documents and Settings\jbarthelmes\Local Settings\Temp\ hh5ADC.htm11/17/2006
Tutorials11.Page 19 of 138Save your MovieYou are ready to continue with the Creating a Menu tutorial.Creating a MenuTop Previous NextThis is a step-by-step tutorial for creating a Menu. This tutorial illustrates some of the features seen in the"first.swi" file in the File Samples Tutorials Menu.1. Open file "myfirst.swi" saved from the previous tutorial.2. Check that Scene 2 appears in the Scene row on the Timeline Panel. If Scene 2 does not appear in the'Timeline' Panel, select Scene 2 from the Outline Panel3. Press the'Fit in Window' Zoom button to see the complete stageNote: You can also Zoom In or Zoom out on the stage at any time by pressing theZoom Out buttonZoom In button or the4. Select theRectangle/Square Tool from the T
This is a step-by-step tutorial on how to create your first SWiSH Movie. This tutorial illustrates some of the Text Effects seen in the "first.swi" file in the File Samples Tutorials Menu . 1. Start the SWiSH application 2. From the File Menu select Samples Tutorials "first.swi" 3. From the File Menu select Test In Player