Transcription
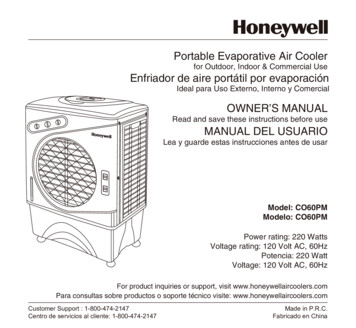
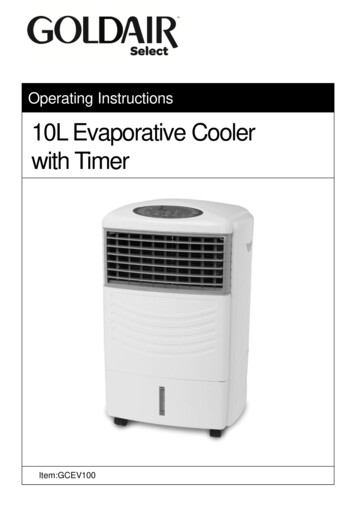
Operating Instructions10L Evaporative Coolerwith Timera 3V CR2032 battery.Item:GCEV100
General Care and Safety GuideThank you for choosing this Goldair product. This Goldair appliance has beendesigned and manufactured to high standards of engineering and with properuse and care, as described in this leaflet, will give you years of useful service.Please read these instructions carefully and keep them for future se only the voltage specified on the ratingplate of the appliance.Keep all objects at least 1 Metre from the front,sides and rear of the applianceThis appliance is intended for household useonly and not for commercial or industrial use.Use this appliance only as described in thismanual. Any other use is not recommended bythe manufacturer and may cause fire, electricshock or injury.The common cause of overheating is depositsof dust or fluff in the appliance. Ensure thesedeposits are removed regularly by unpluggingthe appliance and vacuum cleaning the air ventsand grills.Always unplug appliance when not in use.When the appliance has been unpacked, checkif for transport damage and ensure all partshave been delivered. If parts are missing of theappliance has been damaged, contact the CDBCustomer Services Team.If your appliance does not work, or is notworking properly, contact the place of purchase.Repair work on the appliance by unqualifiedpersons can cause serious risk to the user.Ensure hands are dry before handling the plugor the Fan.Carry out regular checks of the supply cord toensure no damage is evident.Children should be supervised to ensure thatthey do not play with the appliance.Ensure that the cord is fully extended (notcoiled) while in use.Avoid contact with the moving parts. Keephands, hair, clothing, away from blade of theFan during operation to reduce the risk of injuryto person and/or damage to the Fan.Switch off and use handles provided whenmoving.This appliance is not intended for use bypersons (including children) with reducedphysical, sensory or mental capabilities or lackof experience and knowledge, unless they aresupervised or have been given instructionconcerning the use of the Fan by a personresponsible for their safety.Never place appliance close to radiant heatsource.TECHNICAL SPECIFICATIONModel:GCEV100Supply:220 - 240VAC .29.Never operate in areas where petrol, paint orother flammable liquids are used or stored.Never use the appliance to dry clothes.Never insert or allow foreign objects to enter anyventilation or exhaust opening, as this maycause an electric shock, fire or damage to theappliance.Never use abrasive cleaning products on thisappliance. Clean with a damp cloth (not wet)rinsed in hot soapy water only. Always removeplug from the mains supply before cleaning.Never connect the appliance to mains supplyuntil completely assembled and adjusted.Never remove plug from power socket until theappliance has been switched off.Never remove plug from power socket by pullingcord – always grip plug.Never twist, kink or wrap the cord around theappliance, as this may cause the insulation toweaken and split. Always ensure that all cordhas been removed from any cord storage areaand is unrolled before use.Never use this appliance in the immediatesurrounds of a bath, a shower, or a swimmingpool or other liquids. The appliance must not beimmersed in any liquids.Due to the risk of injury, never use thisappliance for any purpose other than itsintended use. This appliance is intended for usein household and similar applications such asstaff kitchen areas in shops, offices and otherworking environments; farm houses, by clientsin hotels, motels and other residential typeenvironments, bed and breakfast typeenvironmentsNever use this appliance outdoors.The use of an extension cord, power board, orexternal timer is not recommended with thisunit.Never operate the appliance with a damagedcord or plug, after it malfunctions, or if it hasbeen damaged in any manner. Have theappliance checked and repaired by a qualifiedelectrician if repair is necessary. If the supplycord is damaged, it must be replaced by themanufacturer, its service agent or similarlyqualified persons in order to avoid a hazard.
Components1. Control panel2. Louvre3. Water level indicator4. Wheel (4pcs)5. Water tank6. Power CordControl Panel Layout7. Water filling box (for water and ice)8. Back cover9. Air filter10. Water drainage outlet11.Handle
Operating your FanFor best operating performance position the unit in a location that will create a “flowthrough” air effect. The greatest cooling effect will be felt if the unit is operated in a partlyopened doorway or window with the “cool” conditioned air directed into the room to becooled. It is important to also have a door or window partly opened away from the cooler tocreate this “flow through” effect.On days of high humidity, the cooling effect may be reduced as the air entering the filtermay already be saturated with moisture. On days like this it may be better to switch thecooling feature OFF and operate the unit as a fan only.ON/OFF: Connect the unit to a powersource and press the button once to startair cooler. Press again to Power OFF theair cooler. When cooler is plugged into themain socket, the LED will light indicatingthe air cooler is in standby mode ready tobe switched ON or OFF.SWING: Press once, the indicating LEDwill light, the louvre of the air cooler beginsto swing horizontally and blow cool air .Push the button again, the LED is nowOFF. The louvre stops swinging, and air willblow in one direction.COOL MODE: Press once for cool air. Thisfunction blows normal air through a watercurtain to cooler it. Press the button againto switch this function OFF and the unit willoperate in fan mode only.Note: Please fill enough water into thewater tank before using this function.MODE: There are 3 mode functions:Normal, Natural or Sleep.Normal mode: Constant air flow which canbe adjust by pressing the SPEED functionbutton. For example, Normal LOW orSPEED: Press to change fan speed from Normal MEDIUM or Normal HIGH.“High-Mid-Low”, the relevant SPEEDindicator LED will light up. The SPEED Natural mode: Programmed to simulatedfunction (High-Mid-Low) can also be used Natural air flow (wind) as if it was enteringin-conjunction with the SLEEP and Natural via the window. Natural mode can be inoperate HIGH, MEDIUM or LOW speed.MODE function.TIMER: Press to set the length of timebefore the cooler switches itself OFF. Pressonce for every 0.5hr increments. Maximumallowable time is 7.5hrs.For example, if 0.5hr and 1.0hr lights on atthe same time , it means the timer is set 1.5hrs after which time the unit willautomatically switch OFF. The TIMERfunction is OFF when all LED lights are off.Sleep Mode: Programmed to providecomfort while the user is asleep. This modeis similar to the Natural mode and canoperate with SPEED mode HIGH orMEDIUM or LOW.NOTE: All of the above functions can beoperated using the remote control unit.
Operating your Fan1. Ensure that the cap on the Water 5. To initiate the cooling function depressdrainage outlet of the unit is tight. Pour the COOL button. It will take a few minutesclean cold water into the water filler area, for the air to cool.observing the water level indicator in thebottom front panel.NOTE: If this button is not depressed theunit will only circulate “room temperature”CAUTION: DO NOT SPILL OR ALLOW air.WATER TO COME IN CONTACT WITHTHE CONTROL PANEL6. Move the horizontal louver for the airoutlet to blow up or down to suit.Do not overfill past the MAX water indicatormark. If desired, place ice in the ice tank in 7. The vertical louvres can be set to athe top of the unit.direction or allowed to rotate through 120oDo not pour water into the ice tank.by depressing the SWING button.Do not allow the combined use of water andice to overfill the water reservoir.8. All the functions can be performed withWhen moving the unit, do so with extreme the remote control supplied with this unit.caution, so as not to spill any water in the a) Point the remote towards the unit andreservoir. The unit should be moved slowly depress the appropriate button. The remoteand in a sideways direction.control will operate up to 4 metres from theAlways keep the unit upright.unit.b) Remove battery cover and install two2. Connect the unit to a power outlet of the “AAA” batteries (not included) as indicated.same voltage and frequency as indicated on (Please observe correct battery polarity.)the rating plate. The unit ON/OFF LED forthe power will light to indicate that there is 9. Depress the OFF button to cancel allpower to the unit.functions.3. Turn the unit ON by depressing theON/OFF button. The unit will start and thenrevert to the initial Normal/LOW speedsetting. Further operation can be performedby pressing the SPEED, MODE, TIMER,COOL and SWING buttons.4. If you wish to turn the unit off at a predetermined time depress the TIMER button.The unit can be set to turn off at any timebetween 0.5 hour and 7.5 hours from “TurnOn” by depressing the TIMER button. If notime is selected, the unit will operatecontinuously.The time set can be incremented in 0.5hrsteps and the selected time is indicated by acombination of indicator lights.Eg. 5.5hrs is indicated by the 4hr LED, the1hr LED and the 0.5hr LED beingilluminated.10. When not in use disconnect the unitfrom the power outlet and drain all waterfrom the water reservoir. (See HOW TOCLEAN)NOTE: Initial setting is “normal” mode and“low” speed and will occur every time theplug into plugged into the power main. Oncethe cooler has been set to desire function/s,the cooler will keep memory of the settingas long as there is power to the cooler (step2) when it is switched OFF, and withoutunplugging the plug from the power main.
Cleaning and MaintenanceTo ensure effective humidifying andfiltering, it is recommended that thefiltering system be cleaned once every 12 months.3. It is recommended that the filter becleaned once every week. The air filter isconnected into the back cover via twoclips at the top. Release by pressing thetwo clip down and give it a little push.Care full not to damage the filter.CAUTION: Do not immerse or allow themotor or electric cables to come incontact with any liquid.To clean the exterior surfaces simplywipe over with a soft damp cloth. Shouldit be necessary, greasy marks may beremoved from the surfaces by using mildsoap and a cloth dampened in hot water.Avoid all other types of detergents,cleaners, solvents that may containchemicals which could damage parts ofthe unit. Thoroughly dry all parts beforestorage.5. Store in a cool dust free location for1. Disconnect the unit from the mains next use.supply.2. Empty the water reservoir by looseningthe plug of the water drainage outlet.Make sure you have a container underthe drain to collect the water or empty theunit outside. You may have to empty thewater collector a few times, finally recapthe plug of the water drainage outlet.PROOF OF PURCHASETo receive warranty retain receipt as proof of purchase. (Refer to back of booklet).SUPPORT AND TECHNICAL ADVICEGoldair – New ZealandMonday – Friday 8am-5pmPhone 64 (0)9 917 4000Phone 0800 232 633info@cdb.co.nzGoldair – AustraliaMonday – Friday 8am-5pmPhone 61 (0)3 9336 4423Phone 1300 465 324info@cdbgoldair.com.au
One Year WarrantyThank you for purchasing this Goldair product. Your product is warranted against faults and manufacture when used innormal domestic use for a period of one year. In non-domestic use Goldair limits the voluntary warranty to threemonths.Goldair undertake to repair or replace this product at no charge if found to be defective due to a manufacturing faultduring the warranty period.This warranty excludes damage caused by misuse, neglect, shipping accident, incorrect installation, or work carried outby anyone other than a qualified electrical service technician.PLEASE KEEP YOUR RECEIPT AS THIS WILL HELP VERIFY YOUR WARRANTY.The benefits to you given by this warranty are in addition to other rights and remedies available to you under a law inrelation to the goods or services to which this warranty relates.In Australia, our goods come with guarantees that cannot be excluded under the Australian Consumer Law. You areentitled to a replacement or refund for a major failure and compensation for any other reasonably foreseeable loss ordamage. You are also entitled to have the goods repaired or replaced if the goods fail to be of acceptable quality and thefailure does not amount to a major failure.In New Zealand this warranty is additional to the conditions and guarantees of the Consumers Guarantee Act (1993).Goldair – New ZealandCDB GoldairPO Box 100-707N.S.M.CAucklandPhone 64 (0)9 917 4000Phone 0800 232 633www.goldair.co.nzGoldair – AustraliaCDB Goldair Australia PtyPO Box 574South MorangVictoria, 3752Phone 61 (0)3 9336 4423Phone 1300 GOLDAIR (1300 465 324)www.goldair.com.auGoldair One Year Warranty (IMPORTANT: Please complete and retain this warranty card)NameAddressPlace Of PurchaseDate of PurchaseName Of ProductModel NumberAttach a copy of the purchase receipt to this warranty cardDue to continual design improvements, the product illustrated in this User Manual may differ slightly from the actual product.
opened doorway or window with the "cool" conditioned air directed into the room to be cooled. It is important to also have a door or window partly opened away from the cooler to create this "flow through" effect. On days of high humidity, the cooling effect may be reduced as the air entering the filter may already be saturated with .