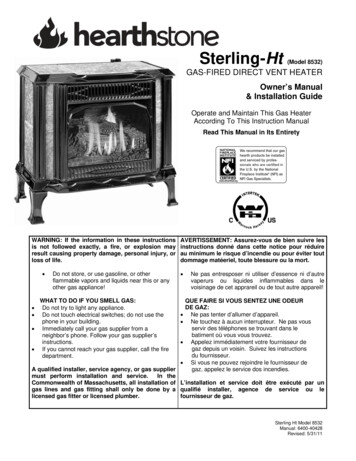
Transcription
Sterling-Ht(Model 8532)GAS-FIRED DIRECT VENT HEATEROwner’s Manual& Installation GuideOperate and Maintain This Gas HeaterAccording To This Instruction ManualRead This Manual in Its EntiretyWARNING: If the information in these instructionsis not followed exactly, a fire, or explosion mayresult causing property damage, personal injury, orloss of life. Do not store, or use gasoline, or otherflammable vapors and liquids near this or anyother gas appliance!WHAT TO DO IF YOU SMELL GAS:Do not try to light any appliance.Do not touch electrical switches; do not use thephone in your building. Immediately call your gas supplier from aneighbor’s phone. Follow your gas supplier’sinstructions. If you cannot reach your gas supplier, call the firedepartment. AVERTISSEMENT: Assurez-vous de bien suivre lesinstructions donné dans cette notice pour réduireau minimum le risque d’incendie ou pour éviter toutdommage matéeriel, toute blessure ou la mort. Ne pas entresposer ni utiliser d’essence ni d’autrevaperurs ou liquides inflammables dans levoisinage de cet apprareil ou de tout autre appareil!QUE FAIRE SI VOUS SENTEZ UNE ODEURDE GAZ:Ne pas tenter d’allumer d’appareil.Ne touchez à aucun interrupteur. Ne pas vousservir des téléphones se trouvant dans lebatiment où vous vous trouvez.Appelez immédiatement votre fournisseur degaz depuis un voisin. Suivez les instructionsdu fournisseur.Si vous ne pouvez rejoindre le fournisseur degaz, appelez le service dos incendies. A qualified installer, service agency, or gas suppliermust perform installation and service.In theCommonwealth of Massachusetts, all installation of L’installation et service doit être exécuté par ungas lines and gas fitting shall only be done by a qualifié installer, agence de service ou lelicensed gas fitter or licensed plumber.fournisseur de gaz.Sterling Ht Model 8532Manual: 6400-40428Revised: 5/31/11
Hearthstone Quality Home Heating Products, IncSTERLING-Ht Model 8532INFORMATION SHEETUse this pag e to record al l relevant information con cerning the purchase, installation, and maintenance of yourSTERLING Ht Model 8532 Gas-Fired Direct Vent Heater. This information will facilitate servicing, purchase o freplacement parts, and warranty claims (if nece ssary). Keep your original re ceipt in a saf e place as proof ofpurchase.Serial Number:Fuel type (check one)Natural GasLiquid PropaneSold by:Phone:Date of Purchase:Installed by:Date of Installation:Phone:Gas Supplier:Phone:Read this Owner’s Manual before installing, or operating the STERLING heater. Retain this manual for futurereference.SERVICE RECORDDateWho Performed WorkWHATFirebox cleaning.Glass cleaning.Door Gasket.Work PerformedWHENannuallyas neededReplacement as needed1Notes:
Hearthstone Quality Home Heating Products, IncSTERLING-Ht Model 8532WELCOMETABLE OF CONTENTSCongratulations on your purchase of Hearthstone’sSterling Ht Gas-Fired Direct Vent heater. TheSterling incorporates the latest in balanced vent gastechnology, which will provide you with clean,efficient heat for years to com e. Combustion aircomes directly from the outside of you r home to thesealed firebox system, eliminating the potential forannoying back drafts or other problems associatedwith home depressurization. The com bination ofnatural stones with cast iron gives the Sterlingapleasing look, which can bemaintained withminimum care.WELCOME . 2The Sterling will provide you with years of practicaland convenient service. However, as with an y gasappliance, the unit must be properly and safelyinstalled and maintained byqualified servicepersonnel to ensure safe and trouble-free operation.GAS CONNECTIONS . 16OWNER’S INFORMATION . 4LIGHTING INSTRUCTIONS .4DAILY OPERATIONS .4INSTALLER’S INFORMATION . 5UNPACKING AND INSPECTION .5STOVE DIMENSIONS & CLEARANCES TOCOMBUSTIBLES .6VENTING INFORMATION .9ATTACHING YOUR VENTING .15LOG PLACEMENT .17INSTALLATION OF THE LOG SET .17REMOVAL OF THE LOG SET .18LIGHTING THE UNIT THE FIRST TIME . 19READ THIS OWNER’S MANUALOperate and maintain this gas heater according to theinstructions in this m anual. Read this manual in itsentirety.ODORS AND IMPURITIES .19PREPARE FOR LIGHTING .19INITIAL ADJUSTMENTS .19LIGHTING INSTRUCTIONS .19TURNING OFF THE UNIT .20THIS HEATER MUST BE INSTALLED ANDMAINTAINED BY QUALIFIED SERVICE PERSONNELVerify the gas connections, and venting systems withrequirements of local,regional, or natio nalinstallation codes. Qualified service personnel mustinspect the gas heater before use, and at leastannually.PILOT AND BURNER FLAMES . 20VARIABLE OUTPUT CONTROL .20GAS CONVERSIONS . 21ROUTINE MAINTENANCE AND CARE . 22ALWAYS VENT TO THE OUTSIDENever vent the gas heater to other rooms, orbuildings. Do not con nect this gas appliance to achimney flue serving a s eparate solid-fuel burni ngappliance.PARTS LISTS . 24TROUBLESHOOTING GUIDE .26MANUFACTURED BY:Hearthstone Quality Home Heating Products, Inc.317 Stafford AvenueMorrisville, Vermont 05661-8695USAE-mail: inquiry@Hearthstonestoves.comWeb: www.Hearthstonestoves.com2
Hearthstone Quality Home Heating Products, IncSTERLING-Ht Model 8532SERVICE CAUTIONAny shield, door, or other component removed forservicing must be replaced prior to o perating. Anycomponents of the stove rem oved for servicing m ustbe replaced prior to operating. If you believe y ourSterling is not perform ing properly, immediatelydiscontinue operation until the unit has beeninspected and approve d by qualified servicepersonnel. Prior to servicing the unit, turn the valvecontrol knob clockwise to “OFF”. Ensure the unit iscool before servicing and cleaning.Any safetyscreen, guard, or component removed duringservicing must be r eplaced before operation. Donot use any components other than those approvedby Hearthstone Quality Home Heating Products,Inc., otherwise all warranties are void. Do notsubstitute components!WARNING: do not operate the appliancewith the fr ont glass removed, cracked, orbroken. Replacement of glass sh ould bedone by a licensed or qualified serviceperson. Only open front for routineservice. Do not slam, or strike the glass.WARNING: A qualified service technicianshould do installation, and repair. A qualifiedservice technician must inspect the appliancebefore use, and at least annuall y. More frequentcleaning may be required due to excessive lintfrom carpeting, bedding material, pets, etc. It isimperative that the c ontrol compartments,burners, and circulating air passag es of theappliance are kept clean and free of obstructions.(S’assurer que le brûleur et le compartiment descommandes sont propres. Voir les instructionsd’installation et d’utilisation qui accompagnentl’appareil.)FIRE HAZARDDo not store or use gasoline, or other flammablevapors or liquids near this appliance. The Sterlingshould be l ocated out of traffic, and awayfromfurniture, draperies, clothing, an d other flammablematerials.SHOCK HAZARD (IF EQUIPPED WITH ACCESSORY FAN) Theaccessory blower is equipped with a three-prong(grounding) plug for protection against shock hazardand must be plugged directly into a properlygrounded three-prong receptacle. Do not cut orremove the grounding prong from the plug.HOT SURFACESCertain exposed surfaces of the Sterling will reachhigh temperatures during n ormal operation.Clearances to combustibles must be maintained, asspecified in the “Clearances To Combustibles”section of this manual. Due to high tem peratures,the appliance should be located out of traffic an daway from furniture, draperies, clothing, andother flammable materi als. Children and adultsshould be al erted to the hazards of high surfacetemperatures and m ust stay away to avoid burnsto skin or possible cloth ing ignition. Ensure tha tyoung children ar e carefully supervised when inthe same room as the appliance. Clothing or otherflammable material must not be placed on or nearthe appliance. (Surveille les enfants. Garder lesvêtements, les meubles, l’essence ou autres liquides àvapeur inflammables lin de l’appareil.) Clean thearea around, under, and b ehind the unit on a regularbasis to prevent the accumulation of dust and lint.3
Hearthstone Quality Home Heating Products, IncSTERLING-Ht Model 8532OWNER’S INFORMATIONThe installation must conform with local codes or, i nthe absences of local codes, the current National FuelGas Code, ANSI Z223.1 ( NFPA 54), or CAN/CGAB149 Installation Code. (Installer l’appareil selon lescodes ou règlements locaux, ou, en l’absence de telsrèglements, selon les Codes d’installation CAN/CGAB149.)7.8.Warning: Do not use this appliance if any part hasbeen under water. Immediately call a qualifiedservice technician to inspect the heater, and toreplace any part of the control system that hasbeen under water. (Ne pas se servir de cet appareils’il a été plongé dans l’eau, complètement ou enpartie. Appeler un technicien qualifié pour inspectorl’appareil et remplacer toute partie du système decontrôle et toute commande qui ont été plongés dansl’lau.)9.10.If knob does not pop out when released, stopand immediately call a qualified servicetechnician or gas supplier.If the pilot will not stay lit after several tries,turn the gas control knob “OFF” and call aqualified service technician or gas supplier.Turn gas control knob counterclockwise to“ON”.Select “ON” or “T-STAT” position on theon/off/t-stat switch.Plug in the blower accessory, if so equipped.Set thermostat to “ON” and set the desiredtemperature setting.Normally, if the “T-STAT” position was selected, themain burner is cycled on and off by the Thermostator the “on”, “off” switch located on the bottom of theThermostat body.TO TURN OFF THE GAS TO THE APPLIANCETurn the ga s control k nob clockwise to “OFF”position. If s hutting the unit off for the non-heatingseason, this will improve the overall efficiency of theunit as the heat from the p ilot is wasted in thesummer. W hen putting the unit back into servicefollow the lighting instructions described on thispage.Certified for use by:Board of State Examiners of Plumbers and Gasfitters100 Cambridge Street, Room 1511Boston, Massachusetts02202LIGHTING INSTRUCTIONSThe gas control knob is located on the top of thestove, in the rear, right-hand corner.VARIABLE OUTPUT CONTROLThe gas con trol valve is equipped with a variableoutput control. This contr ol varies the rate of heatproduced by the unit by vary ing the ga s pressure tothe ember burner.1. Set the on/off/T-stat switch or thermostat to theoff position.2. Unplug the blower accessory, if so equipped3. Push in and turn gas control knob clockwise to“OFF”. (If not previously lit, the knob should bein this position.)4. Wait (5) five minutes to clear out any gas. If youthen smell gas, STOP! Smell all around theappliance area for gas. Be sure to smell next tothe floor because some gases (LPG) are heavierthan air and will settle on the floor. If you smellgas immediately follow the What To Do If YouSmell Gas! warning on the cover of this Manual.If you do not smell gas, go to the next step.5. Turn gas control knob counterclockwise to“PILOT”.6. Push in control knob all the way and hold in.(You should hear the clicking of the igniter in thefirebox) Verify ignition of the pilot. Continue tohold the control knob in for about 20 secondsafter the pilot is lit. Release the knob and it willpop back out. Pilot should remain lit. If the pilotgoes out, repeat the operation.DAILY OPERATIONSThe homeowner can e asily operate the Sterling gasfired heater. The unit comes with a standardthermostat. Remote thermostats, or wall switches areavailable for purchase fr om your local Hearthstonedealer. Once the therm ostat is installed and properlyadjusted, the desired room temperature is maintained.By adjusting the variable output contr ol located onthe gas control valve, the rate of heat output can b evaried to meet the heating requirements of the season.Choosing a low flame setting will result in longerburn cycles at a reduced output, whil e choosing ahigh flame setting will result in a short er, hotter burncycle. Thr ough trial an d error, the h omeowner canselect the optim um flame size for thei r setting andapplication. Also available is a variable speed blower.(Kit# 95-57320)4
Hearthstone Quality Home Heating Products, IncSTERLING-Ht Model 8532INSTALLER’S INFORMATIONinstalling the unit. If any damage, or a missing part, isdetected, immediately contact y our dealer. Do notinstall or put into service a damaged or incompleteheater.CodesAdhere to ALL local codes or, in their absence, thelatest edition of THE NATIONAL FUEL GASCODE ANSI Z223.1 (NFPA 54) or CAN/CGA B1 49Installation Code, which can be obtained from:The unit should appear to be square and level. Thesheet metal parts should be smooth and free of bend sor dents. The ena meled cast iron should be free ofchips or cracks. If visible or concealed damage isfound, contact your dealer.AMERICAN NATIONAL STANDARDSINSTITUTE, INC.1430 BROADWAYNEW YORK, NY 10018ORNATIONAL FIRE PROTECTIONASSOCIATION, INC.BATTERY MARCH PARKQUINCY, MA 02269The decorative fiber logs supplied with the Sterlingare located in the firebox. Alway s use great car ewhen handling the decorative fiber logs, as they arevery fragile and subject to damage and breakage. Toopen the front, grasp both sides of the front castfacade, toward the bottom , and lift upward and thenoutward. The bottom will slide up an d out. Thewhole piece is then easil y removed. Set the frontaside taking care not to chip or scratch the enamel .Next, locate the two rotating clips above the glass.Rotate the clips out of the “locked” position and tiltthe top of the glass outward. Lift the e ntire glass upand out. The log set can now beinspected fordamage. To take the unit off the pallet, rem ove thelag bolts, which fasten th e unit to the pallet. Tak ecare not to chip the enameled legs. H ave someonehelp lift the stove off the pallet, and set it into place.The appliance, when inst alled, must be el ectricallyconnected and grounded in accordance with localcodes or, in the absenc e of local co des, with thecurrent NFPA 70-National Electrical Code or CSAC22.1-Canadian Electric Code.A manufactured home (mobile) OEM installationmust conform with the Manufactured HomeConstruction and Safety Standard, Title 24 CFR, Part3280 (U.S.) or Standard for Manufactured Ho meInstallation, ANSI/NCBCS A225.1 or Standard forGas Equipped Recreational Vehicles andmobileHousing, CSA Z240.4 .CAN/SCA Z240 M H(Canada).(Installer l’appareil selon les codes ourèglements locaux, ou, en l’absence de telsrèglements, selon les Codes d’installation CAN/CGAB149.)Packing List1-Sterling Gas-fired Heater containing:3-Decorative Fiber Logs1- Bag Platinum Bright Embers1-AA Battery1-Owner’s Manual and Warranty Card1-Thermastat and wire1-LP Conversion kitFIBER LOG SAFETY INFORMATIONIf the decorative fiber logs supplied with the Sterlingare damaged, they must be replaced. Themanufacturer, through your local Hearthstone dealer,supplies replacement parts. Do not replace fiber logswith any materials not approved by HearthstoneQuality Home Heating Products, Inc.UNPACKING AND INSPECTIONUnpack and Inspect for DamageThe Sterling is packaged by the m anufacturer towithstand normal shipment without damage.However, damage can still occur during transit, sotake care to inspect for damage when unpacking and5
Hearthstone Quality Home Heating Products, Inc STERLING-Ht Model 8532WARNING! Do not oper ate the stove withthe glass front remov ed, cracked, orbroken.ITEMS REQUIRED FOR INSTALLATION* External regulator (for propane/L.P.G. only)* Piping which complies with all codes* Pipe sealant approved for use with propane/L.P.G.(resistant to sulfur compounds)* Manual shutoff valve* Sediment trap (page 16)* Tee joint* Pipe wrench* Phillips head screwdriver* Other parts as required by local code*Safety Glasses*Gloves*Stone SetAIR SUPPLYThe Sterling Direct-vent does not requi re additionalinstaller provided ventilation.Sterling DimensionsIf this appliance is to be installed on carpeting, vinyltile or combustible material other than wood flooring,it must be installed on a metal or wood panel extendingthe full width and depth of the stove.STOVE DIMENSIONS & CLEARANCES TOCOMBUSTIBLESAlways maintain clearances around the stove, asshown in the Clearan ces to Com bustibles figures.This allows for adequate ventilation.6
Hearthstone Quality Home Heating Products, IncSTERLING-Ht Model 853218" (458mm)2" (51mm)2" (51mm)4" (102mm)Parallel Installations1" (26mm)14" (355mm)3" (76mm)3" (76mm)2" (51mm)FloorMantel InstallationsCorner InstallationsCLEARANCE TO COMBUSTIBLESSPECIFICATIONS:LISTED: DIRECT VENT GAS HEATERModel: 8532-Sterling Ht DVTesting Agency: Intertek Testing Services NA, Inc. (ITS)Tested to: ANSI Z21.88-1998 CSA 2.33-M98 CAN/CGA 2.17* You may keep your orifices the same if you wish to burn at the lower 33,000 btus with the top exit kit.Venting Exit TypeGas TypeInput rating (Btu/hr) 0-2000ftMaximum output (Btu/hr) 0-2000ftMinimum input rating (Btu/hr)Orifice size DMS 0-2000ftMan. pressure- HI setting (in.w.c./kPa)Man. pressure- LO setting (in.w.c./kPa)Minimum inlet pressure (in.w.c./kPa.)Maximum inlet pressure (in.w.c.)Rear Exit – 5”x8” 887.0137*Top Exit – 4”x6” 88713
Hearthstone Quality Home Heating Products, IncSTERLING-Ht Model 85328
Hearthstone Quality Home Heating Products, IncSTERLING-Ht Model 8532VENTING INFORMATIONVertical Vent CapSnorkel 36”Vinyl Siding Standoff 4 x 6 5/8”Round Ceiling Support WallThimble CoversWall thimbleThe Sterling is approved for installation onlywith the following venting manuafcturersproducts. Simpson Dura-vent Direct Vent GSAmeriVent DirectSecure Vent systemsSelkirk Direct-Temp EXCELDirectIf the vent air intake s ystem, for any reason, isdisassembled, it m ust be reinstalled per theinstructions provided for in the initial installation.WARNINGThis appliance must not be connected to a chimneyflue serving a separate solid-fuel burning appliance.The Sterling can be vented two ways:A) Straight out the back exit, using 5”x8” pipe.Allowable Venting Configuration GraphsB) Top exit, using kit #95-60320. If you want torun your vent vertically, you must buy thisvertical vent kit which will convert the ventingpipe to 4"x6". The restrictor will be part of thiskit. No restrictor is needed for a horizontalexit.When determining the venting configuration, youmust consider the position of the termination cap.There are 5 possible categories.A)B)C)D)When referring to the rest of this section ensurewhich way your unit is being vented.E)Note:If the unit is vented vertically, 4”x6” pipemust be used.If using Top Exit Kit, a 24” section of pipemust be used directly off of stove.Fireplace & Existing chimneyinstallationHorizontal termination for 5”x8” pipeHorizontal termination for 4”x6” pipeVertical termination straight or 2 45Oelbows (4”x6” pipe only)Vertical termination, 1 or 2 90 O elbows(4”x6” pipe only)Every venting configuration must fall into one ofthese categories.The vent/air intake termination clearances above thehigh side of an angled roof as follows:APPROVED VENTING SYSTEMCOMPONENTSComponent Description90 0 Elbow45 0 Elbow6" Straight9" Straight12" Straight24" Straight36" Straight48" Straight11"-14 5/8" Adjustable Pipe LengthHorizontal Vent CapRoof PitchHorizontalOverhangVertical WallFlat to 6/127/12 to 9/1210/12 to 12/1213/12 to 16/1217/12 to 21/12Feet12468Meters0.30.61.21.82.4The termination cap must notbe recessed into a wall orceiling.TerminationCap9Termination Clearances
Hearthstone Quality Home Heating Products, IncSTERLING-Ht Model 8532A. Fireplace & Existing Chimney InstallationThe use of an existing chimney as an air intake is not covered under the ANSI Z21.88-1998 CSA 2.33-M98test methods and the resulting ITS/WHI product certification. The Code Authority Having Jurisdiction mustbe consulted prior to proceeding with this installation method.10
Hearthstone Quality Home Heating Products, IncB.STERLING-Ht Model 8532Horizontal Terminations for 5"x 8" Pipe.11
Hearthstone Quality Home Heating Products, IncC.STERLING-Ht Model 8532Horizontal Terminations for 4"x 6" Pipe (Requires the use of Top Exit Kit, # 95-60320)Note: All top exit configurations require a minimum of a 24” section of pipe directly off the unit.12
Hearthstone Quality Home Heating Products, IncD.STERLING-Ht Model 8532Vertical Terminations - Straight or (2) 45O Elbows (4"x 6” Pipe Only)13
Hearthstone Quality Home Heating Products, IncE.STERLING-Ht Model 8532Vertical Terminations - (1) or (2) 90O Elbows (4"x 6" Pipe)14
Hearthstone Quality Home Heating Products, IncSTERLING-Ht Model 8532ATTACHING YOUR VENTINGLoosen the Phillips head screw and rotate th elocator, found on the rear middle of the stove toa position which corresponds to the ap propriatechart setting. Shown below are the app roximatelocations of the settings 1-3; however it can beset in any position. Ti ghten the screw in thedesired setting.Follow the instructions in either of the 5”x8”starter kits. If you are attaching the Top Exit kit,(#95-60320) for vertical v enting configurations,the instructions will be provided with the kit.INNER COLLAR:Locate the 8 screw holes where the in ner collarattaches to the heat exch anger. Attach t he innercollar and gasket with the 8 screwsprovidedwith the collar.Note:These positions are based on lab results and canhave some variance.IF the vent-air intake s ystem is disasse mbled forany reason, reinstall per the instruction providedfor the initial installation.OUTER COLLAR:Locate the 8 screw holes where the outer collarattaches to the heat exch anger. Attach t he outercollar and gasket with the 8 screwsprovidedwith the collar.The flow of combustion and ventilation airmust not be obstructed.You are now ready to install your venting.1. Gasket2. Inner Starter3. Gasket4. Outer StarterVENT RESTRICTORWhen converting the u nit to a top exit, (4”x6”pipe), a restrictor is supplied with the kit.Instructions for installation of the restrictor aresupplied with the kit. To adjust your restrictorfor maximum flame appearance, first ensure theunit is cool before touching any part of the stoveor venting. Refer to the Venting Configurationsfor recommended restriction plate positions.Restrictor Plate Setting Locations15
HearthStone Quality Home Heating Products IncSTERLING Ht Gas-Fired Direct Vent heaterCet appareil peut êtreinstallé dans un maisonpréfabriquée (mobile) déjà installée à d emeure si lesrèglements locaux le permettent.Conditionally approved for purchased mobile homeinstallation. This appliance may be installed in anaftermarket permanently located, manufactured(mobile) home, except where prohibited by localcodes.Cet appareil doit être utilisé uniquement avec lestypes de gas indiqués sur la plaque signalétique. Nepas l’utiliser avec d’autres gas sauf si un kitdeconversion certifié est installéThis appliance is only for use with the type of gasindicated on the rating plate. This appliance is notconvertible for use with other gases, unless acertified kit is used, available through your localHearthstone dealer.GAS CONNECTIONSA top plate and a side cover must be removed toaccess the gas control valve. First re move the gascontrol valve knobs, b y grasping the knobs firm lyand gently pulling straight up o n the knobs. Nextremove the six screws holding the top pl ate on. Twoare located on the sides, a nd four are located on top.To remove the side cover, loosen the two screwswhich have holes in the side for acce ssing. Do notremove these screws, just loosen them. Slide theside cover upward and remove. The gas suppl y lineconnection is made to the Sterling’s gas controlvalve, located on the back of the unit, in the lowerright corner, using a 3/8" NPT fitting. The pipe mustbe sized to provide sufficient gas supply to meet themaximum demand of the unit. The supply line mustinclude a manual shut-off valve and union so that theunit can be disconnected for servicing.Gas SupplyInletTo EquipmentInletTee Fitting3" MIN.NippleCapSediment Trap is requiredUse of a dedicated sedi ment trap is required by code ,and by Heart hstone. Damage to com ponents causedby the lack of a sediment trap isnot covered by16
STERLING Ht Gas-Fired Direct Vent heaterHearthStone Quality Home Heating Products Incdealer for replace ment. The decorative fiber log s etwill last a long tim e; however, they will break easil yif subjected to rough or improper handling.warranty.Once connected to the gas supply , the gas inletpressure, and m anifold gas pressure, must be tested.The gas control valve has built in pressure taps fortest gauge connections. The supply line pressure mustbe tested to ensure it meets the minimum pressure forthe type of fuel in use (NG or LP).Exact positioning of the log set is required in order t oobtain a pleasing fla me pattern a nd efficientcombustion. Incorrect logplacement can causecarbon build-up (soot); excess ther mal stress on thelog set and stove parts, reduced efficie ncy, and highlevels of carbon monoxide. If the log set does not fitinto the fire box exactly as outlined, contact yourdealer for assistance.Pressure Measurements: To measure the gaspressures, connect a manometer to th e gas inlet tap(6) and manifold pressure tap (7)in the ValveDescription Figure.INSTALLATION OF THE LOG SET1) First remove the front cast and glass asse mbly.To remove the front, grasp both sides of thefront cast fa cade, toward the bottom , and liftupward and then outward. The bottom will slideup and out. The whole piece is then easilyremoved. Set the fro nt aside taking care not t ochip or scratch the enam el. Next, locate the tworotating clips above the gl ass. Rotat e the clipsout of the “locked” position and tilt the top ofthe glass outward. Lift the entire glass asse mblyup and out.GAS PRESSURE ADJUSTMENTA qualified technician must connect the heater to thegas supply, and leak test the unit before it is approvedfor use. Consult all applicable codes. The appliance,and its main gas valve, must be isolated from the gassupply piping system by closing its individual manualshutoff valve during any pressure t esting of the gassupply piping system at test pressures equal to o rgreater than ½ psig (3.5kPa).2) Gently take the logs out of the fire box andremove the bubble wrap from the log set. Becareful not to damage the log set whenunpacking. There are three logs, a Right, a Leftand a “Twig”.REPLACING THE GLASSTo replace the front glass, first shut the pilot light off.Next remove the front cast and glass assembly, asdescribed in Installation of Log Set s ection. If theglass is broken, pull the broken fragments of glassaway from the glass fra me using heavy-duty gloves,as the pieces will be very sharp. Carefully replace theglass gasket as necessary, and repla ce the glassassembly and front cast. 3) Gently place the Right Log (1) in the firebox, onthe ember burner. The right log has a portion oftwig on the top part of it. On the underside ofthe log there is an “L-shaped” cutout that linesup the log on the ember burner, in theappropriate position. It should sit as shown.WARNING! Do not use substitute materials.Use only parts that have been supplied byHearthstone,through an authorizedHearthstone dealer.1CAUTION! Do not clean the glass while theunit is hot. Allow app roximately one hourbefore attempting cleaning.LOG PLACEMENTPlace only the decorative fiber log set supplied withthe unit in the firebox. This log setis specificallydesigned to work with the provided em ber burner.Do not use any other type of fiber logs, wood logs, orother materials in the firebox. If the original log setis damaged, or broken , contact yo ur Hearthstone4) Gently place the Left Log (2) in the firebox, onthe ember burner. On the underside of the logthere is an “ L-shaped” cutout that lines up the17
STERLING Ht Gas-Fired Direct Vent heaterHearthStone Quality Home Heating Products IncREMOVAL OF THE LOG SETlog on the ember burner, in t he appropriateposition. It should sit as shown.CautionLog set retains heat and can be very hot, ifpreviously lit! Allow 1 hour after pilot light is turne doff before handling.2To remove the log set, follow the Installation ofLog Set instructions in reverse. Place the logs andin a safe area where they will not be damaged.CAUTIONFragile! Handle log set with care.5) Gently place the Twig Log (3) in the firebox, onthe ember burner and agai nst the Right Log (1).The twig sits in a recess ed part of the e mberburner, which lines it up, in the appropriateposition. It should sit as shown.36) Open the bag of Platinu m Bright Embers. Fluffup the pieces, and spread randomly over the logsand burners. These em bers will glow brightlywhen the unit is running.7) Re-install the glass a ssembly by lining up thethree tabs on the bottom of the assembl y withthe three slots on the fire box. Slide t he lowerportion of the glass as sembly into the slots andpush it flush against the firebox. Rotate the clipsinto the “loc ked” position. Re-install the frontcast by sliding the upper portion under the lip o
Sterling Ht Model 8532 Manual: 6400-40428 Revised: 5/31/11 Sterling-Ht (Model 8532) GAS-FIRED DIRECT VENT HEATER . Owner's Manual & Installation Guide . Operate and Maintain This Gas Heater According To This Instruction Manual . Read This Manual in Its Entirety . WARNING: If the information in these instructions
