Transcription
ZENworks 2020 Configuration ManagementEvaluator’s GuideJune 2020Some endpoint management solutions can manage your organization’s servers. Others can manage your workstations andlaptops. And still others can manage your mobile devices.However, few can do what ZENworks 2020 Configuration Management does—unify the management of yourorganization’s server, workstation, and mobile devices into one system under a single management console. And none cando it with the simplicity, uniformity, and control provided by ZENworks.But don’t take our word for it. Use this Evaluator’s Guide to check out ZENworks yourself. We’ll help you look at howZENworks performs on two of the most common endpoint tasks an organization faces: delivering applications to devicesand securing those devices. And we’ll help you do it on not one but three of the major device platforms: iOS, Android, andWindows.How to Evaluate ZENworks1. Review the list of resources you’ll need for thisevaluation: What You’ll Need for the Evaluation (page 1)2. Install and configure ZENworks: Download ZENworks Software (page 2) Install ZENworks (page 3)What You’ll Need for the EvaluationHere’s a heads up on some of the resources you’ll need inorder to run through this evaluation. More information aboutthese requirements is provided as needed in the sectionsthat follow.ZEN WORKS S YSTEM A ZENworks server. This can be either a supportedhypervisor where you can run the ZENworks VirtualAppliance or a server (physical or virtual) where youcan install the ZENworks software. Connect to a User Source (page 5) Enable Communication with Mobile Devices(page 6)3. Enroll devices with ZENworks: An LDAP directory. ZENworks user authenticationand user-based management requires access to anLDAP user directory. Enroll Mobile Devices (page 9) Enroll a Windows Device (page 20)4. Use policies to secure your devices: Secure Your Mobile Devices (page 21) Secure Your Windows Device (page 24)5. Distribute apps to your devices: Distribute an App to Your Mobile Devices(page 25) Distribute an Application to Your Windows Device(page 31)6. Unenroll devices from ZENworks: Unenroll Your iOS and Android Devices (page 34) Unenroll Your Windows Devices (page 35)I OSD EVICE M ANAGEMENT An iOS device. This is a test device for you to seehow ZENworks manages policies on the device anddistributes apps to the device. It needs to be running aminimum of iOS version 10. You’re going to play withsettings so we recommend it be a clean device thatyou can reset when finished. An Apple Business Manager account or AppleSchool Manager account. Required if you want tosee how ZENworks manages enrollment of iOSdevices purchased through the Device Enrollment
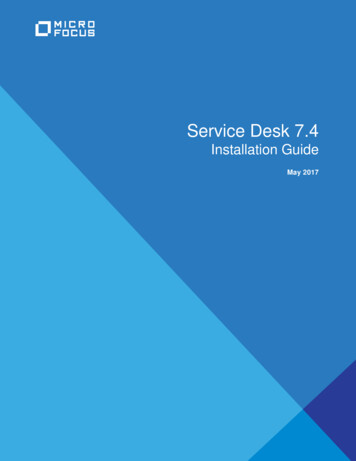
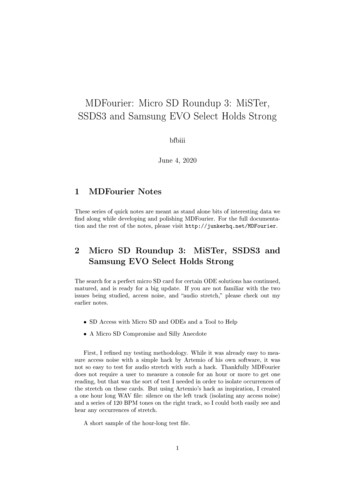
Program (DEP) or how ZENworks supports distributionof apps purchased through the Apple VolumePurchase Program (VPP).3 Use the emailed link to go to the download page. Two Apple ID accounts. One ZENworks-dedicatedaccount to link ZENworks to the Apple PushNotification Service. A second individual account toreceive apps distributed through ZENworks. Requiredfor managing iOS devices.A NDROID D EVICE M ANAGEMENT An Android device. This is a test device for you tosee how ZENworks manages policies on the deviceand distributes apps to the device. It needs to berunning a minimum of Android 5. You’re going to playwith settings so we recommend it be a clean devicethat you can reset when finished. A Firebase account. This is a Google account youcan use to access Firebase to set up Firebase CloudMessaging services for ZENworks. We recommendthat you use a ZENworks-dedicated Google account. An Android Enterprise account. This is a Googleaccount you can use to register with the AndroidEnterprise program. This is required to enroll Androiddevices in ZENworks and distribute managed GooglePlay Store apps to the devices. It can be the sameaccount you use for the Firebase.W INDOWS D EVICE M ANAGEMENT A Windows device. This is a traditional Windows 7,8.1, or 10 desktop or laptop. As with the mobiledevices, you’ll use it to test policies and apps.Download ZENworks SoftwareIf you don’t already have the ZENworks software, you canget it through our evaluation site:1 Go to the ZENworks 2020 Suite Trial Registrationpage l/).2 Fill out the request form and submit it.You’ll be emailed a link to the software download page.4 Click GLOBAL PRODUCT KEYS to expand thesection, then copy and save the ZENworksConfiguration Management Activation Code (circled inthe above screenshot).5 Download the ZENworks software.You’ll quickly notice that there are a bunch of differentdownload files. Which files you need depends onwhether you want to use the ZENworks VirtualAppliance or perform a traditional install.Virtual Appliance: ZENworks is available as a virtualappliance that can be deployed to a supported virtualinfrastructure. The appliance is built on a customizedSUSE Linux Enterprise Server (64-bit) and comes preinstalled with ZENworks.Because the appliance is convenient and easy to use,we recommend using it if possible.The appliance issupported on the following hypervisors.HypervisorFileVMware ESXi 6.xVMware Workstation 6.5 andnewer (use in non-productionenvironments only)ZENworks2020 Appliance-x86 64.ovaMicrosoft Hyper-V ServerZENworks2020 AppliaWindows 2012 2012 R2 2016 nce-x86 64.vhd.zip2019ZENworks2020 Appliance-x86 64.vhdx.zip2XEN on SLES 12.x 15.xZENworks2020 Appliance-x86 64.xen.tar.gzCitrix XenServer 7.x and CitrixHyervisor 8.xZENworks2020 Appliance-x86 64.xva.tar.gz
Traditional Install: You can install the software on oneof the servers in the following list.Operating SystemFileWindows 2012 Server x86 64ZENworks 2020.isoWindows 2012 Server R2 x86 64Windows 2016 Server x86 64Windows 2019 Server x86 64SLES 11 SP4 x86 64SLES 12 SP3 and SP4 x86 64SLES 15 and SP1 x86 64ZENworks 2020.isoInstall ZENworksOnce you’ve downloaded the ZENworks software you want,refer to the appropriate section for installation instructions: Deploying the ZENworks Virtual Appliance (page 3) Installing the ZENworks Software (page 3)D EPLOYING THE ZEN WORKS V IRTUAL A PPLIANCE1 Make sure the host machine has at least 16 GB RAMand 80 GB free disk space, and has a static IP addressor a permanently leased dynamic (DHCP) IP address.2 Import the ZENworks Virtual Appliance into yourhypervisor to create a new virtual machine.3 Power on the new virtual machine.4 Follow the prompts to configure the virtual machine4 Complete the installation wizard.For this evaluation, we recommend the following: Create a new ZENworks Management Zone. Use the embedded Sybase Anywhere database. Use the internal Certificate Authority.If you need more details, refer to the ZENworks 2020Server Installation Guide 0-update-1/zen installation).Update Your ZENworks SystemThe software you installed is the ZENworks 2020 software.The most recently released software is ZENworks 2020Update 1. This evaluation is based on the functionalityavailable in ZENworks 2020 Update 1, so you will want toapply the update to your system.Updating your system is a simple process done throughZENworks System Update. This process is covered in thefollowing sections: Enabling Your ZENworks System to Receive Updates(page 3) Applying the System Update (page 4)E NABLING Y OUR ZEN WORKS S YSTEM TO R ECEIVEU PDATES1 Log in to ZENworks Control Center:1a In a web browser, enter the following URL:and then the ZENworks Server and zone.For this evaluation, we recommend the following: Create a new ZENworks Management Zone. Use the embedded PosgreSQL database. Use the internal Certificate Authority.If you need more details, refer to the ZENworks ApplianceDeployment and Administration Reference 0-update-1/zen ca appliance).https://ZENworks Server Address:portReplace ZENworks Server Address with the IPaddress or DNS name of the ZENworks PrimaryServer. You only need to specify the port if youare not using one of the default ports (80 or 443).1b Specify Administrator as the username, specifythe password you defined during installation, thenclick Login to display the Welcome page.I NSTALLING THE ZEN WORKS S OFTWARE1 Make sure the target server meets the operatingsystem requirements shown in the Download section,has at least 16 GB RAM and 40 GB free disk space,and has a static IP address or a permanently leaseddynamic (DHCP) IP address.2 Log in to the server as a user with administrativerights.3 Mount the ZENworks ISO and run the installationprogram: Windows: Run setup.exe. Linux: Run setup.sh.3
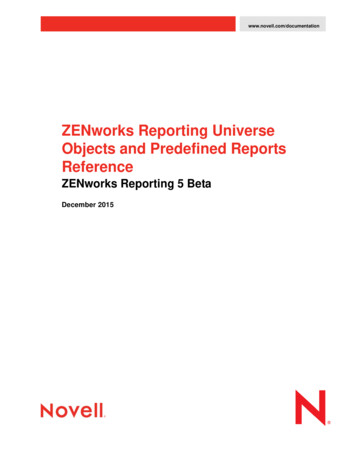
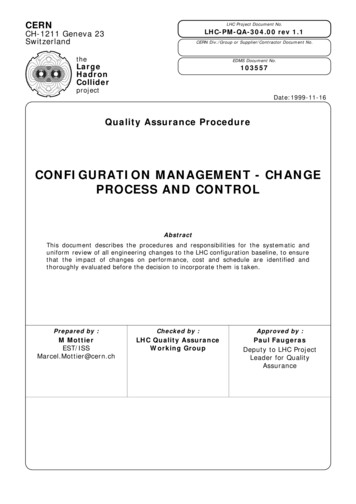
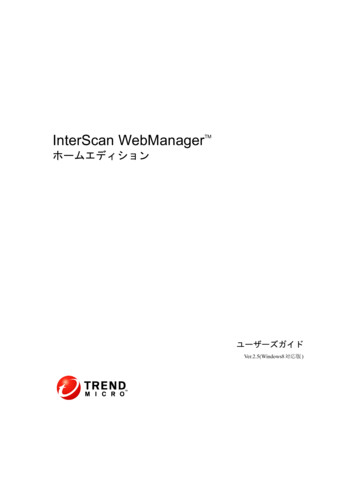
2 Click Configuration (in the left navigation pane).6 Click OK to save the changes to the System Updatesettings.A PPLYING THE S YSTEM U PDATE1 In ZENworks Control Center, click Configuration, thenclick System Updates (one of the tabs at the top of thepage) to display the System Updates page.3 In the Management Zone Settings panel, clickInfrastructure Management to expand the section,then click System Update Settings to display theSystem Update Settings page.2 In the Available System Updates panel, click Action Check for Updates.Any updates that are available are displayed in the list.You should see ZENworks 2020 Update 1 in the list aswell as the most recent Product Recognition Update(PRU). ZENworks 2020 Update 1 is what you apply toupdate your system. The PRU includes the latesthardware and software fingerprints used by ZENworksinventory to identify hardware and software ondevices. We recommend that you apply these monthlyas they come out.4 In the System Update Entitlement panel, clickConfigure to display the Configure System UpdateEntitlement dialog box.5 Enter the email address used to request yourevaluation, enter the activation code you copied fromthe Evaluation Download page, then click Activate.If you don’t have your activation code, go to theEvaluation Download page (using the link that wasemailed to you) and copy the ZENworksConfiguration Management Activation CodeEvaluation key from the GLOBAL PRODUCT KEYSsection.The entitlement is activated and the Entitlement Statein the System Update Entitlement panel changes toACTIVE.3 Select the check boxes next to ZENworks 2020Update 1 and the PRU, then click Action DownloadUpdate.The status for the two updates changes toDownloading. When the download is complete, thestatus changes to Awaiting Authorization.4 Select the check box next to ZENworks 2020 Update1, then click Action Authorize Update to change theupdate status to Ready to Deploy.4
5 Select the check box next to ZENworks 2020 Update1, then click Action Deploy Update to Devices tolaunch the deployment wizard.11 When the update has successfully completed, log in toZENworks Control Center.12 Go to the System Update page (Configuration System Updates).In the Deploying System Updates panel, notice thatthe update is still listed as Pending.6 Select the Deploy System Updates to All Devices inthe Management Zone option, then click Next.Normally, you would want to deploy to selecteddevices rather than all, but since your zone only hasthe one Primary Server at this point you can use thisoption to avoid having to select your Primary Server aspart of the wizard process.7 Leave the Prompt user for reboot when updatefinishes applying option selected, then click Next.8 In the Schedule Type list, select Now, then click Next.9 Click Finish to start the update and display thefollowing dialog box.Although the ZENworks Server software was updated,there are still some update tasks, such as rebuildingthe deployment packages used when distributing theZENworks Agent to devices, that need to becompleted.When all update tasks are complete, the update statusis changed to Successful.13 (Optional) To apply the PRU at this time:13a Select the check box next to the PRU, then selectAction Authorize Update.13b Select the check box next to the PRU, then selectAction Deploy PRU Now.Connect to a User SourceZENworks ties into your LDAP user directory in order toprovide user-based management of devices.During update, the ZENworks Server is not accessiblethrough ZENworks Control Center. Therefore, youneed to use the System Update console to monitorsystem update progress.10 Click the link to open the System Update console thenclick OK to start the update.If the link cannot be clicked, copy the displayed URL toyour web browser and replace SERVER NAME withthe IP address or DNS name of your ZENworksPrimary Server. For example:With mobile devices, a user source is required becausedevice authentication and enrollment are both associatedwith the device’s user, not the device.With workstations and laptops, a user source is notrequired; however, connecting to a user source providesdevice management based on both the device and thelogged-in user. Selecting an Evaluation User (page 5) Connecting to an LDAP Directory (page 6)S ELECTING AN E VALUATION U ate/sustatusThe System Update console is displayed, showing thecurrent status of the update.You need an LDAP user account that you can use for theevaluation. To enroll mobile devices with the user, you’llneed to know the account credentials (username and5
password). You can use an existing account, or you cancreate an account. Throughout this evaluation, we useZENUser.C ONNECTING TO AN LDAP D IRECTORY1 Log in to ZENworks Control Center:1a In a web browser, enter the following URL:https://ZENworks Server Address:portReplace ZENworks Server Address with the IPaddress or DNS name of the ZENworks PrimaryServer. You only need to specify the port if youare not using one of the default ports (80 or 443).1b Specify Administrator as the username, specifythe password you defined during installation, thenclick Login to display the Welcome page.4 On the Connection Information page, define thefollowing connection information, then click Next: Connection Name: Specify a descriptive namefor the connection to the LDAP directory. Address: Specify the IP address or DNShostname of the LDAP directory server. Use SSL: Disable the option if the LDAP server isnot using the Secure Socket Layer protocol. Port: If your LDAP server is listening on a nondefault port (636 or 389), select that port number. Root LDAP Context: The root contextestablishes the ZENworks entry point into thedirectory. If you don’t specify a root context, thedirectory’s root container is used. Ignore Dynamic Groups in eDirectory: Leavethis option unchecked.5 (Conditional) On the Certificate page (which isdisplayed only if the connection is using SSL), verifythe certificate information, then click Next.6 On the Credentials page, specify a Read-onlyusername and password that ZENworks can use toaccess the directory, then click Next.2 Click Configuration (in the left navigation pane).7 On the Authentication Mechanisms page, selectUsername/Password, then click Next.8 On the User Containers page, add the container whereyour evaluation user resides, then click Next.9 Complete the wizard.Enable Communication with Mobile DevicesYou need to complete several system configuration tasks toenable ZENworks to communicate with mobile devices.This includes defining your ZENworks Primary Server asthe Mobile Device Management (MDM) Server that youwant communicating with mobile devices, and thenconfiguring ZENworks to communicate with the devices viathe Apple and Google push notification services.3 In the User Sources panel, click New to launch theCreate New User Source wizard. Designating an MDM Server (page 7) Enabling Push Notifications for iOS Devices (page 7) Enabling Push Notifications for Android Devices(page 8)6
D ESIGNATING AN MDM S ERVERA ZENworks Management Zone must have at least oneZENworks Primary Server that is designated as a MobileDevice Management (MDM) Server. MDM Servers are theonly servers in your zone that communicate with mobiledevices.For this evaluation, you only have one ZENworks PrimaryServer, so you need to designate it as your MDM Server:Apple Push Notification service certificates are issued byApple. The following steps help you create the CertificateSigning Request (CSR), submit the request to Apple, andimport the Apple-issued APNs certificate into yourZENworks zone.1 In ZENworks Control Center, click Configuration (inthe left navigation pane).1 In ZENworks Control Center, click Configuration (inthe left navigation pane).2 In the Management Zone Settings panel, click PushNotification, then click Apple Push NotificationService to display the Apple Push Notification servicesettings.2 In the Management Zone Settings panel, clickInfrastructure Management, then click MDM Serversto display the MDM Servers page.3 Create a Certificate Signing Request:3 In the MDM Servers list, click Add, select yourZENworks Primary Server, then click OK to add it tothe list.4 Click OK to save the MDM Servers list.E NABLING P USH N OTIFICATIONS FOR I OS D EVICESApple Push Notification service (APNs) enables theZENworks MDM Server to notify an iOS device when theserver requires information from the device or has changesfor the device. The ZENworks Primary Servercommunicates with the Apple Push Notification service,which then pushes the notification to the device. Afterreceiving the push notification, the device contacts theMDM Server directly to provide the requested informationor receive the changes.In order to use the Apple Push Notification service, anApple Push Notification service certificate is required. TheAPNs certificate allows the ZENworks MDM Server andiOS devices to authenticate securely to the service.3a Click Create a Certificate Request.3b Fill in the certificate details needed in the request:Organization Apple ID: Specify a valid Apple IDin email format (for example,apns@microfocus.com).Best practice dictates that this should be an AppleID created specifically for managing yourcorporate Apple Push Notification servicecertificate and not an Apple ID used for a personalaccount.Organization Unit: Specify the name of theorganizational unit (division, department, or soforth) to which you belong. For example, IT, ISDepartment, Technical Services Group, orBusiness Services.Organization Name: Specify the name of yourorganization. For example, Micro Focus.City or Locality/State/Country: Specify thelocation information for your organization.7
Key Length: Specify the key length that satisfiesyour corporate policy.3c For the Micro Focus (Novell) Customer Centercredentials, use ZENeval as the username andzeneval! as the password).The Certificate Signing Request must be signedby an approved Mobile Device Management(MDM) vendor, in this case Micro Focus. TheMicro Focus Customer Center credentials enableMicro Focus to sign the request.3d Click Submit for Signing.3e After the Certificate Signing Request file is signedby Micro Focus, save the signed CSR file to alocation of your choice.If desired, you can change the default filename,apns-novell.csr, before saving the file.4 Submit the Certificate Request to Apple:4a Click Apple Push Certificates Portal to open theE NABLING P USH N OTIFICATIONS FOR A NDROID D EVICESFirebase Cloud Messaging (FCM) enables a ZENworksMDM Server to notify an Android device when the serverrequires information from the device or has changes for thedevice.The MDM Server communicates with the Firebase CloudMessaging service, which then pushes the notification tothe device. After receiving the push notification, the devicecontacts the MDM Server directly to provide the requestedinformation or receive the changes.In order to use Firebase Cloud Messaging, you must havean existing Firebase project or use the Firebase Console tocreate a Firebase project. The Firebase project providesthe api/server key and project/sender ID used by your MDMServer to send notifications to Android devices.1 In ZENworks Control Center, click Configuration (inthe left navigation pane).Apple Push Certificates Portal web site.4b Sign in with your Apple ID and password.2 In the Management Zone Settings panel, click PushNotification, then click Firebase Cloud Messaging todisplay the Firebase Cloud Messaging settings.4c Click Create a Certificate, then follow the promptsto upload your Certificate Signing Request fileand create an APNs certificate.4d After the APNs certificate is created, downloadthe certificate.5 Import the APNs Certificate:5a Click Import APNs Certificate.5b Browse for and select the APNs certificate file,then click OK.The default name for the certificate file is MDMNovell Inc Certificate.pem. The certificate isimported into your zone and the certificate’ssubject, expiration date, and key length aredisplayed.5c To check that the certificate is valid and that yourZENworks MDM Server can communicate withthe Apple Push Notification service, click TestNow.6 Click OK to save your Apple Push Notificationchanges.83 Create a Firebase Project:3a Click Firebase Developers Console.3b Sign in using your Google account credentials.Best practice dictates that this should be Googleaccount created specifically for managing yourcorporate Firebase projects and not a personalGoogle account.3c Click Add Project, supply a name for your project(such as ZENworks) and follow the remainingprompts to create the project.
3d After the project is created, the Firebase Consoleis displayed.4 Configure ZENworks with the JSON file and ServerKey:4a In ZENworks Control Center (in the FirebaseCloud Messing settings), click the EnableFirebase Cloud Messaging check box to turn onthe option.3e Click the Android app icon (circled in red above)to display the app registration page.4b Configure the following:Project JSON File: Add the JSON file youdownloaded from Firebase.Server Key: Add the Server Key.Key activation date: Specify the key’s activationdate.Google user ID: Specify the Google account IDused to create the project.4c Click Test Server Key to validate that the3f In the Android package name field, entercom.novell.zapp, then click Register app.3g Click Download google-services.json todownload the .JSON file.3h Complete the wizard and return to the Firebaseconsole.3i In the console’s upper-left corner, click theicon, then click Project Settings.3j Click Cloud Messaging.information is entered correctly and the key isactive.4d Click OK to save your Firebase Cloud Messagingconfiguration.Enroll Mobile DevicesWhew! You’ve made it through the ZENworks installationand configuration tasks! Now it’s time to enroll an iOS andAndroid device in your system so that you can get on withthe fun stuff like distributing apps to the devices andsecuring them. Creating a Mobile Enrollment Policy (page 9) Enrolling an iOS Device (page 11) Enrolling an Apple DEP iOS Device (page 12) Enrolling an Android Device (page 16)C REATING A M OBILE E NROLLMENT P OLICY3k Copy the Server Key so that you can paste it intoZENworks Control Center.In order for mobile devices to be enrolled in your ZENworksManagement Zone, you must create a Mobile Enrollmentpolicy and assign it to any users who will enroll devices.The Mobile Enrollment policy not only allows users to enrolldevices but also assigns specific management settings tothe device. For example, the policy determines theZENworks name and group memberships assigned to the9
device, whether the device is designated as corporateowned or personal, and what happens to the device when itis unenrolled.Depending on the diversity of needs in your organization,you can create a single Mobile Enrollment policy for allusers or you can create multiple policies for users withdifferent needs. For the purpose of this evaluation, we’llhave you create a single policy.1 In ZENworks Control Center, click Policies (in the leftnavigation pane).For example, the Mobile Security policy lets youconfigure different password, encryption, andlockout settings for corporate devices versuspersonal devices. When the Mobile Securitypolicy is applied to a device, the device’sownership type determines which group ofsettings is applied7b Under the Enrollment using the ZENworks UserPortal or the ZENworks Agent app method,enable the Allow the device user to selectownership type option.In a production environment, your corporatepolicy might dictate that you don’t allow users toselect the ownership type during enrollment. Forthis evaluation, however, we suggest that youenable the option so that you experience thisenrollment method.This option is not available for the Enrollmentthrough the Apple Device Enrollment Program(DEP) or Apple Configurator (during initial devicesetup) method because these are silentenrollments; no options are displayed to the user.7c Click Next2 In the Policies panel, click New Policy to display theCreate New Policy wizard.8 On the Configure Device Management Level page:8a Review the differences between a fully manageddevice and an ActiveSync-only device:3 On the Select Platform page, select Mobile, then clickNext.4 On the Select Policy Category page, select GeneralMobile Policies, then click Next.5 On the Select Policy Type page, select MobileEnrollment Policy, then click Next.6 On the Define Details page, specify a name for thepolicy (for example, Mobile Enrollment), then clickNext.7 On the Configure Device Ownership page:7a Leave the Default Ownership set to Corporate forboth enrollment methods.Every mobile policy includes two groups ofsettings, one group that is applied to corporatedevices and a second group that is applied topersonal devices.10 Fully managed: ZENworks can performvarious device management operations suchas apply policies to the device, deployapplications on the device, synchronizeemail from Exchange ActiveSync accounts,and capture device information (inventory).Only iOS or Android devices can be enrolledas managed devices. Full management of anAndroid device is performed through theZENworks App that is hosted on the GooglePlay Store. Full management of an iOSdevice is performed through the device’snative MDM client. ActiveSync only: ZENworks can managecorporate emails on the device. Also, certainpolicies that are enforceable through theActiveSync protocol, such as the DeviceControl Policy and Mobile Security Policy,can be applied to these device. Android, iOS,Blackberry, and Windows devices can beenrolled as ActiveSync only devices.The default setting prompts the user to enroll as afully managed device but allows the change fromfully managed to ActiveSync-only. In a productionenvironment, your corporate policy might dictatethat you don’t allow users to select themanagement level during enrollment. For this
evaluation, however, we suggest that you allowthe choice so that you can see what the optionlooks like when enrolling devices.8b Keep the default setting so that devices areenrolled as fully managed, then click Next.9 On the Configure Mobile Enrollment Rules page, notethe folder and naming settings for the default AllDevices rule in the list, then click Next.Enrollment rules establish the criteria that a user’sdevice must meet in order to enroll, and determinesthe enrolling device’s display name, folder placement,and group assignments in ZENworks Control Center.(available for Apple devices running iOS version 11 ornewer), use the instructions in “Enrolling an Apple DEP iOSDevice” on page 12 instead.1 In the Safari browser on the iOS device, enter thefollowing URL:ZENworks server address/zenworks-eupReplace ZENworks server address with the DNSname or IP address of your ZENworks Primary Server.The login screen for the ZENworks User Portal isdisplayed.10 On the Configure the Un-enrollment Settings page,keep the default settings, then click Next.11 On the Summary page, deselect Create as Sandbox,select Define Additional Properties, then click Finishto create the policy.2 Enter the evaluation user’s username and password,skip the Domain field, then tap Sign In to display theMy Devices screen.12 Assign the policy to your evaluation user:The Domain name field is not needed because thesystem is configured for simple enrollment, whichallows users to log in with only their username ratherthan their full domain name.12a Click Relationships.12b In the User Assignments list, click Add.12c Select the evaluation user, then click OK to addthe user to the assignment list.12d Click Next Finish to complete the assignment.E NROLLING AN I OS D EVICEYou can enroll any device running iOS version 10 or newer.We used an iPhone running iOS version 13.1.2. Obviously,the screens and steps might vary slightly on other iOSdevices and versions.If the device you want to enroll is factory fresh and waspurchased through the Apple Device Enrollment Programor has been added to the program via Apple Configurator3 Tap Enroll in the upper-right corner to display theEnroll Device Modes screen.The available enrollment options are determined bythe Mobile Enrollment policy. If you configured thepolicy as recommended in “Creating a Mobile11
Enrollment Policy” on page 9, both options areavailable as shown below. Otherwise, only one of thetwo options is available.4 Tap Managed Device Only to display the Enroll DeviceOptions screen.7 After you’ve finished enrollment, tap Home to return tothe Home page.The enrolled device is displayed in the My Devices list.8 In ZENworks Control Center, go to the Devices Mobile Devices list to confirm that the device isenrolled in the zone.9 (Optional) In the list, click the iOS device to display itsDevice Information page.5 Click OK to enroll the device as a corporate device anddisplay the Enroll as Managed Device screen.The Device Information page provides inventorydetails collected from the device.6 Complete the steps to enroll the device.Note: If you enroll multiple devices, the steps might notbe the same on all devices. This is because ofdifferences in iOS versions. ZENworks displays onlythe steps required to complete enrollment on thecurrent device.E NROLLING AN A PPLE DEP
4 2Click Configuration (in the left navigation pane). 3In the Management Zone Settings panel, click Infrastructure Management to expand the section, then click System Update Settings to display the System Update Settings page. 4In the System Update Entitlement panel, click Configure to display the Configure System Update Entitlement dialog box. 5Enter the email address used to request your