Transcription
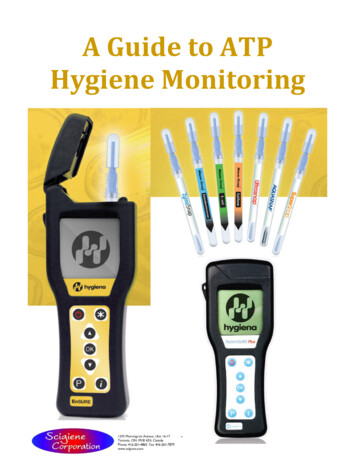
A Guide to ATPHygiene Monitoring-i-
TABLE OF CONTENTSQUICK START GUIDE.vFlow chart: Cleaning, Testing and Corrective Action Procedures.vINTRODUCTION.1The EnSURE & SystemSURE Plus ATP Detection Program.1Components of the EnSURE & SystemSURE Plus ATP Detection Systems.2Overview of this guide.2SECTION 1: An overview of the EnSURE & SystemSURE Plus ATP Detection Program .41.1 What is ATP?.41.2 Measuring ATP with bioluminescence technology.41.3 Interpreting results on the EnSURE SystemSURE Plus luminometers.51.4 Benefits of routine ATP testing.51.5 Other applicable uses for the EnSURE & SystemSURE PlusATP Luminometer Detection Systems .6SECTION 2: Using your EnSURE & SystemSURE Plus ATP Detection Systems .72.1 Proper sampling procedure.72.1.1 Collecting samples with the Supersnap & Ultrasnap devices.72.1.2 Measuring ATP with the EnSURE & SystemSURE Plus luminometers.92.1.3 General precautions and warnings.102.1.4 Ensuring correct results with calibration controls.112.2 Where to do ATP testing.122.2.1 Establishing your facility’s test locations (control points).122.2.2 Types of contact areas.122.2.3 Diagram of typical production floor control points.142.2.4 Monitoring individual control points.152.3 Determining ATP threshold levels for your facility.162.3.1 Options for setting up ATP threshold levels.162.3.2 General Pass/Caution/Fail levels.182.3.3 Storing and viewing threshold data.19- ii -
2.4 When to perform ATP testing.202.5 Corrective action procedures.212.4 Continuous improvement.23SECTION 3: Further help.243.1 Troubleshooting.243.2 Glossary.253.3 Appendix A: Typical ATP threshold guidelines.263.4 Other Scigiene products.283.5 Contact Scigiene Corporation .29- iii -
QUICK START GUIDESampling Procedure using the EnSURE & SystemSURE Plus ATPDetection Systems1. Identify the location to be tested and turn on either the EnSURE or SystemSURE Plusluminometer. Remove either the Supersnap or Ultrasnap swab from the outer tube.Pressing firmly down on the swab tip, collect a sample from a 10 x 10 cm (4 x 4 in)area. Use a side-to-side and up-and-down motion while rotating the swab tip.2. Place the swab back into the swab tube. The Supersnap or Ultrasnap device is nowready to be activated or can be left inactive for up to 4 hours in this state.3. To activate, break the plastic valve at the top of the device by bending backward andforward. Squeeze the bulb twice to expel the liquid in the bulb to the bottom of thetube.4. Bathe the swab bud in the liquid by shaking gently in a side-to-side motion for 5seconds.5. Place the entire swab device into either the EnSURE or SystemSURE Plusluminometers and close the lid. This step must be done within one minute ofactivation.- iv -
6. Holding either the EnSURE or SystemSURE Plus luminometers in a vertical position,press ‘OK’ to initiate reading. The test result will appear on the screen in 15 seconds.Flow chart: Cleaning, Testing and Corrective Action Procedures-v-
INTRODUCTIONThe EnSURE & SystemSURE Plus ATP Detection ProgramsIn today’s market, impeccable hygiene control is an increasingly critical issuefor industries involved in the manufacturing and distribution of consumableproducts.Scigiene’s EnSURE & SystemSURE Plus ATP Detection Programs offers astate-of-the-art solution for organizations looking to advance the hygienicstatus of their facilities.Recognized worldwide for accuracy, ease-of-use and affordability, theEnSURE & SystemSURE Plus ATP Detection Systems are used extensivelythroughout the food and beverage processing industries, as well ashealthcare and pharmaceutical industries, hospitals, restaurants,supermarkets and other facilities where rapid detection of contamination iscrucial.The EnSURE & SystemSURE Plus ATP Detection Systems enablesorganizations to: Instantly assess the cleanliness of production surfaces, allowingimmediate corrective action to be taken Reduce the use of conventional microbiological testing methods thatare slow, labor intensive and costly Monitor water quality Enhance sanitation training, as well as verify efforts of sanitationpersonnel Record and track test results to identify problem areas, makeimprovements and show due diligence and compliance with HACCP,Sanitation Standard Operating Procedures (SSOPs) and industryregulations Optimize the use of sanitation chemicals Protect brand image by increasing product quality and avoidingrecalls--1--
The guidelines detailed within this manual are applicable to multiplebusiness sectors, including but not limited to: Food and Beverage industryFood harmaceutical and Healthcare fieldsComponents of the EnSURE & SystemSURE Plus ATP DetectionSystemsThe EnSURE & SystemSURE Plus ATP Detection Systems includes threecomponents: The EnSURE or SystemSURE Plus Luminometer – a user-friendly,handheld light-reading unit that provides precise, on-site hygiene testresults. Used with either the Supersnap or Ultrasnap sample testingdevices, extremely low levels of contamination can be detected in just15 seconds. Supersnap or Ultrasnap Sample Testing Devices – are convenient,all-in-one ATP sampling device that is activated with a simple swab,snap and squeeze action. SureTrend - Data Analysis Software – a powerful software programthat allows users to upload test results to a database, analyze trendsand generate reports.Scigiene’s luminometers, sample testing devices and software are alldesigned for ease-of-use and reliability, enabling both technical and nontechnical staff to operate both the EnSURE & SystemSURE Plus ATP DetectionSystems without difficulty.Overview of this guideThis guide is designed to assist users in setting up and operating their ownATP hygiene monitoring program using either the EnSURE or SystemSUREPlus ATP Detection Systems. The contents of this manual include:Quick Start GuideA quick reference on how to use the EnSURE & SystemSURE Plus ATPDetection Systems, the Quick Start Guide is included at the beginning of this--2--
manual. Included with it is a flow chart that illustrates the basic stepsinvolved in cleaning, testing and corrective action procedures.Section I: An overview of the ATP Detection ProgramThis section discusses what ATP is, how it’s used in rapid hygienebioluminescence testing, as well as the benefits of an ATP monitoringprogram and other applicable uses for the EnSURE & SystemSURE PlusSystems.Section II: Using your EnSURE & SystemSURE Plus ATP Detection SystemsThis section provides step-by-step practical instructions for how to use theEnSURE & SystemSURE Plus ATP Detection Systems as part of your hygienemonitoring program. It includes information on how to properly collect andtest samples, where and when to do ATP testing, determining Pass/Faillevels, taking corrective action, and using the Sure Trend software package tomanage and track test results over time.Section III: Further helpSection III offers Troubleshooting information, a Glossary of Terms, usefulAppendices, as well as information on how to contact Scigiene – Hygiena’sCanadian Master Distributor.--3--
SECTION 1: An overview of the EnSURE & SystemSURE PlusATP Detection ProgramsThe EnSURE & SystemSURE Plus ATP Detection Programs are rapid hygienemonitoring programs designed to help organizations achieve optimal hygiene statuswithin their facilities. The Program combines the three-part ATP Detection Systemwith a comprehensive monitoring plan to test, record and track biologicalcontamination on production surfaces and in water samples.A key feature of both the EnSURE & SystemSURE Plus ATP Detection Systems is theuse of bioluminescence technology to identify and measure adenosinetriphosphate, commonly known as ATP.1.1 What is ATP?ATP is an energy molecule found in all plant, animal and microbial cells. Itfuels metabolic processes such as cellular reproduction, muscle contraction,plant photosynthesis, and respiration in fungi and fermentation in yeast. Allorganic matter (living or once-living) contains ATP, including food, bacteria,mold and other microorganisms. The detection of ATP on a surface thereforeindicates the presence of biological matter that may not otherwise be visibleto the eye.In industries where hygiene control is crucial, ATP testing is an excellent toolfor detecting and measuring biological matter on surfaces and in water.Scigiene’s EnSURE & SystemSURE Plus ATP Detection Systems use ATPbioluminescence technology to measure extremely low levels of organicresidue.1.2 Measuring ATP with bioluminescence technologyThe Supersnap & Ultrasnap ATP Sample Testing Device contains anatural enzyme found in fireflies. This enzyme, called luciferase,produces a simple bioluminescence (light-producing) reaction whenit comes into contact with ATP. Using bioluminescence technology,the EnSURE & SystemSURE Plus luminometer can measureextremely low levels of ATP collected with the Supersnap &Ultrasnap devices.Measuring the amount of bioluminescence from an ATP reactionprovides a good indication of surface cleanliness or water quality-4-
because the quantity of light generated by the reaction is directlyproportional to the amount of ATP present in the sample. Thebioluminescence reaction is immediate so results can be processedin seconds, at the testing site, by inserting the swab device intoeither the EnSURE or SystemSURE Plus unit. Results are thenexpressed numerically on the luminometer’s screen as RelativeLight Units (RLU).1.3 Interpreting Results on the EnSURE & SystemSURE PlusLuminometersThe relationship between the amount of ATP on the sample and the RLUresult reading on the luminometer is simple:The RLU reading is directly proportional to the amount of ATP collected fromthe sample. A high RLU reading indicates a large amount of ATP at the testlocation. This in turn indicates improper cleaning and the presence ofcontaminants.Cleaning properly results in less ATP at the location. Less ATP results in lesslight output during the bioluminescent reaction and consequently, a lowerRLU reading.1.4 Benefits of routine ATP testingRoutine ATP testing with the EnSURE & SystemSURE Plus ATP DetectionSystems offers a number of benefits to the end user:-5-
Saves money and time by: Ensuring efficient cleaning processes, which reduce the need forlabor-intensive re-cleaning while minimizing the amount ofexpensive sanitation chemicals needed to properly sanitizeequipment Providing rapid results on-site, allowing for immediate correctiveaction that can prevent expensive product recalls and delayedproduction Reducing the required amount of environmental monitoring, labcosts and labor expensesProvides brand protection by: Increasing product quality and shelf-life Preventing food-borne illness and health violations that cancompromise the brand image Demonstrating to clients and auditors that food safety is a priority1.5 Other applicable uses for the EnSURE& SystemSURE Plus ATPLuminometer Detection SystemsIn addition to routine ATP hygiene monitoring, there are also other usefulapplications for the EnSURE & SystemSURE Plus ATP Detection Systems: Troubleshooting – ATP testing with your EnSure or SystemSUREPlus provides a way to expose microbial contamination and otherissues that might be causing higher than normal plate counts inenvironmental testing. It may also be useful in determining thefactors affecting end-product screening results (such as productinconsistency or spoilage). Randomized testing – The EnSURE & SystemSURE Plus systemscan be used to audit cleaning efficacy by doing random spot checksof designated testing locations. A large number of test locations areset up. Of these locations, a select number are tested daily or weeklyon a randomized or rotating schedule. Production line disassembly – During a routine full linedisassembly and reassembly, it is recommended to do copiousamounts of ATP testing to find and clean all areas of machinery thathave the potential to harbor harmful bacteria. Validation of hand cleanliness – ATP testing can be used to verifyproper washing techniques and cleanliness of employees’ hands-6-
when used directly on skin. When doing this type of testing, it isimportant to identify appropriate pass/fail levels taking intoaccount naturally occurring ATP levels in skin cells. To find outmore about using ATP testing to verify hand cleanliness, contactScigiene Corporation. Training – The EnSURE & SystemSURE Plus ATP Detection Systemsare an effective tool for teaching sanitation crews proper cleaningprocedures, since it gives them on-the-spot feedback.SECTION 2: Using your EnSURE & SystemSURE Plus ATPDetection SystemsProper sampling at critical test locations, correct use of the luminometer andsampling devices, and accurate data management are crucial components ofthe EnSure & SystemSURE Plus ATP Detection Programs. Consistency in theprocedures used ensures accurate results. Effective record keeping anddocumentation of results allows for helpful analysis and data retrieval duringan audit.This section will explain how to: collect a sample using the Supersnap & Ultrasnap devicesuse the EnSURE & SystemSURE Plus luminometers to measure ATPdetermine where and when to test control pointsset Pass/Caution/Fail thresholdsfollow corrective action proceduresupload results to the Data Analysis database for storage and analysis2.1 Proper sampling proceduresBefore collecting a sample for testing, the surface should be visibly clean. Ifany soiling or residue is apparent, re-clean the work area before testing.2.1.1 Collecting samples with the SuperSnap & Ultrasnap device1. Remove the Supersnap or Ultrasnap device from the package. Next,remove the outer tube by holding onto the double ring base of the SnapValve while pulling down on the tube. The swab tip comes pre-moistenedwith a detergent that breaks down biofilm* on the test surface.Condensation may be visible on the inside of the swab tube. This isnormal. Do not touch the swab tip or shaft with fingers or anything-7-
else, as this will contaminate the test. Discard any swabs thataccidentally get tainted or activated.NOTE: For optimal performance, swabs that have been removed fromcold storage should stand for 10 minutes at room temperature before use.2. Collect a sample with the Ultrasnap device using the guidelines below. Becareful not to overload the swab bud with too much sample. TheSupersnap and Ultrasnap devices are designed to detect trace amounts ofcontamination, therefore no sample residue should be visible on theswab. An excessive amount of sample may interfere with thebioluminescence reaction and produce an inaccurate test result.* For a definition of biofilm, please see the Glossary section of this guide.a) Regular surfacesSwab a 10 x 10 cm (4 x 4 in) square on the test surface.Rotate the swab as the sample is collected, while applyingfirm pressure to break through any biofilm. This will create aslight bend in the swab shaft.b) Irregular surfacesWhere 10 x 10 cm square sampling is not feasible, swab asmuch of the surface as possible. Be sure that a slight bend inthe shaft is achieved and an adequate sample is collected.c) Water samplingDip the swab for 5 to 10 seconds into a 20 mL sample ofthe water being tested. If the water is not homogenous orcontains sediment, mix it thoroughly before sampling.NOTE: Supersnap & Ultrasnap swabs are designed primarilyfor surfaces, but can be used for some types of water samples.Contact Scigiene to find about the Aquasnap for water testing*-8-
3. Re-insert the swab into the tube. The Supersnap or Ultrasnapis now ready to be activated, or it can be left inactive for upto 4 hours in this state. In some facilities, users prefer tosample each location, write the sample location on the swabtube and run all tests in a laboratory rather then at the testlocation, or they may choose to run each test right aftercollecting their sample.If testing occurs at the sampling location, turn on the EnSUREor SystemSURE Plus luminometer and scroll through theprogram numbers (PROG) to find the one that correlates tothe location being tested. This action can also be taken priorto swabbing. This is up to the user. For more information, seeEstablishing your facility’s test locations, section 2.2.1.4. Holding the device upright, activate the Supersnap orUltrasnap by bending the bulb at the top until the plasticSnap-Valve breaks, then bend once more in the oppositedirection. Squeeze the bulb twice to expel the liquid-stablereagent contained in the bulb and allow it to flow to thebottom of the tube.5. Gently shake the device with a side-to-side motion, bathingthe swab bud in the liquid-stable reagent. The test is nowactivated and the bioluminescence reaction is taking place.For optimal results, the reading should be taken on theEnSure or SystemSURE Plus luminometer within 5 to 60seconds of activation.2.1.2 Measuring ATP with the EnSURE & SystemSURE Plusluminometers1. Open the lid on the EnSURE or SystemSURE PlusLuminometer, and insert the activated Supersnap orUltrasnap device into the reading chamber. Close the lid,making sure to keep the machine upright.-9-
2. Press “OK” on the Ensure or SystemSURE Plus to initiatemeasurement of RLU output. Results are displayed on thescreen in 15 seconds.2.1.3 General precautions and warnings If the Supersnap or Ultrasnap device accidentally gets activated, donot use. Avoid collecting large amounts of sample on the swab bud. Hold the EnSure & SystemSURE Plus upright when taking readings. Hold the Supersnap or Ultrasnap device upright when activating. Read the Supersnap or Ultrasnap sampling device within oneminute of activation. Keep the Supersnap or Ultrasnap device out of direct light whenpossible. To ensure shelf-life for up to a year, the Supersnap and Ultrasnapoosampling devices should be refrigerated at 2-8 C (35-46 F).oSample devices will tolerate room temperature ( 25 C) for 4weeks. Refrigerated sampling devices should be left out at roomtemperature for 10 minutes before being used.- 10 -
2.1.4 Ensuring correct results with calibration controlsTo help ensure the accuracy of test results, the EnSURE & SystemSURE Plusluminometers are programmed to automatically self-calibrate every time theinstrument is turned on. During the 60-second calibration, it checks the lightsensor and adjusts to temperature and humidity.To further verify test result accuracy, Scigiene offers two calibration kits thatare recommended for periodic use with your EnSURE & SystemSURE PlusATP Detection Systems: the Calibration Control Rod Kit (Part # ATP4000)for testing the luminometers, and the Positive Control Kit (Part # ATP2500)for testing Supersnap & Ultrasnap devices.Calibration Control Rod Kit (Part # ATP4000)It’s recommended that you verify calibration of the Ensure & SystemSUREPlus luminometers with the Calibration Control Kit once a month.Incorporating the Calibration Control Kit into your overall Quality Controlprogram will confirm that the instrument is within specifications andoperating correctly.Each kit contains a Positive rod and a Negative rod. The Positive rod emits avery low level of radiation, producing a constant light output that can bemeasured in RLUs to verify proper calibration of the unit. The Negative Rodproduces low-light or zero (0) RLU and is used to check that backgroundlight is not entering the instrument, while ensuring that the light detector iscalibrating correctly.For instructions on how to use the Calibration Control Rod Kit, as well as howto interpret results, consult the product insert.Positive Control Kit (Part #ATP2500)The Positive Control Kit is used for validating the efficacy and quality of theSupersnap & Ultrasnap ATP Sample Testing Devices. It comes with 25 sealed-13glass vials, each of which contain an identical amount (approx. 5 x 10moles) of freeze-dried ATP and sugars to provide a predictable result if theSupersnap and Ultrasnap devices are used and stored correctly.Each vial provides a sample which produces a positive result when testedwith the Ultrasnap. Positive Controls should be used to test one device ineach bag of 25 devices or whenever there is concern about the product’sstorage temperature or shelf life. Incorporating the Positive Control Kit intothe overall Quality Control program will validate results of the EnSURE &SystemSURE Plus and the Supersnap & Ultrasnap.- 11 -
For instructions on how to use the Positive Control Kit, as well as how tointerpret results, consult the product insert.2.2 Where to do ATP testing2.2.1 Establishing your facility’s test locations (control points)Before sample tests are taken, you need to identify areas within your facilitythat are at risk for contamination from product residue or microbe growth.These areas should be designated as “control points” in your hygienemonitoring plan. A control point should provide reliable feedback on thecleanliness of a particular piece of equipment or area during testing. It’simportant that ATP testing is routinely performed on all control points,including product contact areas (direct and indirect) and hard-to-clean siteson your processing and handling lines. If you currently have HACCP or SSOP programs in place, or if youconduct environmental testing, you may choose to use the same testlocations established for these programs as your control points forATP monitoring. If you haven’t previously established test locations, you need todetermine where your facility’s areas of contamination risk are. Thiscan be done by swabbing multiple areas on equipment and productionline surfaces after routine cleaning. ATP levels will be higher in thosespots that are harder to clean, spots that are missed in your currentcleaning procedure, and spots that have developed biofilms. Theseareas should be established as control points for routine testing andmonitoring.2.2.2 Types of contact areasYour ATP testing plan should include the followinglocations:a) Direct contact areasDirect contact areas are surfaces where the presence ofany contaminant will taint the product. These are highrisk areas that should be tested frequently.Examples: conveyor belt, wash bucket, cutting board,slicers and utensilsA direct contact surface (such as a conveyor belt)should be tested in a few different places to verify totalcleanliness.- 12 -
b) Indirect contact areasIndirect contact areas are locations where splashedproduct or contaminants can be dropped, drained, ortransferred onto the product. These areas are oftenoverlooked as sources of contamination and should beroutinely tested.Examples: sink, drain, side walls and additional machinepartsIndicated areas of the sink are examples of indirectcontact points where ATP testing should be conducted.c) Hard-to-clean contact areasHard-to-clean areas have a high potential to harborbacterial growth and should be tested regularly.Examples: hoses, O-rings, nozzles, areas with irregularlyshaped surfaces, corners, grooves, cracks and jointsThe suggested sampling technique for a hose nozzle isto swab around the outer nozzle threads twice, and thenswab around the inside lip once. Apply firm pressurewhile swabbing.- 13 -
2.2.3 Diagram of typical production floor control pointsBelow is an example of a typical food processor’s production floor plan.Direct contact surfaces are indicated with a diamond, and indirect ones witha circle.- 14 -
2.2.4 Monitoring individual control pointsOnce control points have been identified, this information should be enteredinto the Sure Trend software. In Sure Trend software, you can assign eachcontrol point a program (PROG) number that will correspond to a PROGnumber on the EnSURE & SystemSURE Plus luminometers.* Programlocations can also be identified by name and “group” in SureTrend. Testresults from individual control points can now be uploaded from theluminometer to the Sure Trend database for recording, tracking and analysispurposes.Below is an example of a spreadsheet created with the SureTrend software.The program (PROG) numbers correspond to the control points illustrated inthe Diagram of typical production floor test locations shown on the previouspage.For further information about the installation and use of Sure Trend software,see Managing and tracking your data with SureTrend Software in section 2.5.*You may wish to create a legend that matches PROG numbers with location for easy reference duringsampling. This legend can be attached to the key ring holder on the luminometer.- 15 -
2.3 Determining ATP threshold levels for your facilitySetting correct Pass, Caution and Fail levels is a fundamental part of runninga successful ATP hygiene monitoring program. These threshold levels mayvary depending on the type of product being manufactured or processed aswell as the surface or liquid being checked. However, the formulas used todetermine Pass, Caution and Fail levels are always the same.There are two different standards by which to set up Pass/Fail levels:Routine Cleaning and Vigorous Cleaning. The Vigorous Cleaning setupoption is used by facilities requiring extremely high hygiene standardsand/or which have easy-to-clean surfaces. Both methods produce similarresults with slight variation.Scigiene also provides general recommended threshold levels, which meetmost manufacturers’ hygiene standards. Examples of some typical thresholdguidelines specific to the food and beverage industry can also be found inTypical ATP threshold guidelines, in Appendix A.2.3.1 Options for setting up ATP threshold levelsa) Routine Cleaning1. Identify control points in your facility.2. Clean product surfaces to the level that daily sanitation programsshould achieve.3. Conduct an ATP test at each location. Take 5-10 replicate tests ateach location over the course of several days.4. To determine the Pass limit: Calculate the average RLU for eachlocation based on the 5-10 test results. To do this, add all testresults, and then divide the sum by the number of tests taken. Theresulting number is your average RLU. This number is your Passlimit.5. To determine the Fail limit: Multiply the Pass limit by 3. Theresulting number is your Fail limit.6. To determine the Caution limit*: The area between the Pass andFail thresholds is the Caution zone.NOTE: In some cases, test results from individual control pointswithin a facility or specific area are consistently within a similar rangeof each other. In this case, the user may choose to apply a singlePass/Caution/ Fail standard to all control points within that area orfacility.- 16 -
b) Vigorous Cleaning1. Identify control points in your facility.2. Clean all surfaces thoroughly (2 or more times) to achieve themaximum level of cleanliness possible. This may include a totalproduction line disassembly.3. Conduct an ATP test at each location. Take 5-10 replicate tests ateach location over the course of several days.4. To determine the Pass limit: Calculate the average RLU for eachlocation based on the 5-10 test results. This average RLU isconsidered to be the Pass level.5. To determine the Fail limit: Multiply the Pass limit by 2 for easyto-clean areas and by 3 for harder-to-clean areas.6. To determine the Caution li
The EnSURE & SystemSURE Plus ATP Detection Programs are rapid hygiene monitoring programs designed to help organizations achieve optimal hygiene status within their facilities. The Program combines the three-part ATP Detection System with a comprehensive monitoring plan to test, record and track biological