Transcription
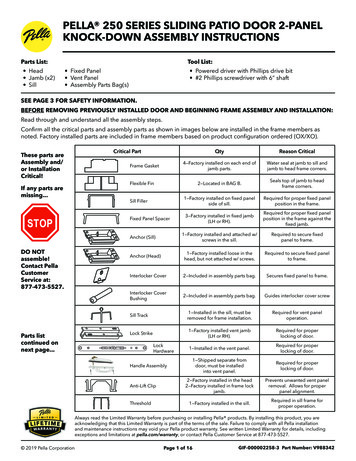
PELLA 250 SERIES SLIDING PATIO DOOR 2-PANELKNOCK-DOWN ASSEMBLY INSTRUCTIONSParts List: Head Jamb (x2) SillTool List: Fixed Panel Vent Panel Assembly Parts Bag(s) Powered driver with Phillips drive bit #2 Phillips screwdriver with 6” shaftSEE PAGE 3 FOR SAFETY INFORMATION.BEFORE REMOVING PREVIOUSLY INSTALLED DOOR AND BEGINNING FRAME ASSEMBLY AND INSTALLATION:Read through and understand all the assembly steps.Confirm all the critical parts and assembly parts as shown in images below are installed in the frame members asnoted. Factory installed parts are included in frame members based on product configuration ordered (OX/XO).These parts areAssembly and/or InstallationCritical!If any parts aremissing.STOPCritical PartQtyReason Critical4—Factory installed on each end ofjamb parts.Water seal at jamb to sill andjamb to head frame corners.2—Located in BAG B.Seals top of jamb to headframe corners.1—Factory installed on fixed panelside of sill.Required for proper fixed panelposition in the frame.3—Factory installed in fixed jamb(LH or RH).Required for proper fixed panelposition in the frame against thefixed jamb.1—Factory installed and attached w/screws in the sill.Required to secure fixedpanel to frame.Anchor (Head)1—Factory installed loose in thehead, but not attached w/ screws.Required to secure fixed panelto frame.Interlocker Cover2—Included in assembly parts bag.Secures fixed panel to frame.Interlocker CoverBushing2—Included in assembly parts bag.Guides interlocker cover screwSill Track1—Installed in the sill, must beremoved for frame installation.Required for vent paneloperation.Lock Strike1—Factory installed vent jamb(LH or RH).Required for properlocking of door.1—Installed in the vent panel.Required for properlocking of door.1—Shipped separate fromdoor, must be installedinto vent panel.Required for properlocking of door.2—Factory installed in the head2—Factory installed in frame lockjamb.Prevents unwanted vent panelremoval. Allows for properpanel alignment.1—Factory installed in the sill.Required in sill frame forproper operation.Frame GasketFlexible FinSill FillerFixed Panel SpacerAnchor (Sill)DO NOTassemble!Contact PellaCustomerService at:877-473-5527.Parts listcontinued onnext page.LockHardwareHandle AssemblyAnti-Lift ClipThresholdAlways read the Limited Warranty before purchasing or installing Pella products. By installing this product, you areacknowledging that this Limited Warranty is part of the terms of the sale. Failure to comply with all Pella installationand maintenance instructions may void your Pella product warranty. See written Limited Warranty for details, includingexceptions and limitations at pella.com/warranty, or contact Pella Customer Service at 877-473-5527. 2019 Pella CorporationPage 1 of 16GIF-000002258-3 Part Number: V988342
BEFORE BEGINNING FRAME ASSEMBLY AND INSTALLATION (CONTINUED):If gasket is missing.Frame Gasket on both ends ofeach jamb. Inspect to confirmit is not torn or damaged.STOPDO NOT assemble!Contact PellaCustomer Service at:877-473-5527.Parts and Screw Packages:Confirm all labeled screws bags listed are present.If any screws are missing, please obtain comparable screws from your local hardware retailer.Screw packages may include extra screws.BagV988327ABBagV988331#8x2-1/2" Phillips Truss HeadScrew - Frame Corner andInterlocker CoverLabel part #: 829Y0002Flexible Fin CornerPackage, WhiteLabel part #: 829Y0000Installation screw and cap package.Note: Installation screws and caps may be in more than one bag.BagV988328DEBagV988332 2019 Pella Corporation#8x1/2" Phillips Panhead Screw– Head Anchor, Astragal Anchor,Interlocker Cover, WhiteLabel part #: 829Y0003#8x2" Phillips PanheadScrew – Lock Strike, WhiteLabel part #: 829Y0006Page 2 of 16GIF-000002258-3 Part Number: V988342
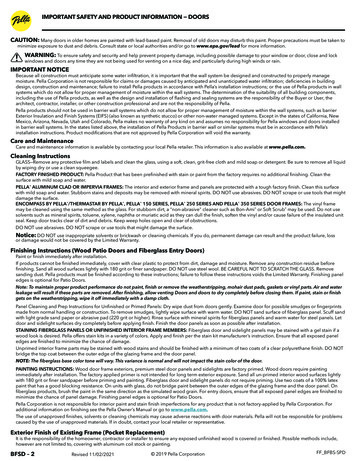
IMPORTANT SAFETY AND PRODUCTINFORMATION DOORSCAUTION: Many doors in older homes are painted with lead-based paint. Removal of old doors may disturb this paint. Proper precautions must be taken tominimize exposure to dust and debris. Consult state or local authorities and/or go to www.epa.gov/lead for more information.WARNING: To ensure safety and security and help prevent property damage, including possible damage to your window or door, close and lockwindows and doors any time they are not being used for venting on a nice day, and particularly during high winds or rain.!IMPORTANT NOTICEBecause all construction must anticipate some water infiltration, it is important that the wall system be designed and constructed to properly managemoisture. Pella Corporation is not responsible for claims or damages caused by anticipated and unanticipated water infiltration; deficiencies in buildingdesign, construction and maintenance; failure to install Pella products in accordance with Pella’s installation instructions; or the use of Pella products in wallsystems which do not allow for proper management of moisture within the wall systems. The determination of the suitability of all building components,including the use of Pella products, as well as the design and installation of flashing and sealing systems are the responsibility of the Buyer or User, thearchitect, contractor, installer, or other construction professional and are not the responsibility of Pella.Pella products should not be used in barrier wall systems which do not allow for proper management of moisture within the wall systems, such as barrierExterior Insulation and Finish Systems (EIFS) (also known as synthetic stucco) or other non-water managed systems. Except in the states of California, NewMexico, Arizona, Nevada, Utah and Colorado, Pella makes no warranty of any kind on and assumes no responsibility for Pella windows and doors installedin barrier wall systems. In the states listed above, the installation of Pella Products in barrier wall or similar systems must be in accordance with Pella’sinstallation instructions. Product modifications that are not approved by Pella Corporation will void the warranty.CARE AND MAINTENANCECare and maintenance information is available by contacting your local Pella retailer. This information is also available at www.pella.com.CLEANING INSTRUCTIONSGLASS—Remove any protective film and labels and clean the glass, using a soft, clean, grit-free cloth and mild soap or detergent. Be sure to remove allliquid by wiping dry or use a clean squeegee.FACTORY FINISHED PRODUCT: Pella Product that has been prefinished with stain or paint from the factory requires no additional finishing. Clean thesurface with mild soap and water.PELLA ALUMINUM CLAD OR IMPERVIA FRAMES: The interior and exterior frame and panels are protected with a tough factory finish. Clean this surfacewith mild soap and water. Stubborn stains and deposits may be removed with mineral spirits. DO NOT use abrasives. DO NOT scrape or use tools that mightdamage the surface.ENCOMPASS BY PELLA /THERMASTAR BY PELLA AND PELLA 350 SERIES DOOR FRAMES: The vinyl frame may be cleaned using the same methodas the glass. For stubborn dirt, a “non-abrasive" cleaner such as Bon-Ami or Soft Scrub may be used. Do not use solvents such as mineral spirits, toluene,xylene, naphtha or muriatic acid as they can dull the finish, soften the vinyl and/or cause failure of the insulated unit seal. Keep door tracks clear of dirt anddebris. Keep weep holes open and clear of obstructions.DO NOT use abrasives. DO NOT scrape or use tools that might damage the surface.NOTICE: DO NOT use inappropriate solvents or brickwash or cleaning chemicals. If you do, permanent damage can result and the product failure, loss ordamage would not be covered by the Limited Warranty.FINISHING INSTRUCTIONS (WOOD PATIO DOORS AND FIBERGLASS ENTRY DOORS)Paint or finish immediately after installation.If products cannot be finished immediately, cover with clear plastic to protect from dirt, damage and moisture. Remove any construction residue beforefinishing. Sand all wood surfaces lightly with 180 grit or finer sandpaper. DO NOT use steel wool. BE CAREFUL NOT TO SCRATCH THE GLASS. Removesanding dust. Pella products must be finished according to these instructions; failure to follow these instructions voids the Limited Warranty. Finishing paneledges is optional for Patio Doors.Note: To maintain proper product performance do not paint, finish or remove the weatherstripping, mohair dust pads, gaskets or vinyl parts. Air and waterleakage will result if these parts are removed. After finishing, allow venting Doors and doors to dry completely before closing them. If paint, stain or finishgets on the weatherstripping, wipe it off immediately with a damp cloth.Panel Cleaning and Prep Instructions for Unfinished or Primed Panels: Dry wipe dust from doors gently. Examine door for possible smudges or fingerprintsmade from normal handling or construction. To remove smudges, lightly wipe surface with warm water. DO NOT sand surface of fiberglass panel. Scuff sandwith light grade sand paper or abrasive pad (220 grit or higher). Rinse surface with mineral spirits for fiberglass panels and warm water for steel panels. Letdoor and sidelight surfaces dry completely before applying finish. Finish the door panels as soon as possible after installation.STAINING FIBERGLASS PANELS OR UNFINISHED INTERIOR FRAME MEMBERS: Fiberglass door and sidelight panels may be stained with a gel stain if awood look is desired. Pella offers stain kits in a variety of colors. Apply and finish per the stain kit manufacturer’s instruction. Ensure that all exposed paneledges are finished to minimize the chance of damage.Unprimed interior frame parts may be stained with wood stains and should be finished with a minimum of two coats of a clear polyurethane finish. DO NOTbridge the top coat between the outer edge of the glazing frame and the door panel.Note: The fiberglass base color tone will vary. This variance is normal and will not impact the stain color of the door.PAINTING INSTRUCTIONS: Wood door frame exteriors, premium steel door panels and sidelights are factory primed. Wood doors require paintingimmediately after installation. The factory applied primer is not intended for long term exterior exposure. Sand all un-primed interior wood surfaces lightlywith 180 grit or finer sandpaper before priming and painting. Fiberglass door and sidelight panels do not require priming. Use two coats of a 100% latexpaint that has a good blocking resistance. On units with glass, do not bridge paint between the outer edges of the glazing frame and the door panel. Onfiberglass products, brush the paint in the same direction as the simulated wood grain. For entry doors, ensure that all exposed panel edges are finished tominimize the chance of panel damage. Finishing panel edges is optional for Patio Doors.Pella Corporation is not responsible for interior paint and stain finish imperfections for any product that is not factory-applied by Pella Corporation. Foradditional information on finishing see the Pella Owner’s Manual or go to www.pella.com.The use of unapproved finishes, solvents or cleaning chemicals may cause adverse reactions with door materials. Pella will not be responsible for problemscaused by the use of unapproved materials. If in doubt, contact your local retailer or representative.EXTERIOR FINISH OF EXISTING FRAME (POCKET REPLACEMENT)It is the responsibility of the homeowner, contractor or installer to ensure any exposed unfinished wood is covered or finished. Possible methods include,however are not limited to, covering with aluminum coil stock or painting. 2019 Pella CorporationPage 3 of 16GIF-000002258-3 Part Number: V988342
1Sill Prep:A. Remove the threshold and the sill track with bumper from the sill frame.ThresholdSill Track 2019 Pella CorporationPage 4 of 16GIF-000002258-3 Part Number: V988342
TIP: Lay frame parts out with wood blocks under each corner.Screw packages may include extra screws.HeadBlock FrameNail Fin FrameExterior Side UpExteriorExteriorInteriorInteriorLH JambSill#8 x 2-1/2”(Qty 4)BagV988327#8 x 2-1/2”(Qty 4) 2019 Pella Corporation#8 x 2-1/2”(Qty 4)HeadA#8x2-1/2" Phillips Truss HeadScrew - Frame Corner andInterlocker CoverLabel part #: 829Y0002LH JambO V E R V I E W / P R E V I E W O N LY.Lay parts on a flat hard surface with exterior side up. Labels attached to the side of the frame partsidentify each part to assist in correct part positioning prior to assembly.RH JambO V E R V I E W / P R E V I E W O N LY.Overview only, follow process steps on the following page.RH JambO V E R V I E W / P R E V I E W O N LY.Layout and Assembly OVERVIEW:SillAlign screwswith these holes#8 x 2-1/2”(Qty 4)Page 5 of 16GIF-000002258-3 Part Number: V988342
2Frame Assembly PROCESS:BagV988327A#8x2-1/2" Phillips Truss HeadScrew - Frame Corner andInterlocker CoverLabel part #: 829Y0002A. Starting in one frame corner, insert (Qty 4)screws from Bag A into the frame by drivingthe screws first through the jamb, (use careto not tear the jamb gasket), so they protrudeon the exit side. Align each screw with thescrew holes in the matching frame part. Startall 4 screws in the matching frame part (heador sill) before fully tightening the screws. Donot overtighten.2ATIP: Finish tightening by hand.YIELD(Qty 4) # 8 x 2-1/2”NOTICE: Do Not tighten screws pasta slight dimple. Overtightening thescrews may damage the vinyl parts.B. Continue to work around the frame until all four corners are assembled.2B2BNote: Extra screwsmay be includedand may also beused in subsequentsteps. Do Not throwout extra screws. 2019 Pella CorporationPage 6 of 16GIF-000002258-3 Part Number: V988342
3Flexible Fin Corner Installation:BagV988331Die CutBFlexible Fin CornerPackage, WhiteNail FinLabel part #: 829Y0000FoldLinesFoldLinesFlexible Fin outline positioned onframe corner overthe nail finsNail FinDie CutThis cavity MUSTbe covered.A. Nail fin product: From Bag B, at each of theassembled top two corners of the frame, removerelease paper from provided flexible fin corner andfold to install the fin corner over the installation fins,making sure the exterior corner is covered.ilNaNail FinFin corner view atback side of fin.B. Block frame product: From Bag B, at each ofthe assembled top two corners of the frame,remove release paper from provided flexiblefin corner, and install the fin corner over theedges of the corner as shown. Trim flush withinterior edge as needed. 2019 Pella CorporationFinTrim edge offlexible cornerPage 7 of 16GIF-000002258-3 Part Number: V988342
4Frame Installation into Rough Opening:Install the assembled door frame into the rough opening using the applicable Pella Installation Instructions.Visit InstallPella.com or your local Pella retailer for complete installation instructions. Installation screws and caps areincluded in the Parts and Screw package.Scan for Installpella.com5Sill Track Installation:A. Re-install the sill track with bumper into sill. Make sure the longer outside track leg is toward the interior andthe shorter leg toward the exterior. The sill track must slope toward the exterior. The bumper goes against theframe on the fixed panel side.Longer sill track leg 2019 Pella CorporationPage 8 of 16GIF-000002258-3 Part Number: V988342
Overview only, follow process steps on the following page.FIXED PANELSill FillerVent Panel BumperInteriorSill AnchorNote: The fixed interlocker panel is installed on top of the factory-installed sill filler and sill anchor.The vent panel bumper is also factory-installed.Note: When installing the panels; make sure the exterior glazing beads with weep holes are at thebottom of the panel.O V E R V I E W / P R E V I E W O N LY.O V E R V I E W / P R E V I E W O N LY.O V E R V I E W / P R E V I E W O N LY.Fixed Interlocker Panel Installation OVERVIEW: 2019 Pella CorporationXO Exterior ViewOX Exterior ViewPush fixedinterlockerpanelagainstfixed jambPush fixedinterlockerpanelagainstfixed jambGlazing beadweep holesGlazing beadweep holesPage 9 of 16GIF-000002258-3 Part Number: V988342
6Fixed Interlocker Panel Installation PROCESS:A. Confirm the head anchor (located in the head) isslid to the vent side, so as not to interfere fixedpanel installation.6BPanel SpacerB. Confirm the panel spacers are installed in thejamb.If the panel spacers are missing whenthe fixed interlocker panel is installed,the door will likely not lock.STOPDO NOT install panel, contactPella Customer Service at:877-473-5527.C. From the exterior, lift the fixed interlocker panel up and insert the top of the panel into the exterior head track.Make sure the panel is positioned so the exterior glazing beads are at the bottom of the panel.D. Slide the bottom of the panel into a vertical position.6FE. Place the panel bottom into the exterior sill pocket.Note: The fixed interlocker panel does NOT get installed over the sillroller track.F. Push the panel into position against the jamb and confirm thefixed panel is properly positioned against the jamb by measuringthe exposed portion of the panel at top, middle and bottom.Measurement should be 2-5/8”. If measurement is greater than 23/4”, pull the panel out of the jamb and re-position it into the jambto assure it is fully seated against the panel spacers.6A Head Anchor6C6F6E6D 2019 Pella CorporationPage 10 of 16GIF-000002258-3 Part Number: V988342
6Fixed Interlocker Panel Installation PROCESS:BagV988328D#8x1/2" Phillips Panhead Screw– Head Anchor, Astragal Anchor,Interlocker Cover, WhiteLabel part #: 829Y0003G. Slide the head anchorabove the edge of the fixedinterlocker panel and alignthe screw holes with the predrilled holes in the frame head.Install and tighten, by hand(Qty 2) - #8 x ½” painted panhead screws from Bag D.6G6G6G6GXO Exterior ViewBagV988328 2019 Pella CorporationDOX Exterior ViewBag#8x1/2" Phillips Panhead Screw– Head Anchor, Astragal Anchor,Interlocker Cover, WhiteV988328Label part #: 829Y0003Page 11 of 16D#8x1/2" Phillips Panhead Screw– Head Anchor, Astragal Anchor,Interlocker Cover, WhiteLabel part #: 829Y0003GIF-000002258-3 Part Number: V988342
Overview only, follow process steps below.Install short screw first.YIELDInsert Interlocker Cover Bushing into Interlocker Cover.Install 2-1/2” screw through Interlocker Cover through busing.Bushing in accessory bag; only screws are in the numbered accessory bags.BagV9883277ADBagV988328O V E R V I E W / P R E V I E W O N LY.O V E R V I E W / P R E V I E W O N LY.Interlocker Cover Installation OVERVIEW:#8x2-1/2" Phillips Truss HeadScrew - Frame Corner andInterlocker CoverLabel part #: 829Y0002#8x1/2" Phillips Panhead Screw– Head Anchor, Astragal Anchor,Interlocker Cover, WhiteLabel part #: 829Y0003IMPORTANT – Install short screw first!XO Interior ViewInterlocker CoverOX Interior ViewInterlocker Cover Installation PROCESS:A. Position the fixedinterlocker cover inthe cut-out at the topedge of the fixedpanel with the anglescrew hole at the top. 2019 Pella Corporation7A7APage 12 of 16GIF-000002258-3 Part Number: V988342
7Interlocker Cover Installation PROCESS: (continued):B. Insert from Bag D (Qty 1) #8 x ½” into the bottomscrew hole. Finish tightening the screw by hand.BagV988328D7B#8x1/2" Phillips Panhead Screw– Head Anchor, Astragal Anchor,Interlocker Cover, WhiteLabel part #: 829Y0003Install 1/2” screw firstC. Insert Interlocker Cover Bushing into the interlocker coverbefore installing the 2-1/2”screw.7CD. Complete the interlocker cover attachment by inserting the Bag A (Qty 1) 8 x 2 -1/2” screw in the top coverhole toward the rough opening and finish tightening by hand.BagV988327A7D#8x2-1/2" Phillips Truss HeadScrew - Frame Corner andInterlocker Cover7DLabel part #: 829Y0002Repeat 7A – 7D on the lower interlocker cover, flipping the cover vertically. For the lower interlocker cover, be sureto install the 1/2” screw in the top hole first and the bushing and the 2 -1/2” screw in the bottom hole second.BagV988328D#8x1/2" Phillips Panhead Screw– Head Anchor, Astragal Anchor,Interlocker Cover, WhiteLabel part #: 829Y0003BagV988327 2019 Pella CorporationA#8x2-1/2" Phillips Truss HeadScrew - Frame Corner andInterlocker CoverLabel part #: 829Y0002Page 13 of 16GIF-000002258-3 Part Number: V988342
8Threshold Installation:A. Install the threshold. Insert the threshold end into the sill and press down into place.8A98AVent Panel Installation:A. Insert the top of the vent panel into the interior head track and slide the bottom of the panel into verticalalignment, making sure the rollers are aligned with the sill roller track. 2019 Pella CorporationPage 14 of 16GIF-000002258-3 Part Number: V988342
9Even RevealVent Panel Installation (continued):Interior ViewB. Use a #2 Phillips screwdriver with a 6” shaft to adjust rollerson each side of the panel to ensure smooth operation andeven reveal between the panel and frame jamb along thelength of the panel. Adjust rollers to raise panel far enoughso it is not dragging on the sill. Turn the screwdriver to theclockwise to raise the panel and counter-clockwise to lowerthe panel.9BEven RevealYIELDRollers must be adjusted prior to adjusting the lock strike.C. Slide the anti-lift clips to above the “closed” vent panel position.9C109CVent Panel Hardware Installation:A. Use the installation instructions included with the hardware. 2019 Pella CorporationPage 15 of 16GIF-000002258-3 Part Number: V988342
11Lock Strike Adjustment:A. Adjust the lock strike on the frame lock jamb, so it aligns with the lock. Lock strike comes attached with screwsin the slotted adjustment holes. Loosen these screws to adjust strike up or down to align with vent panel lock.Tighten screws when alignment is complete.Note: the two separate photosbelow are positioned for alignmentdemonstration purposes.Loosen screws inthe slotted holesand adjust striketo align with lockup or down asneeded.B. After adjustment; finish installing with Qty (4) #8 x 2” painted pan head screws.BagV988332E 2019 Pella Corporation11B11B#8x2" Phillips PanheadScrew – Lock Strike, WhiteLabel part #: 829Y0006Page 16 of 16GIF-000002258-3 Part Number: V988342
2019 Pella Corporation Page 1 of 16 GIF-000002258-3 Part Number: V988342 PELLA 250 SERIES SLIDING PATIO DOOR 2-PANEL KNOCK-DOWN ASSEMBLY INSTRUCTIONS Parts List: Head Jamb (x2) Sill Fixed Panel Vent Panel Assembly Parts Bag(s) Tool List: Powered driver with Phillips drive bit #2 Phillips screwdriver with 6" shaft
