Transcription
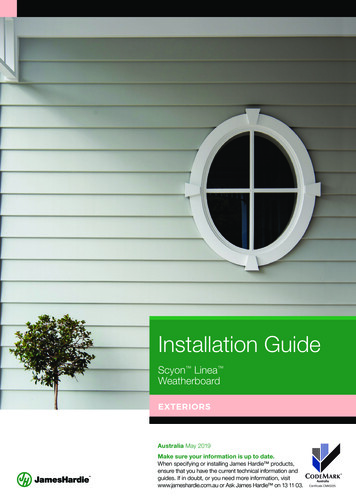
Installation GuideScyon Linea WeatherboardEXTERIORSAustralia May 2019Make sure your information is up to date.When specifying or installing James Hardie products,ensure that you have the current technical information andguides. If in doubt, or you need more information, visitwww.jameshardie.com.au or Ask James Hardie on 13 11 03.Certificate CM40225
Installation GuideMade in AustraliaIMPORTANT NOTES1. Failure to install, finish or maintain this product in accordance with applicable building codes, regulations,standards and James Hardie’s written application instructions may lead to personal injury, affect systemperformance, violate local building codes, and void James Hardie’s product warranty.2. All warranties, conditions, liabilities (direct, indirect or consequential) and obligations whether arising incontract, tort or otherwise other than those specified in James Hardie’s product warranty are excludedto the fullest extent allowed by law. For James Hardie’s product warranty information and disclaimersabout the information in this guide, visit www.jameshardie.com.au.3. The builder must ensure the product meets aesthetic requirements before installation. James Hardie willnot be responsible for rectifying aesthetic surface variations following installation.4. Make sure your information is up to date. When specifying or installing James Hardie products, ensureyou have the current guide. If in doubt, or you need more information, visit www.jameshardie.com.au,www.scyon.com.au or Ask James Hardie on 13 11 03.SCYON LINEA WEATHERBOARD AND SCYON AXENT TRIM SIZESCOVERAGE INFORMATIONProductLength Width Thickness EndEffectiveNo. of planks MassMass Pallet weight(mm)(mm) (mm)details cover (mm) /metre height kg/lin m kg/m2 (90/pack) kg150mm Scyon Linea weatherboard 4200*15016T&G1208.32.823.21350180mm Scyon Linea weatherboard 4200*18016T&G1506.73.422.71620Scyon Axent trim - Refer to current Scyon Axent trim guide for sizes.NOTES1. All dimensions and masses provided are approximate only and subject to manufacturing tolerances.Masses are based on equilibrium moisture content of product.2. *Length is 4200mm plus 5mm for the tongue and groove (T & G) making the length 4205mm overall.3. Refer to page 3 for details of the effective cover and lapped thickness of the cladding.ACCESSORIES / TOOLS SUPPLIED BY JAMES HARDIEACCESSORIES DESCRIPTIONACCESSORIESLineaTM PVC starter strip 3,000mm longA perforated PVC starter strip used to setout the bottom edge of ScyonTM LineaTMweatherboards at the correct angle.25 per pack. Part No. 305571LineaTM Aluminium Corner Soaker for150mm wide boardsA ready to paint aluminium external cornersoaker for use with 150mm wide ScyonTMLineaTM weatherboards. 100 per box.Part No. 305574LineaTM Aluminium Corner Soaker for180mm wide boardsA ready to paint aluminium external cornersoaker for use with 180mm wide ScyonTMLineaTM weatherboards. 100 per box.Part No. 305572LineaTM Aluminium External SlimlineBoxed Corner, 3,600mm longA ready to paint aluminium extrusion to beused with ScyonTM LineaTM weatherboard tocreate external boxed corners. 40x40mmcaps are available to seal the bottom. A6mm hole must be drilled to release trappedwater (supplied by others). 5 per pack.Part No. 305512LineaTM PVC Box Corner Z Flashing.2,700mm longA PVC Z flashing for use with ScyonTMLineaTM weatherboard in conjunction withScyonTM AxentTM trim to form externalcorners. 25 per pack. Part No. 305570James HardieTM 75x75mm Colorbond Corner Flashing. 3,000mm longA Colorbond corner flashing for use behindcladding at internal and external corners.5 per pack. Part No. 305564HardieWrap weather barrierA non-perforated, highly breathable andreflective safe-glare weather barrier designedto be used behind Scyon external claddingproducts to help protect the building.For alternate products, please refer toHardieWrap weather barrier section (p.2) Unitsize 2750mm x 30000mm Part No. 305664.TMDESCRIPTIONLineaTM Aluminium Universal WindowAdaptor, 3,700mm longA ready to paint aluminium extrusion to beused adjacent to windows to finish the edgeof ScyonTM LineaTM weatherboard. 5 per pack.Part No. 305510James HardieTM Joint Sealant. 300mL cartridgeA general purpose, paintable, exterior gradepolyurethane joint sealant. 20 per box.Part No. 305534HardieBladeTM Saw Blade. 185mm diameterA 185mm diameter poly-diamond blade for fastand clean cutting of James Hardie fibre cement.1 each. Part No. 300660HardieDrive Screw 41mm longA class 3 self-tapping wing-tipped screw forfastening to 0.5mm to 1.6mm BMT light gaugesteel frames. 1000 per box. Part No. 305984TMCompound mitre sawDust reducing compound mitre saw usedwith HardieBlade saw blade.Makita: LS0714/LS1013/LS1212Hitachi: C10FSB/C12FSB* Highly corrosive environments and areas within 1km of the coast require Class 4 orstainless steel coatings. Refer to the fastener manufacturer for recommendations.JAMES HARDIE RECOMMENDED SAFEWORKING PRACTICESCUTTING OUTDOORS1. Position cutting station so wind will blow dust away fromthe user or others in working area.2. Position the cutting station in a well-ventilated area. Use adust reducing circular saw equipped with HardieBlade SawBlade or comparable fibre cement blade and well maintainedvacuum and filter appropriate for capturing fine (respirable) dust.DRILLING/OTHER MACHININGHardieBreakTM thermal stripA building code requirement and is installedbehind James Hardie external claddingover metal framing and HardieWrap weather barrier. 42x12x2750mm. Refer toHardieBreak thermal strip installation guide.45 per pack. Part No. 3056121. For maximum protection (lowest respirable dust production)James Hardie recommends always using best practicecutting methods where feasible.2. NEVER use a power saw indoors.3. ALWAYS use a circular saw blade that carries theHardieBlade logo or is of at least comparable performance.4. NEVER dry sweep - Use wet suppression or appropriatevacuum and filter.5. NEVER use grinders.6. ALWAYS follow tool manufacturers’ safety recommendations.James HardieTM Aluminium Internalcorner mould 3600mm long 5pkA ready to paint aluminium extrusion to beused with ScyonTM LineaTM weatherboardto create internal corners. 5 per pack.Part No. 305511Gun nails and nailersSuitable gun nails and nailers for concealedfixing to timber framing. Minimum nail lengthof 40mm is required.Vacuum extraction with HEPA filterUsed with HEPA filter and paper bag forreduced dust exposure.3.0mm dia drill bitFor pre-drilling where required.When drilling or machining you should always wear a P1 or P2dust mask and warn others in the immediate area.IMPORTANT NOTESDUST MASKS AND RESPIRATORSHardieEdge TrimAn architectural slab edge solution fabricatedfrom high-quality powder coated aluminium.Base Trim unit size: 3950mm.Also available:Base Trim4 per pack. Part No. 305911Base Trim Jointer 12 per pack. Part No. 305912Internal Corner 4 per pack. Part No. 305913External Corner 4 per pack. Part No. 305914Scyon Linea weatherboard and Scyon Axent trim. James Hardie does not supply these products and does not provide a warrantyfor their use. Please contact component the manufacturer for information on their warranties and further information on their products.60 x 3.15mm bullet head nailsFor face fixing Scyon Linea weatherboard to timber framing as specified.James Hardie products contain sand, a source ofrespirable crystalline silica which is considered bysome international authorities to be a cause ofcancer from some occupational sources. Breathingexcessive amounts of respirable silica dust can alsocause a disabling and potentially fatal lung diseasecalled silicosis, and has been linked with otherdiseases. Some studies suggest smoking mayincrease these risks. During installation or handling:(1) work in outdoor areas with ample ventilation;(2) minimise dust when cutting by using either ‘scoreand snap’ knife, fibre cement shears or, where notfeasible, use a HardieBlade Saw Blade (orequivalent) and dust-reducing circular saw attachedto an appropriate, well maintained, filtered vacuum;(3) warn others in the immediate area to avoidbreathing dust; (4) wear a properly-fitted, approveddust mask or respirator (e.g. P1 or P2) in accordancewith applicable government regulations andmanufacturer instructions to further limit respirablesilica exposures. During clean-up use a vacuumand filter, both of which are well maintained andappropriate for capturing fine (respirable) dust.Alternatively, use wet clean-up methods - never drysweep. For further information, refer to our installationinstructions and Safety Data Sheets available atwww.jameshardie.com.au. FAILURE TO ADHERETO OUR WARNINGS, SAFETY DATA SHEETS, ANDINSTALLATION INSTRUCTIONS MAY LEAD TOSERIOUS PERSONAL INJURY OR DEATH.HardieDriveTM Collated Screw 41mm longA class 3 self-tapping wing-tipped screw forfastening to 0.5mm to 1.6mm BMT light gaugesteel frames. Suitable for use in most auto feedscrew guns. 1000 per box. Part No. 305982COMPONENTS NOT SUPPLIED BY JAMES HARDIE James Hardie recommends the following products for use in conjunction with its40 x 2.8mm fibre cement nailsFor concealed fixing Scyon Linea weatherboard and various accessories totimber framing as specified.WARNINGDO NOT BREATHE DUST AND CUTONLY IN WELL VENTILATED AREAJames Hardie recommends the use of P2 respirators as bestpractice. As a minimum, an AS/NZS1716 P1 respirator must beused when doing any activity that may create dust. For moreextensive guidance and options for selecting respirators forworkplaces please refer to Australian/New Zealand Standard1715:2009 “Selection, Use and Maintenance of RespiratoryProtective Equipment”.P1 or P2 respirators should be used in conjunction with theabove cutting practices to minimise dust exposure.For further information, refer to Safety Data Sheet (SDS)available at www.jameshardie.com.au. If concern still existsabout exposure levels or you do not comply with the abovepractices, you should always consult a qualified industrialhygienist or contact James Hardie for further information.STORAGE AND HANDLINGTo avoid damage, all James Hardie buildingproducts should be stored with edges and cornersof the product protected from chipping. JamesHardie building products must be installed ina dry state and protected from weather duringtransport and storage. The product must be laid flatunder cover on a smooth level surface clear of theground to avoid exposure to water, moisture, etc.SCYON LINEA WEATHERBOARD INSTALLATION GUIDE PAGE 1 OF 6
DESIGNComplianceAll design and construction must comply with theappropriate requirements of the current NationalConstruction Code (NCC), regulations and standards.ResponsibilityThe specifier or other party responsible for theproject must ensure that the details in thisspecification are appropriate for the intendedapplication and that additional detailing is performedfor specific design of any areas that fall outside thescope of this specification.FRAMINGGeneralScyon Linea weatherboard may be specifiedfor timber-framed or steel-framed structures. Studspacings for Scyon Linea cladding for the windload classifications of AS 4055 ‘Wind Loads forHousing’ are given in Table 1.TABLE 1MAXIMUM STUD SPACINGWIND CLASSIFICATION STUD SPACINGGeneral areasWithin 1200mmNon-cyclonic Cyclonicof building (mm) of building edges(mm)N1, N2, N3C1600600N4, N5C2, C3600450N6C4450300Slab and footingsThe slab and footings on which the building is situatedmust comply with AS 2870 ‘Residential slabs andfootings – Construction’ and the requirements of theNational Construction Code (NCC).Ground clearancesInstall James Hardie external cladding with aminimum 150mm clearance to the earth on theexterior of the building or in accordance with localbuilding codes if greater than 150mm is required.Maintain a minimum 50mm clearance betweenJames Hardie external cladding and roofs, decks,paths, steps and driveways.Adjacent finished grade must slope away from thebuilding in accordance with local building codes,typically a minimum slope of 50mm minimum overthe first metre. Do not install external cladding suchthat it may remain in contact with standing water.NOTEGreater clearance may be required in order tocomply with termite protection provisions, see below.Termite protectionTimber framingDimensionsA 35mm minimum stud width is required.Structural gradeUse only seasoned timber. Unseasoned timber mustnot be used because it is prone to shrinkage andcan cause planks and frames to move.Durability‘Timber used for house construction must have thelevel of durability appropriate for the relevant climateand expected service life and conditions includingexposure to insect attacks or to moisture, whichcould cause decay.’ Reference AS 1684.2‘Residential timber-framed construction’.Frame constructionUse of timber framing must be in accordance withAS 1684 and the framing manufacturer’s specifications.Stud spacings must be in accordance with Table 1.The National Construction Code (NCC) specifiesthe requirements for termite barriers and mustbe complied with. Where the exposed slab edgeis used as part of the termite barrier system, aminimum of 75mm of the exposed slab edge mustbe visible to permit ready detection of termite entry.NOTE: When using 70mm deep framing itis recommended that the Scyon Linea weatherboard be installed prior to plumbing, electricaland other services within the frame. This will preventthese services being damaged by fasteners used toinstall the Scyon Linea weatherboard.Moisture managementSteel framingIt is the responsibility of designer or specifier toidentify moisture related risks associated with anyparticular building design. Wall construction designmust effectively manage moisture, accounting forboth the interior and exterior environments of thebuilding, particularly in buildings that have a higherrisk of wind driven rain penetration or that areartificially heated or cooled.In addition all wall openings, penetrations, junctions,connections, window sills, heads and jambs mustincorporate appropriate flashing and waterproofing.Materials, components and their installation that areused to manage moisture in framed wall constructionmust, at a minimum, comply with the requirementsof relevant standards and the NCC.Structural bracingScyon Linea weatherboard can be used toachieve wall bracing. For more information referto James Hardie's Structural Bracing ApplicationGuide available at www.accel.com.auFire rated wallsScyon Linea weatherboards clad walls canachieve fire ratings of 60/60/60 and 90/90/90when constructed with additional fire rated liningsas specified in James Hardie's Fire and AcousticallyRated Walls Application Guide & TechnicalSpecification.NOTEUse 60 x 3.15 and 75 x 3.15mm corrosion resistantbullet head nails for concealed and face fixingrespectively in fire rated applications.Dimensions and gaugeA 35mm minimum stud width is required. Framingmembers must be in the range 0.55 to 1.6mm BMT(base metal thickness).SteelUse of steel framing must be in accordance withNASH standard for Residential and Low-Rise SteelFraming Part 1: Design Criteria and the framingmanufactures specifications.Framing members must have the appropriate levelof durability required to prevent corrosion.Thermal BreakFor steel frames, the Building Code of Australiasections J1.5 and 3.12.1 volumes 1 and 2respectively, state for both residential and commercialbuildings a thermal break with an R 0.2m2 K/W mustbe installed behind external cladding where thecladding and internal lining make direct contact withthe same steel frame. For information relating to thesuitability of James Hardie’s HardieBreak thermalstrip, refer to the HardieBreak Installation Guide atwww.jameshardie.com.aunthe frame flush externally to adequately supportthe head flashing and trim.Extra packers at external corners for use withScyon Axent trim boxed corners.TolerancesEnsure frame is square and work from central datumline. Frames must be straight and true to provide a flushface to receive the Scyon Linea weatherboard.A suggested maximum tolerance of between 3mmand 4mm in any 3000mm length of frame will givebest results. Scyon Linea weatherboard will notstraighten excessively warped or distorted frames andany warpng may still be visible after product is applied.PREPARATIONWeather BarrierA suitable water control membrane must be installedunder James Hardie cladding in accordance withthe AS/NZS 4200.2 ‘Pliable building membranes andunderlays – Installation’ and NCC requirements.James Hardie has tested and certified the use ofHardieWrap weather barrier for climate zones2-8 within Australia. HardieWrap weather barrieris a Class 4 vapour permeable membrane thatdelivers a triple-shield of protection to help againstexternal weather penetration, internal condensationmanagement and external heat penetration throughits safe-glare reflective layer.If using an alternate product in lieu of HardieWrap weather barrier or the project is located in a hot humidarea (Climate Zone 1), the designer must ensure thatthe product is fit for purpose and it has the followingclassification in accordance with AS/NZS 4200.1:2017‘Pliable building membranes and underlays – Materials’:WEATHER BARRIER URPERMEANCEVapour permeable (Class 3 or 4)Vapour Barrier (Class 1 or 2)Soft compressible insulation installed betweenthe front of the wall studs and directly behind theexternal cladding can cause installation issues andis thus not recommended.FlashingAll wall openings, penetrations, intersections,connections, window sills, heads and jambs mustbe flashed prior to plank installation. See ‘MoistureManagement’ Section for requirements.AccessoriesSome Scyon Linea weatherboard accessoriesmay require installation prior to fixing of the boards.Refer to the relevant details in this document.STEP 1Construct frameand fitting ofwindowsStorey rodsame heightas wallPre-mark toeffective coverlocation markson storey rodStud spacings must be in accordance with Table 1.Special framing requirementsThe following are special framing requirements forboth timber and steel framing:Additional framing may be required at internalcorners and sides of openings, see relevant detailson the following pages.Extra depth lintels may be necessary for fixing ofhead flashing and trim. Lintels must be located inSTEP 2InstallHardieWrap weather barrierSTEP 3Install Linea PVCstarter strip.nnPAGE 2 OF 6 SCYON LINEA WEATHERBOARD INSTALLATION GUIDEEnsure required groundclearance is providedSTEP 4Pre-mark membrane at topof first board to provide20 - 50mm min overhang
NOTES1. Ensure all double studs are well nailed together,and flush at the outside face.2. Generally external and internal corners haveadditional framing requirements and require thatflashings and/or components are fitted prior tofixing the Scyon Linea weatherboard. Referto the external and internal corner details.3. Ensure aluminium corner accessories areinstalled prior to Scyon Linea weatherboardinstallation.4. Alternative methods can be used to gauge theeffective cover during installation e.g. markingcorner moulds or using timber blocks cut toeffective cover height to locate and supportboards.INSTALLATIONNOTEYou must ensure the product is of acceptablequality prior to installation, see Important Note 3.Install the cladding as detailed below around thebuilding, joining the boards at the tongue andgroove progressively.SLAB JUNCTION ALTERNATIVEScyonTM LineaTMweatherboardLineaTMPVC starter stripHardieEdgeTMTrim6mmAlternative Detail:For more information onHardieEdgeTM please refer tothe HardieEdgeTM installationguide available atwww.jameshardie.com.au75mm75mm exposedslab edge allowsvisual detectionof termite trailswhich showsthere is termiteentry tothe buildingFIXINGScyon Linea weatherboard is installed with 40x 2.8mm fibre cement nails by concealed fixing asshown below. Suitable gun nails of 40mm minimumlength can also be used.FramingSTEP 4Fix top of 2ndboard beforefitting nextboard etc.Pre-markedpositionof bottomof first boardFasteners must be fully compatible with all othermaterials that they are in contact with to ensure thedurability and integrity of the assembly.Contact fastener manufacturers for more information.Fasteners for timberNOTEThe minimum edge distance to the end of the board is20mm and 50mm for hand and gun nailing respectively.NAIL REQUIREMENTS FOR SCYONTM LINEATMWEATHERBOARDCONCEALED NAILING40 x 2.8mm Class 3 minimum finished flush withfibre cement nail board surface.STEP 2Fix first board inplace as shownin the figurebelow.LineaTM PVCstarter strip.Fasteners must have the appropriate level ofdurability required for the intended project. This is ofparticular importance in coastal areas, areas subjectto salt spray and other corrosive environments.TABLE 2STEP 3Install 2nd boardusing storey rodas guide. Ensure30mm of lapis achieved.STEP 1Position first board so asto provide 20 - 50mmoverhang. Place usingpre-marked slab edgeas guide.FASTENERSFastener durabilityHand nailingScyon Linea weatherboard must be fixed totimber framing with the types of nails shown inTable 2. Refer to Scyon Axent Trim InstallationInstructions for trim fixing details.STEP 5Fix remainingboardsHardieWrap“weather barrier6. Face fixing method must be used if structuralbracing required.7. Longer fasteners may be required for fire ratedapplications, refer to James Hardie's Fire andAcoustically Rated Walls Application Guide.FACE NAILINGFace fixing must be provided for bracing applicationsas shown below.NOTES1. Boards should be nailed to the studs startingfrom the centre of the board outwards.2. Select an off-cut to start the second course atthe corner so that joints are staggered.60 x 3.15mm Class 3 minimum nails may be drivenbullet head nailsthrough both thicknesses at board lapwithout pre-drilling.Stainless steel nails will requirepre-drilling. Use a 3.0mm drill bit.Gun nailingA variety of gun nails are available for concealednailing of Scyon Linea weatherboard usingvarious guns. Nails must be a minimum of 40mmlong, contact supplier for details.Fasteners for steelScyon Linea weatherboard must be fixed to0.55 – 1.6mm BMT domestic type steel framingwith the types of screws shown in Table 3.SLAB / EAVE JUNCTIONTABLE 3SCREW REQUIREMENTS FOR SCYON LINEA WEATHERBOARDCONCEALED SCREWING41mm HardieDrive A class 3 self-tapping wing-tippedscrew for fastening to 0.5mm to 1.6mmBMT light gauge steel frames.FACE SCREWINGNOTES1. Hold the board hard to the stud when fixing.2. Face fixing may be added whenever siteconditions create undue gaps between boardsat laps. Alternatively corrosion resistant 25 mmbrad nails can be used to minimise gaps by facefixing where required.3. The minimum edge distance to the end of theboard is 20mm for hand nailing and 50mm forgun nailing.4. If fixing is to be carried out using a nail gun,ensure that the appropriate size and fastenerdurability is selected. Gun nailing is notrecommended for face fixing applications.5. Nail guns must be set to ensure that the nailsare flush with the surface of the boards. Gunnails may require extra nailing by hand.52mm special wingscrew by TRI-FIXXFor 0.55 - 1.2mm BMT steel framing.Available in Class 3 (hot-dippedgalvanised) and stainless steel.* Highly corrosive environments and areas within 1km of the coastrequire Class 4 or stainless steel coatings. Refer to the fastenermanufacturer for recommendations.SCYON LINEA WEATHERBOARD INSTALLATION GUIDE PAGE 3 OF 6
Fasteners should be driven flush as shown below.Drive screw flushSlimline box cornerINTERNAL CORNERSScyon Axent trim internal cornerSTEP 1HardieWrap“weather barriercontinuous aroundcornerFlush nailing Unacceptable: Unacceptable:over drivenunder drivenJOINTINGThe ends of Scyon Linea weatherboard arejointed off-stud by means of the tongue-and-groovejoint.STEP 2Fit LineaTM aluminiumexternal slimlineboxed corner with40mm fibre cementnails at 400mmvertical centresin both flangesSTEP 3Install boardsleaving nominal 2mmgap to aluminium cornerInternal corner mouldTypical studSTEP 1HardieWrap“ weatherbarrier continuousaround cornerScyon Linea claddingNOTE:Double studsSTEP 2Fit James Hardie“Aluminium InternalCorner Mouldwith 40mm nails at400mm verticalcentres inboth flangesHardieWrap weatherbarrierNOTE:Provide 50mmoverlap of JamesHardie“ AluminiumInternal CornerMould at joins andat floor level. Uppersection to overlaplower section100Tongue and groove joint tobe 100mm minimum fromside of stud.Ensure adjacent joints areseparated by a minimum ofone stud spacing.Lap30 inalmnoCorner soakersSTEP 3Install boards leaving nominal2mm gap to aluminium cornerusing concealed nailing to 2ndstud from cornerSTEP 1Apply continuous sealantbead to back of tongue inan upward directionSTEP 2Push firmlytogetherBevelBackEXTERNAL CORNERSScyon Axent trim external cornerExternal mitre cornerNOTE: Refer to Scyon Axent trim InstallationInstructions for installation information.NOTCH AND SCRIBEScyonTM LineaTMweatherboardHardieWrapTMweather barriercontinuousaround corner2mm sealed gapInstall JamesHardieTM75x75mmColourbond corner flashingFlashingScyonTM AxentTMTrim 38x45ScyonTM AxentTMTrim 89x382mm sealed gapPAGE 4 OF 6 SCYON LINEA WEATHERBOARD INSTALLATION GUIDE
WINDOWSWindows using Scyon Axent trimWindows using the LineaTM AluminiumWindow AdapterFINISHINGPreparation and primingThe Scyon Linea weatherboard and Scyon Axent trim are pre-primed and must be dry beforepainting. Punch and fill all exposed nails a maximumof 2mm below the surface of the board. For screws,ensure the head of the screw is nominally 2mmbelow the surface of the board.Fill the hole with a suitable exterior grade filler, allowto cure and sand smooth. Priming of filled andsanded patches may be required in accordancewith paint manufacturer’s specifications.NOTE: Care must be taken not to over-sand as itcan affect the finish.SealantsApplication and use of sealants must comply withmanufacturer’s instructions. Sealants, if coated, mustbe compatible with the paint system. James Hardierecommends the use of James Hardie jointsealant, which is a paintable polyurethane sealant.PaintingRefer to the project specification for paintrequirements. The Scyon Linea weatherboardand Scyon Axent trim are pre-primed mustbe painted within 3 months of being fixed. JamesHardie recommends the application of two coatsminimum of a quality acrylic paint over thepre-primed boards in accordance with the paintmanufacturer’s specifications. Some environmentsrequire special coatings. Painting selection andspecifications are dependant on the paint chosen.Refer to the paint manufacturer for information anddetails of their warranty.StainingStains containing linseed oil are specificallydesigned for wood and may not be suitable forJames Hardie cladding products, primed orunprimed. Semi-transparent stains can vary inuniformity of appearance depending on method ofapplication and conditions and will require a highlevel of skill and craftsmanship to achieve a uniformappearance. Clear coats have not proven durable inexterior exposure and James Hardie considers thema maintenance item that may require application of arefurbishing sealer at regular intervals. James Hardiedoes not warrant the appearance or durability ofsemi-transparent stains and clear coats.MAINTENANCEThe extent and nature of maintenance will dependon the geographical location and exposure of thebuilding. As a guide, it is recommended that basicnormal maintenance tasks shall include but not belimited to:nnnnnnWashing down exterior surfaces every 6-12months*Re-applying of exterior protective finishes*Maintaining the exterior envelope and connectionsincluding joints, penetrations, flashings andsealants that may provide a means of moistureentry beyond the exterior cladding.Ensure clearances specified in this document ismaintained.Cleaning out gutters, blocked pipes and overflowsas required.Pruning back vegetation that is close to ortouching the building.*Refer to your paint manufacturer for washingdown and recoating requirements related to paintperformance.SCYON LINEA WEATHERBOARD INSTALLATION GUIDE PAGE 5 OF 6
PRODUCT INFORMATIONGeneralThe basic composition of James Hardie buildingproducts is Portland cement, ground sand, cellulosefibre, water and proprietary additives.James Hardie building products are manufacturedAS/NZS 2908.2 ‘Cellulose-Cement Products-FlatSheet’. These are also compliant with equivalentstandard ISO 8336 ‘Fibre-cement flat sheets- Product specification and test methods’. Forproduct classification refer to the relevant PhysicalProperties Data Sheet.DurabilityResistance to moisture/rottingScyon Linea weatherboard and Scyon Axent trim has demonstrated resistance topermanent moisture-induced deterioration (rotting)by passing the following tests in accordance withAS/NZS 2908.2:nnnnWater permeability (Clause 8.2.2)Warm water (Clause 8.2.4)Heat rain (Clause 6.5)Soak dry (Clause 8.2.5).Resistance to fireScyon Linea weatherboard and Scyon Axent trim are suitable where non-combustiblematerials are required in accordance with C1.9 ofthe Building Code of Australia.James Hardie building products have been testedby CSIRO in accordance with AS/NZS 3837 andare classified as conforming to Group 1 material(highest and best result possible), with an averagespecific extinction area far lower than thepermissible 250m2/kg, as referenced inSpecification C1.10a of the National ConstructionCode (NCC).Resistance to termite attackBased on testing completed by CSIRO Division ofForest Products and Ensis Australia James Hardie building products have demonstrated resistance totermite attack.Alpine regionsIn regions subject to freeze/thaw conditions, allJames Hardie fibre cement external claddingmust be installed and painted in the warmermonths of the year where the temperature does notcreate freeze and thaw conditions or paint issues.The claddin
When specifying or installing James Hardie products, ensure you have the current guide. If in doubt, or you need more information, visit www.jameshardie.com.au, www.scyon.com.au or Ask James Hardie on 13 11 03. WARNING DO NOT BREATHE DUST AND CUT ONLY IN WELL VENTILATED AREA James Hardie products contain sand, a source of