Transcription
Wireless FenceGIF00-16347 Product ManualHave questions about your Wireless Fence or need training tips for your pet?Our Customer Care representatives are here to help you.Call our USA-based Customer Care Center at 1 (866) 381-2785USA & Canada: Mon–Fri 8am–8pm EST Sat 9am–5pm ESTThis product includes a one year warranty.Call, click, or chat with us before you return your product.premierpet.com
Important Safety InformationExplanation of Attention Words and Symbols used in this guideThis is the safety alert symbol. It is used to alert you to potential personal injury hazards. Obey all safety messages that follow this symbol to avoid possible injury or death.WARNING indicates a hazardous situation which, if not avoided, could result in death or serious injury.CAUTION, used with the safety alert symbol, indicates a hazardous situation which, if not avoided, could result in minor or moderate injury.CAUTION, used without the safety alert symbol, indicates a hazardous situation which, if not avoided, could result in harm to your pet.NOTICE is used to address safe use practices not related to personal injury. Do not use this product if your dog is prone to aggressive behavior. Aggressive dogs can cause severe injury or death to their owners and others. If you are not sure that thisproduct is right for your dog, please talk to your veterinarian or a certified trainer. Risk of electric shock. Use the fence transmitter indoors in dry location only. Risk of explosion if battery is replaced by an incorrect type. Do not short circuit, mix old and new batteries, dispose of in fire, or expose to water. When batteries are stored ordisposed, they must be protected from shorting. Dispose of used batteries properly.This Premier Pet Wireless Fence is NOT a solid barrier. The system is designed to act as a deterrent to remind pets by static correction to remain in the boundary established. Itis important that you reinforce training with your pet on a regular basis. Since the tolerance level to static correction varies from pet to pet, Radio Systems Corporation CANNOTguarantee that the system will, in all cases, keep a pet within the established boundary. Not all pets can be trained to avoid crossing the boundary! Therefore, if you have reasonto believe that your pet may pose a danger to others or harm himself if he is not kept from crossing the boundaries, you should NOT rely solely upon the Premier Pet WirelessFence to confine your pet. Radio Systems Corporation shall NOT be liable for any property damage, economic loss or any consequential damages, sustained as a result of anyanimal crossing the boundary. This product is not a toy. Keep it away from the reach of children.Proper fit of the receiver collar is important. A receiver collar worn for too long or made too tight on the pet’s neck may cause skin damage, ranging from redness to pressureulcers. This condition is commonly known as bed sores. Avoid leaving the receiver collar on the dog for more than 12 hours per day.When possible reposition the receiver collar on the pet’s neck every 1 to 2 hours.Check the fit to prevent excessive pressure; follow the instructions in this manual.You may need to trim the hair in the area of the contact points. Never shave the dog’s neck; this may lead to a rash or infection.Never connect a leash to the receiver collar; it will cause excessive pressure on the contact points.When using a separate collar for a leash, don’t put pressure on the receiver collar.Wash the dog’s neck area and the contact points of the receiver collar weekly with a damp cloth.Examine the contact area daily for signs of a rash or a sore.If a rash or sore is found, discontinue use of the receiver collar until the skin has healed.If the condition persists beyond 48 hours, see your veterinarian.For additional information on bed sores and pressure necrosis, please visit our website.Proper training of your pet is essential to successfully using the system. During the first 2 weeks of training, do not use the system without direct supervision of your pet.Always remove your dog’s receiver collar before performing any fence transmitter testing.The receiver collar should not be on your dog when the system is tested. If it is, your pet may receive an unintended correction.The boundary zone must be tested whenever an adjustment is made to the fence transmitter setting to prevent unintended corrections to your pet.Remove the receiver collar from your pet when indoors to avoid activation of the receiver collar.If you use a collar and leash for training, be sure the extra collar does not put pressure on the contact points.Never remove power from the system when the receiver collar is on the pet. This may activate the receiver collar.Radio Systems Corporation recommends the use of an Uninterruptible Power Supply (UPS) for use with your wireless fence. Should the power go out at your home, your pet willbe unprotected. Power outages can be unpredictable, and the use of a UPS will provide you with some time to properly restrain your pet.In rare instances, if your pet is near the boundary at the time when the power fails, it is possible that your pet will receive a correction. This correction will stop after a 30 secondtimeout period has been reached. This is due to the operation of the collar: the collar is activated by the absence of the containment signal.While results will vary depending on the UPS manufacturer’s specifications the following are typical examples to guide your choice of UPS: Using a 400 VA UPS a consumer should expect 3 hours of backup time. Using a 900 VA UPS a consumer could expect 8 hours of backup time.If settings below maximum fence size are used, additional backup time will result. At minimum fence size settings backup time may be more than two times the backup timeestimated at maximum fence size. 2To prevent an unintended correction, after the boundary flags have been placed, be sure to set the static correction on the receiver collar back to level 1, tone-only.Do not place anything on the top of the fence transmitter or cover any ventilation holes. This may overheat the fence transmitter and cause early transmit failure.Do not place fence transmitter in a closet or any other confined, unventilated area.Do not place fence transmitter on or near a metal surface. 1 (866) 381-2785
TABLE OF CONTENTSWhat’s Included 4How It Works 4Key Definitions 5Set Up the Transmitter 6Prepare the Receiver Collar 6Adjust the Pet Area to Desired Size 8Transmitter Range Chart 9Record Your Settings 9Place the Boundary Flags 9Fit the Receiver Collar 10Training Guide 11Wireless - To - Go 11FREQUENTLY ASKED QUESTIONS 12Terms of Use and Limitation of Liability 16Warranty 16Perchlorate Battery 17Battery Disposal 17Compliance 17Mounting Template 19premierpet.com3
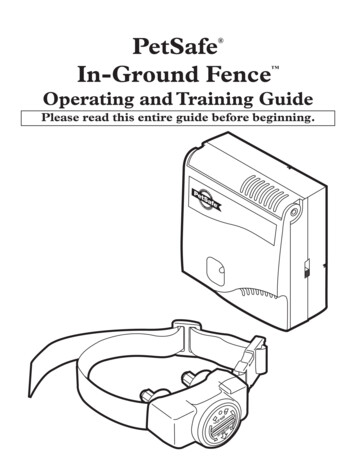
What’s IncludedReceiver CollarBattery(GAC11-16351)Fence TransmitterPowerAdaptorBoundary Flags (50)LongContact PointsTest LightToolItems You May Need PliersScissorsLighterDrill & mounting hardwareTape measureNon-metallic collar and leashSet up and training help: www.premierpet.comHow It WorksThe Premier Pet Wireless Fence has been proven safe, comfortable, and effective for pets over 8 lb. Thesystem works by transmitting a radio signal up to 90 ft. in all directions. You temporarily define the pet area withboundary flags for a visual aid in training your pet. Your pet wears a receiver collar with contact points that touchhis neck, and, once trained, is allowed to roam freely in the pet area. When your pet reaches the boundary zone,the receiver collar gives a warning beep before delivering a safe static correction through the contact points toget his attention until he returns to the pet area.4 1 (866) 381-2785
Key DefinitionsFence Transmitter: Transmits the radio signal and is the center of the pet area.Pet Area: Distance from the fence transmitter where your pet can roam freely.Boundary Zone: 2 to 3 ft. wide area outsidethe pet area where your pet’s receiver collarwill begin to beep and then begin to deliver astatic correction.PET AREAReceiver Collar: Receives the radio signal fromthe fence transmitter.FenceTransmitterCorrection level Button: Adjusts the level ofstatic correction your pet receives outside thepet area.Receiver Indicator Light: Indicates the level ofcorrection at which the receiver collar is set. Thislight also serves as a low battery indicator.Note: In manyneighborhoods,nearby property linesmay limit how largethe Pet Area can be.Maximum90 ft. range(45 average steps)DARY ZONEBOUNNOTE: The correction will start in the boundaryzone and continue anywhere beyond the petarea. The receiver collar is equipped with a safetytime-out feature that will stop correcting after 30seconds if your pet remains outside the pet area.Contact Points: Deliver the safe staticcorrection when your pet moves into theboundary zone.Power Jack: Where the power adapter plugsinto the fence transmitter.Boundary Switch/Range: Adjust according tothe size of the pet area desired.NOTE: Adjusting the switch does not change the level of static correction on the receiver collar.Power Light: Indicates when the fence transmitter is on.Boundary Control Dial: Adjusts the distance from the fence transmitter to the boundary zone.NOTE: Adjusting the dial does not change the level of static correction on the receiver collar.Receiver CollarReceiverIndicator LightFence TransmitterBatteryPower JackBoundary Switch/RangePower LightWashersBoundary Control DialOn/Off SwitchContact Pointspremierpet.com5
Set Up the TransmitterImportant: You may need to move the transmitter several times before determining the final location.The fence transmitter is located at the exact center of the pet area.Place the fence transmitter:1A3 ft.WallMountTabletop1Camme788Réglage deslimitesPowerJack Do not place anything on top of fence transmitter or cover anyventilation holes. This may overheat the fence transmitter and causeearly transmit failure. Do not place fence transmitter in a closet or any other confined,unventilated area. Do not place fence transmitter on or near a metal surface.To maximize your pet area, make sure the boundary switch/range is on High ( ) and the boundary control dial is set to 8 (1C).Plug power adapter into power jack and a standard outlet. Turnthe fence transmitter on (1D).1DRangeGBOUNDARYCONTROL At least 2 ft. above the floor located on the ground floor ofyour home. In a dry, well ventilated, protected area. In an area where temperatures do not fall below -10 F (-23 C). On a non-metal table/hard surface (to ensure properventilation) or mount on a wall (1A). A mounting template isincluded on the back of this guide. At least 3 ft. from large metal objects, as these items mayreduce the size and shape of your pet area (1B). Placing thetransmitter inside a metal building or shed can reduce themaximum range of the system.1BPowerSwitchPrepare the Receiver CollarYour receiver collar comes with short contact points installed. Use the long contactpoints for pets with long or thick hair. Tighten the contact points using the test lighttool (2A) one-half turn beyond finger tight. Check the tightness weekly.2AInsert and Remove the Receiver Collar BatteryNOTE: Do not install the battery while the receiver collar is on your pet.This receiver collar utilizes a replaceable battery (GAC11-16351). This unique battery isdesigned to make battery replacement easier and increase water protection.To insert the battery, align the symbols on the battery (arrow) and receiver collar(triangle) (2B). Use the edge of the test light tool (2B) to turn the battery clockwiseuntil the arrow lines up with the lock symbol on the housing.2BTo remove or replace the battery, turn the battery counter-clockwise using the edgeof the test light tool (2B). DO NOT attempt to cut into or pry open the battery. Be sureto discard the used battery properly. When removing the old battery from the receivercollar, discharge all power by holding the static level button down until the light is nolonger illuminated. Replace with a new battery.Risk of explosion if batteries are replaced by an incorrect type. Do not short circuit, mix old and newbatteries, dispose of in fire, or expose to water. When batteries are stored or disposed, they must beprotected from shorting. Dispose of used batteries properly.A replacement battery (GAC11-16351) can be found at many retailers. Contact the Customer Care Center or visitour web site at www.premierpet.com to locate a retailer near you.6 1 (866) 381-2785
Set the Static Correction LevelRead all steps before attempting to set the static correction level.1. Remove the clear plastic cover with the edge of the test light tool to expose thecorrection level button (2C).2. With the battery installed, press the correction level button and release when thereceiver LED indicator light lights up (2D).3. The receiver LED indicator light will emit a series of flashes representing the staticcorrection level.4. Increase the static correction level by pressing and releasing the correction levelbutton within 5 seconds of the previous series of flashes.5. After setting the static correction level, replace the cover to protect the correctionlevel button.The static correction levels increase in strength from 1 to 6. Pushing the correctionlevel button while the receiver collar is on level 6 will cause the receiver collar to revertto level 1. Refer to the static correction level Table to choose the static correction levelthat best fits your pet.2C2DThe receiver indicator light acts as a low battery indicator. The light will flash every 4 to5 seconds when battery replacement is required.Battery Contact VerificationRemove the receiver collar from your pet. Press the button and verify that the LED light illuminates. If the LEDlight does not come on remove the battery. Locate the metal tabs in the battery compartment. Gently lift thetabs to ensure that the battery will make good contact. Replace the battery into the receiver collar. Press thebutton and check that the LED light illuminates.Static Correction Level TableStatic Correction LevelIndicator Light ResponseReceiver Collar Function11 FlashNo Static Correction, Tone-only22 FlashesLow Static Correction33 FlashesMedium-Low Static Correction44 FlashesMedium Static Correction55 FlashesMedium-High Static Correction66 FlashesHigh Static CorrectionFlashes once every 4 to 5 secondsIndicates Low BatteryOver Correction ProtectionIf your pet enters the boundary zone or continues anywhere beyond the pet area, this feature limits the staticcorrection duration to 30 seconds.In the unlikely event that your pet leaves the pet area, he will not receive a static correction upon return to thepet area.premierpet.com7
Adjust the Pet Area to Desired Size3ASTREETMake sure the entire pet area lies within your property boundaries (3A). Always startdetermining the boundary zone at the shortest distance from fence transmitter. Placethe boundary switch/range on Low (-) if the boundary zone will be less than 45 ft. fromthe fence transmitter.Make sure the receiver collar battery is properly installed, the static correction level is setat 2 or greater, and the test light contacts are touching the contact points (3B).PetAreaNOTE: If your next-door neighbor has an in-ground containment system, see“Troubleshooting” section.Test Light Instructions1. Set the correction level to 2 or above.2. Hold the test light contacts to the contact points.3. Walk toward the boundary zone holding the receiver collar at your pet’s neck leveluntil the test light flashes. Save test light for future testing.3BNOTE: If the test light does not flash, install a new battery and re-test. If test light still doesnot flash, contact the Customer Care Center.To maximize your pet area, make sure the boundary switch/range is on High ( )and the boundary control dial is set to 8. Plug power adapter into power jack andstandard outlet.3CTwo-Person MethodHold the receiver collar at your pet’s neck height (3C) with logoside facing away from the fence transmitter and contact pointsfacing upwards. Walk to the edge of the desired pet area. Facingaway from the fence transmitter, hold the receiver collar at theedge of the desired pet area (3D). Starting with the boundarycontrol dial set to 8, have a second person turn the dial downSLOWLY. When the receiver collar starts to beep, tell the person tostop turning the boundary control dial. Record your settings belowfor future reference.3DPetAreaBoundary ZoneOne-Person MethodMeasure the shortest distance from the desired boundary zone to the fence transmitter. Find the distance on thefence transmitter range chart and set the boundary switch/range and boundary control dial. Hold the test lightcontacts to the contact points (3B). Take the receiver collar to the boundary zone with the logo side facing awayfrom the fence transmitter and contact points facing upwards (3C). Hold the receiver collar at your pet’s necklevel (3D) until the receiver collar beeps and the test light flashes. If the receiver collar beeps before or after thedesired boundary zone, return to the fence transmitter and adjust the boundary control dial. Repeat this processuntil the receiver collar is beeping at the desired location. Record your settings for future reference.8 1 (866) 381-2785
TransmitterRange geLOW (-)BoundarySwitch/RangeHIGH ( )15–10 ft.5–10 ft.25–10 ft.5–10 ft.315–20 ft.25–35 ft.420–25 ft.42–55 ft.525–30 ft.55–65 ft.635–40 ft.75–85 ft.740–45 ft.85–90 ft.840–45 ft.85–90 ft.Record Your SettingsFinal BoundaryFinal BoundarySwitch SettingControl DialHIGH ( ) or LOW (-) Position (1-8)Receiver StaticCorrectionlevel (1-6)HomeCampingVacationOtherOtherOtherNOTE: These distances are approximate.Place the Boundary FlagsThe boundary flags are visual reminders for your pet of where the boundary zone is located. The receiver collarwill activate within 2 to 3 ft. of the boundary flags.4A4B1. Using the test light, with the static correction level set at 2 or greater, holdthe receiver collar at your pet’s neck height with Premier Pet logo sidefacing away from the fence transmitter.2. Walk towards the boundary zone until the receiver collar beeps and thetest light flashes (4A).3. Place a boundary flag in the ground (4B).4. Walk back into the pet area until the beeping stops.5. Repeat this process around the boundary zone until it is marked withboundary flags every 10 ft.The boundary flags may be in different parts of the boundary zone and may not be in a line. The boundary zoneis 2 to 3 ft. wide.premierpet.com9
Fit the Receiver CollarImportant: The proper fit and placement of your receiver collar is important for effective training. Thecontact points must have direct contact with your pet’s skin on the underside of his neck.Please read the front of this guide for Important Safety Information regarding the receiver collar.To assure a proper fit, please follow these steps:1. Make sure that the battery is not installed in the receiver collar.2. Start with your pet standing comfortably.3. Place the receiver collar on your pet so that the Premier Pet logo isfacing your pet’s chin.4. Center the contact points underneath your pet’s neck, touchingthe skin. If your pet has a long or thick coat, use the enclosed longcontact points to reach through the hair(5A).5A5B You may need to trim the hair in the area of the contact points. Never shave thepet’s neck; this may lead to a rash or infection. You should not make the receiver collar any tighter than is required for goodcontact. A receiver collar that is too tight will increase the risk of pressurenecrosis in the contact area.5. The receiver collar should fit snugly, yet loose enough to allow one finger to fit between a contact point andyour pet’s neck (5B).6. Allow your pet to wear the collar for several minutes then recheck the fit. Check the fit again as your petbecomes more comfortable with the receiver collar.7. Once you are satisfied with the fit of the receiver collar, then you may trim any excess collar strap as follows:A. Mark the desired length of the receiver collar with a pen. Allow for growth if your pet is young or grows athick winter coat.B. Remove the receiver collar from your pet and cut off the excess.C. Before placing the receiver collar back onto your pet, seal the edge of the cut collar by applying a flamealong the frayed edge.8. Put battery in receiver collar.Re-Thread the CollarThe slide buckle prevents the collar from becoming loose around yourpet’s neck.The ridges must be facing up; the collar will slip if it is not properly threaded.10 1 (866) 381-2785
Training Guide Proper training of your pet is essential to the success of the system.Remove the collar after each training session.Be sure to place the collar on your dog’s neck with the Premier Pet logo facing up.If your pet shows signs of stress, slow down the training schedule, add additional days of training or increasethe amount of play time with your pet in the pet area. Common stress signals include the pet pulling on theleash toward the house, ears tucked or pulled back, tail down or tucked between legs, body lowered, nervous/frantic movement or stiffening of the pet’s body, lip-licking or yawning.Day 1For the first day, start with the collar set to level 1, tone-only. With your pet on a leash and his favorite treatson hand, allow him to explore the pet area. Let him cross the boundary and hear the tone from the collar, thenask him to come back into the pet area and reward him. Aim to teach your dog that being inside the pet area isrewarding, while being outside it is not. Keep your mood upbeat as dogs can understand when you are happyor upset. Do 2 or 3 training sessions for about 10-15 minutes each. Do not try to do too much too quickly. Morefrequent short sessions are better than less frequent, longer sessions.Days 2–4On days 2 through 4, repeat this process but with the collar set to level 2: the mildest level of static correction.Observe whether or not your dog responds to the correction. Indicators of a response are looking around incuriosity, flicking his ears or scratching at the collar. If he does not respond, check the collar fit to make sure thecontact points are making contact with his skin. If it fits correctly and your dog does not respond, move up to thenext level and repeat the process. Do 2 or 3 training sessions for about 10-15 minutes each.Days 5–8On days 5 through 8, continue where you left off on day 4, but now add in some staged distractions. The goal isto have your pet stay within the boundary even with these new temptations. Start with lower value temptationsand work your way up. Some examples are: Have a family member cross from inside the boundary out of it.Place a toy outside the boundary.Have a friend or neighbor walk another pet outside the boundary area.Remember, it is important to keep your pet on a leash throughout this process while he is still learning theboundary. Also, never coax your pet to leave the pet area.Days 9–30Once your pet consistently avoids the boundary regardless of distractions or temptations, he is ready for the nextstep: unleashed supervision. Stay close by with a leash at hand. Play with your pet for a while during the first fewsessions. If your dog does not try to leave the boundary, occupy yourself with another task in the yard, and allowhim to freely explore. Continue watching your pet. If he escapes, remove the receiver collar and lead him backinto the pet area. Start these sessions at about 15 minutes and gradually work up to an hour or more.When your pet proves trustworthy, you can let him out on his own. Continue to check on him regularly. You canremove every other boundary flag every 4 days until all the flags are removed. Save them in case you move orneed to train another pet.Wireless - To - GoYour Premier Pet Wireless Fence is completely portable. Follow the set-up procedures wherever you wish tohave containment of your pet. Reestablish the pet area and mark it with boundary flags so your pet knows hisboundary zone. NOTE: If setting up in a metal building or vehicle, the maximum size of the pet area may be reduced.Be sure to remove the receiver collar battery before turning off the fence transmitter. If you want to power the fencetransmitter from a car or other DC source, use an inverter rated for 50 watts or more.premierpet.com11
FREQUENTLY ASKED QUESTIONSIs the receivercollar waterproof? Yes. When changing the battery, be sure to keep the battery area freefrom dirt and debris.Will the Premier Pet Wireless You can use another Wireless fence transmitter with overlappingFence cover a larger circle thanboundaries of at least 30 ft. to increase the size of the pet area.180 ft. across?Will a sloping yard or hillsaffect the pet area? The fence transmitter signal extends 90 ft. in all directions. A sloping yardor a yard with hills can cause the pet area to appear less or more thanexpected. Consider repositioning the fence transmitter to maximize yourpet area.Can I use more than onereceiver collar with theWireless Fence transmitter? Yes. There is no limit to the number of pets you can contain with theWireless Fence transmitter. You must purchase an additional WirelessFence receiver collar for each pet. Contact the Customer Care Center orvisit our website to locate a retailer near you.Will the Wireless Fence keepother pets out of my yard? No. The Wireless Fence is only effective on pets who wear thereceiver collar.Is there a hand-held remotetrainer that will work with theWireless Fence receiver collar? No. You would need to purchase a separate Remote Training System.Contact the Customer Care Center or visit our website to locate a retailernear you.If I have a question about Contact the Customer Care Center or visit our web site.my Wireless Fence or needreplacement parts, where can Iget answers or service?Can I use the Wireless Fenceon an aggressive pet? We do not recommend using any electronic training devices on aggressivepets. If you are unsure if your dog is aggressive, please consult yourveterinarian or a certified trainer.Can I use the Wireless Fenceon a cat? The Wireless System can be used as long as the cat can comfortablywear the receiver collar.What happens if the powergoes out? The Wireless System is designed to recognize power outages and shutsdown without activating the receiver collar. However, if your pet is near theboundary zone during the power failure, he may receive a static correction.What can happen if I turnoff or unplug the fencetransmitter power? If your dog is wearing the receiver collar, he may receive an unintendedcorrection. Always remove your dog’s receiver collar before removingpower from the fence transmitter or before performing any fencetransmitter testing.What if I lose the clear plasticcover for the correction levelbutton? The clear plastic cover prohibits the static correction level fromaccidentally being changed and also helps keep the receiver waterproof.Contact the Customer Care Center for a replacement.If my pet leaves the pet area, Your pet will receive static correction as long as he is outside the pet area,how long will he be corrected?for up to 30 seconds. The receiver collar has a safety time-out to stopcorrecting and toning after 30 seconds until it is returned to the pet area.How often do I need to replace Battery life depends on how frequently your pet tests the boundarythe receiver collar battery?zone. The receiver indicator light acts as a low battery indicator, flashingevery 4 to 5 seconds when replacement is required. Typical battery lifelasts 1- 2 months.12 1 (866) 381-2785
FREQUENTLY ASKED QUESTIONSCan I place the receiver onanother collar? Yes. You may use any non-metallic collar. Make 2 holes in the collar toattach the receiver. Use the collar in the kit as a template to locate theholes on the new collar.Do I need to performmaintenance on myWireless Pet Fence? Check your pet’s neck daily for irritation from the contact points. Check the contact points on the receiver collar weekly to make sure theyare tight and clean. Check the fit of the receiver collar weekly. The receiver indicator light acts as a low battery indicator, flashing every 4to 5 seconds when replacement is required.How do I know the batteryin the receiver collar isstill working? Take the receiver collar off your pet and walk into the boundary zone. Thereceiver collar should tone. If not, replace the battery.Will vehicles, buildingsand landscape features(trees, shrubs, etc.) affectthe performance of theWireless Pet Fence? Yes. Placing the fence transmitter inside a metal building can reduce themaximum range of the Wireless System. Parking a vehicle within the pet area, can reduce the range of the systemand cause your pet to receive a static correction where it otherwise wouldnot if the vehicle was not there. Fixed large metal objects such as metal sheds can affect the signal byreducing the maximum range of the system at the location of the object.As a result, your pet may receive a static correction.What do I do if my pet’s neckbecomes red and irritated? This condition is due to the contact points irritating the skin. Discontinueuse of the receiver collar for a few days. If the condition persists beyond48 hours, see your veterinarian. Once the skin returns to normal, replacethe receiver collar and monitor the skin condition closely.Can I attach a leash to thereceiver collar? No. This can result in pulling the contact points too tightly against yourpet’s neck. Attach a leash to a separate, non-metallic collar positionedabove the receiver collar.Why does my receiver collarhave a tone-only mode? The tone-only mode can be used in training your pet to his boundary orfor well-trained pets that no longer require static correction.TROUBLESHOOTINGThe re
Important: You may need to move the transmitter several times before determining the final location. The fence transmitter is located at the exact center of the pet area. Place the fence transmitter: At least 2 ft. above the floor located on the ground floor of your home. In a dry, well ventilated, protected area.