Transcription
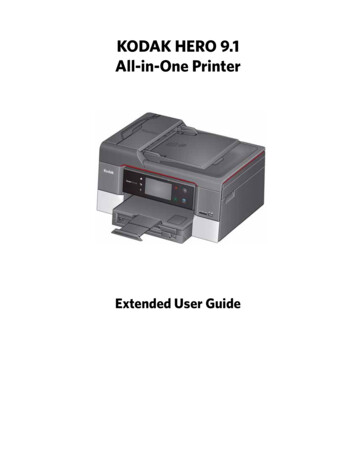
KODAK HERO 9.1All-in-One PrinterExtended User Guide
Eastman Kodak CompanyRochester, NY 14650 Eastman Kodak Company, 2011Kodak, EasyShare, Hero, and Perfect Touch are trademarks of Eastman Kodak Company.Specifications subject to change without notice.P/N 1K5928August 2011
Table of contents1 Printer OverviewComponents.1Control panel.2Using the LCD touch screen . 3Home Screen Menu . 3Home Screen Status Icons .4Home Center Software .6Ordering supplies.7Configuring printer settings .82 Networking Your PrinterConnecting to a wireless network .9Before you connect .9Connecting to a wireless network using the Wi-Fi Setup Wizard.10Setting up an IP Address. 13Viewing the network configuration. 14Printing the network configuration . 14Installing your printer on additional computers on the network. 15Connecting to another KODAK All-in-One Printer . 15Connecting to an Ethernet network . 16Adding a wireless network connection to a USB-connected computer. 17Changing from USB to a wireless connection . 17Changing from USB to an Ethernet connection . 183 Online Printer Management ToolAccessing the Online Printer Management Tool . 20Using the Online Printer Management Tool. 21Configuring printer settings . 21Changing the printer name . 22Adjusting fax settings.23Setting up Scan To Email . 25Setting up Scan To Network Folder . 31Adding a GOOGLE Cloud Print Account .35Adding a KODAK Email Print Account . 38Changing printer settings for copying and printing . 394 Handling PaperPaper types. 42Paper sizes. 43Envelope sizes.44Loading paper .44Loading paper in the main paper tray.44Loading the photo paper tray . 47www.kodak.com/go/aiosupporti
Table of contentsLoading envelopes. 49Loading originals .51Using the scanner glass .51Using the Automatic Document Feeder (ADF) .525 PrintingManually selecting paper trays.53Printing documents . 54Printing two-sided documents. 54Printing forms from the control panel.56Printing pictures.57Viewing pictures on a memory card or USB-connected device.57Printing from a memory card or USB-connected device.58Printing from a wireless device .65Transferring pictures to a computer.65Transferring pictures to a computer with WINDOWS OS.65Transferring pictures to a computer with MAC OS . 666 Mobile PrintingPrinting from an iPhone, iPad, or iPod Touch .67Printing from a BLACKBERRY Device .67Printing from an ANDROID OS Device. 687 CopyingLoading originals for copying. 69Copying a document. 69Using the default settings to copy a document. 69Adjusting the settings and copying a document. 70Changing the number of copies of a document .71Enlarging or reducing the size of a copy.71Darkening or lightening a copy .71Two-sided copying.72Manual two-sided copying .72Copying a photo.73Using the default settings to copy a photo .73Adjusting the settings and copying a photo. 74Changing the number of copies of a photo.76Enlarging or reducing the size of a copy of a photo.77Darkening or lightening a copy of a photo.788 ScanningBefore you begin scanning .79Changing the scan settings for scanning from the control panel . 80Loading originals for scanning.82Scanning from the control panel.82iiwww.kodak.com/go/aiosupport
Table of contentsScanning to a computer . 83Scanning to a memory card or USB flash drive. 85Scanning to email . 87Scanning to network folder . 88Scanning from the computer . 89Scanning multiple pictures simultaneously .90Scanning from the Online Printer Management Tool . 919 FaxingBefore you begin faxing. 92Connecting the printer for faxing . 92Entering fax sender information . 96Selecting fax settings. 97Working with the phonebook. 100Preparing a fax for transmission . 102Printing a fax cover page . 102Loading originals for faxing . 102Changing resolution, brightness, and color mode.103Sending a fax . 104Using the phonebook to send a fax. 104Using Quick Dial to send a fax . 104Using the numeric keypad to send a fax. 104Dialing a recently faxed number. 105Sending a fax from your computer. 105Receiving a fax . 106Receiving a fax automatically . 106Receiving a fax manually . 106Printing fax reports . 107Fax settings report. 107Fax confirmation page. 107Fax activity log. 108Canceling a fax . 10810 Maintaining Your PrinterGeneral care and cleaning . 109Cleaning the scanner glass and document backing. 110Replacing ink cartridges .112Replacing the printhead .115Updating the software and printer firmware.119Updating if your printer is connected to a computer with WINDOWS OS .119Updating if your printer is connected to a computer with MAC OS. 120Monitoring and adjusting printer performance . 120Checking ink levels . 120Checking paper levels.121www.kodak.com/go/aiosupportiii
Resetting factory defaults .12111 TroubleshootingBasic troubleshooting . 122Getting help on the Web .124Status lights. 125Power status light. 125Wi-Fi status light . 12512 Product and Safety SpecificationsFeatures and Specifications .126Print Performance .126Photo Printing Features.126Copy document features . 127Copy photo features . 127Scanning features . 127Main paper tray . 127Photo paper tray .128Output paper tray .128Paper types supported .128Paper sizes supported .128Ink cartridges .129Connectivity.129Software support .130Digital image sources .130Physical specifications .130Warranty .131System requirements .131Safety information . 132LCD touch screen safety . 133Ink cartridge safety . 133Regulatory Compliance.134FCC Statement.134Canadian Statements . 135European Compliance Statement . 135German compliance statement . 135REACH Article 33 Declarations. 136Waste Electrical and Electronic Equipment Labeling . 136ENERGY STAR Qualified. 136Warranty Information . 137Declaration of Conformity. 138ivwww.kodak.com/go/aiosupport
1Printer OverviewThis printer lets you print, copy, scan and fax pictures and documents. In addition,this printer supports networking, letting you access the printer over a wireless(Wi-Fi) or Ethernet 2121Control panel2Automatic Document Feeder (ADF) paper 13edge guides3ADF14 Output tray extender with paper stop4Power cord port155USB port16 Scanner lid6Line In phone port177Ethernet port18 Paper tray extender8Ext out phone port19 Paper tray9Duplexer20 Left paper-edge guides10 Access door1121Front USB portMemory card slotScanner glassFront paper-edge guidesPhoto paper trayPrinthead with ink cartridges installedwww.kodak.com/go/aiosupport1
Printer OverviewControl panel872162534FeatureDescription1LCD touch screenDisplays pictures, messages, and menus2Cancel buttonStops the current operation and returns to the previous menu, and closesthe Help screen3Power buttonTurns the printer on or off4Wi-Fi connectivityLEDWhen lit, signals that the printer is connected to a wireless (Wi-Fi)network; blinks when searching for an available Wi-Fi network5Start buttonBegins copying, scanning, printing, maintenance tasks, and file transfer6Help buttonDisplays context-sensitive help7Back buttonDisplays the previous screen or the next highest screen in the menuhierarchy8Home buttonDisplays the main menuwww.kodak.com/go/aiosupport
KODAK HERO 9.1 All-in-One PrinterUsing the LCD touch screenHome Screen MenuFeature IconDisplays.Copy Document settings and optionsCopy Photo settings and optionsView and Print Photos options andsettingsList of scan to options: Scan toComputer, Memory, USB Flash Drive,Email, and Network Folder. Touching ascan-to option displays settings forthat option.The list of forms that you can printfrom the control panel.Fax options and settingsNetwork settingswww.kodak.com/go/aiosupport3
Printer OverviewFeature IconDisplays.Printer settingsCloud Printing optionsMaintenance optionsIMPORTANT: Use only your finger to touch the screen; other objects can damage thesurface. To select a feature, touch the icon. To view the features, use the scroll bar:– Touch an arrow to scroll in that direction.– Touch the scroll bar to move to a different location.Home Screen Status IconsThree status icons appear on the Home Screen:Paper LevelsInk LevelsWi-Fi Status Touch the Paper or Ink Levels status icons to see information regarding thoseitems. Touch the Wi-Fi icon to open the Networking Menu.(back) to dismiss the screen. Touch OK or4www.kodak.com/go/aiosupport
KODAK HERO 9.1 All-in-One PrinterIf an item requires attention, the attention graphic appears on the correspondingstatus icon. For example, if the level of black ink is low, the attention graphic appearson the ink icon:Touch the icon to display instructions.Touch OK to return to the Home Screen.www.kodak.com/go/aiosupport5
Printer OverviewHome Center SoftwareKODAK Home Center Software is installed with your KODAK All-in-One PrinterSoftware, unless you choose otherwise. The Home Center icon will appear on yourdesktop.NOTE: You can choose to install the KODAK AiO Printer Software Essentials, whichinclude the drivers and Printer Tools only.On a computer with WINDOWS Operating System (OS), you can use Home CenterSoftware to: browse, crop, enhance, and edit picturesprint and scanmake 3D pictures (from picture pairs taken to create 3D pictures)print from videosend images to or print images from KODAK Gallerysend images to or print images from FACEBOOK Social Network, FLICKR,PHOTOBUCKET, PICASA, SMILEBOX Photo Management Systems, andGOOGLE Docsconfigure your printerinstall new network printersupgrade to the latest printer software and firmwareorder suppliesaccess the KODAK Tips and Projects Centeraccess the KODAK Online Printer Management ToolOn a computer with MAC OS, you can use Home Center Software to: 6scanconfigure your printerupgrade to the latest printer software and firmwareorder suppliessee the status of your printeraccess the KODAK Online Printer Management Toolwww.kodak.com/go/aiosupport
KODAK HERO 9.1 All-in-One PrinterOrdering suppliesYou can order ink cartridges, paper, and accessories online. An Internet connectionis required.To order supplies directly from Home Center Software:1. Open Home Center Software.2. Select Order Supplies (on a computer with WINDOWS OS) or select the Toolstab, then click Order Supplies (on a computer with MAC OS).3. Select the item(s) you want to buy, then follow the on-screen instructions.To order supplies from the Web: Ink: www.kodak.com/go/printingsupplies Paper: pport7
Printer OverviewConfiguring printer settingsNOTE: When you first power on the printer, the LCD prompts you to select theLanguage and Country/Region.To set or change basic printer settings:1. Press.2. Touch , then touch Printer Settings.3. Touch the following settings: Date and Time– Touchorto select Year, Month, Day, Hour, or Minute.Touch each setting to change the values; touchwhen you are done.NOTE: You can also synchronize the printer date and time to your computer usingHome Center Software. Button Sounds– Touch On, Off, Soft, or Loud to set. Time to Low PowerTo conserve energy, you can set your printer to go into a low-power mode aftera set amount of time.– Touch the time to low power (select from 1 to 4 hours in 0.5 hourincrements). After the time to low power, the printer enters a low-power(sleep) mode. Tagged Images Printing– Touch On or Off to set. Langu
access the KODAK Tips and Projects Center access the KODAK Online Printer Management Tool On a computer with MAC OS, you can use Home Center Software to: scan retn i r pruo yerug i fn co upgrade to the latest printer software and firmware order supplies see the status of your printer access the KODAK Online Printer .
