Transcription
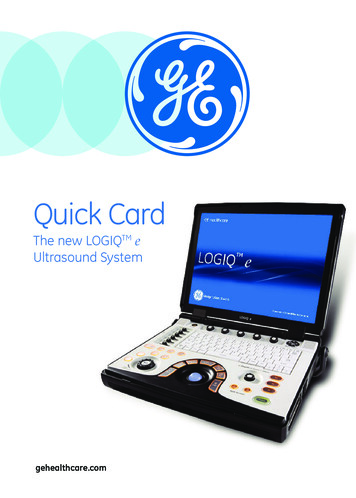
Quick CardThe new LOGIQTM eUltrasound Systemgehealthcare.com
Control Panel117161821575361481041312911LOGIQ e Quick CardThe Quick Card is a quick reference and not does not replace the User Manual. Please refer to the Basic User Manual for complete safetyand operation information.2
1. Power12. Freeze2. Time Gain Compensation (TGC)13. Programmable Print/StoreKeys3. Patient4. Mode/Gain/Auto Optimize Keys: M-Mode (M) Pulsed Wave DopplerMode (Doppler) Color Flow Mode (Color) B-Mode (B)14. Utility5. Exam17. Programmable Soft MenuRotary Dials6. Needle/Power DopplerImaging (PDI)7. Follow Up Tool8. Report9. Imaging/Measurement Key: Cursor Clear Body Pattern Measure M/D Cursor Scan Area Enter10. Depth/Zoom/Ellipse11. Start/Stop: Split Screen Left/Right Easy3D Controls LOGIQ View315. Alphanumeric Keyboard: Use the Keyboard to enterpatient information andannotations16. Menu Select Keys18. Function keys: Help Arrow Eject ReverseProgrammable Function keys F5 F6 F7 F8 F9 F10 F11 F12LOGIQ e Quick CardThe Quick Card is a quick reference and not does not replace the User Manual. Please refer to the Basic User Manual for complete safetyand operation information.
ScanningConnecting the Probe1. Handling the probe carefully, slide the connector straight into the port.2. Lift the probe latch into place.Entering Patient Data1. Press the Patient key [3].2. Enter the patient ID and Name, a patient ID must be enteredin order to store images to the system—the system canbe programmed to automatically generate Patient ID(Utility Connectivity Automatic generation of patient ID Save).3. Exit the patient page by selecting Exit or pressing the B [4]or Freeze [12] keys.Selecting a Preset1. Press the Exam key [5].2. Use the pointer arrow to select the exam type that you willbe performing.3. Press the Enter key [9]. The system will go to the scan screen afterthe preset is selected.Measurements1. Press the Measure key [9]. A caliper will appear on the screen.2. Place the caliper in the appropriate position and press the Enter key.3. A second caliper will appear.LOGIQ e Quick CardThe Quick Card is a quick reference and not does not replace the User Manual. Please refer to the Basic User Manual for complete safetyand operation information.4
4. Place the second caliper in the appropriate position and press Enter. A measurement box appears with the generic measurementthat you have just completed. If you want the measurementto be labeled with the name of the anatomy being scanned,begin the measurement process by pressing the measurementkey, choosing the anatomy and location from the list providedon the left hand side or bottom of the image monitor.5. A new caliper may appear for the next measurement. Ifmeasurements are complete, press the Clear key [9] or Freezeto exit the measurement function.Annotating an Image1. To add text to an image:a. Type the desired word(s).b. B egin typing on the keyboard; if a word appears, press theTab key on the keyboard to type the offered word (type andtab feature).c. Press the comment key (space bar) and type the desired word(s).d. Press the comment key and select a word from the Commentslist with the pointer arrow and press the Enter key.2. To set the text on the screen, place the cursor in the desired location,type the desired word(s) and press Enter. Set text is yellow.3. To edit or move set text, reselect the text with the cursor. Editabletext is green.5LOGIQ e Quick CardThe Quick Card is a quick reference and not does not replace the User Manual. Please refer to the Basic User Manual for complete safetyand operation information.
Color Flow3. Toggle between (L) and (R) to obtain the desired imagesand then press Freeze.1. Press the Color key [4].4. Press both (L) and (R) keys at the same time; the image willbe live on both sides of the screen.2. The color box appears over the B-Mode image.3. Use the trackball to move the color box.Print/Store Keys (Default Settings)4. Press Scan Area key [9] once to size the color box and press oncemore to move the color box.1. Press P1 to store images to the hard drive.2. Press P2 to print images on the thermal paper printer.Power Doppler Imaging3. Press P3 to store images directly to a USB drive/memorystick or network.5. Press the PDI key [6].6. The color box appears over the B-Mode image.To End the Exam7. Use the trackball to move the color box.1. Press the Patient key [3].8. Press the Scan Area key once to size the color box and press oncemore to move the color box.2. Select New Patient.3. Select Store All from the Unsaved Exam Data menu.Pulsed Wave Doppler4. You are ready to begin the next exam.1. Press the Doppler key [4].2. The Doppler gate and B-Mode image appear above the Pulsed WaveDoppler spectral display.3. Use the trackball to move the Doppler gate.4. Press Freeze and Measure to complete calculations.Split Screen1. Press the Start (L) key [11] to display the left side of the imageas active.2. Press the Stop (R) key [11]. The left side of the screen will be frozenand the right side will be active.LOGIQ e Quick CardThe Quick Card is a quick reference and not does not replace the User Manual. Please refer to the Basic User Manual for complete safetyand operation information.67LOGIQ e Quick CardThe Quick Card is a quick reference and not does not replace the User Manual. Please refer to the Basic User Manual for complete safetyand operation information.
New FeaturesPatient Follow-up Tool1. Press the Follow Up Tool key [7].2. Select an existing patient (move the trackball, point the arrowto the name and press Enter).3. Select New Exam (at the bottom of the image monitor) and thenFollow Up Exam (at the bottom of the image monitor).4. Once the Follow Up Tool is activated, all image settings, bodypatterns and comments are transferred from the previous exam tothe current exam.5. S elect the image from the clipboard that you would like to use for thefollow up exam.6. T he image will go into widescreen format. By default, the image fromthe previous exam appears on the Left side of the screen. The imagefrom active exam is displayed on the Right side of the screen.7. Scan the anatomy of interest.8. Freeze and press P1 to store the image to the Hard Drive. The systemwill store the “side by side” as it appears on the image monitor.9. Press the R split screen key. A single image (the image from thecurrent exam is displayed) Press P1 to store to the Hard Drive.10. Complete the exam by pressing the Patient key and then New Patientand Store All.LOGIQ e Quick CardThe Quick Card is a quick reference and not does not replace the User Manual. Please refer to the Basic User Manual for complete safetyand operation information.8
Color and PDI Quantification(Flow QA is only available in cine mode).1. Scan the anatomy of interest. Activate Color or PDI.2. Store a cine-loop to the Hard Drive.3. To activate the Quantification feature, recall the cine-loopand allow it to play on the image monitor.4. Select Q Analysis from the Programmable Soft Key Rotary Dial (17).5. The program will “run” and display the overall analysis on the screen.While the blood flow is being analyzed the following message willbe displayed at the bottom of the image monitor: “Cine computationin progress! Please wait.”6. Use the Frame By Frame rotary dial to scroll through the imageto select the frame that will be assessed.7. Select a region of interest by using the spline ROI, elliptical ROI or thefreehand ROI. Use the Trackball to select the icon.Default ROI style can be changed in Utilities: Utility System System Imaging8. To change the size of the Elliptical ROI, place cursor within thesample area and turn the Set Sample Area rotary dial. A pop-upbox will appear allowing the size of the sample to be changed.9. Repeat steps [6] and [7] for multiple samples.9LOGIQ e Quick CardThe Quick Card is a quick reference and not does not replace the User Manual. Please refer to the Basic User Manual for complete safetyand operation information.
It is recommended to take short cine-loops of 5 seconds(2-3 heart cycles). Longer loops will slow processing time.StatisticsFreehand ROISpline ROIElliptical ROI3. For the Menu Select key, select the features from the options listedunder Secondary Menu.Simplicity creates efficiency. Customize to your needs.This feature allows you to modify the viewable Soft Key Rotary Dial andMenu Select Key options to select the features that you want on yourdisplay for each mode.4. Repeat the steps above for each of the imaging modes as necessary.Image ManagementExport1. Press the Utility button and select the User Interface tab usingthe Trackball.(Save patient exams in a DICOM format to be viewed on the LOGIQ eat a later date or on a PC with a DICOM viewer).2. For the Soft Key Rotary Dial, select the mode, the # of rows to bevisible at the bottom of the image monitor while scanning, and thefunction for each dial.1. Insert blank disc (CD-R or DVD-R) into Burner or USB drive (*)into USB port.2. Press the Patient key [3] and select Export.LOGIQ e Quick CardThe Quick Card is a quick reference and not does not replace the User Manual. Please refer to the Basic User Manual for complete safetyand operation information.1011LOGIQ e Quick CardThe Quick Card is a quick reference and not does not replace the User Manual. Please refer to the Basic User Manual for complete safetyand operation information.
3. Select the Data Transfer option from the upper left menu.4. Be certain that “From” states Local Archive-Int HD and “To” has thecorrect storage device selected. The disc will format automatically.5. Choose patient(s) from the list and select “Transfer”. (To selectmultiple patients, select the first patient by pointing to it andpress Enter. Hold down the shift key, select the last desiredpatient in the group and press Enter. The entire block of patientsshould be highlighted).6.4. Be certain that “From” has the correct storage device selectedand “To” states Local Archive-Int HD.5. Choose patient(s) from the list and select “Transfer.”6. When the exam(s) have successfully transferred to the systemHard Drive, “Successfully Copied” will flash across the bottomof the screen and exams will be marked with a red check mark.7. Press the Eject button (located on the top row of the keyboard).8. Follow the prompts.When the exam(s) have been transferred to the desired location,“Successfully Copied” will flash across the bottom of the screenand exams that have been transferred will be marked with a redcheck mark.MPEGvue(To save entire patient exams that can be viewed on a PC but cannotbe returned to the ultrasound system).7. Press the Eject button (located on the top row of the keyboard).1. Insert blank disc (CD-R or DVD-R) into Burner or USB drive (*)into USB port.8. Follow the prompts.Import2. Press the Patient key [3].(Return the exported exams from the disc or USB driveto the ultrasound system).3. Select the Data Transfer option from the upper left menu.4. Select MPEGvue.1. Place appropriate CD-R or DVD-R into Burner or USB drive (*)into USB port.5. Be certain that “From” states Local Archive- Int HD and “To” hasthe correct storage device selected.2. Press the Patient key [3] and select Import.3. Select the Data Transfer option from the upper left menu.*All manufacturer programs should be removed from USB drive priorto use in an ultrasound system.LOGIQ e Quick CardThe Quick Card is a quick reference and not does not replace the User Manual. Please refer to the Basic User Manual for complete safetyand operation information.*All manufacturer programs should be removed from USB drive priorto use in an ultrasound system.1213LOGIQ e Quick CardThe Quick Card is a quick reference and not does not replace the User Manual. Please refer to the Basic User Manual for complete safetyand operation information.
6. Disc will format automatically.4. Choose patient(s) from the list and select “Transfer.” (To selectmultiple patients, select the first patient by pointing to it and pressEnter. Hold down the shift key, select the last desired patient inthe group and press Enter. The entire block of patients should behighlighted).7. Choose patient(s) from the list and select “Transfer.” (To selectmultiple patients, select the first patient by pointing to it andpress Enter. Hold down the shift key, select the last desiredpatient in the group and press Enter. The entire block of patientsshould be highlighted).8.5. When the exam(s) have been transferred to the desiredlocation,“Successfully Copied” will flash across the bottom of thescreen and exams that have been transferred will be marked with ared check mark.When the exam(s) have been transferred to the desired location,“Successfully Copied” will flash across the bottom of the screenand exams that have been transferred will be marked with a redcheck mark.To check Quick Save Storage Location: Utility Connectivity Service.Select “My Computer.” Select USB Quick Save. Set the destination to beUSB key or Network Storage depending on where files are to be stored.9. Press the Eject button (located on the top row of the keyboard).10. Follow the prompts.Quick Save(To save multiple AVI files and JPEG images directly to USB driveor Network Storage). Single patient or multiple patients may be selectedusing Quick Save.1. Press the Patient key [3].2. Select the Data Transfer option from the upper left menu.3. Select Quick Save.*All manufacturer programs should be removed from USB drive priorto use in an ultrasound system.LOGIQ e Quick CardThe Quick Card is a quick reference and not does not replace the User Manual. Please refer to the Basic User Manual for complete safetyand operation information.1415LOGIQ e Quick CardThe Quick Card is a quick reference and not does not replace the User Manual. Please refer to the Basic User Manual for complete safetyand operation information.
B-Mode OptimizationFocusIncreases or decreases the number of focal zones or moves the focalzone(s) to the area of interest. Multiple focal zones may provide betterresolution but can slow the frame rate. Ensure that focal zones arecentered to the anatomy of interest.Benefit: Optimizes the image by increasing resolution for specific areawithin the focal zone region.Range FocusAvailable on C1-5-RS, 3Sc-RS, and 6S-RS probes. Provides a focal zonein the near field.Benefit: Helps improve near field imaging, decreases vessel fill-in,increases contrast and detail resolution and helps provide optimizedimaging.Auto OptimizeOptimizes the image based on a specific region of interest or anatomywithin the B-Mode image.Benefit: Automatically optimizes contrast resolution of the imagebased on specific anatomy.LOGIQ e Quick CardThe Quick Card is a quick reference and not does not replace the User Manual. Please refer to the Basic User Manual for complete safetyand operation information.16
Gray MapsVaries the appearance of the shades of gray from black to white. GrayMaps gradually change from the least amount of contrast (or softestappearing image) to the greatest amount of contrast (most black andwhite image). Clear Maps provide a more transparent appearance.If you change the gray map you may need to change dynamic range,gain, etc., to obtain the image appearance that you want.Benefit: Optimizes the grayscale of the anatomy being visualized.CrossXBeamTMCombines three or more frames from different angles intoa single frame.Helps improve border definition, continuous boundaries andinterfaces and reduce speckle.Speckle Reduction ImagingAn embedded, adapted algorithm to help reduce the unwanted effectsof speckle (noise) in the ultrasound image.Benefit: Helps smooth the image and reduce “noise.”17LOGIQ e Quick CardThe Quick Card is a quick reference and not does not replace the User Manual. Please refer to the Basic User Manual for complete safetyand operation information.
Weekly CleaningThe system requires weekly cleaning to function properly.Turn off system power before cleaning any part of the system.If possible, disconnect the power source.Note: Failure to perform required cleaning may result in unnecessaryservice calls.System CareMoisten a soft, non-abrasive folded cloth and wipe down the systemcabinet on all sides.Note: Do not spray any liquid directly into the unit.LCD MonitorUse a soft, folded cloth to gently wipe the monitor face.Do NOT use a glass cleaner that has a hydrocarbon base (such asBenzene, Methyl Alcohol or Methyl Ethyl Ketone) on monitors withthe filter (anti-glare screen).Hard rubbing will also damage the filter.Note: When cleaning the screen, make sure not to scratch the LCD.Operator Controls Moisten a soft, non-abrasive folded cloth with a mild, generalpurpose, non-abrasive soap and water solution and wipe downthe operator control panel. Use a cotton swab to clean around the keys or controls.Use a toothpick to remove solids between keys and controls.LOGIQ e Quick CardThe Quick Card is a quick reference and not does not replace the User Manual. Please refer to the Basic User Manual for complete safetyand operation information.18
Note: When cleaning the operator control panel, make sure notto spill or spray any liquid on the controls, into the system cabinet,or in the probe connection receptacle.Note: In case of SARS, please see User Manual for completerecommended cleaning recommendations.Note: DO NOT use T-Spray or Sani-Wipes on the operator control panel.Printer Wipe the external surfaces of the unit with a soft, clean, dry cloth. Remove stubborn stains with a cloth lightly dampened with a milddetergent solution.Note: Never use strong solvents, such as a thinner or benzene, orabrasive cleaners because they will damage the cabinet. No furthermaintenance, such as lubrication, is needed.To clean the surface of the print head: Run the cleaning sheet(provided with the printer) through the printer.Footswitch Moisten a soft, non-abrasive folded cloth with a mild, generalpurpose, non-abrasive soap and water solution. Wipe the external surfaces of the unit then dry with a soft, clean cloth.Transducer CleaningPlease refer to the cleaning instructions found in the transducer box,or the Basic User Manual, or visit the website ducts/probe care.html19LOGIQ e Quick CardThe Quick Card is a quick reference and not does not replace the User Manual. Please refer to the Basic User Manual for complete safetyand operation information.
2014 General Electric Company — All rights reserved.General Electric Company reserves the right to make changesin specifications and features shown herein, or discontinuethe product described at any time without notice or obligation.GE, GE Monogram, LOGIQ, and CrossXBeam are trademarksof General Electric Company.DICOM is a trademark of the National Electrical ManufacturersAssociation.GE Medical Systems Ultrasound & Primary Care Diagnostics, LLC,a General Electric Company, doing business as GE Healthcare.EuropeGE HealthcareBeethovenstr. 239D - 42655 SolingenT 49 212 2802 0F 49 212 2802 28AsiaGE Healthcare ClinicalSystems ASIA1105-1108 Maxdo Center8 XingYi Road, Shanghai200336T 86 21 5257 4640F 86 21 5208 0582For more information contact your GE Representative at888 526 5144 or visit us at www.gehealthcare.com/ultrasoundGE Healthcare9900 Innovation DriveWauwatosa, WI 53226U.S.A.www.gehealthcare.comDOC1538814April 2014
F8 F9 F10 F11 F12 . 4 LOGIQ e Quick Card . (Save patient exams in a DICOM format to be viewed on the LOGIQ e at a later date or on a PC with a DICOM viewer). 1. Insert blank disc (CD-R or DVD-R) into Burner or USB drive (*) into USB port. 2. Press the Patient key [3] and select Export.