Transcription
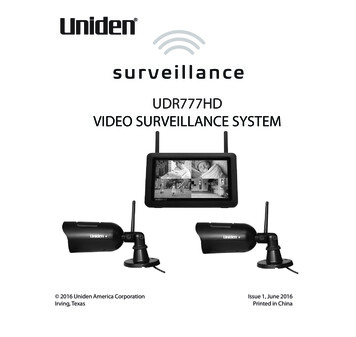
UDR777HDVIDEO SURVEILLANCE SYSTEM 2016 Uniden America CorporationIrving, TexasIssue 1, June 2016Printed in China
CUSTOMER CAREAt Uniden , we care about you!If you need assistance, please do NOT return this product to your place of purchase.Quickly find answers to your questions by:1. Reading this owner’s manual.2. Visiting our customer support website at www.uniden.com.
CONTENTSCustomer Care.2GETTING STARTED.5FEATURE LIST.5WHAT’S INCLUDED.6GETTING TO KNOW THE UDR777HD SYSTEM.7HARDWARE.7UDR777HD Monitor.7UDR777HD Camera (UDRC57HD).8SET UP THE HARDWARE.9Monitor.9Camera.9install Cameras. 10MONITOR SCREEN. 10UDR777HD OPERATION. 12Live View Screen. 13UDR777HD Live Screen Icons. 13UDR777HD SCREEN DESCRIPTIONS. 17OVERVIEW. 17PLAYBACK. 17ALARM. 19BRIGHTNESS. 19GENERAL SETTINGS. 20Camera Setup Screen. 22Recording Setup Screen. 25System Settings Screen. 28Motion Detection Settings Screen. 33Network Setup Screen. 35Firmware Upgrade Screen. 38ADDING NEW CAMERAS. 41Pair Cameras. 42UDR777HD BASIC OPERATION. 42MAINTAINING YOUR SYSTEM. 45UPGRADING YOUR UDR777HD MONITOR FIRMWARE. 45TAKING CARE OF YOUR HARDWARE. 45Monitor. 45Cameras. 45MANAGING RECORDED FILES. 46Copying Files from the SD Card to your Computer. 46SOLVING PROBLEMS. 47INTERFERENCE. 48SPECIFICATIONS. 50Compliance Information. 54RF Exposure Information. 54FCC Part 15 Compliance. 54IC Compliance. 54One-Year Limited Warranty. 55UDR777HD Operation Basics. 40MANUALLY RECORDING LIVE VIDEO (NOT SCHEDULED). 40PLAYING BACK RECORDED VIDEO. 40Uniden surveillance products are not manufactured and/or sold with the intent to be used for illegal purposes. Uniden expects consumer’s use of theseproducts to be in compliance with all local, state and federal law. For further information on video surveillance and audio recording legal requirements,please consult your local, state and federal law. 2016. All rights allowed by law are hereby reserved.
GETTING STARTEDFEATURE LIST 850nm IR LED distance up to 10m 7” TFT LCD Digital panel (1024 x 600) Two-way audio Scan function PIR- or motion detection-triggered recording Manual recording Touch screen operation Schedule recordings from Sunday to Saturday SD card external storage, up to128GB supported (8GB Class 4 included) One LCD monitor can pair four cameras Monitor : 5v DC 2A Power adaptor ( /-5%) Camera: 9v DC 600mA ( /-10%) RF range: 984 feet [300 meters (Line of sight)] New recording indicator/ Memory card full indicator Quad view PIR trigger and Video motion detect alert Night vision up to 40 feet Direct connection to router for remote access to live and recorded video No monthly fee5
WHAT’S INCLUDEDYou should have the following items:(1) UDR777HD Monitor(2) 9V 600mA Power Adapter(Camera)(2) Camera with stand(2) Antenna (may beattached to camera)Not Shown: (1) 5V 2A Power Adapter(Monitor) (1) Ethernet (RJ45) Cable 8G SD Card (1) 3.7V 2000mA Battery(Monitor) Mounting Hardware (2 sets) Quick Start GuideImages may vary slightlyfrom product.If any items are missing or damaged, visit our website at www.uniden.com for assistance.Never use damaged products!6
GETTING TO KNOW THE UDR777HD SYSTEMHARDWAREUDR777HD MONITOR1433111221356147158910No. What it is1LCD Screen: Displays video from the camera(s) or system operation interface.2Microphone34Wireless AntennaPower Button/ Scan Button: Press and hold about 5 seconds to turn the receiver on/off.Press and release while the unit is powered on to turn Scan mode on/off.5Speaker67Power Port: Connert to a local power outlet using the included power adapter.Ethernet Port (RJ45): Connect the receiver to your router using the included Ethernet cableto enable smartphone / tablet connectivity.Reset: Using a paper clip or other thin object, push the reset button to restore the system toits default settings.Receiver Stand897
No.101112131415What it isBattery CoverVolume UpVolume DownTalk. Press and hold to talk through the camera. Release to listen for a response.SD Card Slot. Insert SD card for recording videos.Blue LEDFlashing - Battery power is lowUDR777HD CAMERA (UDRC57HD)128345697No.1234568What it isCamera Antenna: Sends and receiveds signals to/from the monitor.IR LEDs. Infrared LEDs provide viewing in low/ no light conditions.Camera Lens: Catches the video in front of the lens and transmits video from camera tomonitor.Light Sensor: Sense brightness for changing between daytime and nighttime visionMicrophone: Transmit audio to monitor.Pair Button: The pair button is located on the front of the camera. It is used to pair thecamera with monitor.
No.789What it isPIR Sensor: Detects motion in front of the lens and emits detection signal to transmitter.Speaker: Produces the sound transmitted from the monitor.Adjustment screws: Adjusts the camera up/down and clockwise/counterclockwise.SET UP THE HARDWAREMONITOR1. Flip out the stand on the back of the monitor and position the antennas.2. Connect the 5V AC adapter to the power input on the rear of the monitor. Connect the otherend of the adapter to a 120 volt AC (standard indoor) power outlet.The monitor comes with a partial charge. Plug it in and let it charge for a full 8 - 9 hoursbefore using it.3. Press and hold the POWER button on the top of the monitor for 3 - 4 seconds to power it up.4. The monitor displays the Uniden Guardian screen for a few seconds and then transitions to theLIVE view.The screen remains dark until the cameras are powered up.CAMERAGeneralThe UDR777HD cameras included with your monitor are weatherproof and have an IP65rating. Water can be sprayed on them and they will still work; however, the cameras cannot besubmerged.Although the cameras can be exposed directly to the rain, it is recommended that, if they are usedoutdoors, they be mounted under some type of cover like a patio overhang or eave. As rainwaterdrops start to dry on the camera glass, it can create spots that will reflect the light from the infraredLEDs used for night vision, thus causing lower quality video.Also, as dust, grime, and cobwebs accumulate on the camera glass, they can reflect light from theinfrared LED and might lower video quality. Periodically clean the lens glass with a soft cloth.9
Placement ConsiderationsConsider the following when placing cameras: The clearest line-of-sight between the camera and monitor is best.——Walls, especially brick and concrete, shorten the transmission distance.——Placement next to windows allows better transmission. Optimized motion detection range is 6 - 18 feet for the camera. The farther away an object is, theless accurate the motion detection. Avoid having a direct light source in the view of the camera, including street lights, ceiling orfloor lamps, spotlights in the driveway, etc. Rainfall, pool water ripples/reflections, tree/shrub leaves blowing in the wind - and the shadowsthey create - can generate motion detection false alarms.INSTALL CAMERASWhen you are positioning the camera, bring the monitor along; it’s much easier to get the camerainto the right position when you have the display handy.The monitor’s battery will last about 2 hours on its own.1. Install the antennas (if needed), position the camera where you want it, plug it into power, andcheck video on the monitor. Move the camera if the view is not what you want.2. Hold the base of the camera stand where you want to mount it and mark the location of thescrew holes.3. Use the included screws and anchors to attach the base to the wall or ceiling.4. Tug gently on the stand to make sure it is securely in place.MONITOR SCREENThe UDR777HD monitor’s screen has 3 main parts: 10Live View area. The main screen area displays live video from the camera(s).
Pop Out Menu Tab. Tap this tab to display 4 menus that let you manage the UDR777HD system.See page 17 for details. Icon bars. Icons display on the top and bottom of the monitor screen. See page 13 for icon details.Viewing ModesThe Live View area displays live video from the cameras. Each camera can display in its own sectionof the screen or on the full screen. The number of cameras that display depends on how manycameras are turned on (see page 23).There are 4 viewing modes: Multi-Channel mode (Dual or Quad).If you have 2 cameras turned on, video displays in Dual mode.If you have 3 or 4 cameras cameras turned on, video displays in Quad mode.DUAL MODECamera 1QUAD MODECamera 2Camera 3Camera 4Camera 205/13/2016 10:52:13 AM Camera 105/13/2016 10:52:13 AMSingle Channel mode displays one camera at a time on full screen. From Dual or Quad channelmode, tap the center of a channel’s screen to display that channel in full screen. Press tochange between the channels. Tap the center of the image to return to the previous mode.Channel Cycling ModesThere are two ways to cycle between channels - Scan and Auto Sequence.11
With Scan mode, the monitor’s screen and speakers are off until a camera detects motion. Thatcamera then displays at full screen (sound and video on) until there has been no motion for 15seconds. After that, the monitor screen turns off again. Quickly press and release POWER to turnScan mode on and off.In Auto Sequence mode, each channel displays automatically in sequence in full screen. Access thismode from Single channel mode. Tap to turn on Auto Sequence mode; SEQ displays. Tap SEQ toturn it off and return to Dual mode.Single channel modeQuickly press and releasePOWER button.(Scan mode ON)Scan modeQuickly press and releasePOWER button.(Scan mode OFF)Sequence mode(SEQ displays)Tap SEQ.Dual/Quad channel modeQuickly press and releasePOWER button.(Scan mode ON)Scan modeQuickly press and releasePOWER button.(Scan mode OFF)Dual/Quad channel modeTap center of channel screen toenter single channel mode.Dual/Quad channel modeUDR777HD OPERATIONYour UDR777HD monitor operates through a series of screens that let you choose groups ofoperations. For example, when you tap PLAYBACK in the pop-up menus, you can view recordedfiles. Tapping GENERAL SETTINGS lets you set up how your system will operate (i.e., camera setup,recording schedule, motion detection sensitivity, etc.).12
LIVE VIEW SCREENThe Live View screen is the monitor’s main screen that displays video from your camera(s). You canhave the system display a single camera or you can set the screen to display all of them. You canalso set the screen to cycle between all live video feeds. Tap theicon to change the Live screenvideo displays.UDR777HD LIVE SCREEN ICONSDifferent icons display on the monitor screen depending on what is going on with your cameras.This image shows an example of what could be on your screen (the video image is removed tomake it easier to see the icons). A table follows of possible icons and their definitions.Live Screen Icon ExampleSD CardIndicatorRecordingIndicatorSD CardMicrophone OverwriteSignalStrengthCameraNumberPowerLevelNew RecordIndicatorPop-UpMenu TabNetworkConnectionStatusDisplays if newdownloadavailableChangeChannels05/13/2016 10:52:13 AMMotion RecordingIndicatorDate andTimeZoomVolumeNOTE: Icons on the screen display in BLUE. Icons that display will varyaccording to system configuration.13
What the Icons MeanUDR777HD IconSIGNAL INDICATORSD CARDWhat it does Shows how strong the camera’s signal is. Signal ranges from 4 bars down to0 bars (out of range).This graphic displays if an SD card is inserted into the monitor.If blue, recording space is available.If red, the SD card is full.Tap this icon to view recorded files.NEW RECORDINDICATORNew recordings are saved on the SD card.RECORDINGINDICATORNETWORK STATUSINDICATORTIME STAMPSD CARDOVERWRITE14When this icon flashes red, it indicates that recording is in progress. Green - System is connected to the internet and the monitor is connectedwith internet mode. Yellow - System is connected to internet and the monitor is connected withintranet mode. Red - Connection has failed or system is not connected to a network.Current date/time in month/day/year, hour/minute/second format.Displays if the SD card is allowed to overwrite files when it is full. (See page15)
UDR777HD IconCHANNELINDICATORBATTERY INDICATORZOOM INDICATORVOLUME INDICATORTALK BACKINDICATORWhat it doesDisplays the current channel number you are currently viewing. If viewingmultiple cameras at once, the camera indicator will appear above each videodisplay.Indicates the LCD monitor’s battery life: Flashing Red - Low battery Blue - Full battery Flashing Blue - ChargingWhen you tap this icon on the screen, the monitor breaks the screen imageinto 5 areas. Tap the area you want to see in Zoom. That area displays in 2Xsize and the magnifying glass icon changes to the arrows icon (). Tapthe arrows icon to exit Zoom mode.The Volume Indicator displays when you tap or to raise or lower thevolume while in single channel display. It indicates current audio volume.displays when the volume is off (mute).Displays when TALK is pressed. Press and hold TALK on the side of themonitor to talk back through the camera. Release TALK to wait for a reply.NEW DOWLOADDisplays if new firmware is available.SEQUENCEINDICATORDisplays when the monitor is in auto switch mode; it will change channelsautomatically.15
UDR777HD IconWhat it doesCHANGE CHANNELTap this icon to manually change channels. See page 11.MOTION RECORDINGINDICATORIndicates motion detection status. Blue - Automatic recording OFF. Press BLUE icon to record. Icon turnsRED. Red - Automatic recording ON. Press RED icon to stop recording. Iconturns BLUE.POP-UP MENU TABTap to access the pop up menu system.16
UDR777HD SCREEN DESCRIPTIONSOVERVIEWThis section describes the UDR777HD pop-up menu screens in detail. These pop-up menus enableyou to: Play back recorded video files Set alarms Set the brightness level for each camera connected (single channel display only) Set up cameras for recording, motion detection, and other system and network requirements.Tapand the pop-up menus display.PLAYBACKManage recorded files with this screen. You can see what recorded files you have, play them, anddelete them.1. Tap. The following screen displays.17
2. Days that are highlighted have recorded files. Tap the day you want to review and a list ofrecordings for that day displays.3. Tap the record you want and it plays, with a control bar across the bottom of the rse18PreviousRecordDeleteRecord
4. When the file finishes, the monitor displays the Recording File List screen again.5. Tap theicon to delete the file if desired.ALARMWhen motion triggers the camera to begin recording, the monitor sounds an alarm tone. Thisscreen lets you determine how loud that tone will be.1. Tap. The following screen displays.2. Tap or - to increase or decrease the alarm volume. Tap when you are finished.BRIGHTNESSThis feature allows you to set each camera’s brightness level from single camera mode.1. Tap. The following screen displays.19
2. Tap or - to increase or decrease the selected camera’s brightness. Tap when you arefinished.GENERAL SETTINGSThe General Settings screen contains 6 subsections, each of which may contain sub-screens Thesesub-screens let you set features about your system. You can turn cameras on and off, establisha specific schedule for specific cameras to record, set the date and time, and motion detectionsensitivity, among other features. The rest of this section provides details using these screens.Tap the following icons as theyappear on the screens: 20This screen should display:
Main ScreenCamera Setup(see page 22)Sub-ScreensWhat it DoesPairing (see page 22) This system comes with cameras already paired. UsePairing to assign these cameras to different channelsor to pair additional new cameras to the monitor.ON/OFFMakes the cameras visible to the monitor.(see page 23)ResolutionAdjusts the video quality of each camera.(see page 24)RecordingDurationSet the length of time the camera records once motionSetup(see page 26)sensitivity tiggers the camera to record. Choices are(see page 22)15 seconds, 30 seconds, or 1 minute (Default - 15seconds)Schedule Recording Set up a schedule for pre-determined recording times(see page 26)and lengths.File OverwriteOverwrites the oldest recorded data on the SD card(see page 22)once the card is full.Audio On/OffTurns microphones on or off for each camera.System Settings Date & Time Time Setting. Set the current time (includingDaylight Savings Time).(see page 28)(see page 29) Time Zone. Set the time zone for your UDR777HDsystem.Time Zone Set the time zone for your UDR777HD system.(see page 30) Enable/Disable Daylight Savings TimeLanguageChanges language setting for the monitor.(see page 31)Default SettingsRestores the UDR777HD to default settings.(see page 22)Format SD CardReformats the SD card and deletes all existing data.(see page 32)InformationDisplays firmware information for the monitor and(see page 32)each camera.21
Main ScreenMotionDetectionSettings(see page 23)Network Setup(see page 23)FirmwareUpgrade(see page 23)Sub-ScreensWhat it DoesA single screen lets you set motion detection sensitivity for each camera.It also lets you determine which viewing areas for each camera should bemasked from motion detection.Advanced SetupSet up Dynamic or Static IP address(see page 35)Reset PasswordReset U Guard app password to the default (000000).(see page 36)InformationDisplays information about your network and the(see page 37)monitor’s unique UID number.Lets you select how you want to upgrade your firmware (from SD card orfrom server).CAMERA SETUP SCREENThe Camera Setup screen lets you: Pair cameras Turn cameras on and off Adjust the resolutionPairingYour cameras are paired to the monitor at the factory to channels 1 and 2. When you add a newcamera to your system, you have to “introduce” the camera and monitor to each other so they cancommunicate.You can also use this procedure to move a camera from one channel to a different channel.22
Some things to know about pairing cameras: If a camera is already assigned to the selected channel, the pairing operation overwrites thatcamera link with the new one. Only pair one camera at a time! The monitor links to the first camera it detects. If two or morecameras are in pairing mode, you can’t control which camera the monitor will detect first.Tap the following icons as theyappear on the screens: This screen should display: 1. Tap Pairing on the Camera Setup screen.2. Tap the channel number you want to pair the camera to.3. A message displays with instructions to press the PAIR button on the camera. Press and releasethe PAIR button on the front of the camera (see page 8). A 30-second countdown begins.You must press the PAIR button on the front of the camera during the 30-second countdown;otherwise, the camera will not be paired.4. The system displays live video 3 seconds after the camera is successfully paired.On/OffWhen you add a camera to your system, pair up the camera with the monitor and the system willautomatically turn it on.23
Tap the following icons as theyappear on the screens: This screen should display: 1. Tap the switch bar under the camera you want to turn on or off.2. The switch bar indicator turns green when the camera is on. It is greyed out when the camerais off.Although the camera is turned off, it is still powered. The monitor will not receive videosignals from that camera.3. Tapto return to the previous screen.ResolutionTap the following icons as theyappear on the screens: This screen should display: 1. Tap High or Low to set the resolution for each camera (High - 1080; Low - 720p).24
2. Tapto return to the previous screen and tap it again to return to the general Settingsscreen.RECORDING SETUP SCREENUse the Recording Setup screen to: Set the length of time the system will automatically record when something triggers motionsensitivity. Schedule a set time and duration to automatically record from a specific camera. Set up file retention requirements Turn camera’s sound on or off for recordingTap the following icons as theyappear on the screens:This screen should display:Recording SetupRecording Period after Last Motion Event DurationSchedule RecordingFile OverwriteAudio On/Off25
DurationYou can set how long the camera keeps recording after motion detection triggers it. The optionsare 15 seconds, 30 seconds, or 1 minute. (Default 15 seconds)1. Tap the duration you wish to set.2. Tapto return to the previous screen.Schedule RecordingThis feature lets you set up a block of time for a camera to record on a weekly schedule. You canset up multiple cameras to record at the same time and the recording times can overlap betweencameras.Total recording time is limited to the space available on the SD card. If you set the SDcard to delete the oldest files when it is full (see page 27), the system continues recording;otherwise, recording stops until space is available.1. Tap; the Schedule Recording Overview screen displays.2. Tap MODIFY in the lower left corner. The Schedule Recording Setup screen displays.26
3. Select a camera. If you want more than one camera to record at the same time, select bothcameras.4. Set the recording start and end times. Tap the AM/PM block to toggle between them. Tap the hour and minute boxes separately and tap the up and down arrows to set thestart and end times in HH:MM format. Tap the days for which this recording schedule applies.5. Tap SAVE. The system returns to the Schedule Recording Overview screen with the recordingperiod indicated.6. Tap MODIFY again to set up another recording session to schedule.Scheduled recordings are broken up into 5 minute file sizes. For example, if you record a 12minute event, you will have two 5-minute recordings plus one 2-minute recording.7. Tapto return to the previous screen.File OverwriteThis feature lets you set the system to automatically overwrite the oldest files once the SD card isfull. This will allow you to continue recording. If you do not allow overwrite, recording stops whenthe SD card is full.1. Tap to access the File Overwrite function. The following screen gives you the option ofallowing File Overwrite (tap YES) or, if File Overwrite is on, cancelling it (tap NO).27
2. Tapto return to the previous screen and again to return to the general Settings screen.Audio On/OffThis feature lets you turn the microphone on or off for any camera.Recording SetupTurn recording audio on/off12Toggle the ON/OFF button under the desired camera.SYSTEM SETTINGS SCREENUse these setting options to configure your system:2834
Date and Time Time Zone Language Default Settings Format Memory Card InformationTap the following icons as theyappear on the screens: This screen should display: Date and Time1. Tapto access the Date & Time screen.2. Tap the up or down arrow to set the month, day, and year.3. Tap the up or down arrow to set the time. Tap the AM/PM block to toggle between them.29
Tap the up or down arrows to set the correct hour and minute.4. Tap Synchronize with an internet time server if you want the internet clock to set your timeautomatically.You must keep your system connected to your wireless network using the Ethernet cable inorder to synchronize with the internet time server.5. Tapto return to the previous screen.Time ZoneTime Zone allows you to set the time zone your monitor is in. Your system will know that yourrequest refers to the time zone the monitor is in. [Default (GMT-5:00) Eastern Time (USA &Canada)].1. Tap. The Time Zone screen displays.2. Scroll up and down to your camera’s time zone and then tap it. The most commonly used timezones for this system are: GMT-05:00 - Eastern Time (Default) GMT-06:00 - Central Time GMT-07:00 - Mountain Time GMT-08:00 - Pacific Time GMT-09:00 - Alaska Time GMT-10:00 - Hawaii-Time3. Tap the next option to turn Daylight Savings Time on or off.30
4. Tapto return to the previous screen.LanguageTapto set the language used on your system. Options are English, Español, and Français.1. Tap the language you want your system to use.2. Tap. The system returns to the previous screen and automatically changes over to therequested language; no reboot is necessary.Default Settings1. Tapto return your system to the original default settings.2. Tap YES on the Restore Default Settings screen.31
3. Tap OK to confirm the reset.4. Tapto return to the previous screen.Format SD CardFormatting the SD card erases all data stored on the card. (Default NO)1. Tapto reformat your SD card.2. Tap YES on the All stored files will be deleted! screen (Default NO). A confirmation screendisplays. Tap YES to it.3. A progress bar displays on the screen. After formating is complete, a Format OK messagedisplays and the system returns to the System Setting screen.InformationThis screen lists the firmware information of the monitor and all cameras paired to it.32
1. Tap2. Tapto display the screen.to return to the previous screen.Uniden recomments that you check your monitor firmware version against the most recentversion (http://www.uniden.com/page/downloads) at least twice a year. If you need toupgrade your monitor firmware, see page 33.3. Tapto return to the general Settings screen.MOTION DETECTION SETTINGS SCREENVideo motion detection settings control how strong the motion needs to be to trigger recording.This settings screen also lets you mask off any areas in the image for the camera to ignore. Forexample, you may have trees in the image area that would set off motion detection if there is abreeze.Tap the following icons as theyappear on the screens: This screen should display: 33
SensitivityThis selection allows you to set the camera’s motion detection sensitivity levels to High, Low, or Off.1. Tap. The following screen displays.2. Tap High, Low, or Off to set sensitivity.3. Tapto return to the previous screen.Mask AreaUse this selection to mask off any parts of the viewing area you do NOT want to be included formotion detection.Note: the video image is removed to make it easier to see the masking grid.1. Tap. The Mask Area screen displays, superimposed over the image from that camera.Motion Detection SettingsMask AreaSelect All34Detection AreaDelete All
2. Tap the squares that cover the areas of the image you do not want affected by motiondetection.3. When you are finished, tapto return to the Motion Detection Settings screen.4. Tapto return to the general Settings screen.NETWORK SETUP SCREENThis select
4. The monitor displays the Uniden Guardian screen for a few seconds and then transitions to the LIVE view. The screen remains dark until the cameras are powered up. CAMERA General The UDR777HD cameras included with your monitor are weatherproof and have an IP65 rating. Water can be sprayed on them and they will still work; however, the cameras .


