Transcription
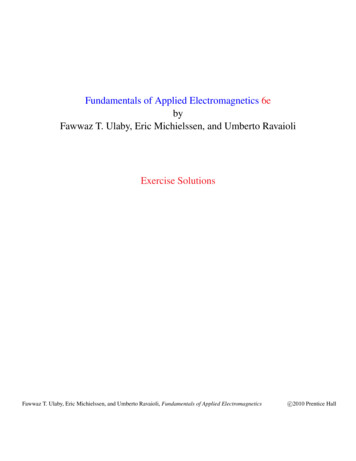
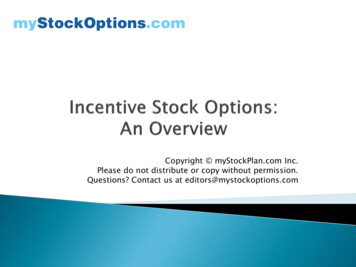
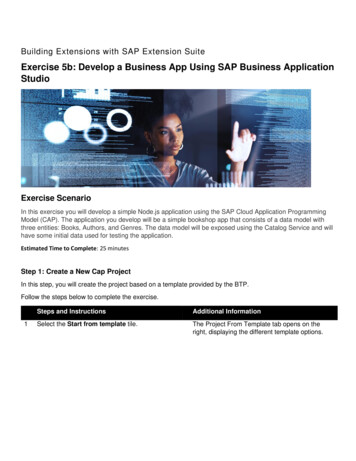
Building Extensions with SAP Extension SuiteExercise 5b: Develop a Business App Using SAP Business ApplicationStudioExercise ScenarioIn this exercise you will develop a simple Node.js application using the SAP Cloud Application ProgrammingModel (CAP). The application you develop will be a simple bookshop app that consists of a data model withthree entities: Books, Authors, and Genres. The data model will be exposed using the Catalog Service and willhave some initial data used for testing the application.Estimated Time to Complete: 25 minutesStep 1: Create a New Cap ProjectIn this step, you will create the project based on a template provided by the BTP.Follow the steps below to complete the exercise.1Steps and InstructionsAdditional InformationSelect the Start from template tile.The Project From Template tab opens on theright, displaying the different template options.
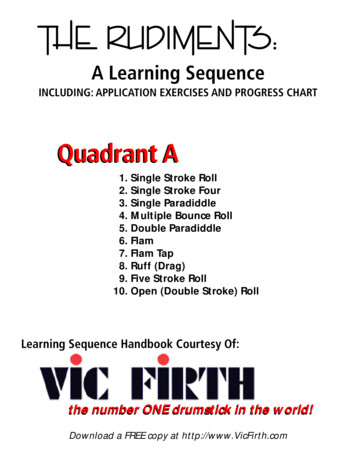
Steps and InstructionsAdditional Information2Select the CAP Project tile, and then select theStart button.The CAP Project Details page appears on theright.3Enter bookshop as the project name, accept thedefaults for all other settings, and then select theFinish button.The loading screen appears as your new projectis created. It may take up to a minute to complete.
Steps and InstructionsAdditional InformationOnce the process is finished, the project files willappear in the EXPLORER pane on the left.Let’s have a look at the CAP specific elements ofthe project structure:Files/Foldersapp/db/srv/DescriptionUI content goes inhere; one or more insubfoldersDomain Models anddatabase-relatedcontent go in hereService definitionsand implementationsgo in here
Steps and InstructionsAdditional Informationpackage.jsonYour projectdescriptor. It containsproject metadata likedependencies to othersoftware, a name anddescription, version orlicensing information.In a “cds” section, youcan provide staticsettings for your CAPproject. Note: This fileis not CAP specific,but required withinnode.js. Furtherinformation on thepackage.json ains staticsettings for your CAPprojectFurther information on CAP Node.js SDK ProjectSpecific cds-envAlternative Method:As an alternative to the UI based generators, the previous process can also be completed with the commandline-based Yeoman generators to create a new project. Yeoman is a generator framework, that allows anyoneto create new generators, that can be used to scaffold complete projects or parts of projects.1Steps and InstructionsAdditional InformationSelect Terminal, and then New Terminal.The Terminal tab opens in the bottom.
Steps and InstructionsAdditional Information2Navigate into the projects directory by enteringthe command cd projects/ and pressing Enteror Return.You new location within the terminal is theprojects directory.3Enter the command yo and press Enter orReturn to start the Yeoman command lineapplication.An overview of available generators appears inthe terminal.4Select the @sap/cap Project generator usingthe arrow keys and press Enter or Return.A project name prompt appears.5Enter bookshop as project name and pressEnter or Return.A prompt to select your runtime appears.
Steps and InstructionsAdditional Information6Select Node.js as runtime and press Enter orReturn.A prompt to select features to your projectappears.7Do not select any additional feature and pressEnter or Return.A prompt to add sample content to your projectappears.8Do not select any additional sample content andpress Enter or Return.Your new CAP project is being generated withinthe projects directory.9List the content of the projects directory byentering the command ls -l and pressing Enteror Return.The contents of the projects directory are beingdisplayed. There is a directory for the newlycreated bookshop CAP project.10Open the bookshop project as your newworkspace. First choose File and then OpenWorkspace.The Open Workspace prompt appears.
11Steps and InstructionsAdditional InformationIn the Open Workspace prompt, select thebookshop project and press Open.The project files will appear in the EXPLORERpane on the left.
Step 2: Define the Bookshop Data SchemaIn this step you will create a local data schema used by your app. A data schema in CAP is based on the CoreData Services (CDS) Definition Language (CDL). Definitions made in CDS can pe parsed into the openspecification Core Schema Notation (CSN), which in turn can be compiled into many target languages, like forexample the HANA Data Definition Language (HANA DDL). HANA DDL is used to define the database artifactswithin a HANA database. In summary, by defining the data schema in CDS, you enable correspondingdatabase tables to be created automatically at a later point in time.Further information on Core Data Services (CDS): https://cap.cloud.sap/docs/cds/Further information on CDS Definition Language (CDL): https://cap.cloud.sap/docs/cds/cdlFurther information on CDS Schema Notation (CSN): https://cap.cloud.sap/docs/cds/csnFollow the steps below to complete the exercise.1Steps and InstructionsAdditional InformationSelect the db folder on the left.There are currently no files under this folder todisplay. You will create one in the next step.
Steps and InstructionsAdditional Information2From the File menu, select New File.The New File prompt appears.3Enter schema.cds in the name field and selectthe OK button.An empty file will be created. You can see itlisted in the db folder on the left and a new CodeExplorer tab will open on the right.
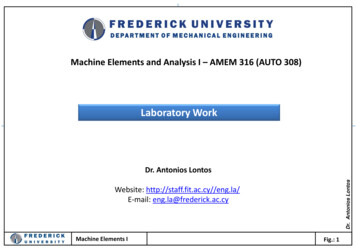
Steps and InstructionsAdditional InformationYou will define the data schema in CDL. The .cdsfile extension lets the parser know to considerthis file.4Enter the text below into the new file.using { Currency, managed, sap } from'@sap/cds/common';namespace my.bookshop;The finished file will look like this.The full text can be found in the Exercise 5,schema.cds file section of the Exercise CodeSnippets.txt file.entity Books : managed {key ID : Integer;title : localized String(111);descr : localized String(1111);author : Association to Authors;genre : Association to Genres;stock : Integer;price : Decimal(9,2);currency : Currency;}entity Authors : managed {key ID : Integer;name : String(111);books : Association to many Books onbooks.author self;}/** Hierarchically organized Code List for Genres*/entity Genres : sap.common.CodeList {key ID : Integer;parent : Association to Genres;children : Composition of many Genres onchildren.parent self;}Read through the new schema.cds file and try tounderstand how the entities are being defined.What are entities? Entities represent data, withrecords identified by primary keys.What are types? Types are used to describe thetypes of elements within entities.What are aspects? Aspects provide mechanismsto separate concerns. Aspects can be composedinto models and entities.Let’s go through file schema.cds step by step:Line 1: With the using directive you can importentity, aspect and type definitions from otherCDS models. In this case for example, we areimporting the reuse type Currency and the reuseaspect managed from the ‘@sap/cds/common’model. This model is recommended for use,because it provides best practices and
Steps and InstructionsAdditional Informationinteroperability through concise andcomprehensible common models.Further information on Common Types use-sapcdscommonLine 2: With the namespace directive you canprefix the names of all subsequent definitions. Inthis case, with namespace my.Bookshop thefully qualified name of an entity Books within thatnamespace becomes my.Bookshop.Books.Line 4: With the entity keyword you begin todefine an entity. The colon : lets you include oneor more named aspects, that have beenpreviously defined or imported. The curlybrackets {} enclose the definition part for theentity.Line 5: With the key keyword you define, that thefollowing element is part of the primary key of thisentity. Next comes the name of the element ID.The element name is followed by a colon :. Afterthe colon follows the typing of the element. Youcan either use built-in types, imported types ortypes that you defined yourself.Line 8: You might want to capture relationshipsbetween entities. For that, use the Associationkeyword, followed by to if it is a 1:1 relationshipand followed by to manay, if it is a 1:nrelationship. This is followed by the entity namethat you want to capture the relationship to.Line 25: You can model “contained-in”relationships using the Composition keyword. A“contained-in” relationship is comparable to a 1:nrelationship, where all the entries of thecomposed entity are being fully dependent on theparent entity object. In easy words: An entry of acomposition cannot exist without an entry of itsparent entity. This also by default leads tobehavior like Cascaded Deletes when aComposition root is being deleted.
Steps and InstructionsAdditional InformationDetailed information about Domain Modeling withCDS: her information on CDS Definition Language:https://cap.cloud.sap/docs/cds/cdl5From the File menu, select Save.The file will save. If an error is generated, youcan safely ignore it. The next step will resolve theissue.Step 3: Define the Bookshop ServiceEvery active thing in CAP is a service. They embody the behavioral aspects of a domain in terms of exposedentities, actions, and events. A service in CAP is served to OData out-of-the-box. Again you use CDS to definea service in your CAP application.Follow the steps below to complete the exercise.Steps and InstructionsAdditional Information1Select the srv folder on the left.Just like the db folder in the previous step, thereare currently no files under this folder to display.You will create one in the next step.2From the File menu, select New File.The New File prompt appears.
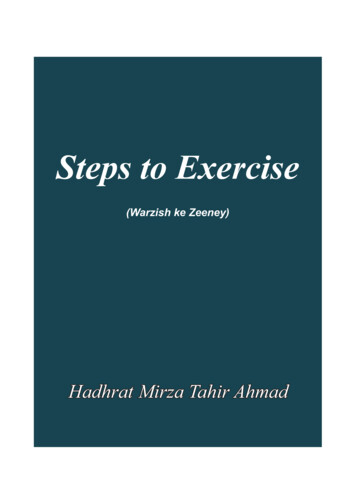
Steps and InstructionsAdditional Information3Enter cat-service.cds in the name field andselect the OK button.An empty file will be created. You can see itlisted in the srv folder on the left and a newCode Explorer tab will open on the right.4Enter the text below into the new file.The finished file should look like this.using { my.bookshop as my } from './db/schema';service CatalogService @(path:'/browse') {The full text can be found in the Exercise 5, catservice.cds file section of the Exercise CodeSnippets.txt file.@readonly entity Books as SELECT frommy.Books {*,author.name as author} excluding { createdBy, modifiedBy };action submitOrder (book : Books:ID, amount:Integer);}Read through the new cat-service.cds file andtry to understand how the service is beingdefined.
Steps and InstructionsAdditional InformationLet’s go through file cat-service.cds step bystep:Line 1: Everything in namespace my.Bookshopfrom schema.cds will be imported andaccessible via the alias my.Line 2: Using the service keyword you start todeclare a new service definition. By default, theservice endpoint is constructed by the servicename, dropping the string service and enforcingkebab-case. Using the @path annotation, youcan overwrite the path for your service endpoint.Line 4: Within a service you mostly exposeentities from underlying data models. Again, usethe keyword entity to start defining an entity tobe exposed and define a view that the entityshould consist of, using the as SELECT from oras projection on phrases.Line 8: Using the action keyword, you define anaction that can be performed on your service.There will be a dedicated path for that action onyour service. Actions can be bound to entities,like in this example, or unbound, meaning theyare not specific to a certain entity. An action canhave named and typed inbound parameters aswell as an optional response type (add returns Type to your action).Further information on Providing ngservices.5From the File menu, select Save.Step 4: Add Initial DataNow that the schema and service have been defined, you can populate the schema with somesample data. Provide sample data in .csv files, that follow the naming pattern namespace entity .csv, for example, my.bookshop-Books.csv. The files need to be located in folders db/csv,db/data/, or db/src/csv and must start with a header line that lists the needed element names.See ing-initial-data.
Follow the steps below to complete the exercise.Steps and Instructions1Select the db folder on the left.2From the File menu, select New Folder.3Enter data in the name field and select the OKbutton.Additional InformationThe New Folder prompt appears.
Steps and Instructions4Select the data folder you just created on the left.5From the File menu, select New File.Additional InformationThe New File prompt appears.
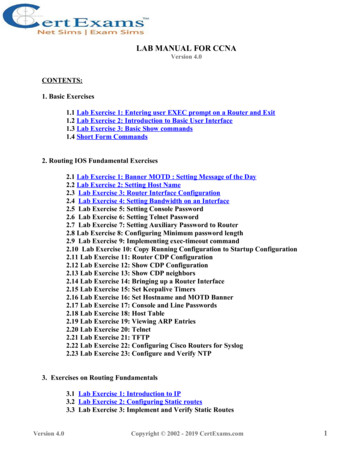
Steps and InstructionsAdditional Information6Enter my.bookshop-Authors.csv in the namefield and select the OK button.An empty file will be created. You can see itlisted in the data folder on the left and a newCode Editor tab will open on the right.7Enter the text below into the new file.The finished file should look like this.ID;name101;Emily Brontë107;Charlotte Brontë150;Edgar Allen Poe170;Richard Carpenter8From the File menu, select Save.9Select the data folder on the left.The full text can be found in the Exercise 5,my.bookshop-Authors.csv file section of theExercise Code Snippets.txt file.
Steps and InstructionsAdditional Information10From the File menu, select New File.The New File prompt appears.11Enter my.bookshop-Books.csv in the namefield and select the OK button.An empty file will be created. You can see itlisted in the data folder on the left and a newCode Editor tab will open on the right.
12Steps and InstructionsAdditional InformationEnter the text below into the new file.The finished file should look like this.ID;title;author ID;stock201;Wuthering Heights;101;12207;Jane Eyre;107;11251;The ;2213The full text can be found in the Exercise 5,my.bookshop-Books.csv file section of theExercise Code Snippets.txt file.From the File menu, select Save.Step 5: Add Custom LogicIn this step you will build some custom logic to extend the functionality of your bookshop catalog service. Bydefault, CAP translates your services into standard OData APIs. If you require custom logic, you need toexplicitly define it by implementing event handlers in Node.js.Further information on CAP event handlers: handlers.Follow the steps below to complete the exercise.Steps and Instructions1Select the srv folder on the left.Additional Information
Steps and InstructionsAdditional Information2From the File menu, select New File.The New File prompt appears.3Enter cat-service.js in the name field and selectthe OK button.An empty file will be created. You can see itlisted in the data folder on the left and a newCode Editor tab will open on the right.Note how we use the same name for the serviceimplementation .js file as for the servicedefinition .cds file. This allows the CAPframework to find the corresponding serviceimplementation for a given service definition. Ifyou want to specify a service implementation filewith a different name, use the @impl
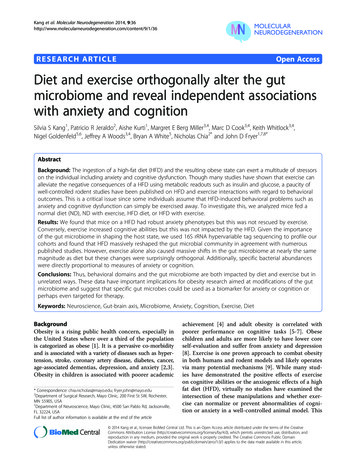
Steps and InstructionsAdditional Informationannotation. impls.4Enter the text below into the new file./*** Implementation for CatalogService defined in./cat-service.cds*/const cds require('@sap/cds')module.exports function (){// Register your event handlers in here, e.g.this.after ('READ','Books', each {if (each.stock 111) {each.title -- 11% discount! }})}The finished file should look like this.The full text can be found in the Exercise 5,cat-service.js file section of the Exercise CodeSnippets.txt file.Read through the new cat-service.js file and tryto understand how the custom logic is beingadded to the service. Note that the service isimplemented in Node.js.Let’s go through file cat-service.js step by step:Line 4: Using the require() function you canimport external modules and dependencies. Inthis case we require the @sap/cds package,which is the Node.js API package for CAP. ForAPI documentation, seehttps://cap.cloud.sap/docs/node.js/.
Steps and InstructionsAdditional InformationLine 5: Using module.exports you can return afunction for the service. The function can beused to register a custom event handler.Lines 7-11: this is the instance of the serviceclass that you are extending with custom logic.Using methods before(), on() and after() youcan register handlers to be performed before,instead of or after the generic service handlers.As method parameters you need to specify anevent, an entity and the handler implementation.In this case, when the entity Books is beingREAD, for each book the handler function willcheck, if the book’s stock is larger than 111. Ifyes, the book’s title will be extended with ‘ -11% discount!’.Further information on the Handler /services#event-handlers.5In the lower left corner, you will see a number ofother sections in the EXPLORER, such as NPMSCRIPTS and APPLICATION MODELER. Youmay need to adjust the window frames to seethem. Expand CAP DATA MODELS ANDSERVICES.You should see a folder structure similar tobelow. It is the sematic representation of theCAP application you defined using CDS.
Steps and Instructions6Additional InformationFrom the File menu, select Save.Step 6: Test the Application with a Local DatabaseIn this step you will test your application locally in your Dev Space. As we do not provide a persistent databaseto deploy the data model to, the application will run using an in-memory database implicitly.Further information on using databases in CAP: l#databases.Follow the steps below to complete the exercise.1Steps and InstructionsAdditional InformationSelect New Terminal from the Terminal menu.The terminal window appears in the lower right.
Steps and InstructionsAdditional Information2Type npm install into the terminal and press theEnter or Return key on your keyboard.The npm tool installs all the dependencies ofyour CAP project into a new directorynode modules. A message similar to what isseen below will appear when it is finished.3Select the Run Configurations button on theleft.The RUN CONFIGURATIONS area appears witha message stating that no configurations werefound.4Select the Create Configuration button.The run prompt appears with two default options.
Steps and InstructionsAdditional Information5Select the bookshop (development profile)option.The Enter a name dialog appears, displaying adefault name.6Select the default value for the name.A new Run Configuration appears. You mayhave a different number than what is in the imagebelow.7Hover your mouse over the Run Configurationon the left and then select the Run icon.The terminal will show some activity. It may takeup to a minute for the activity to complete. Whenthe activity is complete a message will appear inthe lower right indicating that a service islistening.
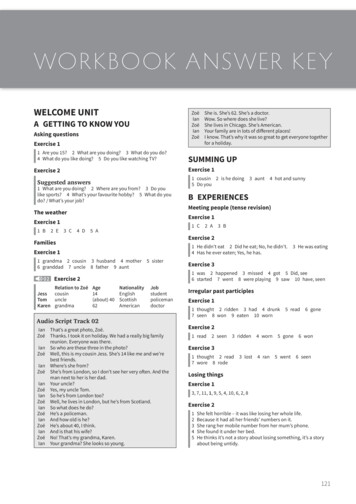
Steps and Instructions8Select the Expose and Open button.9Enter bookshop into the Description field andpress the Enter or Return key on yourkeyboard.Additional InformationA new browser tab or window appears displayingthe details below. You can click to see themetadata and entities the service. Leave this tabor window open. It is best if you can have thispage and the Business Application Studioopen at the same time so you can view themboth simultaneously.
Steps and InstructionsAdditional InformationThe following steps illustrate how you can debugyour application to check your logic. In thisexample, you will debug the custom logic.When running the configuration, the BusinessApplication Studio automatically switched to theDebug pane and opens the Debug Console inthe lower right.10Switch back to the SAP Business ApplicationStudio browser tab or window and select thetab showing displaying the cat-service.js file.11Place a Breakpoint in the file by selecting thearea to the left of line 8.A red dot appears indicating the Breakpoint.
Steps and InstructionsAdditional Information12In the window with the running app select theBooks link.The Books page will not open and the Debugpane will indicate that it is Paused. TheBreakpoint is causing the app to stop at eachbook in the database.13Select the Continue button in the Debug pane.The debugger advances to the next book.
Steps and InstructionsAdditional Information14Repeat step 13 until the books page displays inthe app. This should be a total of five times.The books page is displayed.15Select the Breakpoint to remove it.16Select the Stop button in the Debug pane.The number displayed on the Debug icon isreduced by one. This number indicates thenumber of running processes.
17Steps and InstructionsAdditional InformationRepeat step 16 until all processes havestopped.The Debug icon has no number displayed. 2021 SAP SE or an SAP affiliate company. All rights reserved.No part of this publication may be reproduced or transmitted in any form or for any purpose without the expresspermission of SAP SE or an SAP affiliate company.SAP and other SAP products and services mentioned herein as well as their respective logos are trademarks or registeredtrademarks of SAP SE (or an SAP affiliate company) in Germany and other countries. Please right/index.epx for additional trademark information and notices.Some software products marketed by SAP SE and its distributors contain proprietary software components of othersoftware vendors.National product specifications may vary.These materials may have been machine translated and may contain grammatical errors or inaccuracies.These materials are provided by SAP SE or an SAP affiliate company for informational purposes only, withoutrepresentation or warranty of any kind, and SAP SE or its affiliated companies shall not be liable for errors or omissionswith respect to the materials. The only warranties for SAP SE or SAP affiliate company products and services are thosethat are set forth in the express warranty statements accompanying such products and services, if any. Nothing hereinshould be construed as constituting an additional warranty.In particular, SAP SE or its affiliated companies have no obligation to pursue any course of business outlined in thisdocument or any related presentation, or to develop or release any functionality mentioned therein. This document, orany related presentation, and SAP SE’s or its affiliated companies’ strategy and possible future developments, products,and/or platform directions and functionality are all subject to change and may be changed by SAP SE or its affiliatedcompanies at any time for any reason without notice. The information in this document is not a commitment, promise,or legal obligation to deliver any material, code, or functionality. All forward-looking statements are subject to variousrisks and uncertainties that could cause actual results to differ materially from expectations. Readers are cautioned not
to place undue reliance on these forward-looking statements, which speak only as of their dates, and they should not berelied upon in making purchasing decisions.
Building Extensions with SAP Extension Suite Exercise 5b: Develop a Business App Using SAP Business Application Studio Exercise Scenario In this exercise you will develop a simple Node.js application using the SAP Cloud Application Programming Model (CAP). The application you develop will be a simple bookshop app that consists of a data model with