Transcription
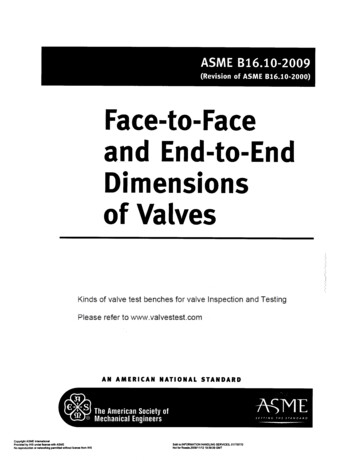
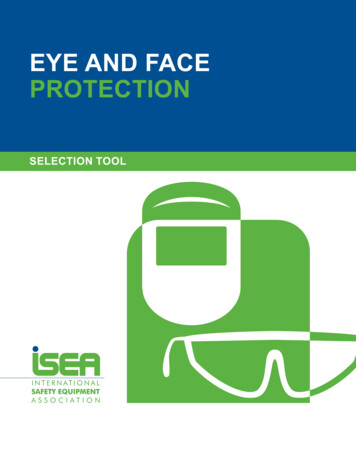
Drawing the FaceWORKSHEETProportions of the Face - This refers to how large and small facial features and areas of the face are inrelation to each other. There are basic rules that you can learn to capture the face in a realistic way. Onceyou have learnt these rules stylising the various facial features and exaggerating areas of the face tocreate a character will become much easier.Facial Features - The face is the feature which best distinguishes a person.It’s features - the eyes, nose, mouth and ears - are where we see individualityin people. If we understand the basic components of these features drawingthem will become easier and your drawings and paintings will only be better.- Task One -In your diary, drawand label the keyparts of each ofthefour facial featuresbelow.Upper Palpebral GrooveLacrimal ostrilSeptumPhiltrumUpper LipLower Lipw w w. t h e b u t c h e r s h o p .co m .au
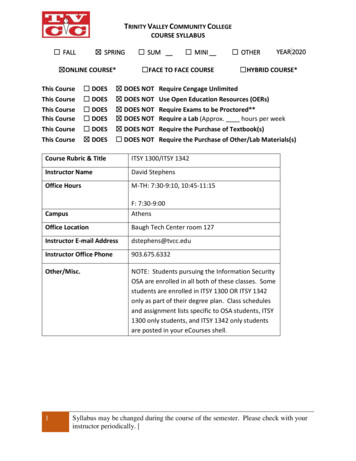
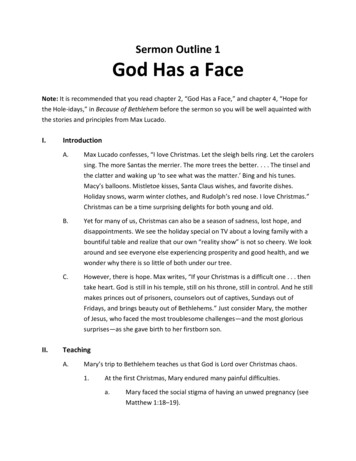
- Task Two -In your diary, practiceialdrawing these four facawDrfeatures with shadingat least 4 differentexamples of each.shapedTry drawing differentfeatures and fromdifferent angles.w w w. thebut cher shop.c om . a uAn I n t ro d u c t io n t o Ur b a n Ar t - Dr a w in g t h e F a c e Wo r k s h e et - P ag e 2
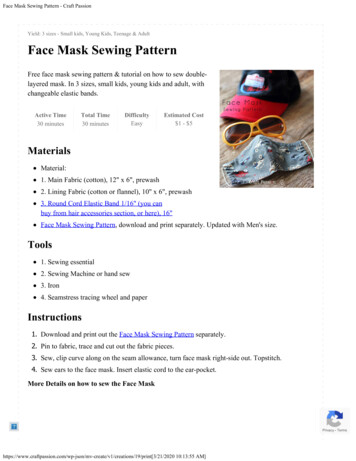
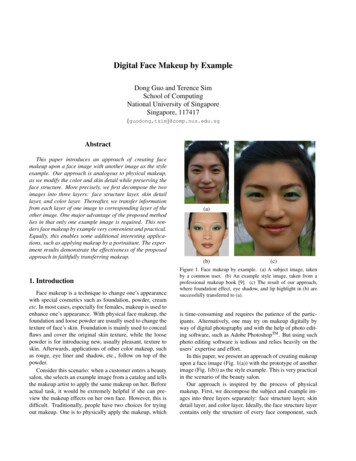
Mapping out the Face - Before you can begin to fill in the face with it’s features you need to map out theface using a ruler and pencil. Each individual face will vary and the more you observe and draw the face thebetter you will become at capturing unique traits in your portraits.TYPICAL FACE SHAPESHEART- Task Three -Follow the stepsbelow to create a mapfor a portrait, you willneed a pencil, eraser,ruler and A4 portraitpaper.LONGROUNDOVALSQUAREStep One - It can be said that there are five face shapes- round, oval,square, long and heart. Hairdressers, Make up Artists and Stylists use theseshape guidelines to help accentuate various facial features and althoughthese shapes are guidelines it is a great starting point in understanding theindividuality in faces. Start by choosing one of the above face shapes anddraw on your page using a light pencil such as a HB. Then draw two lightlines- one to divide the face horizontally and one to divide it verticallyStep Two - Draw two eyes half way down theface, a basic rule is that the size of one eye willfit between the two. When shading the eye leavea small white dot on the iris and the pupil to givethe illusion that light is glistening on a moistsurface. Remember to consider the light sourcewhen placing this highlight.Step Three - Draw a line one quarter of the wayup between the centre of the eye and top of thehead. This is where the eyebrows generally sit.Step Four - Draw a line half way between theeyes and the bottom of the head, this is wherethe bottom of the nose sits. Simplify the shapeof the nose by drawing three curved lines.Step Five - Draw a line which sits one thirdbetween the bottom of the nose and the bottomof the chin, this line is where the middle of thelips sit.w w w. thebut chershop.c om . a uAn I n t ro d u c t io n t o Ur b a n Ar t - Dr a w in g t h e F a c e Wo r k s h eet - P ag e 3
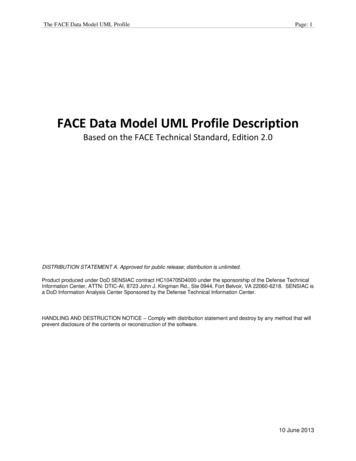
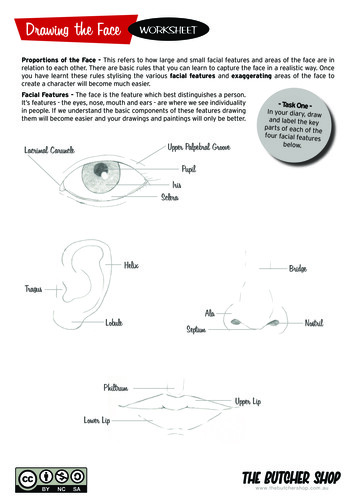
Exaggerating : This refers to the way cartoonists, illustrators and artists will often represent certainfacial features on the face such as the nose, eyes mouth and ears as being much larger or smaller than theyactually are to create a personality for the character. Very often characters which are sweet and innocentwill have large wide eyes and evil or anger is shown through narrowed eyes.aracter:Describe the ch- Task Four Have a look at howthe artists below haverepresented various facialfeatures. In the provided spacewrite a few words that describethe character’s personalitysuch as happy, angry orsad based on thefacial features.D eathbotaracter:Describe the chCreepyaracter:Describe the chTimothy Rollinw w w. thebut cher shop.c om . a uAn I n t ro d u c t io n t o Ur b a n Ar t - Dr a w in g t h e F a c e Wo r k s h e et - P ag e 4
- Task Five Using what you haveciallearned so far about faylisingproportion, features, stea tean d exag ge ra tio n, crter.another stylised characayrtr ingThis time focus on pojustem ot io n focusing onthe head and face.What emotion is the character in your portrait going to have?What features are you going to exaggerate to help portrayyour chosen emotion?Step One - Start by drawing the head first,consider the shape and refer back to theface in proportion worksheet. Divide theface in sections to map out where yourfeatures are, although you are creating acharacter and not necessarily sticking tothe proportion rules you still need to planthe face before you fill in the features.Step Two - Start to fill in the facial features,refer back to your facial features worksheetand consider the structure of the eyes, noseand mouth when drawing them.Step Three - Once you have drawn thefeatures on the face you can start to thinkabout hair and other accessories on thehead such as hats, ribbons etc.w w w. thebut chershop.c om . a uAn I n t ro d u c t io n t o Ur b a n Ar t - Dr a w in g t h e F a c e Wo r k s h eet - P ag e 5
Refer back to your shading worksheet and add tone to areas onthe face to give the illusion of depthLook how colour can change the mood and feeling of the face.w w w. thebut cher shop.c om . a uAn I n t ro d u c t io n t o Ur b a n Ar t - Dr a w in g t h e F a c e Wo r k s h e et - P ag e 6
What emotion is the character in your portrait going to have? What features are you going to exaggerate to help portray your chosen emotion? Step One - Start by drawing the head first, consider the shape and refer back to the face in proportion worksheet. Divide the face in sections to map out where your features are, although you are creating a character and not necessarily sticking to the .File Size: 2MBPage Count: 6