Transcription
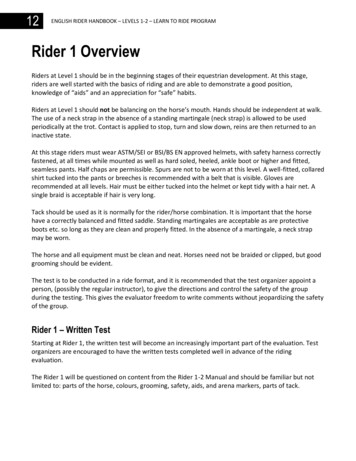
12ENGLISH RIDER HANDBOOK – LEVELS 1-2 – LEARN TO RIDE PROGRAMRider 1 OverviewRiders at Level 1 should be in the beginning stages of their equestrian development. At this stage,riders are well started with the basics of riding and are able to demonstrate a good position,knowledge of “aids” and an appreciation for “safe” habits.Riders at Level 1 should not be balancing on the horse’s mouth. Hands should be independent at walk.The use of a neck strap in the absence of a standing martingale (neck strap) is allowed to be usedperiodically at the trot. Contact is applied to stop, turn and slow down, reins are then returned to aninactive state.At this stage riders must wear ASTM/SEI or BSI/BS EN approved helmets, with safety harness correctlyfastened, at all times while mounted as well as hard soled, heeled, ankle boot or higher and fitted,seamless pants. Half chaps are permissible. Spurs are not to be worn at this level. A well-fitted, collaredshirt tucked into the pants or breeches is recommended with a belt that is visible. Gloves arerecommended at all levels. Hair must be either tucked into the helmet or kept tidy with a hair net. Asingle braid is acceptable if hair is very long.Tack should be used as it is normally for the rider/horse combination. It is important that the horsehave a correctly balanced and fitted saddle. Standing martingales are acceptable as are protectiveboots etc. so long as they are clean and properly fitted. In the absence of a martingale, a neck strapmay be worn.The horse and all equipment must be clean and neat. Horses need not be braided or clipped, but goodgrooming should be evident.The test is to be conducted in a ride format, and it is recommended that the test organizer appoint aperson, (possibly the regular instructor), to give the directions and control the safety of the groupduring the testing. This gives the evaluator freedom to write comments without jeopardizing the safetyof the group.Rider 1 – Written TestStarting at Rider 1, the written test will become an increasingly important part of the evaluation. Testorganizers are encouraged to have the written tests completed well in advance of the ridingevaluation.The Rider 1 will be questioned on content from the Rider 1-2 Manual and should be familiar but notlimited to: parts of the horse, colours, grooming, safety, aids, and arena markers, parts of tack.
ENGLISH RIDER HANDBOOK – LEVELS 1-2 – LEARN TO RIDE PROGRAM13Rider 1 – Practical Horse KnowledgeIn the practical horse knowledge phase of this test, the riders should demonstrate that they are awareof the basic parts of the horse and of their equipment, and that they can, with assistance, be involvedin the daily care of their horse.The evaluator can observe and assess much of this phase while candidates are preparing for their rideand likewise upon their return to the stable. Candidates should be advised in advance that this mayhappen. This enables the evaluator to easily accommodate the riding school where time is oftenlimited for extras therefore encouraging the use of rider levels in the riding school program.Turnout should be neat and workmanlike. Paddockboots, work boots, or riding boots are acceptable. Looseor baggy jeans or shirts are not acceptable. Neat sweatpants or slush pants over breeches are also acceptable.Hair should be tied back. Ball caps that cover the eyesare discouraged.Safety and a willingness tolearn about the horse/ponyshould be emphasized at thislevel.The Rider 1 evaluation is comprised of a written test, a practical horse knowledge component and aflat riding component.Who May Examine Candidates?English Rider Level 1-2 Evaluators Equine Canada current certified Instructor or Coach May be evaluated by own current certified Instructor or Coach. May be evaluated by a single evaluator.
14ENGLISH RIDER HANDBOOK – LEVELS 1-2 – LEARN TO RIDE PROGRAMEnglish Rider 1 – Evaluation RequirementsA. Practical Horse KnowledgeNo.A.1RequirementPractical Horse Knowledge Approach and halter horse, lead horse out of stall, lead back to stall, remove halter and exit.If cross ties are used, safety an importantfactor.Applicant to be observed for safety leading thehorse out to the riding ring, ability to halt thehorse, handling of reins.EvidencesRiders must enter the stall, approach thehorse/pony safely and put the halter on. Riders areto lead the pony or horse out of the stall properly,turn it correctly, take the horse/pony back into thestall and remove the halter. A lead line with orwithout chain should be attached correctly andthe rider must not lead the horse without a leadattached.2Tack up the horse (with assistance)Riders should attempt to tack up. Evaluators mayassist but must be directed by the student.3Describe the colour of the candidate’s own horse4How and what to feed as a treatRiders must demonstrate how to feed a treat andwhat types of foods are best to offer as treats.Riders may feed the treat by hand or use the feedtub (Rules may differ as per stable policy).5Carry tack to tack room area, put up bridle infigure 8. Discuss cleaning the bit.Riders must put the bridle up in a figure of eightarrangement. Riders need not polish the bit but beaware that the bit should be rinsed to rid it of anydirt that may harden and become uncomfortablefor the horse the next time it is used.6General Impression: Presentation of candidate,overall confidence and awareness of safety
ENGLISH RIDER HANDBOOK – LEVELS 1-2 – LEARN TO RIDE PROGRAM15B. Riding PhaseNo.B.RequirementRiding PhaseEvidences1Mount and Dismount: Mount in the correct, safe mannerDismount, run up stirrups, reins over head,lead in handMounting (from ground or block)2Tack Adjustments: Pre-Mounting: Adjust stirrups fromground, tighten girth, put reins over head While mounted, adjust girth, stirrups);while reins are held correctlyAssistance allowed with adjustments at this level3Position: At walk and rising trotRiders at Level 1 should not be balancing on thehorse’s mouth. Hands should be independent atwalk. The use of a neck strap in the absence of astanding martingale (neck strap) is allowed to beused periodically at the trot.Contact is applied to stop, turn and slow down,reins are then returned to an inactive state.4Drop and retake stirrups at walkUpper body should remain still, practicingindependent use of legs.5Transitions, Diagonals: Change rising diagonal when asked TransitionsRiders at Level 1 should be able to change theirdiagonals when asked but may not necessarilyknow if they are rising on the correct diagonal.Transitions: halt /walk, walk /halt, walk/trot,trot/walk6Figures:Look for awareness and use of arena figures. 7Turn down centerline at walkAcross the school in walkLong diagonal in rising trotIdentify direction of travel (i.e. left rein,right rein)General Impression: Overall authority, safety and confidence,rider conduct, ability to maintain saferiding distance in ride formation. Applicant turnout and horse presentationSafety, knowledge of aids and a willingness tolearn about the horse/pony should be emphasizedat this level.
16ENGLISH RIDER HANDBOOK – LEVELS 1-2 – LEARN TO RIDE PROGRAMRider 2 OverviewRiders at Level 2 will demonstrate more polish and knowledge than Riders at Level 1 and will be moreindependent in both riding and stable management skills.At this stage riders must wear ASTM/SEI or BSI/BS EN approved helmets, with safety harness correctlyfastened, at all times while mounted as well as hard soled, heeled, ankle boot or higher and fitted,seamless pants. Half chaps are permissible. A well-fitted collared shirt tucked into the pants orbreeches is recommended with a belt that is visible. Gloves are recommended at all levels. Hair mustbe either tucked into the helmet or kept tidy with a hair net. Spurs are not to be worn at this level. Asingle braid is acceptable if hair is very long.Tack should be used as it is normally for the rider/ horse combination. It is important that the horsehave a correctly balanced and fitted saddle. At the evaluator’s discretion, if they feel a particular pieceof equipment is inappropriate the evaluator should work with the candidate to educate him/her as tomore appropriate options. Running and standing martingales are acceptable as are boots etc. so longas they are clean and properly fitted. A neck strap is permitted but should only be used periodically atthe canter.The rider’s understanding of contact should be is as per Rider Level 1, except that now no use of a neckstrap at trot is permitted. The rider should exhibit a balanced position in trot, not balancing on thehorse’s mouth.Horse and all equipment must be clean and neat. Horses need not be braided or clipped, but goodgrooming should be evident.The test is to be conducted in a ride format. It is acceptable for the test organizer to appoint a person,(possibly the regular instructor), to give the directions and control the safety of the group during thetesting. This gives the evaluators freedom to write comments without jeopardizing the safety of thegroup.Mounting, adjusting tack and dismounting are to be evaluated at every level.
ENGLISH RIDER HANDBOOK – LEVELS 1-2 – LEARN TO RIDE PROGRAM17Rider 2 – Written TestThe written test is an important part of the candidate evaluation. Test organizers are encouraged tohave the written tests completed well in advance of the riding evaluation.The Rider 2 will be questioned on content from the Rider 1-2 Manual and should be familiar but notlimited to: uses of grooming items, parts of the hoof, common hoof ailments, parts of the saddle andbridle, basic tack fitting, bedding and rein aids, markings.Rider 2 – Practical Horse KnowledgeTurnout should be neat and workmanlike. Paddock boots, work boots, or riding boots are acceptable.Loose or baggy jeans or shirts are not acceptable. Neat sweat pants or slush pants over breeches arealso acceptable. Hair should be tied back. Ball caps that cover the eyes are discouraged.The Rider 2 evaluation is comprised of a written test, a practical horse knowledge component and aflat riding component.English Rider 2 – Evaluation RequirementsA. Practical Horse KnowledgeNo. RequirementA. Practical Horse KnowledgeEvidence12Demonstrate the technique of using the dandybrush, body brush and safely using the hoof pick.3Tie a quick release knot.There are slightly different methods that are allacceptable.4Tack up (unassisted).Describe how to position the saddle and saddlepad on the horse and where the girth should layon the horse.The evaluator will use discretion and aid wherenecessary.Riders should recognize how to place saddles, padsand girths correctly on the horse5General Impression: Presentation of candidate,overall confidence and awareness of safety.
ENGLISH RIDER HANDBOOK – LEVELS 1-2 – LEARN TO RIDE PROGRAM17Rider 2 – Written TestThe written test is an important part of the candidate evaluation. Test organizers are encouraged tohave the written tests completed well in advance of the riding evaluation.The Rider 2 will be questioned on content from the Rider 1-2 Manual and should be familiar but notlimited to: uses of grooming items, parts of the hoof, common hoof ailments, parts of the saddle andbridle, basic tack fitting, bedding and rein aids, markings.Rider 2 – Practical Horse KnowledgeTurnout should be neat and workmanlike. Paddock boots, work boots, or riding boots are acceptable.Loose or baggy jeans or shirts are not acceptable. Neat sweat pants or slush pants over breeches arealso acceptable. Hair should be tied back. Ball caps that cover the eyes are discouraged.The Rider 2 evaluation is comprised of a written test, a practical horse knowledge component and aflat riding component.English Rider 2 – Evaluation RequirementsA. Practical Horse KnowledgeNo. RequirementA. Practical Horse KnowledgeEvidence12Demonstrate the technique of using the dandybrush, body brush and safely using the hoof pick.3Tie a quick release knot.There are slightly different methods that are allacceptable.4Tack up (unassisted).Describe how to position the saddle and saddlepad on the horse and where the girth should layon the horse.The evaluator will use discretion and aid wherenecessary.Riders should recognize how to place saddles, padsand girths correctly on the horse5General Impression: Presentation of candidate,overall confidence and awareness of safety.
18ENGLISH RIDER HANDBOOK – LEVELS 1-2 – LEARN TO RIDE PROGRAMB. Riding PhaseNo. RequirementB. Riding Phase1Mount and Dismount: 2 Demonstrate jumping position (half seat) attrotCorrect use of rising diagonalsJumping Control and Straightness: 8Circles in trot (20M minimum)Turn across ring away from ride, riderindependenceJumping Position 7Transitions (progressive) at all paces (exceptcanter)Canter brief distance showing basicknowledge of aidsHalt, recognize that their horse is in abalanced and immobile haltFigures: 6Position (basic seat) at all pacesWalk with and without stirrupsDrop and regain stirrups at trotTransitions: 5Show knowledge of adjusting girth andstirrups (unassisted)Hold and use of whip correctlyPosition: 4Mount in the correct, safe manner (fromground or block)Dismount, run up stirrups, reins over head,lead in handTack and Adjustments: 3EvidenceTrot a simple course of poles, rising trotShow evidence of control and straightnessover courseGeneral Impression: Overall authority, safety and confidence,rider conduct, ability to maintain safe ridingdistance in ride formation.Applicant turnout and horse presentationFocus is on stability of position and confidence. Withoutstirrups at walk – make sure the leg position does notchange (i.e. knee pinching, leg raised or drop toe); upperbody stays on vertical. Whip, if used, shouldbe held with hand centered on handgrip, and whip shouldrest on thigh. If not used, candidate should be able todemonstrate. Maintain upper body when dropping stirrups.Knowledge of canter lead not required at this level. Howeverriders should be able to recognize leads by observinganother horse. The goal is to see that the canter can beachieved if only briefly. Riders should have knowledge ofhow to prepare for the transition but a prompt accuratetransition is unlikely at this stage.Circles should be of correct size (i.e. Go to tangent points)not necessarily bent, or rhythmic.At this level riders should be beginning to demonstrate theability to ride independently.Trot course of poles to demonstrate ability to controldirection, approach and ride to the end of the lines and usecorners. They should be able to focus on direction, and useof eyes to plan where to turn for next fence.Course should be “simple” with 2 changes of direction andnothing related. For example a single pole at B, diagonal,diagonal and a single pole at E. The candidate is to executethe course in rising trot with correct use of diagonals. Thestandards should be left at the ends of the poles toencourage horse and rider to go through the standards andover the middle of the poles.
Rider Level Written Tests 2012 – Study GuideCoach SupplementRider Level 1(Information based on Rider Level 1-2 Manual)Parts of the horseParts of the SaddleReasons to groom your horseSafety rules in stablesTacking up the horseNatural and artificial aidsRider fitnessColors of HorsesCleaning of tackGrooming tools and their useSafety around the horseCare of tackArena markersRiding in hot weatherRider Level 2(Information based on Rider Level 1-2 Manual)All of topics from Rider 1Horse CoatBedding – use and typesRein AidsExercises on horseback – how they help the riderJuly 2013Parts of the hoof, function of eachCare of tackParts of the saddle and bridle, fitting of sameMarkings of legs and face
8ENGLISH RIDER HANDBOOK – LEVELS 1-2 – LEARN TO RIDE PROGRAMAbout the Rider – Levels 1 and 2Like other sports, participants in equestrian sport have varying motivations and degrees ofengagement, from very leisurely participation to more serious competitive involvement. Regardless oflevel of ability or type of engagement, both the horses and the riders are athletes. In both riding forpure enjoyment and riding for better performance, the horse and the rider benefit by appropriatepreparation. The horse and rider that are both fit for what they are doing, enjoy the activity more andhave better ability to accomplish their goals and avoid injury. Horse and rider are two athletes workingtogether.Riders have a particular responsibility for being physically and mentally prepared, because everything arider does on the horse affects the horse’s way of going. The rider has an enormous impact on thehorse’s performance, soundness and long term potential either positively or negatively. Riders caninfluence their horse to improve his movement and performance, or they can unknowingly block himfrom being his best.Horses often compensate for riders’ lack of self-preparation without the rider ever knowing. When thishappens, the horse can take on more strain than he should in movements, and his long termsoundness can be affected. The best way to help the horse perform in the freedom of movement hewas designed for, is for the rider to be balanced, free of tension and able to control their ownmovements as needed. A balanced and relaxed rider with good posture and body awareness can givenice clear aids to the horse and allow the horse to move properly. The rider can also respond betterand is more likely to avoid injury.At these beginning stages of a rider’s development, being prepared is not complicated. Riders inLevels 1 & 2 are in a phase of development as a rider which is most benefitted by improvements ingeneral athletic ability, such as posture, body awareness and nicely balanced muscle tone. In theLong-Term Equestrian Development model, riders at this stage are in the early Learn to Ride phases.More information on Long-Term Athlete Development is available in other Equine Canada resources.It is important to be involved in a variety of activities outside of riding that promote the basic athleticabilities mentioned. It is also equally as important to sample different equestrian disciplines. Riding isclassified as an "early start, late maturation" sportwhere riders are best to start with very broadThe more the rider at this stage canexperience and only specialize much later. Themore the rider at this stage can learn aboutlearn about different ways to use theirdifferent ways to use their body on and off thebody on and off the horse, and thehorse, and the more they can learn about horses inmore they can learn about horses ingeneral, the more successful they will be in theirgeneral, the more successful they willriding. At this stage, children and adults alikebe in their riding.should be involved in other sports and activities,and sampling different equestrian disciplines.
ENGLISH RIDER HANDBOOK – LEVELS 1-2 – LEARN TO RIDE PROGRAM9Depending on age, riders in levels 1 & 2 would be expected to start out with riding once a week, andgradually increase practice times to a few times a week. Riders in this stage do not have the musclememory or postural stamina to sustain many hours of riding in a week or at one time, withoutfatiguing, falling into bad habits and causing the horse to be uncomfortable or to compensate for theriders’ lack of self-carriage and accurate aids. At this stage, riding more and more is not the best way tobecome better. Being fitter and more prepared with lots of exposure to horse learning and experiencewill help the rider progress from lesson to lesson. Parents can be assured that keeping their childinvolved in other sport activities is the best way to help your child be ready to excel at riding later.Adult riders can enjoy the riding experience while balancing the rest of life, knowing that acquiring newmuscle memory patterns and skills takes time. The brain and body work best at this stage with variety.Levels 1 & 2 are a skill acquisition stage when riding should be fun and safe for both the rider and thehorse.There are simple things riders of all ages can do to be prepared for their riding sessions and to be abetter athlete. Getting enough sleep is one of the most important things a rider can do. Being tiredmakes the body less able to react quickly and may increase the risk of falling off of the horse. Fatiguealso influences mood. Horses are very sensitive to moods, especially when the mood is blocking therider from understanding the lesson or applying clear and fair aids.Simple Keys to Safer Better Riding in Levels 1-2 Be active in a variety of ways to improve Self-carriage (ability to keep posture and use bodycorrectly, through muscle tone, core strength, goodposture habits) Balanced strength and core muscle tone Body awareness (proprioception) Flexibility and joint mobility Balance Warm up your body before your ride Learn all you can about horses and try differentdisciplines Get enough sleep Stay Hydrated Eat sensibly and regularly to keep consistent mood,energy levels and attention-span
10ENGLISH RIDER HANDBOOK – LEVELS 1-2 – LEARN TO RIDE PROGRAMNutrition is another easy to manage factor in enjoyment and success with riding. Drinking plenty ofwater and eating healthy foods affect both physical and mental ability to learn and perform. Nutrienttiming can also have a significant impact on riding. Riding on a completely empty stomach is a badidea. Whether a rider is aware of being hungry or not, their body will respond to low blood-sugarlevels. Not only does being hungry affect concentration, but low blood sugar compromises the tone inthe core muscles which are needed for a rider to maintain good posture while riding. Concentrationand posture are very important for safe riding.Usually, riders are not aware of dehydration in the early stages. Drinking fluids in the hour beforeriding, whether the rider feels thirsty or not, will help prevent dehydration. Extreme dehydration orheat stroke are not the most common problem. Water levels are needed in the body for neuraltransmission and neuro-muscular efficiency. Being dehydrated affects concentration, learning andmuscular control well before the state of dehydration becomes obvious or alarming.In warm or hot weather, it is even more important that the rider is well hydrated before their ridingsession. Riders and coaches should be aware of the signs of heat stroke. The first signs of heat strokeare feeling hot, not remembering instructions and not thinking clearly. If the rider starts to have aheadache, feel dizzy, is sick to their stomach or their legs feel wobbly they should see a doctorimmediately.Physical elements required to ride efficiently and effectively at this stage include suppleness, stamina,proprioception and co-ordination (accuracy with body placement and response), balance and posturalstability. Posture in riding is dynamic, meaning that the rider has to maintain good biomechanicalignment while in motion and while the horse is in motion. The ability to maintain good posture andalignment while doing an activity is not something that can be mastered just in training sessions. Basicstarting posture in the saddle is greatly affected by the way a rider carries themselves through the restof their day and other activities.Training posture in a variety of ways through the day andA goal for riders in Levels 1 & 2week will contribute to being able to maintain good postureis to develop balance andwhile riding, without tension. Ideally, a rider should notcomfortableness on andhave to think about posture at all. At beginning stages suchas these levels, the rider may need to think about it quite aaround horses.lot, and constantly fix issues as they ride. Achieving the subconscious ability to maintain posture without thinkingabout it, takes ingrained muscle memory patterns, which only come from good posture and goodbiomechanics with every ride, and practiced throughout the day and week in all other activities.An easy adjustment to poor posture can be made by simply keeping the eyes up and looking forward,not looking down at the horse. There are many resources for good posture, both in classical equestrianliterature, as well as other modalities such as Centered Riding , Pilates , yoga, dance, Feldenkrais, Taichi, martial arts, voice training technique and gymnastics. Good posture for a rider should be relaxedand natural to allow the spine and hips to follow the horse’s motion, while maintaining the ability toguide and control the horse through thighs, seat, head and torso adjustments, primarily, and legs andhands secondarily.
ENGLISH RIDER HANDBOOK – LEVELS 1-2 – LEARN TO RIDE PROGRAM11A goal for riders in Levels 1 & 2 is to develop balance and comfortableness on and around horses.Building ability methodically will help a rider master new techniques in a relaxed and confidentmanner, which keeps them supple and free of tension. Pushing too fast or trying too hard introducestension which is counterproductive and will have a negative impact on skill progression, especially forchildren.As with any physical activity or performing art, warming up before riding is important. Exercising forthree to five minutes before riding will warm up your muscles, prevent injury and improve balance andcoordination. Choose warm-up activities that activate muscles, promote balance, mobilize joints andhelp with mental preparation for focusing on the ride. There are some warm up routines specific forriders, but riders generally would benefit by doing any balanced warm up they are familiar with whichachieves the above goals.Each rider s warm up will vary depending on personality and on discipline and other sportinvolvements. One rider may need a calming and slow warm up to prepare to ride with focus andwithout tension from their day. Another may need more active warm up exercises, or specific exercisesto undo negative tightness patterns from a day seated at a desk, or other sports. Most adults do notmove enough on a daily basis to bring a balanced body to their ride, without a warm up. Children usedto be more active, but trends in drops in activity and increase in sedentary ‘screen’ time pursuits arecausing children to be less active generally as well. These trends for both adults and children makedeliberate warm up preparation even more critical in all sport, including and especially riding.A rider who gets on their horse without warming up and stretching, will cause their horse to have tocompensate for the rider’s tension patterns. Tension patterns in joints affect the horse’s movement,even if the rider does not feel particularly tense psychologically.Note that holding stretches is very out of date with current conditioning practice. Stretching beforeactivities, including riding, should be dynamic (stretches that flow in and out), not static (stretches thatare held) or bouncing. Static stretches and bouncing in a stretch pull on muscles and ligaments whichare not warmed up.There are also warm up exercises that can be done whilemounted. Some suggestions are indicated toward the endof this book.
ENGLISH RIDER HANDBOOK – LEVELS 1-2 – LEARN TO RIDE PROGRAM107Equine Canada’s Comprehensive Program forRider DevelopmentObjectivesTo create a national program that offers levels of achievement for all riders from recreational tocompetitive. The program encourages riders to ride, learn and enjoy the equestrian sport, andpromotes a continuous and progressive path of learning towards safe and knowledgeablehorsemanship. The program encourages participants to continue learning in the sport by offeringvarious attainable levels of achievement that are recognized by certificates. The English RiderLevel 1-10 program is a preparation for future Equine Canada certified instructors and coaches. Thisprogram will compliment programs offered by riding schools across Canada and provide guidelines tocoaches and instructors.The EC Rider Level program provides NCCP certified Instructors and Coaches a complete andprogressive program of instruction to their students. This program is also an important component toaid in the continued promotion, development and recognition of qualified instructional programs andwill compliment the national stable registry system as it is developed.In addition to providing a national standard recognized from coast to coast, this program offers enoughlevels to maintain the interest of a rider over an extended period of time. For example, the youngstudent starting riding at age 8 can potentially participate in the program for a number of years. Thisprogram also meets the needs of achievement and goals for the adult rider.Note: This program is also tailored for those riders who seek to further their riding skills onthe flat but who may not wish to continue over fences. Therefore, the option opens atRider Level 3 to take either the full riding phase or only the flat phase. This option iscontinued through Rider Levels-4-10.If a candidate elects not to do the gymnastic/jumping phase at a particular level, and has indicated thischoice on their application form prior to the test, the evaluator is only to mark the flat phase of theriding test.Candidates, who have elected to complete solely the flat phase of evaluation, will be issued acertificate of achievement stating that it is for the flat phase.
108ENGLISH RIDER HANDBOOK – LEVELS 1-2 – LEARN TO RIDE PROGRAMCandidates intending to pursue their instructor or coach levels should carefullyconsider the following:Those candidates who wish to attain their instructor certification must successfully pass either the fullriding OR the flat phase at Rider 6.The Practical Horse Knowledge/Written/Lunging Phases must also be completed. If an instructorcandidate wishes to teach over fences then the candidate would be required to complete the fullRider 6 exam.Those candidates who wish to attain their Competition Coach certification will need to ensure theycomplete full rider levels up to and including Rider 8.History and Schedule of Dev
The Rider 2 will be questioned on content from the Rider 1-2 Manual and should be familiar but not limited to: uses of grooming items, parts of the hoof, common hoof ailments, parts of the saddle and bridle, basic tack fitting, bedding and rein aids, markings. Rider 2 - Practical Horse Knowledge . Turnout should be neat and workmanlike.
