Transcription
TIPSAll you need to know to manage and make the most of your paid Zoom account.ContentsZoom’s New Users Guide . 2Downloading the Zoom app vs. Joining from the Zoom Website . 2Phone Only Participants . 3Sound Management. 3Your Settings . 4Host Controls. 5Co-Hosts . 5Host tips . 6Meeting Registration . 6Registration Reports . 8Polling. 9Downloading a Report of Poll Results . 11Breakout Rooms . 11Preset Breakout Rooms. 12Breakout Room Tips . 12Recording While in a Breakout Room . 12In Meeting – Renaming . 13In Meeting – Reactions . 13In Meeting – Chat . 13In Meeting – Participants Tab . 14In Meeting – Hide Self Video. 15In Meeting – Screen Sharing . 15In Meeting – Closed Captions . 17In Meeting – Removing a Participant . 20Recording . 20Recording Settings . 21Zoom Security . 22Waiting Rooms . 23Customizing the Waiting Room. 24Sending Messages to Participants in the Waiting Room . 25Icebreakers and Interactive Activity Ideas . 26Additional Apps to Engage Participants . 28As of August 19, 2020Written by Heather Pontonioedits/additions? Email heather@artiststhrive.org
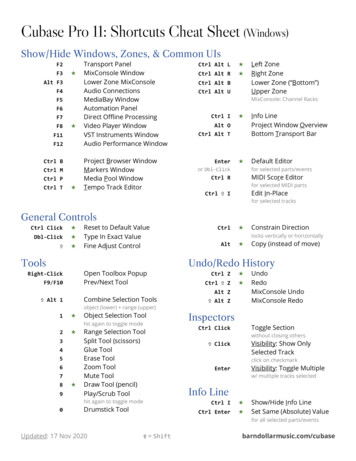
Zoom’s New Users ng the Zoom app vs. Joining from the Zoom WebsiteYou have the option to download their Zoom Client App or launching from the Zoom website for any meeting.When launching from the website, you receive this prompt.The website limits the options for a meeting. Participants will still have the same Chat and Participants optionsbut they do not have Reactions to Settings or other controls (see image).Page 2 of 28
Phone Only ParticipantsZoom provides a phone only option for participants. Hosts should share with participants by phone that theyhave control to mute and raise their hand.*6 - Toggle mute/unmute*9 - Raise handNote that participants by phone only cannot respond to poll or utilize reactions or other icon nonverbalresponses.There are additional considerations for phone participants if you are using breakout rooms.Sound ManagementSigning in via video and phone may improve audio.Selecting on the arrow next to your microphone in a meeting will open a menu of options to manage yourmicrophone and speaker.Selecting Switch to phone audio will open a pop-up with phone number options.Follow the prompts on the phone.Page 3 of 28
If you enter the Participant ID the phone audio and video will be synced.Syncing audio and video:1) Merges the phone image with the video2) Means that if the video connection is lost, the audio connection is also lost* it may be beneficial for hosts to NOT merge lines by not including the participant ID to sync the connections.Your or-mobile-appThere are 2 areas where you locate settings. One in the downloaded app and another online. OnlineSettings are available in your meeting by selecting Audio or Video settings (using the arrows next to themicrophone/video images) but you cannot alter the items in the General tab (shown here).Page 4 of 28
From this area or by selecting the Audio or Video settings during a meeting (using the arrows next to themicrophone/video images) you can access all tabs except the General. In the Audio tab you can activate theoption to be able to temporarily unmute yourself during a meeting by holding down the space bar.Host ControlsZoom provides a nice overview of all the host controls in this article: -Host-and-co-host-controls-in-a-meetingCo-HostsYou may have to enable this in your https://zoom.us settings – In Meeting (basic) – about ½ way down the list.The co-host feature allows the host to share hosting privileges with another user, allowing the co-host to managethe administrative side of the meeting, such as managing participants or starting/stopping the recording. The hostmust assign a co-host. There is no limitation on the number of co-hosts you can have in a meeting or webinar.Page 5 of 28
Co-hosts do not have access to the following controls, as they are only available as host controls in a meeting: Start closed captioning and assign someone or a third-party to provide closed captioningStart live streamingEnd meeting for all participantsMake another participant a co-hostStart breakout rooms or move participants from one breakout room to anotherStart waiting room (co-hosts can place participants in waiting room or admit/remove participants fromthe waiting room)Co-hosts cannot start a meeting. If a host needs someone else to be able to start the meeting, they can assign analternative host when creating the meeting. Co-hosts must have a licensed paid Zoom account to be co-hosts.Co-hosts also have the ability to move between breakout rooms.Host tips Don’t go it alone! Consider who else can help:o Can a participant be made a co-host to help monitor the participants tab for raised hands, etc(and then they can also remove those icons)o Can a participant be made a co-host to see all chats?o Can a participant be made a co-host to be assigned as the tech help (that person could renamethemselves to *tech help - - the combo of the symbol * and making them a co-host means thatare first on the list); Have your chat, participants tab open throughout the call and view participants in Gallery View Beginning the meeting with a brief Zoom overview can be helpful to all.o Participants may feel more comfortable turning off their video or being on mute if the host gives‘permission’ at the start of the meeting. Many participants are suffering Zoom fatigue but worrythat it will not appear they are focused on the meeting if they turn off their camera.o Phone participants should know that *6 mutes/unmutes *9 raises your hand # returns you tothe main room from a breakout sessiono Make sure participants know how to Mute/Unmute themselves. Encourage participants to mutethemselves when not speaking to reduce noise. Hosts can mute all in the Participants Tab (seebelow).o Ask participants to open the Participants Tab and locate the Raise Hand and other icons to usethroughout the meeting.o Participants can also change their personal view from Speaker to Gallery by clicking on the topright corner button. This is unique to each computer.Meeting RegistrationHosts can set up a meeting with an RSVP through Zoom – this will also make it easier to pre-assign breakoutrooms (when creating the meeting RSVP, select the box to pre-assign breakout rooms (more details below).Creating a meeting registration via the web portal https://zoom.us/After you sign in, click My Account on the top right in blueSelect Meetings under the left side barClick the Blue Schedule a New Meeting buttonAdd your meeting detailsClick on Registration requiredSave the meetingPage 6 of 28
After you save, scroll to the bottom and you will see these options:Registration detailsIf you click on the far right “Edit” on the Registration options line, you can add registration questions fromtheir list or go to the custom questions tab to create your own.Email SettingsYou can edit the Confirmation sent to registrantsBrandingYou can add your logo to the registration pagePollYou can prep polls for your meeting that will be available during the callManage AttendeesUnder the manage attendees area you will be able to see who is registered and view a list, but you cannot exportor pull a list there. For that, you need to go to reports (see below).Page 7 of 28
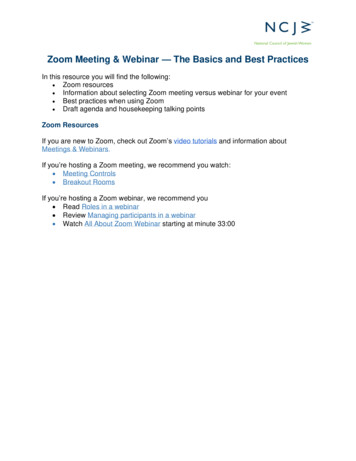
Registration ReportsTo get a report of everyone who has registered, you need to go to https://zoom.usIn your Account, left side bar, under Admin, Account Management - locate Reports (see the image)On the next screen, select the Meeting Report to see all your meetings and download registrationsAfter you select Meeting, you need to select the date range to locate the meeting.Once you do, you will need to select the blue Generate button on the right. After it processes, that will change toDownload. You can then download a csv file with all the registrations and form responses.Page 8 of 28
PollingTo enable the polling feature, Sign in to https://zoom.us. In the navigation menu, click Account Managementthen Account Settings (if you are an account administrator) or Settings (if you are an account member).Navigate to the Polling option on the Meeting tab and verify that the setting is enabled. If the setting is disabled,click the toggle to enable it. If a verification dialog displays, choose Turn On to verify the change.Note: If the option is grayed out, it has been locked at either the Group or Account level, and you will need tocontact your Zoom administrator.After you enable the Poll settings, you can create a poll during a meeting or in advance.To create a poll in advance, go to https://zoom.us and create or locate the meeting. At the boom of the meetingyou will see the option to Add a poll. Each question can have up to 10 choices and participants can be forced toselect only 1 or multiple choices.To launch the poll in the meeting, select Poll on the taskbar.If you have prepared more than 1 poll, use the down arrow at the top to select the correct question and then clickLaunch Polling.Page 9 of 28
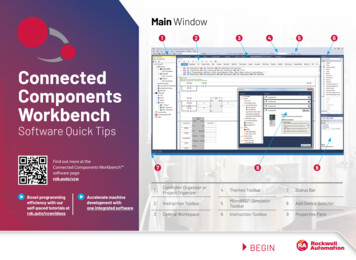
When the poll launches it will pop up on the screen.Phone participants cannot participate in polls.Participants cannot see responses until you close the poll.Hosts see this screen when polling is live. They can see how many people have voted, what responses are andhow long the poll has been open. Attendees do not see this until you end poll and share results.When the host Ends Polling, they receive this option:Page 10 of 28
When the hosts shares results, participants see results. To stop sharing results, the host needs to click on StopShare Results.Again, note that phone only participants cannot see results or participate in polling.You can only create a max of 25 polls for a single meeting.Downloading a Report of Poll ResultsThis is found in the same area you can download a meeting registration report. You can download a report of thepoll results after the meeting. When viewing a report of the poll results, take note of these things: If registration was turned on and the poll was not anonymous, it will list the participants' names and emailaddresses. If registration was not on, the polling report will show the profile names of authenticated users in thesame account. If the poll was anonymous, it will show "anonymous" for the participants' names and email addresses. Breakout Rooms Breakout rooms are available to all users.Breakout rooms allow you to split your Zoom meeting in up to 50 separate sessions.Zoom guide: 3-Enabling-breakout-roomsYou must enable this in your account settings at https://zoom.us – In Meeting (Advanced) 2nd item.Page 11 of 28
Preset Breakout RoomsIn the image above, having the Allow host to assign participants to breakout rooms when scheduling allows thehost to use the registration list to pre-set rooms.You can also present the room names (without adding participants) when creating the meeting.Breakout Room Tips-The co-host can leave and join any breakout room only after they join a breakout room assigned to themby the host.If a participant clicks Ask for Help, it will notify the meeting host that you need assistance and they will beasked to join your breakout room.Any phone-only participant must stay in the room until the full countdown clock ends. They can return tothe main room immediately if they hit #.When creating the breakout room the host sets how long the rooms will take to return. Note that anyoneon the phone that does not hit # will need to wait until the full countdown clock to return.Hosts can broadcast messages to all the breakout rooms. Note that this message appears in small print atthe top of the screen and participants on phone only will not receive them.Recording While in a Breakout RoomParticipants must be given permission by the host to record. The host needs to allow recording before openingthe breakout rooms. If the host has already open the breakouts rooms, they can join your breakout room to allowyou to record.Recordings from the breakout room cannot be saved to the cloud, they go to the computer of the participant whohit record.Page 12 of 28
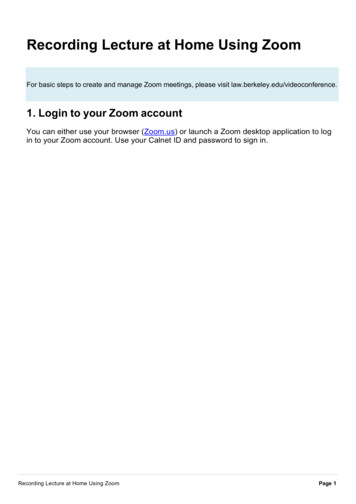
In Meeting – RenamingWhatever name is on the video is that name that will be used in the transcript and chat. Asking everyone torename to their proper name, include organization, pronouns, and/or native lands is helpful for all participants.Hosts can rename participants by clicking on the on their video or I the participants tab.In Meeting – ReactionsReactions are one of the choices in the app that is across the bottom bar.The skin tone is changed in your settings (mentioned above)Also note that reactions are not available to those using the browser to view the meeting.Reactions appear for a short time and are viewable on the top corner of your video screen.In Meeting – ChatParticipants can only see chats from their point of entry. So, if you posted a link when the call started, only thoseon the call at that moment see that chat. A latecomer will see a blank chat when they join.Hosts can control chat capability. See image below for options.In the https://zoom.us/ settings you can turnon/off the ability for attendees to send files viachat. For large public meetings it's recommendthat you turn this feature OFF to avoid zoombombing issues.Note, private chats are saved in the master chatrecording – they are only private during themeeting.Page 13 of 28
In Meeting – Participants TabUnder the participants you have access to all the other features for participation including raise hands, yes, not,go slower, go faster, thumbs up/down, need a break, and stepping away.When participants click on these, they appear in the participant tab next to their name. Hosts see these images inthe video boxes as well.Hosts can clear these for everyone (clear all) or for a single participant (by clicking the icon at their name/video).It is also in this tab where hosts can instantly mute all participants except hosts (mute all button bottom middle)and by clicking on the next to mute all select options for participants (see image).Hosts can see a tally count on top ofthe icons at the bottom of the tab.Hosts will see the icons in the participants tabto the right of their name.Hosts will also see the raised hand icon on the video screens – hover your mouse over the hand will open the textto click to lower the hand.In the Participants Tab, raised hard will show up in the cue order from top down in order that they clicked on theRaise Hand icon.Page 14 of 28
In Meeting – Hide Self VideoIn your video screen, click on the Click on the Bottom choice – Hide Self ViewTo show again, click on Show Self View in the top right next to the Gallery/Speaker View optionIn Meeting – Screen SharingBy simply clicking on the bottom green icon in the middle of your toolbar you can share any open file orapplication.You can preset who can share screens in the online settings for your account. Or during a meeting, follow thesesteps:Click on the arrow next to Screen Share:Page 15 of 28
Click on Advanced Sharing Options Change options to Only Host.If you are hosting a public meeting, turning OFF screen sharing for participants will help limit "zoom bombing".If you have more files/applications open than can be seen on this screen, click on the bottom right box for allfiles/applications to be added to their screen.If you are sharing sound, make sure you check the box in the bottom left cornerMake sure you test the video before you the meeting. You may have to download something that allows Zoom toofficially share your computer audio. This is key because otherwise when you share a video, you will be using yourcomputer speaker or headset audio so you can’t mute yourself or the video audio will also be muted.Under the Advanced tab you can share computer sound only – a great tool if you would like background musicplaying as people enter the meeting (especially if everyone is on mute).Page 16 of 28
While screen sharing the default view is 4 participants. You can grab the bar to see more participants.If you are the host, you can pop out the videos to see more participants.In Meeting – Closed CaptionsTo activate Closed Captioning, first you need to turn on the feature:Page 17 of 28
In a Zoom meeting or webinar that you are hosting, click Closed Caption.Click one of these options:Assign a participant to type: Opens the Participants Tab. Hover over the participant's name andclick More then Assign to Type Closed Caption.I will type: Opens the closed captioning window for you to manually type closed captions.Copy the API token: Copy the URL that you can provide to a third-party closed captioning service to integrate theservice with your meeting.Page 18 of 28
When closed captions are in use, participants will see a notification. In a meeting, it will appear in the controls atthe bottom of your screen.After selecting Closed Caption, you will see the captioning at the bottom of your screen.Optional: If you need to adjust the caption size, click on the arrow next to stop/start video and choose VideoSettings.Click on Accessibility.Move the slider to adjust the caption size.Page 19 of 28
In Meeting – Removing a ParticipantIf someone has joined the meeting who should not be there, or if a presenter is done with their piece of themeeting, you can remove them.When you do remove someone, they can’t rejoin the meeting. But you can toggle your settings to allow removedparticipants to rejoin, in case you remove the wrong person of they need to join again.Note that if this is a recurring meeting, if you remove them without turning on the setting to return, they areunable to rejoin (even on a future call) without your approval.RecordingHosts can record Locally (Record to this Computer) or to the Cloud (Record to the Cloud).Local Recording Available for all free and paid accounts. If the host loses the connection, a local recording will stop. Recording to your local computer will record utilizing the host’s view – gallery or active speaker. Local recordings do not show speakers names.Cloud Recording Cloud recording is automatically enabled for all paid subscribers. The cloud recording includes options for video, audio, transcript, and chat text files. If you select multipleways to record you will receive separate files for each. The recording files can be downloaded to a computer or streamed from a browser. Recording to the cloud will show speakers names, local recordings will not. In cloud recording, you can select different recording layouts including active speaker, gallery view, andshared screen. See Zoom’s article highlight each option: 091. This is set online in settings (see below) If you're have issues with cloud recording, see Zoom’s frequently asked questions about recording.Page 20 of 28
A few considerations: If there is a co-host, either person can initiate the recording, but only 1 person can record. You cannot record locally and to the cloud – you need to pick. Recording settings include an option to optimize for 3rd party software – make sure this is selected if youare planning to share your recordings to YouTube, etc.Recording SettingsChange your Recording settings at https://zoom.us/Settings/Recording TabUnder the Advanced cloud recording settings are a number of helpful options, including the option for an AudioTranscript. This generally takes 1 hours longer to receive than the notification of the cloud recording beingavailable.Page 21 of 28
Zoom SecurityZoom offers this robust blog post about security: your-zoomevent/? ga 352& gac 1.192622424.1597841050.CjwKCAjwm UDcdMeaoZ2gH7ajXRoCEjgQAvD BwEThis article covers: Screen Sharing Personal Meeting ID Password Protecting Waiting Rooms Locking the Meeting Two-factor Authentication Removing Participants Disabling Video Muting Participants Turning Off Annotation Disability Private ChatA few additional tips:In Meeting - Security SettingsIn addition to the settings you can enable prior to the meeting, during a meeting Zoom provides options in theSecurity Button that you can turn on/off at any point in the meeting.In Meeting – Lock MeetingWhen you lock a Zoom Meeting that’s already started, no new participants can join, even if they have the meetingID and password (if you have required one).You can do this in 2 ways:1. In the meeting, click Participants at the bottom of your Zoom window. In the Participants pop-up, click thebutton that says Lock Meeting.2. Click on the Security button on your Zoom toolbar. First choice is Lock Meeting.Page 22 of 28
In Meeting – Chat File SharingIn the https://zoom.us/ settings you can turn on/off the ability for attendees to send files via chat. For largepublic meetings it's recommend that you turn this feature OFF to avoid zoom bombing issues.In Meeting – Removing/Reporting a ParticipantSee the previous section on Removing a Participant, but note that as a host, you have the ability to removesomeone from the meeting or report them to Zoom’s Trust and Safety Team for review.Waiting RoomsWaiting rooms can be turned on in your settings for all meeting or in scheduling for just that meeting.You can turn on waiting rooms during a call in the Participants Tab.Page 23 of 28
This is a great tool if you are looking to manage office hours or drop in visitors. Check out this video tip:https://www.youtube.com/watch?v ntaT7KEcids&feature youtu.be The host is the only one who can see/bring in people from the waiting room. If using this feature,consider co-hosts, you can also approve attendees. If the Waiting Room option is enabled, join before host will not work for that meeting.Using waiting rooms raises Security as any unwanted guests would be held in that space rather than having theability to join the meeting.Hosts can also move participants back and forth to/from the waiting room. A great feature if you are planning aninteractive game or having presentations during a longer meeting.Customizing the Waiting RoomYou can customize the Waiting Room title, logo, and description at an account, group, or user level.Note: You will need to enable Waiting Room before you have the option to customize it.After enabling Waiting Room, navigate to the Security section.Click the pencil icon below the Waiting Room option.This will open the Waiting Room customization options.Page 24 of 28
Sending Messages to Participants in the Waiting RoomAs the meeting host, open the Chat.Select to send a message to Everyone (in Waiting Room). Type and send your chat message to the WaitingRoom.Once the message has been sent, the participants in the Waiting Room will see the message on the Waiting Roomscreen:Page 25 of 28
Icebreakers and Interactive Activity IdeasHere’s a collection of icebreaker and team activities to get people connecting and talking during your meetings Get ConnectedHave all participants hold up their hands as if they are pushing on the sides of their Zoom video boxes, but keeptheir hands in view of the camera. No matter where the videos appear, it will look like people our hand-in-handconnecting across the screen.Video On/OffThis works for any single answer game – a Would-You-Rather or Yes-No type game. Ask all participants to turnoff their video camera. If they answer one way they turn on their video – this will put all videos to the top of thescreen.Make A WaveHave all participants turn off their video camera. In the order you note, have them turn them back on – thisshould place the videos in the same order for all. Have everyone practice making a wave like you would in asports arena – note that some videos are mirrored and some are not. When ready, have the host start the waveand see how far it can go in order from top left through each line weaving through the screen. The host canrestart the wave whenever they would like.Heads and ShouldersIn this activity, the facilitator will need to have prepared a series of trivia questions with two possible answers. Forexample, one such question would be “Does Wayne Grezky have more regular NHL season goals or assists?” Ifparticipants believe the answer is goals, they’d put their hands on their heads, and if they believe the right answeris assists, they’d put their hands on their shoulders. The facilitator would then reveal the correct answer, andthose who did not get the right answer will press the Stop Video button on Zoom to temporarily stop sharing theirvideo, indicating that they are out of the round. The last person remaining in the game will be the winner.Everything from A-ZThe larger team will be broken up into multiple smaller teams via the Breakout Rooms feature on Zoom. Oncethey are in their breakout rooms, participants will have 5 minutes to find items in the room that they are calling in(or, shall we say, Zoom-ing in) from that starts with each letter of the alphabet. They will need one item for eachletter, and each item can be used once only. For example, they can use Apple for A, and Book for B. Each team willalso select one recorder to write down what each item they have found for each letter. Once their time is up, thefacilitator will bring the team back to one call, and the recorders from each team will share what they came upwith.Something in CommonThis simple Zoom icebreaker will also take advantage of Zoom’s Breakout Rooms option. Let Zoom automaticallyassign the larger team into groups of 2, and give them 5 minutes to find 5 UNIQUE things that they have incommon. Within those 5 minutes, participants also need to choose the most unique thing that they have incommon with their partner, which they will share with the larger group once they go back to their larger meeting.Guess Who?Start by getting participants to think of a unique and interesting fun fact about themselves. Then, using the Chatoption on Zoom, have each person send the fun fact (or favourite song, hobby, etc.) only to the facilitator (and notto Everyone). Alternatively, the facilitator can have participants email the fun fact to the them. Once the fun factshave been collected, the facilitator will read each of the fun facts to the group, and as each fun fact is read, thelarger team will try to decide who the fun fact bel
The co-host feature allows the host to share hosting privileges with another user, allowing the co-host to manage the administrative side of the meeting, such as managing participants or starting/stopping the recording. The host must assign a co-host. There is no limitation on the number of co-hosts you can have in a meeting or webinar.