Transcription
XDECT 8355SeriesFor more exciting new products please visit our website:Australia: www.uniden.com.au1
IMPORTANT SAFETY INSTRUCTIONSWhen using your telephone equipment, basic safety precautions shouldalways be followed to reduce the risk of fire, electric shock and injury topersons, including the following: This unit is NOT waterproof. DO NOT expose this unit to moisture. DO NOT expose this unit to rain. Do not use this product near water, for example, near a bath tub, washbowl, kitchen sink or laundry tub, in a wet basement or near a swimmingpool. Avoid using a telephone (other than a cordless type) during an electricalstorm. There may be a remote risk of electric shock from lightning. Do not use the telephone to report a gas leak in the vicinity of the leak. Use only the power cord and batteries indicated in this manual. Do notdispose of batteries in a fire. They may explode. Check with local codesfor possible special disposal instructions. Do not place the handset in any charging cradle without the batteryinstalled and the battery cover securely in place.SAVE THESE INSTRUCTIONS!General Notices for New Zealand Model: The grant of a NZ Telepermit for any item of terminal equipmentindicates only that Telecom has accepted that the item complies withminimum conditions for connection to its network. It indicates noendorsement of the product by Telecom, nor does it provide any sortof warranty. Above all, it provides no assurance that any item will workcorrectly in all respects with another item of Telepermitted equipmentof a different make or model, nor does it imply that any product iscompatible with all of Telecom’s network services. The maximum volume setting of this telephone exceeds the Telecomspecified volume requirement. Telecom takes no responsibility for thehigh volume available on this telephone, who believe this telephone istoo loud should contact the manufacturer at the website indicated onowner’s manual warranty page. For telephone networks other than Telecom there may be a chargeincurred for local calls if the Insert 0 feature is on. Turn Insert 0 off. This equipment may not provide for the effective hand-over of a call toanother device connected to the same line.2
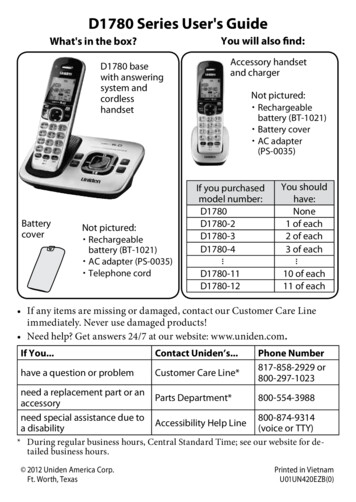
WHAT’S IN THE BOX?XDECT 8355 base with cordlesshandsetNot Pictured: Rechargeable battery(BT-694 or BT-694s) AC adaptor(AAD-6135) Telephone cord Belt Clip Battery cover Wall Mount BracketYou will also find:Accessory handset and chargerNot Pictured: Repeater andAC Adaptor(Optional)(AAD-041S(R)) Rechargeablebattery(BT-694 or BT694s) Charger ACadaptor(AAD-600S(R)) Battery cover Belt ClipIf you purchasedmodel number:You shouldhave:XDECT 8355NoneXDECT 8355 11 of eachXDECT 8355 22 of eachXDECT 8355 33 of each If any item is missing or damaged, contact your place of purchaseimmediately. Never use damaged products! Need help? Get answers at our website:www.uniden.com.au for Australian model3
CONTENTSIMPORTANT SAFETY INSTRUCTIONS. 2INSTALLING YOUR PHONE. 6Charge the Battery. 6Connect the Telephone Cord. 7Mounting the base unit. 8Set Up the Repeater. 10SETTING UP THE MOBILELINK BLUETOOTH CONNECTION. 14GETTING TO KNOW YOUR PHONE. 16Parts of the Base. 16Parts of the Handset. 19Reading the Displays. 21USING THE MENUS. 23USING YOUR PHONE. 27Using Your Bluetooth Connection. 28Finding a Lost Handset. 28Changing the Volume. 29Staying in the Range. 29Using the Caller ID and Redial Lists. 30Using Call Waiting. 32Using Optional Headset. 32Using your Phonebooks. 32USING SPECIAL FEATURES. 36Power Failure Back Up System. 36DND (Do Not Disturb). 37Multihandset Features. 38Privacy Mode. 39Room Monitor. 39Call Transfer. 39Intercom. 40Voice Message Notification. 40USING THE ANSWERING SYSTEM. 41Answering System Options (Answering Setup). 41Personalize the Greeting. 42Accessing the Answering System. 42IMPORTANT INFORMATION. 46INDEX. 52ONE-YEAR LIMITED WARRANTY. 534
1FEATURES OF THE XDECT 8355 SERIES1.8GHz Extended DECT TechnologyBluetooth MobileLink- Connection for up to 4 Mobile phones- USB port to charge single Mobile phone- 6000 Phonebook download (up to 1500 entries per Mobile)Multi (12) Handset Capable1 /DECT Headset capableMulti (6) Repeater CapableWall Mountable BaseRoom Monitor10 Speed DialPower Failure ModeDigital Duplex Speakerphone on Handset200 Number Home PhonebookCall Waiting²/FlashCall ID² Features- 50 Caller ID² Memories (shared)- Caller Name Tag² and Personal Ring²- Caller Announce on Base (Text-to-Speech for Caller ID Information)Call Block PRO²10 Ringer options (4 Rings/6 Melodies)4 Level Ringer VolumeRinger Do Not Disturb (DND) mode6 Level Earpiece Volume6 Level Speaker VolumeHearing Aid Compatible10 Number Redial Memories1-Line Conference Calling, up to 4 way (1 line (landline or mobile) 2 Handsets Base)2-Line Conference Calling, up to 5 way (Landline Call Mobile Call 2 HS Base)up to 10 Days Handset Standby Time3up to 10 Hours Handset Talk Time3Automatic ECO (power save) ModeMute/HoldHeadset Capable (for Handset)Shoulder Rest BeltclipIntegrated Digital Answering Machine- 30 minutes recording capacity- up to 59 messages- Remote access from handset or away from home.Maximum expandable with XDECT 8305 accessory handsets.Caller ID, Call Waiting features work only if you subscribe to the service provided by your local telephonecompany. There is usually a fee for this service. Name Tag, Personal Ring and Call Block features requireincoming Caller ID data.23Based on normal use with full battery charge.Specifications subject to change. Visit the XDECT 8355 webpage on the Uniden website for the latestinformation.5
INSTALLING YOUR PHONECharge the Battery1) Unpack all handsets, battery packs, andbattery covers. If any battery cover is alreadyon the handset, press in on the notch andslide the cover down and off.2) Line up the red and black wires on the batterypack with the label inside the handset.3) Push the connector in until it clicks into place; tug gently on the wiresto make sure the battery pack is securely connected.4) Place the cover over the battery compartment and slide it up intoplace.5) Connect the base AC adaptor to the ADAPTOR jack on the rear of thebase.6) If you have accessory handsets, connect a charger AC adaptor toeach charger's DC IN 9V jack and set the plug into the notch asshown.7) Plug the other end of each adaptor into a standard 240V AC poweroutlet.8) Place a handset in the base and anyaccessory handset(s) in the charger(s)with the display(s) facing forward. TheCHARGE light on the handset(s) shouldturn on.If.the CHARGE lightdoes not turn onTry. reseating the handset checking the AC adaptor connection seeing if the outlet is controlled by a wall switch##Charge all handsets completely (about 15-20 hours) before usingthem.6
Connect the Telephone CordUse the telephone cord to connect the TEL LINE jack to a standardtelephone wall jack.Test the Connection1) Pick up the handset from the cradle and press HOME/FLASH. Youshould hear a dial tone, and the display should say Talk.If.Try.you don’t hear a dialtone or the displaysays Check Tel Linechecking the connection between thebase and the phone jack.2) Make a quick test call. (Press END/CLEAR to hang up.)If.Try.there’s a lot ofnoise or staticsee page 46 for tips on avoidinginterference.3) Test any accessory handsets the same way. If you can't get a dialtone or the handset display says Unavailable, try moving the handsetcloser to the base or resetting it (see page 49). Charge all handsetscompletely (about 15-20 hours) before using them.Installing the Belt ClipLine up the holes on each side of the handset. To attach the belt clip, insertinto the holes on each side of the handset. Press down until it clicks. Toremove the belt clips, pull either side of the belt clip to release the tabsfrom the holes.7
Mounting the base for desktop use121. Turn the stand so the word DESK is right-side up (it will be on the left).2. Insert the tabs into the notches at the top of the base.3. Press in on the latches and slip them into the notches marked DESK.Attach the base for wall mount211. Turn the stand so the word WALL is right-side up (it will be on the left).2. Insert the tabs into the notches at the bottom of the base.3. Press in on the latches and slip them into the notches marked WALL.8
Connect the Power and Telephone Cords1. Connect the base AC adaptor to the power jack and the telephone cordto the TEL LINE jack. Route the cords as shown below:For Desktop UseFor Wallmount2. Plug the AC adaptor into a standard 240V AC power outlet, and connectthe telephone cord to a standard telephone wall jack.3. If you are mounting the phone on the wall, place the mounting slots overthe pins on the wall plate, and slide the base down to lock it into place.9
Set Up the Repeater (Optional) The repeater is not a telephone; it must be registered to a phone basebefore using. Any repeater that came packaged with a base are already registered tothat base for you. For instructions on registering repeaters to the base, see page 50.How it WorksThe repeater extends therange of your base in alldirections, including up anddown. Cordless handsetsautomatically connect tothe repeater or the base,depending on which signalis stronger. You can roamanywhere within range of thebase or the repeater(s) andmake and receive calls asusual from your handsets.RepeaterRANGEEXTENDERBase coverage areaThe base signal isstrongest; handsetsin this area connectto the base.Hand-off areaHandsets in thisarea can connectto either unit.BaseExtended coverage areaThe repeater has astronger signal; handsetsin this area connect to therepeaterHand-offareaRANGEEXTENDER Handsets operate exactly the same no matter which unit they connectto. Usually, you can’t tell when a handset switches between the base andthe repeater in the middle of a call. Repeaters can be up to 3 chain-links (maximum) from the base. Your base supports a total of 6 repeaters, including any that weresupplied with your phone.10
Connect the Repeater Power CordUse the included adaptor to connect therepeater to a regular indoor (240 V AC)power outlet.Placing the RepeaterWall-mountholesHere are a few tips for placing yourrepeater so that you get the clearestRegistrationbuttonsignal and the maximum range: Place the repeater just inside thebase’s coverage area, that is, as farPower connectorfrom the base as possible where youstill have good reception. Put the repeater at least 10 m awayfrom the base or any other repeater. If you place the repeater on a flat surface, make sure the power corddoesn’t pull on the unit and that people walking by won’t knock it off thesurface. If possible, mount the repeater on the wall.Finding the Base’s Coverage Area1. Stand near the base and make a call on a cordless handset that isregistered to that base.2. Continue the call and carry the handset away from the base. Make sureyou go at least 10 meters.3. Make a note where you start to hear noise on your call (the signal isgetting weaker). You can use the signal strength icon on the handsetdisplay to find the best location: make a note where the icon indicatesthe signal is getting weaker.4. Place the repeater anywhere inside the range where the handset had aclear connection with no noise and the icon showed a strong signal.11
Testing the LocationPlace the repeater in its final position and connect the AC adaptor. TheLINK light will flash for a few seconds, then stay on.If.Try.the Link lightdoesn’t turn on checking the repeater’s AC adaptor connecting the adapter to a different outlet.the Link lightcontinues flashing making sure the repeater is not nearelectronic devices that can causeinterference. making sure there are no thick walls or largemetal objects between the repeater and thebase; these can block the signal. making sure there is no other base orrepeater within 10 m of this location.Move further away from the base and make a test call on a cordlesshandset.If.Try.the call won’t connectre-registering the repeater.there is a lot of noiseon the callmoving the repeater closer to the base.Placing the Repeater on the WallYou can mount the repeater directly to a wall using the horizontally alignedmounting slots at the back of the repeater unit. Before doing this considerthe following: Avoid electrical cables, pipes, or other items behind the mountinglocation that could cause a hazard when inserting screws into the wall. Mount the repeater within distance of a working 240V AC power outlet.##The Repeater unit is NOT waterproof. If mounted onto an outsidewall place under an eave or roof overhang where it is protectedfrom direct weather conditions, DO NOT place in direct sunlight.1. Insert two #10 screws into the wall, 57 mm apart. Leave the heads of thescrews about 6 mm away from the wall. (For best results, use a level toensure the screws are even.)12
##Remember to use appropriate anchors for the wall material.2. Keeping the AC adaptor cord out of the way, place the repeater over thescrew heads and slide it down into place.To remove the unit from the wall, just slide it up and lift it off the screwheads.13
SETTING UP THE MOBILELINK BLUETOOTH CONNECTIONThe XDECT 8355 with MobileLink technology can connect with mobilephones that support the Bluetooth V2.1 handsfree profile.Visit our website on the front cover or contact customer service for adetailed list of tested mobile phones. If you are not certain of the profiles supported by your Bluetooth phoneor if you have difficulty pairing your phone to the XDECT 8355, see themanual that came with your phone. With the MobileLink feature, you can essentially treat your mobile phoneas a second line. You can use the XDECT 8355 handset to make andreceive calls on your mobile phone number, put mobile phone calls onhold, and transfer calls to other handsets. See page 27, 28 for moreinformation. Bluetooth wireless devices have a maximum range of about 3 m; theactual range will vary depending on local conditions (obstacles, batterypower, interference, etc.).Pair your Bluetooth phonePairing “introduces” the Bluetooth device and the XDECT 8355 and givesthem permission to connect to each other. In most cases, once you pair aphone to the XDECT 8355 , these devices connect automatically wheneverthey detect each other. (If you have to manually reconnect each time,check the Bluetooth settings on your mobile phone.) You can pair yourBluetooth devices through the XDECT 8355.1. Press MENU/SELECT to display the main menu.2. Select the Bluetooth Setup menu, then select the Add Mobile phonesubmenu. The base goes into pairing mode when the handset displaysSearch & select from Mobile XDECT8355 PIN: 0000.3. On your Bluetooth phone, start a search for other Bluetooth devices.(This process may take several seconds and it will be different for eachmobile phone. See your phone owner’s manual for detailed instructions.)4. Your phone should discover a device called XDECT 8355 or Handsfreedevice. When your phone asks if you want to pair with this device,answer yes.5. 5. If your phone prompts you for a PIN code or password to pair with theXDECT 8355, enter 0000 (four zeroes).14
6. When your phone accepts the Bluetooth connection, the XDECT 8355sounds a confirmation tone. The Bluetooth device number icon on thebase and the handset display light up.##Most mobile phones automatically transfer the audio to aBluetooth device as soon as it pairs; if yours does not, look in yourmobile phone’s Bluetooth setup for a “transfer audio” or “sendaudio to device” option.To Test the Connection1. Pick up the handset from the cradle.2. Dial the number you want to call, then press MOBILE on the handset.You may not hear a dial tone or ringing, but the handset display saysTalk.3. Make sure the call connects and you can hear clearly. (When you’refinished, press END/CLEAR to hang up.)4. The XDECT 8355 remembers the pairing information for your mobilephone; if it loses connection with your phone for any reason (e.g., themobile phone travels out of range, runs out of charge, etc.), the XDECT8355 can automatically reconnect the next time your phone becomesavailable.Using the XDECT 8355 with four Bluetooth phones The XDECT 8355 can save the pairing information for four differentBluetooth phones, but it can only use one mobile line at any given time.For example, if you pair the XDECT 8355 to four Bluetooth phones,when you press MOBILE on the handset, the XDECT 8355 asks whichphone you want to connect to. If you are using the XDECT 8355 to talk on one Bluetooth phone, theXDECT 8355 will not ring if a call comes in on another phone. To pair another Bluetooth phone, just repeat the pairing procedure withthe new phone. (If the paired phones interfere when you’re pairing thenew one, just turn off Bluetooth on any paired phones until you finishpairing the new one.)15
GETTING TO KNOW YOUR PHONEParts of the BaseSPEAKERFIND HANDSET/INTERCOMMENU/SELECT DO NOT DISTURBPHONEBOOK/LEFTUPPLAY/STOPCALLER ID/RIGHTDOWNANSWER ONEFLASH12-KEY DIAL PADCLEAR/ PAUSE/ BLOCKMUTEREDIALMICROPHONEUSB CHARGINGPORTKey (Icon)What it doesFLASHDuring a call: switch to a waiting call.In Australia: Press Flash and then 2 to make theswitch.MUTE/CLEARREDIAL/PAUSE16 While this station is ringing: mute the ringer forthis call only. During a call: mute the microphone. While entering text: delete one character, orpress & hold to delete all the characters. In standby: open the redial list. While entering a phone number: insert a2-second pause.
BLOCKWhile the phone is ringing: add the incoming callerID to the call block list (block the call).FIND HANDSET/INTERCOM In standby: page a handset using the intercom. During a call: put the call on hold & start a calltransfer. In standby: open the menu. In the menu or any list: select the highlighteditem.In standby, press and hold to turn the Do NotDisturb feature on or off (see page 37).MENU/SELECTDO NOT DISTURBPLAY/STOP In standby: start playing messages. While a message is playing: stop playingmessages. In the menu or a list: exit the menu completely.PHONEBOOK/LEFT / In standby or during a call: open thephonebook. In any menu or list: go up one level. (If you arealready at the top level, the phone exits themenu and returns to the previous operation.) During text entry: move the cursor to the left. While playing messages: for the first 2seconds, go to the previous message; afterthat: go to the start of this message. In standby or during a call: open the Caller IDlist. During text entry: move the cursor to the right. While a message is playing: skip to the nextmessage.CALLER ID/RIGHT/UP ()DOWN () In standby: increase the ringer volume. During a speakerphone call or while amessage is playing: increase the speakervolume. In the menu or any list: move the cursor up oneline. In standby: decrease the ringer volume. During a speakerphone call or while amessage is playing: decrease the speakervolume. In the menu or any list: move the cursor downone line.17
ON/OFFIn standby: turn the answering system on or off. While a message is playing: delete thismessage. In standby: delete all messages. In standby: start a speakerphone call using aMOBILEpaired Bluetooth phone.SPEAKERPHONE While a paired phone is ringing: answer theincoming call. During a MobileLink call: hang up. In standby: start a speakerphone call (get a dialHOMEtone).SPEAKERPHONE During a speakerphone call: hang up.USB Charging Port Standard size USB port for charging devices.DELETE18
Parts of the HandsetCharge ILEHOME/FLASHDOWN12-keydial padKey padlockREDIAL/PAUSEMicrophone#/DNDMUTEMESSAGELED StatusDescriptionSteady OnOn Standby and ChargingSlow BlinkNew message received on the answering machine/voicemailFast BlinkReceiving calls19
Key IconWhat it doesSPEAKERSwitch a normal call to the speakerphone (and back). During a call: hang up. In the menu or any list: go to previous menu. When entering text or numbers: erase the character atthe cursor. In standby: start a telephone call on your land line (get aHOME/FLASHdial tone). During a call: switch to a waiting call. In Australia: PressHome/Flash and then 2 to make the switch. In standby: start a telephone call using a pairedMOBILEBluetooth phone. While a paired phone is ringing:answer the incoming call. During a MobileLink call: switch to a waiting call. In standby: open the menu.MENU/SELECT In the menu or any list: select the highlighted item. In standby or during a call: open the phonebook.PHONEBOOK In the menu: go back to the previous screen. When entering text: move the cursor to the left. In standby: or during a call: open the Caller ID list.CID When entering text: move the cursor to the right. In standby: increase the ringer volume.UP During a call: increase the audio volume. In any menu or list: move the cursor up one line. In standby: decrease the ringer volume.DOWN During a call: decrease the audio volume. In any menu or list: move the cursor down one line. During a call: mute the microphone.MUTE While the phone is ringing: ignore this call(mute the ringer). In standby: access your answering machine.REDIAL/PAUSE In standby: open the redial list. When entering a phone number: insert a 3-secondpause.Press and hold to silence the ringers on the base and all#/DNDhandsets for a specific period of time.Press and hold to lock/unlock the keypad.END/CLEAR20
Reading the DisplaysOn the BaseTime & DateStatus iconsAnsweringsystemstatusMessage CounterOn the HandsetAnswering systemstatus21
The table shows the possible status icons and what they mean. Since theicons appear based on what the phone is doing, you won’t see all the iconsat the same time.IconWhat it meansThe signal from the base is 1) weak through 4) strong.The ringer is turned off and will not ring for new calls.Answer Machine ON/OFF status.The handset is using ECO (power save) mode.The speakerphone is on.You have a voice message waiting.T-coil mode is on (see page 24).Privacy Mode is on: no other handset can join the call.The battery levels;Level 3 (Full)Level 2Level 1Level 0 (Empty)1234Bluetooth device number linked to the XDECT 8355.Home phone line.[Aa] - [aA]22Enter 1) capital or 2) lower case letter (see page 26).Appears when you are entering text.
USING THE MENUSWith the phone in standby, pressMENU/SELECT to open the menu.Handset SetupPressPHONEBOOK togo back a screenORpress and holdEND to exit themenu.Press MENU/SELECT tochoose that option.T-coilRinger TonesPersonal RingUse UP and DOWN toselect a menu.T-coilOnOffIf you don’t press any keys for about 30 seconds, the handset exits themenu. During a call, use PHONEBOOK to back out of the menu withouthanging up.Intercom MenuThe Intercom menu lets you connect 2 handsets without using the phoneline. Any handset can connect to an intercom call, but only two handsetscan be in the call at one time.Base Setup MenuThis menu is available on the base only.Menu OptionWhat it doesKey Touch ToneHave a keypad sound a tone when youpress a key.LCD ContrastChange the contrast of the display.Caller AnnounceTurn Text-to-Speech on or off to hearCID information.23
Bluetooth Setup MenuUse the Bluetooth Setup menu to pair to a mobile phone to the XDECT8355 and select a mobile phone, if you pair more than one.When you select the Bluetooth Setup Menu, Add Mobile displays. Selectthis option to pair your mobile phone with the XDECT 8355.Then select the paired mobile to get the options displayed below.Menu OptionWhat it doesMake CallUse this option to make a call through the mobileusing the Handset or Base.Privacy SetupDetermines which handsets will ring when a mobilecall comes in (default off).Download PBDownloads the mobile phonebook to the base.Remove MobileUn-pairs a mobile phone from the base.Handset Setup MenuYou can change these settings separately for each handset.Menu OptionWhat it doesT-coilTurn on T-coil mode to reduce noise on hearing aidsequipped with a telecoil (T-coil) feature. T-coil modeshortens talk time, so keep your battery fully charged.Ringer TonesChoose this handset’s ring tone for landline and pairedmobile line. As you highlight each ring tone, the phoneplays a sample. When you hear the tone you want,press MENU/SELECT.Personal RingTurn on personal ring so you can assign a special ringtone to people in your phonebook. With Caller ID, thisHS uses the assigned tone when the person calls.Auto TalkHave this handset answer a call when you pick it upfrom the cradle (without pressing any buttons).Any Key Answer Have this handset answer a call when you press anykey on the 12-key dialpad.BannerChange the name used on the handset’s display.Key Touch ToneHave the keypad sound a tone when you press a key.LCD ContrastChange the contrast of the displayHD AudioTurn HD Audio on or off.24
Date & Time MenuUse this menu to set the clock. Enter the date (DD/MM/YY) and time,select AM or PM. Use CID to move the cursor past a digit without changingit. If you have CID service, you can set it to provide the time (Global Setup/Time Adjustment).Global Setup MenuThe settings on this menu affect all handsets. Only one handset at a timecan change these menu options.Set Line ModeDo not change this setting unless instructed to bycustomer service.VMWI ResetReset the Voice Message Waiting Indicator (seepage 40).Edit Voice MailEnter, edit your voice mail access number (page 40)Edit Int’l NoEnter, edit, or delete international numbers. The “ ”in a phonebook entry will be actually dialed with thisnumber.Insert 0This feature adds “0” or “00” at the beginning of thenumber received from Caller ID. The default settingfor New Zealand is ON. The default setting forAustralia is OFF.Time AdjustmentSelect Auto from CID to allow phone network toautomatically set cordles
owner's manual warranty page. For telephone networks other than Telecom there may be a charge incurred for local calls if the Insert 0 feature is on. Turn Insert 0 off. This equipment may not provide for the effective hand-over of a call to another device connected to the same line.