Transcription
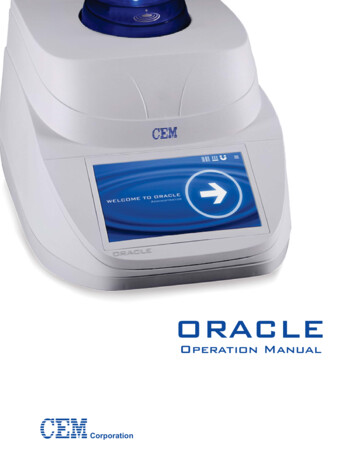
ORACLEOperation ManualCorporation
CEM Corpora onMa hews, North Carolina 28104(704) 821-7015email: info@cem.comCopyright 2016 by CEM Corpora onAll Rights ReservedThis manual contains proprietary informa on which shall notbe reproduced or transferred to other documents or disclosed to otherswithout prior wri en permission from CEM Corpora oniPower, iDri, IFM, and One Touch Technology are registered trademarks of CEM Corpora on.CEM is a registered trademark of CEM CorporationSMART 6 is a trademark of CEM Corpora on.Oracle is a trademark of CEM CorporationPatents PendingManufactured in theUnited States of America600785Rev. 112/16
Table of ContentsNotice – Safety Precautions . iiIntroduction . 1Safety Overview. 2Instrument Components . 3System Installation . 4Unpack System . 4Cable Connections . 12Software Icons . 19Software Overview . 20SMART 6 Connection . 25System Setup . 30Balance Setup . 36Sample analysis . 37ORACLE Station Sample Preparation . 39CEM High Precision Heater Block . 41CEM QuikPrep Integrated Heater . 42Batch Testing on the ORACLE with Air Oven . 43QuikPrep Analysis on the ORACLE with an Air or Vacuum Oven. 47QuikPrep Analysis on the ORACLE with SMART 6 . 50SMART 6 Method Development . 58Data Management . 59Internal Data Management . 59External Data Management . 64ORACLE Maintenance . 61QC Tests . 62QC Standards . 63CRM . 64Short Term Stability . 65Long Term Stability . 65Diagnostics . 66Exporting System Diagnostics . 67Routine Maintenance . 67ORACLE Settings . 68Sample . 89System . 70Backup . 71Tools. 71Event Viewer . 72Service and Repair . 73System Specifications . 74Warranty. 75i
NOTICEThe following precautions should be observed to avoid possible exposure to excessive microwave energy if usingthe SMART 6 Moisture/Solids Analyzer: Do not tamper with the safety interlocks. The SMART 6 is equipped with three safety interlocks which prevent theinstrument from producing microwave power if the cover is open. Do not place any object between the SMART 6 cavity and the cover, or allow soil or cleaner residue to accumulateon sealing surfaces. Do not operate the instrument if it is damaged. It is particularly important that the instrument cover close properlyand that there is no damage to the cover (bent), hinges and latch (broken or loosened), or sealing surfaces of theSMART 6. The instrument should only be adjusted or repaired by qualified service personnel.The following precautions should be observed to avoid instrument-induced electromagnetic interference: The possibility of instrument-induced electromagnetic interference (EMI) is minimal if the precautions outlinedabove are followed. The ORACLE should not be placed close to any electrical device susceptible to EMI. It is suggested that the userpost a sign warning pacemaker wearers that a device utilizing microwave and magnetic fields is in operation. If the SMART 6 is suspected of inducing EMI, please contact the CEM Service Department to perform a MicrowaveLeakage Test.This instrument utilizes high voltages and microwave radiation. Instrument service and repair should be performed only by those trained in repair and maintenance of highvoltage and microwave power systems. If the ORACLE or SMART 6 are used in a manner not specified by CEM Corporation, protections provided by thesystems may be impaired.Warnings, cautions, and notes are included throughout this manual and should be read thoroughly and strictlyfollowed.WARNING: A warning is inserted for essential information used to emphasize dangerous or hazardous conditions tothe operation, cleaning, and maintenance of the instrument which may result in personal injury.CAUTION: A caution is inserted for essential information used to emphasize procedures which, if not strictlyfollowed, may result in damage or destruction of the instrument or improper instrument operation.NOTE: A note is inserted for emphasis of procedures or conditions which may otherwise be misinterpreted oroverlooked and to clarify possible confusing situations.ii
IntroductionThe ORACLE Universal Fat Analyzer offered by CEM utilizes proprietary nuclear magnetic resonance (NMR) signalgathering to accurately measure the fat content of any product without the need for method development. TheORACLE is the first rapid, non-destructive technology able to provide a primary fat analysis, as opposed to thesecondary analysis techniques employed by other rapid technologies (i.e. NIR, FT-IR, FT-NIR, and traditional TDNMR). Using the ORACLE, a sample is dried to remove any free moisture that may cause interference, thenconditioned to an optimal temperature using a stand-alone heater block or the internal QuikPrepTM heater. TheNMR then sends a pulse of radio-frequency energy through the sample, causing any hydrogen protons specific to fatmolecules to generate a response signal. This signal is recorded and calculated to represent the percent of total fatin the sample, typically taking less than 45 seconds for the entire process.The ORACLE consists of an NMR magnet to perform the fat analysis, an electronics box (listed as processor box) forcontrolling and storing system settings and data, and may also include a SMART 6 Moisture/Solids Analyzer for rapidmoisture analysis and sample drying prior to testing in the magnet. The ORACLE utilizes a glass-capacitancetouchscreen for intuitive testing and data maintenance, and employs the use of internal diagnostics to ensure fullsystem functionality.ORACLE is the first rapid fat analysis system that requires no method/channel development and directly analyzesfat/oil in food samples. The system is rapid (45 second analysis), requires no solvents or chemists, and preventsoperator to operator error and is not prone to potential issues encountered during wet reference chemistry. SinceORACLE is a direct technique and measures the entire sample, there are no costly method recalibrations or methoddevelopment required. Once installed, the ORACLE is ready to accurately and repeatably measure fat/oil in anyunknown food sample.Despite the word “nuclear” in the name, NMR does not use or generate radiation. The word “nuclear” in NMR refersto the instrument’s ability to analyze the nuclei of the sample.1
Safety OverviewTo the best of our knowledge, the information contained herein is accurate. However, CEM cannot accept liability ofany kind for the accuracy or completeness of the information contained in this manual. The final determination ofthe suitability and proper use of the instrument described herein, the accuracy of the information and data obtainedfrom such use, and whether such use infringes any patents or the legal safeguards of others are the soleresponsibility of the user.WARNINGTo avoid degradation of the ORACLE magnet performance, or operator injury, do not placeferromagnetic items (e.g. mechanical tools) near the magnet. Magnets can attract ferrous objects,turning them into projectiles and causing injury.To prevent injury from high voltages, do not remove instrument covers or components unless you aretrained in the repair of high voltage instruments. All components of this instrument utilize highvoltages. Instrument service and repair should be performed only by those highly trained in repair andmaintenance of high voltage and microwave power systems.Samples that can be considered flammable, corrosive, poisonous, or explosive must be discussed withthe Process Applications group at CEM Corporation prior to analysis in the ORACLE. Failure to obtainapproval from CEM Corporation can create a dangerous testing environment and will void anywarranty.When using the SMART 6, analyzing solvents or products containing harmful volatiles requires theconnection of an exhaust hose to the exhaust assembly located on the rear of the instrument. Theexhaust hose must lead to an approved fume containment or ventilation system.Proper handling of dangerous materials must be followed based on the SDS (Safety Data Sheets) of thematerial to ensure a safe testing environment.Certain pace makers and other magnetically sensitive prosthetic devices may be affected by magneticfields used in the ORACLE. It is recommended that users with these prosthetics do not approach theORACLE within 11 in (0.3m).The ORACLE is susceptible to electromagnetic interference, and should not be placed close to anyelectrical device that emits EMI. If there are any uncertainties to the level of EMI being emitted by anearby instrument, please contact CEM about the options available for ensuring an optimal testinglocation.2
Instrument ComponentsProcessor BoxORACLENMRMagnetQuikPrepORACLETouch ScreenUSB PortsOnly for users with a SMART ancepanUSB PortsType B (2)USB PortsType A (3)SMART 6CavityPower InletReceptacleSMART 6Touch Screen3
System InstallationUnpack SystemNoteRetain all packing materials.1. Following the instructions below, carefully remove the instrument and place it on a vibration-free workbenchor laboratory table in a location that:a. provides a draft free, dust free, dry environment. The temperature of the room must be between 50 Fand 85 F (10 C - 29 C). Temperature should not vary more than 5 F (2.5 C) per day. Relativehumidity range should be 0-85%. Take special care to avoid areas positioned directlyunderneath or in line with an air conditioner or similar source of air drafts.b. is free from vibration of large equipment and/or excessive walk-through traffic.c.is capable of supporting the combined weight of the ORACLE magnet (120 lbs/55 kg) and, ifapplicable, the ORACLE processor (37 lbs/17 kg) and SMART 6 (55 lbs/25 kg).d. does not have a steel (iron) top. Materials such as wood, plastic, aluminum, or non-magneticstainless steel are suitable surfaces. Ensure that no steel bar, supporting the work surface, runsdirectly beneath the magnet. Any cabinets directly beneath the magnet should be cleared ofmetallic materials (though the cabinets themselves can be metallic).e. provides adequate bench space - 44 in. (112 cm) in length and 30 in. (76 cm) in depth minimum SMART System and ORACLE Magnet- 75 in. (190 cm) in length and 30 in. (76 cm) in depth minimum –SMART System, ORACLE Magnet. ORACLE Processor and PowerConditioner (If space is available above or below the ORACLE forthe power conditioner, 58 in. [148 cm] in length is sufficient forinstallation.)f.allows the instrument to be connected to a dedicated, grounded outlet as specified in the instrumentspecifications and capable of accepting the plug of the power conditioner illustrated in this manual.2. Carefully remove the ORACLE Processor from its shipping cartonand, based on available space, place it on the workbench, on ashelf above the workbench or on the floor under the workbench.Note: The processor box must be within 9 ft. (3 m) of the magnet.4
Processor Box onShelf above WorkbenchProcessor Box onWorkbench beside MagnetProcessor BoxUnder Workbench5
3.Remove the six screws from the sides of the magnet shipping container.4.Lift the top from the shipping container.5.With two people positioned on the sides of the magnet container - one on each side - use the straps andcarefully lift the magnet from the skid and place it on the workbench. The magnet weighs approximately120 pounds (55 kg).6
6.Inspect each component of the system for visual damage.WARNINGIf damage is noted, do not attempt instrument operation.7.If any instrument component has been damaged in shipping, contact the freight carrier to report thedamage and to file a damage report. Contact CEM Service or the nearest subsidiary or distributor torequest service information.8.Verify that all accessories illustrated and listed are included.1” NylonSplit LoomFrequency OilStandardORACLE TubesNormalizationStandardExternalUSB DriveTrac FilmUSB toSerial CableGlass FiberSample PadsAdditional AccessoriesAccessory Kit containing:ORACLE Station (907980)ORACLE Tube x5 (143360-M)Fuse, 2 10/15AMP (BR880007)Trac Film (159875)Frequency Oil Standard (160065)Normalization Standard (160570)External USB Drive (277200)1” Nylon Split Loom (BR869500)Glass Fiber Sample Pads (200150)USB-Serial cable (160335)ORACLE Operation Manual (600785) (Not Illustrated)Importance of Line Voltage (SM0049) (Not Illustrated)7
Cable Kit (160660)BNC CableGround CableShim CableShort SMB – SMB CableLong SMB – SMB CableCross-over Ethernet CableGround Cable(Rx out to Rx in)SMB-SMBLong Cable(Tx in to Tx out)SMB – SMBShort CableBNC Cable(Tx out to Tx in)CAT 5Ethernet CableShim Cable37-WayDisplay CablesMonitor (Video) Cable2x USBa-USBb CablesAudio CableUSB CableMonitor (Video) Cable8Audio Cable
Power Conditioner9.Unpack the power conditioner and place it on the work bench or the floor as far away from the ORACLEmagnet as possible.CAUTIONEnsure that the power conditioner is not placed in close proximity with the ORACLE magnet to preventdemagnetization of the magnet.Note: CEM Corporation recommends that the ORACLE power cords be connected to electrical outlets and the powerswitches remain in the “on” position at all times. After 10 minutes of idle time, the touchscreen assumes a “sleep”mode.Note: The power cord below is applicable to the U.S. only. Power cords for instruments installed in other countries willbe supplied based on electrical specifications for the applicable country.ONOFFBalance (if applicable)10.Remove the plastic cover from the balance.11.Place the balance on the workbench between the processor box (if applicable) and the powerconditioner.12.Plug the power cord from the balance into one of the receptacles of the power conditioner.9
ORACLE Station13.Place the roll of Trac film on the roller.14.Place the roller and Trac film in the ORACLE Station so that the film will roll forward.15.Place the ORACLE tubes in the openings of the back of the ORACLE Station.16.Place the sample tamper into one of the openings on the top of the ORACLE Station.17.Place the sample removal tool into the clips on the right side of the ORACLE Station (facing unit).Heater BlocksEvery ORACLE will be supplied with a high precision CEM heater block to use for the temperature conditioning ofsamples or the heating of the various standards that are used to confirm the ORACLE’s functionality.18.Unbox the heater block and place it near the ORACLE, either on a shelf or the benchtop. Plug the heaterblock into a standard wall outlet.19.Power the heater block on, and use the arrows to set the temperature to the value indicated on the silversticker (see below).20.Place the Oil Standard, Normalization Standard, and the Check Standard tube into the heater block. Theheater block should remain on at all times to ensure consistent heating of these standard tubes.10
Bar Code Scanner21.Unbox the scanner and stand, following the included directions to connect the cable to thescanner and assemble the stand in a convenient area near the ORACLE system.22.Plug the barcode scanner into any of the remaining USB outlets on the back of the ProcessorBox. Once connected, the scanner is immediately ready to begin transmitting information to theORACLE system.11
Cable Connections1.Plug the power cord of the power conditioner into the appropriate electrical outlet. Turn the powerconditioner on, confirming it is working by the green light on the front of the conditioner.2.If using a SMART 6 for moisture analysis, first refer to the SMART 6 Operations Manual for installationand setup of the SMART 6.3.Once installed, plug the SMART 6 power cord into the power conditioner. Wait until connecting allORACLE cables to connect the SMART 6 to the ORACLE processor box via the supplied green Ethernetcable, then proceed with powering the SMART 6 on.4.Following steps 5-16, carefully connect each cable provided in the cable kit and accessory kit. Ensurethat each cable is connected properly. Use caution to prevent bending or damaging the pins of theconnectors.5.Connect the BNC cable to the processor box and magnet.12
6.Connect the ground cable to the processor box and the magnet as illustrated. Ensure all washersare placed back on the screw prior to adding the nut.7.Connect the SMB long cable to the processor box and the magnet as illustrated below.13
8.Connect the shim cable to the processor box as illustrated below.9.Connect the crossover CAT 5 Ethernet cable to the processor box as illustrated below.14
10.Connect the monitor video cable to as illustrated below.11.Connect the Tx crossover cable to the processor box as illustrated below.15
12.Connect the USB cable to the ORACLE and to the processor box as illustrated below.13.Connect the second USB cable to the ORACLE and processor box as illustrated below.16
14.Connect the audio cable to the ORACLE and processor box as illustrated below.15.Use the 1” loom provided to wrap each cable going from the ORACLE to the processor box.17
16.Connect the Power cords to the ports on the back of the magnet and processor box. Plug bothcords into the Power Conditioner, then turn the green switch on the processor box to the ONposition.FOR SMART 6 USERS ONLYAfter following instructions to install the SMART 6 system in the SMART 6 manual, connect the SMART 6 to theORACLE analyzer with the CAT5 Ethernet cable provided as illustrated below.18
Software IconsAcceptBalance ConnectionBackTrac Film CounterCancelQuikPrep TemperatureDeleteMagnet TemperatureEdit TagSMART 6 ConnectionFailing ValuePassing ValueMain MenuPlay/Start SampleNextRepeat Sample19
Software OverviewThe ORACLE is primarily operated using a glass capacitance touchscreen interface, although certain operations willbe carried out by the SMART 6 if it is being used for moisture analysis. This manual will only review the ORACLEsoftware interface and the SMART 6 screens that relate to the ORACLE analysis. Please refer to the SMART 6 manualfor an overview of the SMART 6 software screens.LoginUpon boot up or activation from sleep mode, the softwarerequires the user to login as either a Basic or Admin user.This user access is part of the CFR Title 21 Part 11compliance for tracking system actions by a signature (in thiscase the login acts as the signature). User logins can becreated for each individual using the ORACLE, or sharedbetween users. Both Basic and Administrator access ispassword protected.Once logged in, the remainder of the ORACLE software isprimarily accessed through the option menu in the top rightcorner. It contains access to all the primary functions of theORACLE, including sample analysis, user access, diagnostictesting, and other system settings.20
Run SampleThe Run Screen allows users quick access to sample analysisat any time. Simply choose the tab, then click through andapply the necessary labels to the sample, then begin testing.Samples can be analyzed one at a time or in large batches,depending on the process that best fits the workflow of thelab.SamplesThe ORACLE stores pertinent data for every sample test ithas performed. Accessing the Sample Log will allow users toreview a number of run parameters, such as fat result,moisture result (if connected to SMART 6), sample ID, dateand time, user, tag, and initial weight.MaintenanceORACLE Maintenance consists of a variety of tests thatvalidate and check system functionality. By running CertifiedReference Materials (CRM), performing routine maintenancetests, or checking system hardware and processes viadiagnostics, the ORACLE software has the ability to giveusers confidence in the system’s performance, and reducedown time in the event of an issue.21
UsersTo add new users, or edit the access privileges or passwordsof current users, simply choose the Users tab.Administrators will have complete system access, includingthe ability to perform diagnostic tests, manage heater andbalance connections, and other advanced systemfunctionality, on top of the features Basic users areprovided.Basic user will have access to running and reviewingsamples, as well as exporting data. They will also have accessto some basic maintenance and system settings, such asrunning diagnostics.Guests can log in without a password, and have thecapability to run samples, view results, and export data.InstrumentsThe Instruments tab consists of connection and functionalityfeatures for the QuikPrep heater and the balance connectedto the ORACLE, if one is present, as well as parameters forthe ORACLE magnet itself.The Quik Prep tab controls functionality of the QuikPrepintegrated heater located on the top of the ORACLE magnet.The Balance Tab ensures proper connection and datatransfer between the ORACLE and the balance. This allowsthe ORACLE to fully calculate data and provide resultswithout the need for user inputThe Magnet tab allows users to review and reset certainparameters directly related to the functionality of theORACLE magnet, specifically the magnet sensor thresholdand F-lock interval setting. Users should not adjust theseparameters unless specifically instructed to do so by atrained CEM specialist.22
ExportExport gives the user the option to transfer data to a USB (6ports on the ORACLE), for viewing data externally, such as ona laptop or PC. Users also have the option to transferDiagnostic and Maintenance logs, which can lead to fasterservice and minimize system downtime in the event of anyissues.SettingsAny other system settings will be located in the Settings tab,including adjustment to the screen brightness, volume,screensavers, and service tools for advanced systemtroubleshooting.Header IconsEasily accessed and viewable from any screen, the headericons are quick looks for certain ORACLE functions. Theseinclude:-Magnet Temperature: indicates if magnet isoperating out of optimal range. Red indicates thatthe magnet is above optimal operating temperatureand blue indicates that it is below optimal operatingtemperature. By pressing the magnet temperatureicon, a window will appear showing exactly how faroff the temperature is from the optimal magnettemperature23
-QuikPrep Temperature: displays the actualtemperature and set temperature of the QuikPrepheater at the top of the magnet. The icon will displaya red bar/up arrow when warming up, and a bluebar/down arrow when cooling down. The QuikPrepheater will take approximately2 minutes to heat10 C, and 10 minutes to cool 10 C-The Barcode Scanner, which displays the number oftests the current roll of Trac Film has left. The iconwill display a yellow icon when there are 100 testsremaining, and a red icon when there are 20, as areminder to purchase more film before it runs out.The user can scan in or manually enter a newbarcode by pressing the Barcode icon, then theScanner button.-This screen also allows the user to personalize thereminders, or use a One-Time Pass in the instance abarcode was lost or thrown away before beingscanned.Note: The One-Time Pass can only be used once, and willnot be available after it is used. If an issue occurs wherea bar code is lost after having already used the One-TimePass, please contact the Process Control Group at CEMCorporation-The balance icon indicates if the CEM suppliedbalance is connected and communicating with theORACLE software. The balance is only for customersnot using a SMART 6 for moisture content.-The SMART 6 icon indicates if the SMART 6 isconnected and communicating with the ORACLEsoftware. This is only for customers using the SMART6 for rapid moisture analysis.24
SMART 6 ConnectionThis section is for users with a SMART 6 system. If not using a SMART 6 to dry the sample prior to ORACLEanalysis, please continue to the System Setup section.1. After following instructions in the SMART 6 manual toset the system up, go to the Main Menu and chooseSettings, then while on the System tab scroll to thebottom until the Trac IP Address option appears.2. Touch the IP Address entry bar and type the following IPaddress into the system. Once correctly entered, pressthe Save icon in the top right corner.192.168.1.103. Once the SMART 6 IP Address has been set, go to theORACLE after it has been turned on and the software hasappeared. Then log in under the Admi
6 3. Remove the six screws from the sides of the magnet shipping container. 4. Lift the top from the shipping container. 5. With two people positioned on the sides of the magnet container - one on each side - use the straps and