Transcription
MOSK Operations Guideversion beta
MOSK Operations GuideBetaContentsCopyright notice1Preface2About this documentation set2Intended audience2Documentation history2Conventions3Introduction5OpenStack operations6Add a compute node6Run Tempest tests6Update OpenStack components8Calculate a maintenance window durationCeph operations1013Add a Ceph OSD node13Remove a Ceph OSD14Remove a Ceph OSD node15Replace a failed disk16Tungsten Fabric operationsRedeploy Tungsten FabricLimitations 2020, Mirantis Inc.181820Page i
MOSK Operations GuideBetaCopyright notice2020 Mirantis, Inc. All rights reserved.This product is protected by U.S. and international copyright and intellectual property laws. Nopart of this publication may be reproduced in any written, electronic, recording, or photocopyingform without written permission of Mirantis, Inc.Mirantis, Inc. reserves the right to modify the content of this document at any time without priornotice. Functionality described in the document may not be available at the moment. Thedocument contains the latest information at the time of publication.Mirantis, Inc. and the Mirantis Logo are trademarks of Mirantis, Inc. and/or its affiliates in theUnited States an other countries. Third party trademarks, service marks, and names mentionedin this document are the properties of their respective owners. 2020, Mirantis Inc.Page 1
MOSK Operations GuideBetaPrefaceAbout this documentation setThis documentation provides information on how to deploy and operate the Mirantis OpenStackon Kubernetes (MOSK) environment. The documentation is intended to help operators tounderstand the core concepts of the product. The documentation provides sufficient informationto deploy and operate the solution as of its state for the beta release. The beta release can onlybe used in a non-production small environment for demonstration and evaluation purposes.The information provided in this documentation set is being constantly improved and amendedbased on the feedback and kind requests from our beta software consumers.The following table lists the guides included in the documentation set you are reading:Guides listGuidePurposeMOSK ReferenceArchitectureLearn the fundamentals of MOSK reference architecture toappropriately plan your deploymentMOSK Deployment GuideDeploy an MOSK environment of a preferred configuration usingsupported deployment profiles tailored to the demands of specificbusiness casesMOSK Operations GuideOperate your MOSK environmentMOSK Release notesLearn about new features and bug fixes in the current MOSKversionThe MOSK documentation home page contains references to all guides included in thisdocumentation set. For your convenience, we provide all guides in HTML (default), single-pageHTML, PDF, and ePUB formats. To use the preferred format of a guide, select the required optionfrom the Formats menu next to the guide title.Intended audienceThis documentation is intended for engineers who have the basic knowledge of Linux,virtualization and containerization technologies, Kubernetes API and CLI, Helm and Helm charts,Docker Enterprise UCP, and OpenStack.Documentation historyThe following table contains the released revision of the documentation set you are reading:Release dateDescriptionApril 08, 2020Mirantis OpenStack on Kubernetes (MOSK) beta v1April 30, 2020Mirantis OpenStack on Kubernetes (MOSK) beta v2May 29, 2020Mirantis OpenStack on Kubernetes (MOSK) beta v2.1 2020, Mirantis Inc.Page 2
MOSK Operations GuideJuly 22, 2020BetaMirantis OpenStack on Kubernetes (MOSK) beta v3The documentation set refers to MOSK beta as to the latest released beta version of the product.ConventionsThis documentation set uses the following conventions in the HTML format:Documentation conventionsConventionDescriptionboldface fontInline CLI tools and commands, titles of the procedures andsystem response examples, table titlesmonospaced fontFiles names and paths, Helm charts parameters and their values,names of packages, nodes names and labels, and so onitalic fontInformation that distinguishes some concept or termLinksExternal links and cross-references, footnotesMain menu menu itemGUI elements that include any part of interactive user interfaceand menu navigationSuperscriptSome extra, brief informationMessages of a generic meaning that may be useful for the userNoteThe Note blockInformation that prevents a user from mistakes and undesirableconsequences when following the proceduresCaution!The Caution blockWarningThe Warning block 2020, Mirantis Inc.Messages that include details that can be easily missed, butshould not be ignored by the user and are valuable beforeproceedingPage 3
MOSK Operations GuideBetaList of references that may be helpful for understanding of somerelated tools, concepts, and so onSeealsoThe See also blockLearn moreUsed in the Release Notes to wrap a list of internal references tothe reference architecture, deployment and operation proceduresspecific to a newly implemented product featureThe Learn moreblock 2020, Mirantis Inc.Page 4
MOSK Operations GuideBetaIntroductionThis guide outlines the post-deployment Day-2 operations for a Mirantis OpenStack onKubernetes environment. It describes how to configure and manage the MOSK components,perform different types of cloud verification, and enable additional features depending on yourcloud needs. The guide also contains day-to-day maintenance procedures such as how to backup and restore, update and upgrade, or troubleshoot your MOSK cluster. 2020, Mirantis Inc.Page 5
MOSK Operations GuideBetaOpenStack operationsThe section covers the management aspects of an OpenStack cluster deployed on Kubernetes.Add a compute nodeThis section describes how to add a new compute node to your existing Mirantis OpenStack onKubernetes deployment.To add a compute node:1. Provision the node as described in MOSK Deployment guide: Provision bare metal servers.2. Ensure that the node configuration satisfies the UCP system requirements as instructed inDocker Enterprise v3.0 documentation: UCP system requirements.3. Add the node to UCP as described in MOSK Deployment guide: Add Kubernetes nodes toUCP.4. Verify that the host operating system is configured as described in MOSK Deploymentguide: Configure host operating system.5. Assign the required set of labels to the new compute node. The list of labels to be assignedto the node depends on the roles that the node will perform. Usually, the labels to beassigned to an OpenStack compute node include the following labels:kubectl label node new-compute-node-id openstack-compute-node enabled \openvswitch enabledNoteAdditional labels can be added to a compute node depending on the applications thathave to be colocated with the compute service. For example, role ceph-osd-node.Run Tempest testsThe OpenStack Integration Test Suite (Tempest), is a set of integration tests to be run against alive OpenStack cluster. This section instructs you on how to verify the workability of yourOpenStack deployment using Tempest.To verify an OpenStack deployment using Tempest:1. Configure Tempest as required.To change the Tempest run parameters, use the following structure in the OsDpl CR:spec:services:tempest: 2020, Mirantis Inc.Page 6
MOSK Operations GuideBetatempest:values:conf:script: tempest run --config-file /etc/tempest/tempest.conf \\--concurrency 4 --blacklist-file /etc/tempest/test-blacklist --smokeThe following example structure from the OsDpl CR will set image:build timeout to 600 inthe tempest.conf pest:image:build timeout: 6002. Run Tempest. The OpenStack Tempest is deployed like other OpenStack services in adedicated openstack-tempest Helm release by adding tempest to spec:features:services inthe OSDPL resource.spec:features:services:- tempest3. Wait until Tempest is ready. The Tempest tests are launchedopenstack-tempest-run-tests job. To keep track of the tests execution, run:bythekubectl -n openstack logs -l application tempest,component run-tests4. Get the Tempest results. The Tempest results can be stored in a pvc-tempestPersistentVolumeClaim (PVC). To get them from a PVC, use:# Run pod and mount pvc to itcat EOF kubectl apply -f apiVersion: v1kind: Podmetadata:name: tempest-test-results-podnamespace: : enabled 2020, Mirantis Inc.Page 7
MOSK Operations GuideBetavolumes:- name: : pvc-tempestcontainers:- name: tempest-pvc-containerimage: ubuntucommand: ['sh', '-c', 'sleep infinity']volumeMounts:- mountPath: "/var/lib/tempest/data"name: tempest-pvc-storageEOF5. If required, copy the results locally:kubectl -n openstack cp ort file.xml .6. Remove the Tempest test results pod:kubectl -n openstack delete pod tempest-test-results-pod7. To rerun Tempest:1. Remove Tempest from the list of enabled services.2. Wait until Tempest jobs are removed.3. Add Tempest back to the list of the enabled services.SeealsoMOSK Reference Architecture: OpenStackDeployment custom resourceUpdate OpenStack componentsThis section provides the reference information to consider when updating OpenStack and itsauxiliary services. Use the descriptive analysis of the techniques and tools, as well as thehigh-level upgrade flow included in this section to create a cloud-specific detailed updateprocedure, assess the risks, plan the rollback, backup, and testing activities.An update refers to a patch or minor version change. For example, an update from v1.0.1 tov1.0.2 or v1.1.0 to 1.2.0.You can update the following OpenStack components: Supported OpenStack services MariaDB RabbitMQ 2020, Mirantis Inc.Page 8
MOSK Operations GuideBeta Etcd MemcachedTo update OpenStack components:1. Update your local release-openstack-k8s Git repository to the target release tag:cd release-openstack-k8sgit fetch && git checkout GIT-TAG 2. Perform the procedure from MOSK Deployment guide: Deploy the OpenStack Controller.3. Verify that the image precaching has finalized. The numberReady value must be equal tothe desiredNumberScheduled value. For example:kubectl -n openstack get ds image-precaching-0 -o json jq '.status'{"currentNumberScheduled": 8,"desiredNumberScheduled": 8,"numberAvailable": 2,"numberMisscheduled": 0,"numberReady": 2,"numberUnavailable": 6,"observedGeneration": 1,"updatedNumberScheduled": 8}4. Verify the OsDpl object status for the components that are being updated. For example, toverify the MariaDB status:kubectl -n openstack get osdpl osh-dev -o json jq '.status.health.mariadb'Example of the output illustrating that MariaDB is being updated:{"ingress": {"generation": 8,"status": "Ready"},"ingress-error-pages": {"generation": 6,"status": "Ready"},"server": {"generation": 2,"status": "Progressing"}} 2020, Mirantis Inc.Page 9
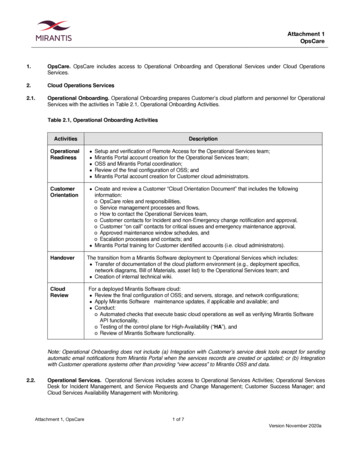
MOSK Operations GuideBetaExample of the output illustarting that the MariaDB update has been finalized:{"ingress": {"generation": 8,"status": "Ready"},"ingress-error-pages": {"generation": 6,"status": "Ready"},"server": {"generation": 2,"status": "Ready"}}Seealso MOSK Reference Architecture: Status elements Calculate a maintenance window durationCalculate a maintenance window durationThis section provides the background information on the approximate time spent on operationsfor pods of different purposes, possible data plane impact during these operations, and thepossibility of a parallel pods update. Such data helps the cloud administrators to correctlyestimate maintenance windows and impacts on the workloads for your OpenStack deployment.Maintenance window calculationPod namePod actParallel update[*]-apiContains APIservices ofOpenStackcomponents.Horizontally wellscalable.Deployment 30sNOYES (batches 10%of overall count)[*]-conductorContains proxyservice betweenOpenStack anddatabase.Deployment 30sNOYES (batches 10%of overall count) 2020, Mirantis Inc.Page 10
MOSK Operations Guide[*]-schedulerBetaSpreads OpenStackresources betweennodes.Deployment 30sNOYES (batches 10%of overall count)Process userrequests.Deployment 30sNOYES (batches 10%of overall count)nova-computeProcesses userrequests, interactswith the data planeservices.DaemonSet 120sNOYES (batches 10%of overall count)neutron-l3-agentCreates virtualrouters (spawnskeepalivedprocesses for theHA routers).DaemonSet10-15m(for 100routers)YESNO (one by one)neutron-openvswitch-agentConfigures tunnelsbetween nodes.DaemonSet 120sNOYES (batches 10%of overall count)neutron-dhcpagentConfigures theDHCP server for thenetworking service.DaemonSet 30sPartially(only ifthe downtimeexceedstheleasetimeout.YES (batches 10%of overall count)neutron-metadata-agentProvides metadatainformation to userworkloads (VMs).DaemonSet 30sNOYES (batches 10%of overall count)libvirtStarts the libvirtdcommunicationdaemon.DaemonSet 30sNOYES (batches 10%of overall count)openvswitch-[*]Sets up the OpenvSwitch datapathsand then operatesthe switching acrosseach bridge.DaemonSet 30sYESNO (one by one)mariadb-[*]Contains persistentstorage (database)for OpenStackdeployment.StatefulSet 180sNONO (one by one)[*]-worker[*]-engine[*]-volume[*]-backup[*] 2020, Mirantis Inc.Page 11
MOSK Operations GuideBetamemcached-[*]Contains thememory objectcaching system.Deployment 30sNONO (one by one)[*]-rabbitmq-[*]Contains themessaging servicefor OpenStack.StatefulSet 30sNONO (one by one) 2020, Mirantis Inc.Page 12
MOSK Operations GuideBetaCeph operationsThe section covers the management aspects of a running Ceph cluster.Before you proceed with any reading or writing operation, first check the cluster status using theceph tool as described in MOSK Deployment Guide: Verify the Ceph core services.Add a Ceph OSD nodeThis section describes how to add a Ceph OSD node to an existing Ceph cluster.To add a Ceph OSD node:1. Provision the node as described in MOSK Deployment guide: Provision bare metal servers.2. Ensure that the node configuration satisfies the UCP system requirements as instructed inDocker Enterprise v3.0 documentation: UCP system requirements.3. Add the node to UCP as described in MOSK Deployment guide: Add Kubernetes nodes toUCP.4. Verify that the host operating system is configured as described in MOSK Deploymentguide: Configure host operating system.5. Open the MiraCeph CR for editing:kubectl -nceph-lcm-mirantis edit miraceph6. In the nodes section, specify the parameters for the new Ceph OSD node as required. Forattributes description, see MOSK Deployment guide: Deploy a Ceph cluster.nodes:NODE NAME:crushPath: {}ips:- IP ADDRroles: [mon, mgr]storageDevices:- name: folderrole: ROLEsizeGb: SIZENoteTo use the new node for Ceph Monitor or Manager deployment, also specify the rolesparameter.7. Inspect the rook-operator logs. If the logs include any issues with ceph-prepare jobs, restartthe operator: 2020, Mirantis Inc.Page 13
MOSK Operations GuideBetakubectl delete pod (kubectl -n rook-ceph get pod -l "app rook-ceph-operator" -o jsonpath '{.items[0].metadata.name}') -n rook-cephkubectl delete job -n rook-ceph (kubectl -n rook-ceph get jobs -o jsonpath '{.items[*].metadata.name}')8. Verify that the node was properly added to the Ceph cluster:kubectl -n rook-ceph exec -it (kubectl -n rook-ceph get pod -l "app rook-ceph-tools" -o jsonpath '{.items[0].metadata.name}') bashceph statusceph osd treeThe ceph osd tree output includes the ID of the new Ceph OSD node.9. Connect the new OSD to the Kubernetes cluster and perform rebalancing. In {osd-nr},specify the Ceph OSD node ID obtained in the previous step:kubectl -n rook-ceph exec -it (kubectl -n rook-ceph get pod -l "app rook-ceph-tools" -o jsonpath '{.items[0].metadata.name}') bashceph osd in {osd-nr}Once done, the Ceph cluster must be in the HEALTH OK status.Remove a Ceph OSDThis section describes how to remove a Ceph OSD from a Ceph cluster.WarningA Ceph cluster with 3 OSD nodes does not provide hardware fault tolerance and is noteligible for recovery operations, such as a disk or an entire node replacement.To remove a Ceph OSD:1. Access the rook-ceph toolbox CLI:kubectl -n rook-ceph exec -it (kubectl -n rook-ceph get pod -l "app rook-ceph-tools" -o jsonpath '{.items[0].metadata.name}') bash2. Identify the ID of the Ceph OSD to remove:ceph osd tree3. Remove the Ceph OSD:ceph osd out osd. ID 4. Verify the Ceph cluster status. Once the status is HEALTH OK, proceed to the next step.ceph status5. Remove the OSD deployment from the Kubernetes cluster:kubectl delete deployment -n rook-ceph rook-ceph-osd- ID 2020, Mirantis Inc.Page 14
MOSK Operations GuideBeta6. Remove the Ceph OSD from the Ceph cluster:ceph osd purge osd. ID 7. Remove the chosen Ceph OSD disk from the cluster definition in the cephcluster Rook CR:kubectl -n rook-ceph edit cephcluster rook-ceph8. Remove the Ceph OSD disk from the miraceph CR:kubectl -n ceph-lcm-mirantis edit miraceph cephclusterSeealsoRemove a Ceph OSD nodeRemove a Ceph OSD nodeThis section describes how to remove a Ceph OSD node from a Ceph cluster.WarningA Ceph cluster with 3 OSD nodes does not provide hardware fault tolerance and is noteligible for recovery operations, such as a disk or an entire node replacement.To remove a Ceph OSD node:1. Remove all Ceph OSDs running on the node one by one as described in Remove a CephOSD.2. Remove the ceph-osd-prepare jobs:kubectl delete job -n rook-ceph (kubectl -n rook-ceph get jobs -o jsonpath '{.items[*].metadata.name}')3. Remove the chosen Ceph OSD node definition from the cephcluster CR:kubectl -n rook-ceph edit cephcluster rook-ceph4. Remove the chosen Ceph OSD node definition from the miraceph CR:kubectl -n ceph-lcm-mirantis edit miraceph cephcluster5. Delete the target Ceph OSD node from the Ceph cluster: 2020, Mirantis Inc.Page 15
MOSK Operations GuideBetakubectl -n rook-ceph exec -it (kubectl -n rook-ceph get pod -l "app rook-ceph-tools" -o jsonpath '{.items[0].metadata.name}') bashceph osd crush rm NODE HOSTNAME 6. Verify that the Ceph OSD node has been successfully removed:kubectl -n rook-ceph exec -it (kubectl -n rook-ceph get pod -l "app rook-ceph-tools" -o jsonpath '{.items[0].metadata.name}') bashceph statusceph osd treeReplace a failed diskThis section instructs you on how to replace a failed physical disk with a Ceph OSD node.WarningA Ceph cluster with 3 OSD nodes does not provide hardware fault tolerance and is noteligible for recovery operations, such as a disk or an entire node replacement.To replace a failed disk:1. Verify the Ceph cluster status. Once the status is HEALTH OK, proceed to the next step.ceph status2. Remove the failed OSD from the Ceph cluster:ceph osd purge osd. ID 3. Verify the Ceph cluster status. Once the rebalancing is done, proceed to the next step.ceph status4. Remove the OSD deployment from the Kubernetes cluster:kubectl delete deployment -n rook-ceph rook-ceph-osd- ID 5. Remove the OSD directory from /var/lib/rook/ on the target node:rm -rf /var/lib/rook/osd ID 6. Replace the failed disk.7. Remove the ceph-osd-prepare jobs:kubectl delete job -n rook-ceph (kubectl -n rook-ceph get jobs -o jsonpath '{.items[*].metadata.name}')8. Restart the Rook operator:kubectl delete pod (kubectl -n rook-ceph get pod -l "app rook-ceph-operator" -o jsonpath '{.items[0].metadata.name}') -n rook-ceph 2020, Mirantis Inc.Page 16
MOSK Operations GuideBeta9. Verify that the disk was replaced properly and monitor the status of rebalancing:kubectl -n rook-ceph exec -it (kubectl -n rook-ceph get pod -l "app rook-ceph-tools" -o jsonpath '{.items[0].metadata.name}') bashceph statusceph osd tree 2020, Mirantis Inc.Page 17
MOSK Operations GuideBetaTungsten Fabric operationsNoteThis feature is available as technical preview. Use such configuration for testing andevaluation purposes only.The section covers the management aspects of a Tungsten Fabric cluster deployed onKubernetes.Redeploy Tungsten FabricRedeployment of a Tungsten Fabric cluster implies deletion of all related components andcreation of new resources from scratch.Caution!After the redeployment, all previously created workloads will be affected and cannot berecovered.The redeployment of a Tungsten Fabric cluster is required if you want to update your cluster.Due to the development limitations and impossibility to update the 3rd-party components suchas Cassandra, ZooKeeper, Kafka, and Redis clusters, a seamless update of a Tungsten Fabriccluster is not possible.To redeploy a Tungsten Fabric cluster:1. Update the OpenStack components as described in Update OpenStack components.2. Change directory to the release repository and switch to the latest release tag:cd release-openstack-k8sgit tag -ngit checkout GIT-TAG 3. Execute the following script to update metadata ple of a positive system response:secret/tf-data patched 2020, Mirantis Inc.Page 18
MOSK Operations GuideBeta4. Delete the Tungsten Fabric related resources: Delete the tf namespace:kubectl delete namespace tfExample of a positive system response:namespace "tf" deleted Delete the CRD:kubectl delete crd tfoperators.operator.tf.mirantis.comExample of a positive system s.io "tfoperators.operator.tf.mirantis.com" deleted5. Perform the procedure from MOSK Deployment guide: Deploy Tungsten Fabric. 2020, Mirantis Inc.Page 19
MOSK Operations GuideBetaLimitationsThe section covers the limitations of Mirantis OpenStack on Kubernetes.[3544] Due to a community issue, Kubernetes pods may occasionally not be rescheduled on thenodes that are in the NotReady state. As a workaround, manually reschedule the pods from thenode in the NotReady state using the kubectl drain --ignore-daemonsets --force node-uuid command. 2020, Mirantis Inc.Page 20
About this documentation set This documentation provides information on how to deploy and operate the Mirantis OpenStack on Kubernetes (MOSK) environment. The documentation is intended to help operators to . May 29, 2020 Mirantis OpenStack on Kubernetes (MOSK) beta v2.1 MOSK Operations Guide Beta 2020, Mirantis Inc. Page 2.
