Transcription
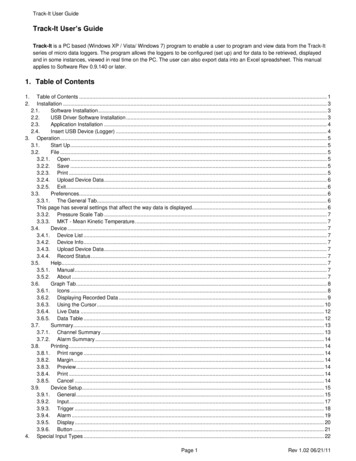
Track-It User GuideTrack-It User’s GuideTrack-It is a PC based (Windows XP / Vista/ Windows 7) program to enable a user to program and view data from the Track-Itseries of micro data loggers. The program allows the loggers to be configured (set up) and for data to be retrieved, displayedand in some instances, viewed in real time on the PC. The user can also export data into an Excel spreadsheet. This manualapplies to Software Rev 0.9.140 or later.1. Table of Contents1.2.Table of Contents . 1Installation . 32.1.Software Installation . 32.2.USB Driver Software Installation . 32.3.Application Installation . 42.4.Insert USB Device (Logger) . 43. Operation . 53.1.Start Up . 53.2.File . 53.2.1. Open . 53.2.2. Save . 53.2.3. Print . 53.2.4. Upload Device Data . 63.2.5. Exit. 63.3.Preferences . 63.3.1. The General Tab. 6This page has several settings that affect the way data is displayed. . 63.3.2. Pressure Scale Tab . 73.3.3. MKT - Mean Kinetic Temperature. . 73.4.Device . 73.4.1. Device List . 73.4.2. Device Info . 73.4.3. Upload Device Data . 73.4.4. Record Status . 73.5.Help. 73.5.1. Manual . 73.5.2. About . 73.6.Graph Tab . 83.6.1. Icons . 83.6.2. Displaying Recorded Data . 93.6.3. Using the Cursor . 103.6.4. Live Data . 123.6.5. Data Table . 123.7.Summary . 133.7.1. Channel Summary . 133.7.2. Alarm Summary . 143.8.Printing . 143.8.1. Print range . 143.8.2. Margin . 143.8.3. Preview . 143.8.4. Print . 143.8.5. Cancel . 143.9.Device Setup . 153.9.1. General . 153.9.2. Input. 173.9.3. Trigger . 183.9.4. Alarm . 193.9.5. Display . 203.9.6. Button . 214. Special Input Types . 22Page 1Rev 1.02 06/21/11
Track-It User Guide4.1.Event Logger . 22This page intentionally left blankPage 2Rev 1.02 06/21/11
Track-It User Guide2. Installation2.1. Software InstallationThis installation is detailed for a Windows 7system – It is similar for Windows Vista / XP.Note: Before reinstalling or upgrading thesoftware, remove existing versions using theControl Panel – Add/Remove ProgramsInsert the Installation CD into the Drive. If theinstallation does not begin automatically useWindows File Explorer to navigate to the CDdrive and run CD Start.exe. The installationprogram will launch and display the menushown here.If you plan to use the help files you will need toinstall the AcrobatTM Reader if not alreadypresent on your system. Click “Install Acrobat8.0”.There are two parts to the software installation- install the USB Driver and then install themain application (software).2.2. USB Driver Software InstallationNote: Ensure the USB device (Recorder) is NOT plugged induring this installation. The USB driver has to be installed inorder for the software to run.To install the USB Driver - click the "Install USB Driver" button.The installer will automatically launch the USB driverinstallation. If it does not use Explorer to navigate to theinstallation CD “USB VCP Driver” directory and double click“USBDataLoggerVCPInstaller.exe”. This will bring up theInstaller window shown here.The default installation location will be shown, if you wish to change it for any reason, enter the new install location. Click the“Install” button. The system will be scanned then the software will be installed. Follow any instructions.You may get the ominous Window’s Unsigned Driver warning message (or Windows can't verify the publisher of this software) –click “Continue Anyway”. The Driver Software will be installed.Page 3Rev 1.02 06/21/11
Track-It User Guide2.3. Application InstallationTo install the actual application software click the “Install Software” button. This will launch the Track-It setup wizard shownbelow left. Click the “Next ” button to continue to the license agreement. Accept the license agreement – “I Agree” (or quit theinstallation) and click the “Next ” button to continue. You will then be asked to enter your information – name and business.Enter the information if you wish and click the “Next ” button to continue. Now select the installation folder – shown below right.If you wish to change the default for any reason, enter the new install location and whether the installation will be accessible toall users of this machine or just you (default). Click the “Next ” button.On the “Confirm Installation” screen click the “Next ” button. The software will be installed.Note: This program requires the DotNet component. If it is not found on the system it will be installed. Whencompleted click the “Close” button. A short cut icon (shown here) will be placed on the desktop. Click "Close"once the installation is complete.2.4. Insert USB Device (Logger)Insert the USB Device into the USB slot on the computer. It will be recognized and depending on the operating system it will beannounced as – “Found new hardware – Loading Driver or Loading Software"The device will be installed as a VCP - virtual communication (comm) port. Correct installation can be checked using the DeviceManager. In Windows 7 - from the "Start" menu - right click on "Computer" and select "Properties" then select "Device Manager"from the list on the left. For Windows XP - from the "Start" menu - right click on "My Computer" and select "Properties". Selectthe "Hardware" tab the click "Device Manager".This will bring up the device list shown here. Click on "Ports (COM& LPT)" and youshould see an entry for "USB DataLogger (COMx)" where x is the comm portnumber assigned and will depend on what devices are already resident on your PC.In this case x 7 so the USB DataLogger will appear as Serial Comm Port 7.Page 4Rev 1.02 06/21/11
Track-It User Guide3. Operation3.1. Start UpTo start the program double click the Track-It icon shown on the right or select the program from the Start menu. Theprogram start up window will appear as shown below.The window has menu options (File, Preferences, Device, Help) at the top of the window. Below are some iconsOpen File;Save File;Printand below that some tabs (Graph, Data Table, Summary, Device Setup). What is in the space below the tabs is dependent onwhich Tab is selected. The window above shows the Graph window without data loaded. This is the default start up window.At this point there are several options available. A previously saved data file can be opened or a logger can be connected and itsdata can be uploaded or it can be configured for use or in some cases live data can be read.The menu options are as follows:3.2. File3.2.1. OpenThis allows the user to open a saved data file for viewing. Also available by iconThe Open Data File window will pop up so the user can select the file (of type .dat) to beloaded into the graphic window for viewing.3.2.2. SaveThis allows the user to save any current data on the graph. Also available by iconThe Save Data File window will pop up so the user can name the file to be saved.3.2.3. PrintThis allows the user to print the current graph. Also available by iconThe print window will pop up. The user can select a printer and adjust its properties. The Print Range is used to print just theCurrent Page or a range of pages – All. If All is selected use the drop down menu to select the Total number of Pages to beprinted. The Margins can be set. The options allow for top, left and right and bottom margins.Page 5Rev 1.02 06/21/11
Track-It User Guide3.2.4. Upload Device DataThis allows the user to retrieve the current recorded data in the device. If selected it will ask for a file name. This operationwill stop any recording currently in progress on the device. If there is no recorded data in the device you will get a messageto that effect.3.2.5. ExitClose and exit the program3.3. PreferencesThere are basic settings that need to be set up by the user if the defaults are not acceptable. Select “Preferences “ from themenu at the top of the window. This will pop up the preferences window shown below.3.3.1. The General TabThis page has several settings that affect the way data is displayed.3.3.1.1. Decimal PlacesSelects the number of decimal places that numeric datawill display3.3.1.2. Graphic Display 24 Hr FormatIf checked time on the graph will be displayed in 24 hourformat. If unchecked time will be displayed in 12 hourformat with AM and PM indication3.3.1.3. TemperatureSelects the temperature units used by this programlocally C or F. Note the Logger Device always uses Cinternally.3.3.1.4. LanguagesSelects the language that all dialogs will be presented in.This requires language specific file "language.csv" that isconfigured for the languages required. The default is English.3.3.1.5. Date FormatSelects the format that the date is presented. Select your preference from the pull down menu.3.3.1.6. Cursor Snap to PointDetermines whether the cursor will snap (jump) to the actual data point on a line – check Yes, or move along theextrapolation of the line – check No.3.3.1.7. Recall DirectoryIf checked Yes the program will remember the last directory used and will default to this at each start up.3.3.1.8. Use Channel TagIf checked Yes – uses the user supplied channel Tag as set in the Device Setup - Input tab else uses the genericlabels Chan 1 or Chan 2.3.3.1.9. Autoload ConfigIf checked Yes – each time the Device Setup tab is selected the program will load the configuration from thelogger, provided the logger is attached to the USB port. If checked No – the user will need to load theconfiguration manually, either from the device or the PC. When navigating away from Device Setup and back, theconfiguration will remain intact once loaded.3.3.1.10. Real Time Data – Sample RateWhen sampling and displaying in real time this selects the real time sample update ratePage 6Rev 1.02 06/21/11
Track-It User Guide3.3.1.11. Real Time Data – Samples per ScreenUse the pull down menu to select how many samples fill the screen before the graph starts to auto scroll. Theuser can still choose to compress the data at a later stage.3.3.1.12. Real Time Data – Data typeSelect whether to show data as Instant – each data point is displayed as is, Max or Min will show the peak valuehigh or low, Average will average the readings. Note that a 2 second sample rate is the maximum sample rateand essentially all points will be instantaneous.3.3.1.13. Real Time Data – Save DataCheck Yes to record data to your local storage medium. When choosing to display live data in the graphic windowyou will be asked to select a data file to save the data to.3.3.1.14. Real Time Data - Digital DisplayIf checked Yes - adds a digital display on the left hand side of the graphic window during LIVEdisplay.Note: Right Clicking on the Digital Display pops up a window allowing selection of colors.3.3.2. Pressure Scale TabSelect this tab to select the units used by this program locally to display pressure (specific to certain loggers only). Note thisdoes not affect the logger which always uses its default units (KPa). The scale factor from selected engineering units to kPAis shown and may be adjusted by the user.3.3.3. MKT - Mean Kinetic Temperature.The user can enter the values that are used to calculate Mean Kinetic Temperature.3.4. DeviceThe Device option refers to the Logger plugged into the USB port on the PC3.4.1. Device ListThis will show the device(s) currently connected or available to the PC. Select the deviceyou will be working with by checking the box and then press the “Connect” button.3.4.2. Device InfoThis shows the information about the current connect device. It shows memory capacity, device type, the current firmwarerevision and the device serial number.3.4.3. Upload Device DataThis allows the user to retrieve the current recorded data in the device. If selected it will ask for a file name.This operationwill stop any recording currently in progress on the device. If there is no recorded data in the device you will get a messageto that effect.3.4.4. Record StatusThis will show the current recording status of the device – On or Off. The status can be changed selected the desired state.3.5. HelpSelecting the “Help” menu item pops up the help selection. There are two choices:3.5.1. ManualBrings up this user manual3.5.2. AboutPops up a window showing the software revisionPage 7Rev 1.02 06/21/11
Track-It User Guide3.6. Graph TabThe Graph tab allows for the visualization of data. The user can choose to load an already saved file using the Open option orUpload data from a connected device or View data in real time (select loggers only)3.6.1. IconsThe graphic area is fully interactive. Data can be zoomed and scrolled, the interaction controlled by the icons above thegraph. Mouse over the icons for a brief description of their function.- PanThis is the default cursor. It is used to scroll the trends horizontally and vertically by simply right clicking in thegraphics area. Traces can be scrolled individually by clicking and dragging the individual vertical scales or together byclicking and dragging in the graphics area.- Expand / CompressClick this button to expand (zoom) or compress the graph along the x-axes (time) and y-axis (scale). Traces can bezoomed individually by clicking and dragging the individual vertical scales or together by clicking and dragging in thegraphics area.- Zoom InClick this button to zoom in the graph.- Zoom OutClick this button to zoom out the graph.- Zoom WindowClick this button to zoom to a user-defined window. When clicked, the cursor will turn into a draw window tool. Drawa window around the area of interest by holding the right mouse button and dragging the window. On release, thewindow area will fill the graphics screen.- Zoom X-Axis to FitClick this button to fit all data into one screen.- Manual Zoom to FitClick this button to manually zoom the vertical (Y) Axis. This will pop up the Manual Zoom window. Enter theminimum and maximum vertical Axis scale values and check which channel to apply it to, then press the “OK” buttonto execute or “Cancel” to exit.- Zoom ScalesClick this button to zoom the vertical (Y) Axis to the defaults. This will pop up the Zoom Scales window. Check whichchannel to apply it to, then press the “OK” button to execute or “Cancel” to exit. The vertical scales will zoom to thedefault extremes.- CursorClick this button to enable the cursor. There are several cursor options to enable in depth examination of the data onthe graph. See Section 3.3.6 below.- Scroll to EndClick either the left or right scroll button to jump to the start or end of the data.- ClearClick this button to clear the graph and return to the start up state.- Upload Data from DeviceThis allows the user to retrieve the current recorded data in the device. If selected it will ask for a file name. Thisoperation will stop any recording currently in progress on the device. If there is no recorded data in the device you willget a message to that effect. A device must be connected in order to perform this task.Page 8Rev 1.02 06/21/11
Track-It User Guide- Start Live DataThis allows the display (and recording if enabled under Preferences) of real time data from the connected device.Data will plot on the graph and show on the Digital Indicators if these are enabled under Preferences.- Stop Live DataThis allows the display of live data to be stopped.- Pause / Run Live DataOnly visible during Live Data display. If running the Pause icon will be visible and is used to pause live datadisplay, note that data continues to be acquired and when the Play icon is pressed the graph will “catch up” to realtime. No data is lost. If paused, the Run icon will show.There is a TEXT BOX at the top of the graph. By default this will contain the Unit Tag but the user can choose to writeanything here. This is useful as it is printed on the printout.3.6.2. Displaying Recorded DataData can be loaded from a file or uploaded from a connected device. To open a previously saved file press the File openiconand select the file. To upload recorded data from a connected device press the Upload Data iconand followthe instructions. Once loaded the data is displayed on the graph. Use the icons above to navigate around. Use the Zoom XAxis to Fit icon to see an overall trend. A typical graph is shown below.Note: This display shows the digital readouts (on the left) enabled in the Preferences menu.On the top left are the trend identifiers, above the digital readouts – these identify the channel by trendcolor. By unchecking the boxes you can shut off the corresponding trace. The vertical scales for eachchannel will be in the corresponding color of the trace for easy identification as is the background of the digital display.If you move the cursor anywhere on the graph and right click the mouse you will bring up thesetup menu shown below. There are several options:Page 9Rev 1.02 06/21/11
Track-It User Guide3.6.2.1. (Graph) SetupThe Channel Setup dialog allows the user to modify the properties of each channel.ChannelSelects a channelVisibleTurns the trace on or off for the selected channelMarker TypeIdentifies the actual points recorded. The trace is extrapolatedbetween these points. The points can be marked by a square,circle or diamond. The user can also select None for no marker.Marker SizeAdjusts the size of the marker on the points.Line TypeIdentifies the trace type. It can be solid, dashed or dotted.Line ThicknessAdjusts the thickness of the trace.Data Trace ColorChanges the trace color for the selected channel.Alarm Trace Color Changes the alarm trace color for the selected channel.3.6.2.1.1. Background ColorAllows the graph background Color to be changed3.6.2.1.2. X-Axis ColorAllows the graph X-Axis color to be changed3.6.2.1.3. Vertical Grid Line ColorAllows the Vertical grid line color to be changed3.6.2.1.4. Set As DefaultSave the current settings as default.3.6.2.1.5. Swap Y-AxisSwap the position of the vertical scales.3.6.2.2. Digital Display SetupThe Digital Display Setup dialog is accessed by right clicking on the digital display activearea. The user can set the display background color and the color of the digits as describedabove. The settings may also be "Set as Defaults" and will be remembered each time theprogram is started.3.6.3. Using the CursorThe cursor is turned on using the Cursor icon. When the cursor is on, a number of optionsappear on the left hand side of the window as shown left. Some of these cursor choices can beselected by right clicking the mouse button on the graph which brings up the cursor setup menushown right. The cursor modes are described here:3.6.3.1. Value - XY.This uses a single cursor to identify a point on thetrace as shown here. When the mouse is movedoverthe cursor line the pointer will turn into a pointingfinger. If you left click at this time you can drag the cursor line left or right, the data in thetravelling window will update the time and value of the point in the target circle. You can attach the cursor to the othertrace by using the right click pop-up menu - "Attach" option, or simply click Chan 1 or Chan 2 radio button on thecursor menu on the left. Pressing the "S" key on the keyboard will also switch between traces.3.6.3.2. Dual PointThis brings up the cursor with targets around both traces as shown right. The values of the datawithin the target circle is shown at left in two digital panel meter windows shown above. The timestamp of the data point is below these windows and the date stamp is at the bottom left of thewindow. . When the mouse is moved over the cursor line the pointer will turn into a pointingfinger. If you left click at this time you can drag the cursor line left or right, the data in the digitalpanel meter windows will update.Page 10Rev 1.02 06/21/11
Track-It User Guide3.6.3.3. PeriodSelecting the Period Cursor option will bring up two vertical cursors which movealong the X-axis (Time) with a data window box between them that shows the time ofeach cursor and the difference between them. This box can be dragged up or down.This enables easy measurement of time between events or duration of events. Inaddition there is a summary of the data between the cursors shown on the left of thegraph. This gives the minimum, maximum and average of all points between thecursors for each trace. In addition, clicking the "Summary" button will jump to theSummary tab page which has additional information of the data points between thecursors.3.6.3.4. PeakSelecting the Peak Cursor option will bring up two horizontal cursors two cursors which move along the Y-Axis(amplitude) with a data window box between them that shows the value of each cursor and the difference betweenthem. This box can be dragged left or right. This enables easymeasurement of amplitude related evants (Spikes). You canattach the cursor to the other trace by using the right click pop-upmenu - "Attach" option, or simply click Chan 1 or Chan 2 radiobutton on the cursor menu on the left. Pressing the "S" key on the keyboard will also switch between tracesPage 11Rev 1.02 06/21/11
Track-It User Guide3.6.4. Live DataThe graph can be used to display live data from certain devices. The data can also be saved to the local PC storagemedium if selected. This and other options are setup in the Preferences Real Time recording menu.To record real time data make sure the device is connected and press the “Start Live Data” button.Data will plot on the graph and shows on the Digital Indicators if these are enabled under Preferences.To stop displaying/recording live data press the “Stop Live Data” button.The Pause / Run Live Data buttons are only visible during Live Data display. If running the Pauseicon will be visible and is used to pause live data display, note that data continues to be acqu
Track-It User Guide Page 1 Rev 1.02 06/21/11 Track-It User's Guide Track-It is a PC based (Windows XP / Vista/ Windows 7) program to enable a user to program and view data from the Track-It series of micro data loggers. The program allows the loggers to be configured (set up) and for data to be retrieved, displayed