Transcription
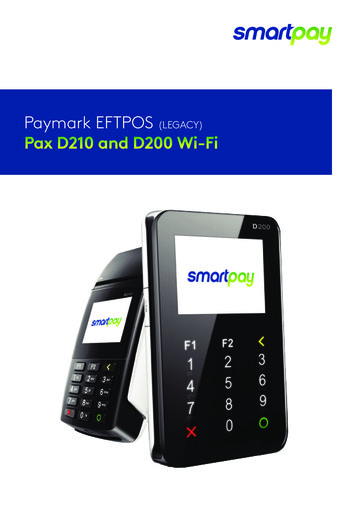
Paymark EFTPOS (LEGACY)Pax D210 and D200 Wi-Fi
CONTENTSTERMINAL HARDWARED210D200Function KeysOther AccessoriesPaper Rolls334445SETTING UP YOUR EFTPOS EQUIMENT5TRANSACTIONS OVERVIEWContactless TransactionsElectronic Offline Vouchers (D210 Only)Smartlink Lite EFTPOS (D210 & D200)Manual (standalone) EFTPOS (D210 Only)Transaction TypesPurchasePurchase with SignatureCash OutPurchase Cash OutMOTO PurchaseRefundMOTO Refund5667778888999ADMINISTRATIVE FUNCTIONSPayment Application MenuCommon Admin FunctionsManual LogonManual SettlementPrint (Shift) TotalsStored TotalsSettlement InquiryReprint Last ReceiptOffline Transactions10101010101010101010MERCHANT and COMMUNICATION SETTINGSConnecting to Wi-FiNew Network On Start-upChanging NetworkNetwork Setting DetailsSetting Static IP AddressPrint Current ConfigurationConfiguration UpdateNetwork Comms CheckTMS111111131314161616162
CONTACTFor EFTPOS terminal enquiries, issues or support contact Smartpay Technical Helpdesk on0800 476 278 or email customer.service@smartpay.co.nzTERMINAL HARDWARESmartpay Pax D210 EFTPOS provides a smart, secure and robust payment terminal. The D210 connects tothe Internet to process either manual or Smartlink Lite integrated POS transactions via your 2.4GHz Wi-Finetwork connection.Smartpay Pax D200 EFTPOS provides a small footprint, secure and robust mobile payment terminal. The D200connects to the Internet to process Smartlink Lite integrated POS transactions via your Wi-Fi connection.D200 does not have its own receipt printer and cannot be used for manual EFTPOS transactions or MOTO.D210 The battery on your D210 will last /- 8 hours in standard use situations. Battery life can be affected by Wi-Fi signal availability and consistency. Smartpay recommends charging the unit regularly when not in use.Thermal PrinterMag Swipe Card Reader(use side indents to lift printer coverwhen changing paper rolls)Number/Letter KeysPaper CutterCancel KeyContactless ReaderEnter KeyDisplay ScreenChip Card SlotPower On/Off ButtonPower Charging PortFunction KeysSmartpay User Guide Pax D210 and D200 Wi-Fi3
D200 The battery on your D200 will last /- 5 hours in standard use situations. Battery life can be affected by Wi-Fi signal availability and consistency. The terminal uses a standard micro USB charger. Smartpay recommends charging the unit regularly when not in useWi-Fi ButtonPower On/Off ButtonContactless ReaderMag Swipe Card ReaderDisplay ScreenNumber/Letter KeysUSB Charging PortEnter KeyFunction KeysChip Card SlotCancel Key!D200 CAN ONLY BE USED WHEN PAIRED WITH A COMPATIBLE SMARTLINK LITE POSOTHER ACCESSORIES Swivel counter stand Spare battery Wetcovers (D210) Car charger Cleaning cardsTo order paper rolls or other accessories please contact Smartpay on 0800 476 278or visit our website smartpay.co.nz4
PAPER ROLLS D210 terminals use standard 57mm (w) x 40mm (dia) thermal paper rolls. D200 DOES NOT HAVE A RECEIPT PRINTER.Replacing printer paper:1.Engage printer cover release flap to open printer bay.2. Remove existing roll core and place new roll in printer well (when replacing a paper roll, thetongue of paper should be feeding up and out towards the top of the terminal).3. Pull out tongue of paper so it is coming out of feeder and close the printer cover.To order paper rolls or other accessories please contact Smartpay on 0800 476 278 or visit ourwebsite smartpay.co.nzSETTING UP YOUR EFTPOS EQUIPMENTPlease read the Getting Started Letter that is provided with your Smartpay EFTPOS equipment. Ourtechnical helpdesk team (THD) can be contacted if you would like any assistance and to release thesecurity key and perform your initial Logon.1.Power on unit by pressing and holding down power key for 3 seconds then release and the screencomes on.a. D210 – key on side of unitb. D200 – key on top of unit2. Follow prompts to connect unit to your Wi-Fi network3. Terminal performs boot up sequence.4. Contact Smartpay THD to release security key and perform initial Logon.TRANSACTIONS OVERVIEWFor a more consistent contactless card experience the swipe/insert quick start option has beenremoved. To follow best security practices for payment card handling the customer should alwayspresent their own card (swipe/insert /tap) to the terminal wherever possible.Smartpay User Guide Pax D210 and D200 Wi-Fi5
CONTACTLESS TRANSACTIONSSmartpay EFTPOS terminals can accept contactless payment cards and smart devices. Merchants can havecontactless acceptance enabled or disabled through their Merchant bank. If contactless payment functionality isenabled, then once the transaction value is entered the Paywave/Paypass/tap-and-go card PRESENT option will beoffered automatically for valid transaction types.The S300 PINpad prompts the customer to PRESENT / INSERT / SWIPE their card. Merchants should offer the S300 totheir customer to complete the transaction; instructing them (if required) to present their card over the screen wherethe blue light is flashing. It is best security practise for the customer to perform these steps themselves. The merchantshould not take the customers payment card unless necessary.CREDIT CARD is the default account for all contactless transactions. Account selection is not required. Fortransactions over the industry prescribed limit currently (NZD 80) the customer will be prompted to enter their PIN tocomplete the transaction.Contactless available:No contactless available:This is the symbol forcontactless transactions. TheTOTALTOTAL --.-- --.--symbol will be displayed onthe PRESENT CARD screenand coloured LED boxes flashalong the top of the screen:PRESENT CARDSWIPE / INSERT CARDSWIPE / INSERT CARDBLUE LED Awaiting card presentationBLUE YELLOW GREEN LED Card read successfulBLUE YELLOW LED Card presentedRED LED Card read failedELECTRONIC OFFLINE VOUCHERSElectronic Offline Voucher (EOV) enables your business process EFTPOS transactions if your terminal has gone offline.EOV is not designed to function as a secondary connectivity option. EOV allows for emergency processing capabilitywhen unforeseen situations such as a loss of network or connectivity occur. To find out more about EOV, contact thePaymark Customer Care Centre on 0800 729 627.How does it work?If the EFTPOS terminal encounters an issue connecting to the Paymark network, it will automatically revert to offlinemode after two failed transactions. “EFTPOS OFFLINE” will be displayed on terminal screen. Your terminal can storeup to 99 EOV transactions (to maximum allowed value). Once a successful connection has been made with Paymark,the terminal will automatically send stored offline transactions through for processing.All EOV transactions require the customer signature on the Merchant EFTPOS receipts instead of PIN verification.Merchants must keep all signed Merchant Receipts to verify EOV transactions. Refund and Cash Out transactiontypes are not supported in EOV mode.Most customers will automatically be enabled for offline mode but it can be enabled or disabled by your merchant bank.6
SMARTLINK LITE EFTPOS (D210 & D200)When the terminal is in Smartlink Lite mode the idle screen will display the text PAYMARK EFTPOS.EFTPOS terminal is paired with a Smartlink Lite capable POS. Transaction requests are sent from POS to terminal.Administrative functions may be accessed directly on the terminal or through the POS (depends on POS functionality).Your POS provider should supply any instructions required to assist you with adding integrated EFTPOS acceptance.For some systems, a Smartpay EFTPOS option may need to be enabled before we can pair the terminal. Please checkwith your POS provider or read your POS setup instructions to perform these steps.When in integrated/interfaced mode you will require a password to access the MERCHANT FUNCTIONS / ADMINMENU. Contact Smartpay THD for assistance if required.MANUAL (STANDALONE) EFTPOS EFTPOS terminal is not connected to POS The idle screen displays transaction options To start a transaction the operator selects transaction type required and types in amountIDLE SCREENPAGE 2dd/mm/yytimedd/mm/yyPAYMARK EFTPOS1.2.3.4.PURCHAUTHPUR / TIPCASH5.6.7.8.timePAYMARK EFTPOSPUR / SHIFT5. ADD TIP When in manual mode the terminal idle screen displays a standard TRANSACTION MENU To start any of the main 4 transaction types – select corresponding keypad number To access secondary transaction types – press up/down ARROW keys To tab between the transaction type screens press up/down ARROW keys Press MENU key to access EFTPOS MAIN MENUTRANSACTION TYPESPURCHASEStandard Purchase/Sale transaction using an EFTPOS/CREDIT/DEBIT card.CASHCash Out transaction using an EFTPOS/CREDIT/DEBIT card.PUR/CASHCombined Purchase/Sale and Cash Out transaction using an EFTPOS/CREDIT/DEBIT card.REFUNDRefund transaction using an EFTPOS/CREDIT/DEBIT card.AUTHHospitality transaction type to request pre-authorisation of funds on CREDIT card(usually for room or vehicle hire).Hospitality functionality must be approved by Merchant bank before it can be enabled on terminal.FINALISEHospitality transaction type to complete (Finalise) transaction from a previous a pre-authorisationon CREDIT card (usually for room or vehicle hire).Smartpay User Guide Pax D210 and D200 Wi-Fi7
PURCHASE1.Operator selects 1.PURCHASE on base unit and types in PURCHASE amount2.Press ENTER and terminal prompts customer to PRESENT INSERT or SWIPE CARD3.Operator presents EFTPOS terminal to customer4. Customer taps, inserts or swipes carda. Insert or swipe - customer follows screen prompts to select account and enter PINb. Tap - customer follows screen prompts if required5. Base and PINpad display ACCEPTED or DECLINED result6. EFTPOS Receipt will be offered (depending on receipt print/prompt settings)7.EFTPOS terminal returns to idle screen ready for next transactionPURCHASE WITH SIGNATUREIn some cases, the customer may be able to select ENTER instead of using their PIN. If this happens theMerchant Receipt will print with a space for the customer to sign in. The terminal will require the operatorto verify the customer signature and confirm the transaction.Your Paymark merchant agreement states you must keep a copy of your signed Merchant Receipts. Thesewill be used to verify the transaction should it be disputed.CASH OUT(Contactless not available with cash out transaction type)1.Operator selects 2.CASH and types in Cash Out amount2.Press ENTER and terminal prompts customer to INSERT or SWIPE CARD3.Operator presents EFTPOS terminal to customer4. Customer inserts or swipes card5. Customer follows screen prompts to select account and enter PIN6. Base and PINpad display ACCEPTED or DECLINED result7.EFTPOS receipt will be offered (depending on receipt print/prompt settings)8. EFTPOS terminal returns to idle screen ready for next transactionPURCHASE CASH OUT(Contactless not available with cash out transaction type)1.Operator selects 3.PUR/CASH2.Operator types in Purchase amount and press ENTER3.Operator types in Cash out amount and press ENTER4. EFTPOS terminal will prompt customer to INSERT or SWIPE CARD5. Operator presents EFTPOS terminal to customer6. Customer inserts or swipes card7.Customer follows screen prompts to select account and enter PIN8. EFTPOS terminal displays ACCEPTED or DECLINED result9.EFTPOS receipt will be offered (depending on receipt print/prompt settings)10. EFTPOS terminal returns to idle screen ready for next transaction8
MOTO PURCHASEManual EFTPOS processing using manual card entry or MOTO functionality can be enabled for merchantswho process telephone or mail order sales. MOTO should only be used in situations where cardholderauthorisation is given for the transaction and the physical card is not present to be used at the terminal.1.Operator selects 1.PURCHASE and types in PURCHASE amount2.Press ENTER and terminal prompts user to PRESENT INSERT or SWIPE CARDOn PINpad:On PINpad:3.Operator should press ENTER4. Operator types in 16-digit card number - press ENTER5. Operator types in card expiry date [mm/yy] - press ENTER6. Operator is prompted to enter card CSC - select YES or NO and follow screen prompts7.Operator selects appropriate MOTO TYPE option8. Operator selects CRD account type9.EFTPOS terminal displays ACCEPTED or DECLINED result10. EFTPOS receipt will be offered (depending on receipt print/prompt settings) - you should always printa copy of MOTO receipts11. EFTPOS terminal returns to idle screen ready for next transactionREFUNDMerchants are enabled for refund transactions and provided a Merchant Refund Card by their merchantbank. Merchants should contact their bank to request this service and the card.1.Operator selects 4.REFUND types in REFUND amount2.Press ENTER and terminal prompts for MERCHANT REFUND CARDOn PINpad:On PINpad:3.Operator swipes MERCHANT REFUND CARD and enters REFUND PIN4. EFTPOS terminal will display refund amount and prompt customer to PRESENT INSERT or SWIPE CARD5. Operator presents EFTPOS terminal to customer6. Customer taps, inserts or swipes carda. Insert or swipe - customer follows screen prompts to select account and enter PINb. Tap - customer follows screen prompts if required7.EFTPOS terminal displays ACCEPTED or DECLINED result8. EFTPOS Receipt will be offered (depending on receipt print/prompt settings)9.EFTPOS terminal returns to idle screen ready for next transactionMOTO REFUNDMOTO Refunds can be performed in the same way as MOTO purchase. Merchant should select Refundtransaction type and use their Merchant Refund Card. The amount being refunded should be creditedback to the card used for the original purchase. Merchants should contact their bank to request thisservice and the card.Smartpay User Guide Pax D210 and D200 Wi-Fi9
ADMINISTRATIVE FUNCTIONSPAYMENT APPLICATION MENUPress MENU (pw 746723)MERCHANT FUNCTIONSQUICK ACCESS MENUADMINISTRATIVE MENUUTILITY MENUCONFIGURATION MENUSECURITY MENUAPP MANAGER MENU To scroll through menu options - UP/DOWN ARROW keys Press CLEAR or CANCEL to go backCOMMON ADMIN FUNCTIONSMANUAL LOGONMENU ADMINISTRATIVE MENU LOGONMANUAL SETTLEMENTMENU ADMINISTRATIVE MENU SETTLEMENT CUTOVERNote: Terminal will automatically perform Paymark settlement once per day. Forfurther information about auto settlement window you can contact Paymark.PRINT (SHIFT) TOTALSPress MENU ADMINISTRATIVE MENU SHIFT TOTALS Press NO to print without clearing totalsOR Press YES to print totals and clear them for next shiftSTORED TOTALSPress MENU ADMINISTRATIVE MENU STORED TOTALSSETTLEMENT INQUIRY Press MENU ADMINISTRATIVE MENU SETTLEMENT INQUIRY Enter required date [dd/mm/yyyy] and press ENTERREPRINT LAST RECEIPTPress MENU ADMINISTRATIVE MENU REPRINT RECEIPTOFFLINE TRANSACTIONSPress MENU ADMINISTRATIVE MENU SHIFT TOTALS OFFLINENote: Terminal will automatically send stored offline transactions when theterminal regains connection to the Paymark network.10
MERCHANT & COMMUNICATION SETTINGSEFTPOS requires an active Internet connection to process payments. D-Series terminals use your2.4GHz Wi-Fi network* which can be generated via a fixed router or a mobile Wi-Fi device or yoursmartphone hotspot†.* D-Series terminals connect to 2.4GHz Wi-Fi band on 802.11b, g and n standards. They do not connect to 5GHz wirelessfrequency.†Some hotspots will stop broadcasting when idle for set periods. Because the EFTPOS terminal only uses the hotspot when atransaction is being processed, the hotspot may require regular resetting. To do this turn off personal hotspot on your smartdevice and then turn it back on, and wait for the terminal to connect again. These are general known issues with smartdevice Wi-Fi hotspots and do not solely relate to Smartpay EFTPOS terminal connections. It is also recommended you do nothave Bluetooth enabled while using your Wi-Fi hotspot as it can cause signal interference.CONNECTING TO Wi-FiIf using a mobile Wi-Fi hotspot or hot spotting off your phone, first ensure you have sufficient data thenturn on and confirm the Wi-Fi network is available. Have your EFTPOS terminal fully charged and ready.Make sure the terminal is in the range of your Wi-Fi network. Press and hold power button for few seconds,release and LCD screen backlight will turn on. After a few seconds if terminal has turned on successfully, abeep sound will be heard and the PAX logo will appear on screen.Terminal will run through start up sequence and automatically attempt to connect to last used Wi-Finetwork (SSID). If connection is successful the Wi-Fi iconin the top left corner of the screen will light upand the unit will display the idle screen ready for use.NEW NETWORK ON START-UPTerminal will run through start up sequence and automatically attempt to connect to last used Wi-Finetwork (SSID).If the Wi-Fi network is not available, the terminal willCannot Connect toSSID : [current network name x]Try Again?ENTER YESprompt to retryIf you have not changed your Wi-Fi network, make sure theCLEAR NOWi-Fi is on and signal is broadcasting Press ENTER to retry connectionIf you want to connect to a new network Press CLEAR to start connection process Press ENTER to configure new network connectionWIFI Not ConnectedConfigure Now?ENTER YESCLEAR NOSmartpay User Guide Pax D210 and D200 Wi-Fi11
MERCHANT & COMMUNICATION SETTINGSScreen displays Wi-Fi network settingsWi-Fi SETTING: Press CLEAR to changeSCAN FOR AVAILABLE Press ENTER to start automatic scanWi-Fi ACCESS POINTS?orSSID : Networkname1234Sec mode: WPA2PSKENTER OKCLEAR CHANGEENTER: SCANCLEAR: MANUAL ENTRYSELECT SSID:SPYpublic1Networkname abcNetworkname xxxNetworkname 123ENTER WPA KEY Press CLEAR if you want to configure manuallyWait while terminal scans for available Wi-Fi networks Scroll through options using up/down ARROW keys tohighlight and ENTER to select Press CLEAR to go back and perform scan againType in Wi-Fi password/encryption key Press ENTER key to acceptSymbols: Uppercase [F1], then ‘0’ will give you: 0 , space * #F1 @ & ? ‘ ! % ( ) \ { } [ ] ; : ‘ “ /Wait while terminal connects to chosen Wi-Fi networkTERMINALADDRESS ALLOCATIONCURRENTLYDHCPCLEAR TO CHANGEOnce the terminal has successfully connected to network theADDRESS ALLOCATION screen will be displayed and the Wi-Fiicon will light up(If you want to set to Static IP and you know your networkdetails you can press CLEAR now and follow the prompts.Otherwise press ENTER and return to the idle screen.)12
MERCHANT & COMMUNICATION SETTINGSCHANGING NETWORKTo change from currently connected Wi-Fi network Press MENU QUICK ACCESS MENU COMMSSelect WIFITERMINAL COMMSBluetooth option is not available at this timeWIFIBLUETOOTHWi-Fi SETTING:Screen displays Wi-Fi network settingsSSID : Networkname1234Sec mode: WPA2PSKENTER OK Press CLEAR to change Press ENTER to start automatic scanCLEAR CHANGESCAN FOR AVAILABLEWi-Fi ACCESS POINTS?ENTER: SCANCLEAR: MANUAL ENTRYor Press CLEAR if you want to configure manuallyWait while terminal scans for available Wi-Fi networksContinue Wi-Fi set-up as per corresponding steps in NEW NETWORK ON START-UP instructionsNETWORK SETTINGS DETAILSSmartlink Lite uses the terminal’s IP address to “pair” with the POS. If that IP address changes, then theconnection will be lost and you must reconfigure the new terminal IP address in the POS settings. When inSmartlink Lite mode you can press 1 to view terminal current IP address.When using the EFTPOS terminal paired with your POS using Smartlink Lite it is recommended that youconfigure the terminal with a Static IP address.Smartlink Lite does not work over a dial-up or GPRS connection.Here’s a tip:Connect your terminal to the network using a standard automatically assigned DHCP IP address andperform a PRINT CONFIG first so that you have all your network information. You will need this toconfigure a Static IP address for Smartlink Lite pairing.From idle screen Press MENU QUICK ACCESS MENU PRINT CONFIG- see LOCAL IP SETTINGS section on receipt print-out for detailsSmartpay User Guide Pax D210 and D200 Wi-Fi13
MERCHANT & COMMUNICATION SETTINGSSETTING STATIC IP ADDRESSThe terminal will default to a DHCP IP address. To change this to a Static IP follow the steps below orcontact our THD to assist you.To use a Static IP address your network must either have a section of addresses reserved for thispurpose (this is usually configured in your router - if you are unsure please consult your ISP or IT networkadministrator).Alternatively assuming there are only a few devices connecting on your network, you can select a highnumber in the DHCP range* (this is to reduce likelihood of IP conflict issues).* Smartpay is not an IT provider and does not take any responsibility for managing your network configuration. Press MENU QUICK ACCESS MENU COMMSTERMINAL COMMSWIFIBLUETOOTH Select WIFI(Screen displays Wi-Fi network settings)Wi-Fi SETTING:SSID : Networkname1234Sec mode: WPA2PSKScreen displays current Wi-Fi network settings Press ENTERSCAN FOR AVAILABLE Press ENTER to start automatic scanWi-Fi ACCESS POINTS?ORENTER OKCLEAR CHANGE ENTER: SCANCLEAR: MANUAL ENTRYTERMINALADDRESS ALLOCATIONCURRENTLYDHCPCLEAR TO CHANGE14Press CLEAR if you want to configure manuallyWait while terminal scans for available Wi-Fi networksWait while terminal connects to chosen Wi-Fi network Press CLEAR to change to STATIC then press ENTER tocontinue
MERCHANT & COMMUNICATION SETTINGS Type in static IP addressSTATIC IPENTER IP ADDRESS Press ENTER key to continueUse F1 for dots, use CLEAR to backspace if you make an error.CLEAR TO CHANGESUBNET MASKENTER IP ADDRESS Press ENTER to continueorCLEAR TO CHANGEGATEWAYENTER IP ADDRESS Press CLEAR change Type in Subnet Mask address Press ENTER to continueorCLEAR TO CHANGENETWORK DNSENTER IP ADDRESS Press CLEAR to change Type in Gateway address Press ENTER to continueorCLEAR TO CHANGE Press CLEAR to change Type in DNS addressREBOOT REQUIREDTERMINAL WILLPOWER DOWN NOWTerminal will power down. Press power key to reboot.Smartpay User Guide Pax D210 and D200 Wi-Fi15
MERCHANT & COMMUNICATION SETTINGSPRINT CURRENT CONFIGURATIONMERCHANT FUNCTIONSQUICK ACCESS MENUADMINISTRATIVE MENUUTILITY MENUCONFIGURATION MENUSECURITY MENUAPP MANAGER MENU Press MENU QUICK ACCESS MENU PRINT CONFIGTerminal will print out configuration receipt with currentnetwork and other host and merchant settings.CONFIGURATION UPDATESmartpay offers a range of value-add services like Smartcharge automatic surcharging, Tipping onterminal and Multi merchant. Contact our sales team or THD to discuss activating/deactivating theseservices on your EFTPOS terminal.MERCHANT FUNCTIONSQUICK ACCESS MENUADMINISTRATIVE MENUUTILITY MENUCONFIGURATION MENUSECURITY MENUAPP MANAGER MENUFrom time to time Smartpay THD may need to perform aCONFIG UPDATE on the terminal to apply functionality changes. Press MENU CONFIGURATION MENU Enter the password provided by Smartpay THD operator Select UPDATE CONFIGNETWORK COMMS CHECKMERCHANT FUNCTIONSQUICK ACCESS MENUADMINISTRATIVE MENUUTILITY MENUCONFIGURATION MENUSECURITY MENUAPP MANAGER MENUThis check can be performed to verify the terminal has aworking network connection. Press MENU UTILITY MENU DIAGNOSTICS COMMUNICATIONSTerminal screen will display ACCEPTED for a workingconnection or PROCESSING NOW DECLINED PLEASE TRYAGAIN if the connection is not working.TMSSmartpay Terminal Management System provides remote access software updates and configurationchanges for your terminal.We use this from time to time to ensure our customers have the most up-to-date, secure and bug freesoftware on their units. Please contact Smartpay THD for assistance before you attempt to use this menu. Press MENU APP MANAGER MENU TMS MENU TMS START0800 476 278 - Option 2SP126194251-0217smartpay.co.nz
Smartpay User Guide Pax D210 and D200 Wi-Fi 3 Smartpay Pax D210 EFTPOS provides a smart, secure and robust payment terminal. The D210 connects to the Internet to process either manual or Smartlink Lite integrated POS transactions via your 2.4GHz Wi-Fi network connection. Smartpay Pax D200 EFTPOS provides a small footprint, secure and robust mobile payment terminal.
