Transcription
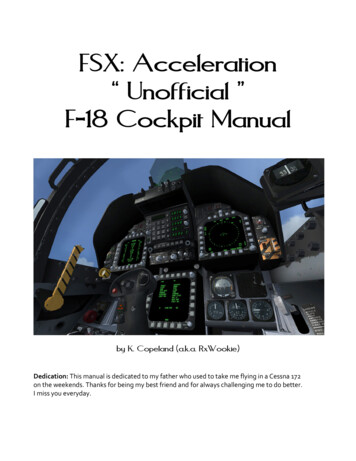
FSX:FSX: Acceleration“ Unofficial ”F-18 Cockpit Manualby K. Copeland (a.k.a. RxWookie)Dedication: This manual is dedicated to my father who used to take me flying in a Cessna 172on the weekends. Thanks for being my best friend and for always challenging me to do better.I miss you everyday.
Table of ContentsChapterPg.1. Introduction .1-22. Getting Oriented 3-43. Using the Head-Up Display . 5-64. Using the Head-Down Displays . 7-16- Root Menu . 7- SMS . 7- RDR . 8-9- HUD . 10- HSI . 10- FUEL / FPAS . 11- E/W 11- ADI 12- ACL 12- S/A . 13- ENG . 13- CHK . 14- BIT . 14- Summary 155. Using the Up-Front Control Panel . 17-24- COM Mode . 17-18- A/P Mode 19- IFF Mode 20- TCN Mode . 20- ILS Mode 21- Potential Problems & Fixes . 22- D/L Button . 23- TCN Mode . 23- Summary 236. Sample Flight Plan (written by Virtuali) . . . 25-307. Standby/Backup Systems . . 31-32- Left Side (Engine Readouts, Fuel Stores) 31- Right Side (Analog Standby Instruments) . 31FSX: Accel F-18 Cockpit Manual, pg i
Table of Contents (cont’d)8. The Rest of the Interactive Cockpit . 33- Left Side . . . 33Landing Gear (up/down)Launch Bar (extend/retract)Flaps (Auto, Half, Full)Emergency/Parking Brake (on/off)Throttle, Left/Right (manual control)Test A/off/Test B (selectable)Strobe Light (on/off)Rotating Beacon Light (on/off)Refueling Probe (extend/retract)Fuel Dump (on/off)Rudder Trim (left/neutral/right)APU (on/off)Engine Starter (left/off/right)TCN/ILS Volume (low/high)Audio Control Panel (comm1/comm2/off)- Right Side . . . . 34Arresting/Landing Hook (extend/retract)Wing Fold (extend/fold)Left Alternator (on/off)Battery (on/off/override)Right Alternator (on/off)Canopy (open/closed)Pitot Heat (on/off)De-Ice (on/off)Instrument Panel Lighting (on/off)Cabin Lighting (on/off)Light Test (test/off)9. Appendix . 35-38- TACAN Frequencies . 35- Printable Avionics Map (by Virtuali) . 37- Printable FSX: Acceleration Keyboard Commands . 3910. Conclusion / Credits . 41FSX: Accel F-18 Cockpit Manual, pg ii
1.) IntroductionSo you decided to buy the FSX: Acceleration Expansion. After getting everything installed, youfinally have the program up and running. It’s not a hard decision which plane you’re going to try outfirst the F/A-18, of course! The load screen takes forever, or at least it seems that way, andsuddenly you are sitting in one of the meanest, fastest, and toughest aircraft ever built. I mean,come on, its nickname is ‘Hornet’, what else would you expect? You smile involuntarily and thenlook around the beautifully rendered virtual cockpit and suddenly realize, “I have no idea whatthese displays, switches, and readouts mean!”If you are like me, you shrug, open the throttles to full, and take off relying on previous flightexperience to guide you through. Somehow, after a lot fun (including barrel rolls, inverted loops,and a blistering supersonic ride), you find your way back to an airport and land. What anexhilarating ride! This aircraft is simply fun to fly. After a few flights like this, you begin to get a feelfor some of what you are seeing in the cockpit, mainly the HUD. But, you wonder is there a guideout there to help you understand what all these controls and readouts actually mean? After a few,frustrating hours on the internet, you realize that there is very little available, especially incondensed and printable format. The only real exception is the fsdreamteam.com forum where youcan find some useful information from the guys and gals who worked their tails off to bring you oneof the best aircraft for the MS FlightSim series, ever.So, I set out to create this document to help others who want to get everything they can out of thisamazing aircraft. Even if you never use the navigational aids to make an authentic cross-countrytrip, I hope that this information helps you in some small way. I know that understanding all of thereadouts in my HUD and virtual cockpit was the difference between only occasionally (andsuccessfully) landing on a carrier to consistently snagging a ‘3-wire’ with a textbook approach. Italso helped me appreciate just how hard the design team must have worked on this amazing virtualcockpit.Please note: In order to allow you to visualize what you will actually be seeing in FSX, most imagesare taken from actual screen shots. I hope you enjoy!F-18 Cockpit, NighttimeFSX: Acceleration F-18 Cockpit, NighttimeFSX: Accel F-18 Cockpit Manual, pg 1
Let’s fly!F-18 taking off from a carrier at full military power.Photo courtesy U.S. Navy(public domain)FSX: Accel F-18 Cockpit Manual, pg 2
2.) Getting OrientedWhile your first experience with the F-18 cockpit is likely to leave you bewildered, once you getoriented it’s actually a very nice layout. If you look out the front canopy, you will see the Head-UpDisplay (HUD) which gives flight data such as speed, altitude, etc.Looking down into the cockpit, you will see three large displays. The one on the upper-left is knownas the Master Monitor Display (or MMD) and serves as a primary monitor for the pilot. The one onthe upper-right is known as the Multifunction Display (or MFD) and is generally tasked out to radar,though it is constantly changed as the situation dictates. The final large display is located in thebottom-center of the cockpit and is called the Horizontal Situation Display (HSD) and is primarilyused for navigation. The beauty of this design is that the displays all have the same root menu andsubmenus available which gives triple redundancy in the event of a system failure. It also meansyou can configure the displays to your personal preferences.In between the two upper displays is a number pad and row of displays showing several lettersknown as the Up-Front Control Panel (UFC). This controls communication and NAV / Auto-Pilotfunctions. To the left and right of the lower display (HSD) are a small set of standard instrumentsintended solely for use as a backup system. If you pan left and right in the cockpit, you will see lotsof switches and knobs, many of which are useable.FSX F/A-18 Virtual CockpitFSX: Accel F-18 Cockpit Manual, pg 3
What do all those knobs and switches do again?F/A-18 cockpit.Photo courtesy U.S. Navy(public domain)FSX: Accel F-18 Cockpit Manual, pg 4
3.) Using the Head-Up Display (HUD)The HUD on the F-18 was one of the first developed to serve as a ‘Primary flight display’ and as suchprovides the majority of information you will need to visually fly the F-18 in FSX. Switching thecockpit to 2D mode causes the HUD to be superimposed over the screen.FSX F/A-18 HUD (Virtual Cockpit)At the very top of the display is a digital heading and tape. In the center of the display, and movingaround, is the flight path vector. Wherever the flight path vector sits in the HUD is where theaircraft is headed regardless of pitch, attitude, etc. There are several horizontal lines representingthe pitch ladder. At the bottom is a bank indicator.To the left you will find airspeed in kts, angle of attack (α) in degrees, current mach speed (M),acceleration/gravitational forces (G) you are experiencing, and peak aircraft G’s. On the right, youwill find the ascent/descent rate in ft per min, current altitude, and altitude barometer setting.Just outside of the glass portion of the HUD is a visual angle of attack indexer. This is used in settingup the aircraft for landing. If you see an arrow pointing up, you need to reduce thrust(or pull back on the stick). If you see an arrow pointing down, you need to add thrust (or push thestick forward). If you see an orange donut, the angle of attack for landing is ideal.FSX: Accel F-18 Cockpit Manual, pg 5
Ready for the ride of your life?Front canopy view of F-18 sitting on carrier deck, attached to catapult.Photo courtesy U.S. Navy(public domain)FSX: Accel F-18 Cockpit Manual, pg 6
4.) Using the Head-Down DisplaysThere are three large digital display screens (DDIs) that provide information. They are surroundedby twenty softkey push-buttons and all have the same menus and displays available.Root Menu – The root menu is the top-level option where all other display menus can be selected.Root MenuSMS (Stores Management System) – SMS controls armament. Since weapons are not implementedin FSX, this screen is blank and the ‘GUN’ submenu is inoperable.SMS MenuSMS - GUN SubmenuFSX: Accel F-18 Cockpit Manual, pg 7
RDR – The A/A Radar screen is used in finding and intercepting aircraft. The first thing to realize isyou need targets around you to see anything so turn up the air traffic sliders.It is important to understand that the radar is ‘forward looking’ only. Targets appear on the screenas little squares. When you select a target, using TUP and TDN, it will be enclosed by two verticallines. Numbers will appear to the left and right of the vertical lines indicating target Mach speedand target altitude respectively. The straight line leading off the target indicates their direction oftravel relative to your own. If it points to the right, they will be heading from your left to your rightas you look out the canopy. If you want to know their exact heading, check the upper left corner fortarget heading in degrees. In the left-center of the display is an ‘ ’ icon and a number (either or -).This is your altitude differential from the target in thousands of feet. So if it reads -30.5, you are30,500 ft higher than the target; and, if it reads 9.5, you are 9,500 ft below the target (if it’s positivethe target is higher than you).Okay, I’ve got a target how far away are they? Remember, the radar is ‘forward looking’ so thehigher up the screen they are, the further away they are. That doesn’t help you much, though.So, look on the right side for a ‘ ’ icon. This is a visual representation of your distance to targetrelative to scale. Your scale is denoted by the number in the top right of the display. In the examplebelow, the scale is 40 nm. This means each individual hash mark represents 10 nm.Take a look at the two screen shots below. On the left, you will see the radar screen. Notice thetarget is at the bottom-center of the radar screen. He is traveling at Mach 0.6 at roughly 3,000 ft.He is approximately 700 feet above me and his true heading is 267 degrees. The ‘ ’ icon (on theright) is at the very bottom indicating the target is less than 1 nm in front of me. The radar alsoshows that I am turning to the left (represented by the center horizontal line that is shifted up onthe left which is actually an artificial horizon). In fact, I am turning to place the target square in mysights. Essentially, this target is in perfect ‘kill position’ if we were dogfighting.Target in Perfect Kill Position - RadarTarget in Perfect Kill Position - HUDFSX: Accel F-18 Cockpit Manual, pg 8
Now that we understand target acquisition and tracking, let’s see what else is displayed. On the topleft, there is a number (‘2B’) that designates the vertical beam pattern. You can change it with thesoftkey next to it, but it has no effect on the operation of the radar. The term RWS is an indicationof the radar mode (Range While Scan). In the lower left corner, you will find your current speed inkts with your Mach speed just below it. In the lower right corner is your current altitude inthousands of ft. To the right of your current speed is the beam width in nautical miles.Correspondingly, on the upper right hand corner is the radar range in nautical miles. These can bechanged using the softkeys near them. Lowering these numbers narrows the radar range providingextra detail. Raising these extends the radar range for a broader view. In the example above, eachsection of the radar represents 10 nm for a total scan of 40 nm by 40 nm. The bottom-right softkeys(TUP & TDN) are used to cycle between targets. The toggle dial at the top cycles throughday/auto/night modes, change it by clicking and dragging with mouse. Finally, you can adjustbrightness and contrast by dragging the appropriate dials with the mouse.RDR MenuPractice your technique by assessing the target selected in the screenshot above. Find the one thatis selected. He is traveling Mach 0.3 at approximately 2,000 ft (0.3 --2--). Look to the left to seehe has a true heading of 354 and is roughly 8,200 ft below me ( -8.2). His position on the screentells me he is off to my left, traveling from my left to my right. He is approximately 38 nm in front ofme (found using the ‘ ’ icon on the right-hand side and seeing the radar is set to sweep both40 nm wide and 40 nm ahead).In fact, this target is a Cessna Caravan who is flying through an active MOA that I have beendispatched to intercept in the mission “Rocket Launch Air Cover”.I am traveling 351 kts (Mach 0.6) at a height of 10,259 ft and flying relatively level (artificial horizonis level). This means to intercept him, I need reduce throttle to zero and push the aircraft into a diveto shed 8,000 ft. Once I hit the 2,000 ft mark, I need slow down to around 180 kts (Mach 0.3) andscan for an aircraft in front of me traveling from left to right. Once I have him spotted, I can make alazy right hand, circular turn, match his speed (plus a few kts), and overtake him from his left side.FSX: Accel F-18 Cockpit Manual, pg 9
HUD – The HUD display functions exactly the same as the one in your canopy.HUD MenuHSI (Horizontal Situation Indicator) – The icon in the center of the screen represents your aircraft.Select TCN / ILS modes using the keys on the upper left. The lower left number is your headingselection and the lower right number is your course selection for NAV1. Adjust the informationdisplayed using the lower left softkey. If ‘AUTO’ has a box around it, the HSI is in auto-waypointmode. To the right is SEQ which places the HSI into route mode. WPT places it into waypointmode. Pressing the DATA key takes you to a screen where waypoints are displayed. CSEL displayscurrent course. To the left of this is the Map Scale (in nm). Pressing the GPS softkey will take youinto the FlightPlan screen.HSI MenuFSX: Accel F-18 Cockpit Manual, pg 10
FUEL / FPAS (Flight Plan Analysis Screen) – Moving to the bottom row of softkeys on the main menuis the FUEL and FPAS keys.FUEL MenuFPAS MenuThe FUEL screen displays current fuel levels as well as your BINGO amount. The FPAS screendisplays your current usage of fuel as well as current aircraft weight (which can be used forcalculating speed and angles for takeoff and landings). It adjusts in real-time based on current fuelstores and flight parameters.E/W – The E/W button brings up the Electronic Warfare screen. Since weapons are notimplemented in FSX, this screen simply brings up an inoperable display.E/W MenuFSX: Accel F-18 Cockpit Manual, pg 11
ADI –ADI brings up an ‘artificial horizon’ that gives current speed on the left and height on the right.ADI MenuACL (Automated Carrier Landing) – The ACL screen provides commands from a carrier during yourapproach for landing. What is displayed depends on if you are manually landing the aircraft of not.In FSX, it is more often used to provide information while the aircraft is in autopilot mode. You canadjust the scale of the map using the softkey at the top of the screen to change the scale (SCL) innautical miles.ACL ScreenFSX: Accel F-18 Cockpit Manual, pg 12
S/A – The S/A option is intended to bring up the Situational Awareness screen. Again, sinceweapons are not implemented in FSX this simply brings up an inoperable display.S/A MenuENG – The display on the left of the cockpit is set to the Engine (ENG) screen by default. When youstart the engines, these displays will begin to reflect the change in engine status. The primaryinformation you will want from this screen is ENG STATUS. When the engines are fully operational,this should read NORMAL for both LEFT and RIGHT.ENG MenuFSX: Accel F-18 Cockpit Manual, pg 13
CHK – The CHK button brings up a list of checklists and controls and is the starting display for thebottom-center display. This is simply a reminder of what you need to do on landing and takeoff.CHK MenuBIT – These menus bring up the Built-In Test pages. Of particular note is the GDI menu you canaccess on the lower right side. This allows you to adjust how the displays appear and their refreshrate. If you are getting 50-60 fps, you may want to consider upping the refresh rate to4 or 5. Be aware that this will impose a hit on your FPS, but will result smoother displays.BIT MenuGDI MenuFSX: Accel F-18 Cockpit Manual, pg 14
SummaryThat is a lot of information, so here’s a quick look at how I set up my displays for flight. I begin bychanging using my left display to adjust the GDI to fit my style. When I get it tweaked, I switchover to A/A Radar (RDR) to allow me to monitor all traffic around me. I will change this display toany other screen as the situation dictates. On the right, I leave the display in HSI mode and adjustthe NAV display (lower-left softkey) to read ‘ALL’. Finally, I set the bottom-center display to showthe FPAS screen.This set-up works for me as the display to my right shows my course, glideslope, waypoints, etc. atall times. It is the default setting for that display and is where most users are familiar with it being. Ilike the ‘ALL’ function, though it does tend to clutter up the display a bit (I’m used to it!). Thedisplay on my left functions as a supplemental one that I change as often as needed, though I dolike the radar function. Finally, the bottom-center display of fuel status is out of the way, butavailable quickly should I need it.Now that you understand the screens a little better, experiment until you have a set-up that worksfor you. It makes flying much more enjoyable.FSX: Accel F-18 Cockpit Manual, pg 15
Things you don’t see everyday Simultaneous F-18 launches from catapultsPhoto courtesy U.S. Navy(public domain)FSX: Accel F-18 Cockpit Manual, pg 16
5.) Using the Up-Front Control Panel (UFC)The Up-Front Control Panel (UFC) of the F/A-18 can be quite difficult to grasp, because it deviatesfrom a civilian A/P quite a bit. The majority of this chapter was written by Virtuali, an administrator forthe FSDreamteam.com forums and remains copyright for him. I have taken the liberty of updatingand collating some information and screenshots.COM ModeThe first thing to be noted is the UFC has basically two “levels” of operation. The “top” level is theCOM mode. This is the mode the UFC is in by default, you know you are in this mode, because theindications will read:FSX F/A-18 UFC in COM ModeThis mode is simplified compared to the real one, since we don’t obviously have the capability toencrypt ATC communications in FSX. Several options “act” like the real ones, but will not have anyimpact on operation. GRCV (Guard Receive) – Aircraft emergency frequency reserved for emergencycommunications. The frequencies are 121.5 MHz for civilian and 243.0 MHz for military,no impact in FSX SQCH (Squelch) – Tone squelch allows audio only in the presence of the correct code,no impact in FSX. CPHR (Cipher) – Enable encryption of communications, no impact in FSX AM (Frequency) – Enable frequency for communication (AM/FM/AJ), no impact in FSX MENU – Enter UFC Menu, no impact in FSXThe most important controls in COM mode are the two channel selectors under the “1” and “2”Windows at the lower left and right of the UFC. These will control COM1 and COM2, respectively. Inthe real F/A-18, these knobs can either be pulled or rotated. Pulling them places the UFC into“Manual” mode allowing for a direct COM frequency selection; while rotating them, notimplemented in FSX, selects preset channels.FSX: Accel F-18 Cockpit Manual, pg 17
Pull the selector and the corresponding radio will go into Manual mode, showing an “M” in itswindow and the current COM frequency in the UFC Scratchpad (which is the readout just above thenumberpad). Now, the COM radio is ready to accept input from the keypad. The input system issmart enough to allow to use shortcuts so, for example:to select 128.375, dial 1-2-8-3-7-5-ENT on the keypadto select 128.35, dial 1-2-8-3-5-ENTto select 128.3, dial 1-2-3-3-ENTto select 128.00, dial 1-2-8-ENTIllegal input will be flagged with a flashing “Error” message, and you can correct an input bypressing the CLR button.By using the two “VOL COMM1” and “VOL COMM2” knobs on the left and right, you can selectwhich COM you are transmitting to. When you click on one of the knobs, it activates that COMchannel and silences the other. The active COM is signaled by the “ON” indication on the UFCScratchpad, when the frequency is displayed.To resume normal operation, pull/push the Channel selector knob again.It’s important to note that all the other modes are sub-menus of the main, top-level COM mode.You ‘enter’ a mode pressing the relevant mode key, and you ‘exit’ from it, by pressing the samebutton again, thus returning to the top-level COM mode.FSX: Accel F-18 Cockpit Manual, pg 18
A/P Mode - AutopilotPressing the A/P button will enter into Autopilot mode. The UFC Panel will now show:FSX F/A-18 UFC in A/P ModeIt’s important to note that, unlike civilian autopilots, the F-18 will immediately turn on and engagethe A/P when the mode is selected. Of course, you can always manually turn on/off the A/P, byusing the ON/OFF button when in Autopilot Mode. To better learn autopilot modes, I suggestputting the left DDI screen on the ACL page, so you will be able to see all the AutopilotAnnunciators, and the right DDI screen on HSI mode (which should be there default). ATTH (Attitude Hold) – Maintain current Attitude HSEL (Heading Select) – Maintain the Heading selected with the HDG selection bug. The HDGand CRS selection bugs are just under the Fuel selector. You can check the current selectedheading on the HSI under the HSEL readout, and there’s a bug displayed on the HSI as well.Note also, on the HSI, a “CPL HDG” readout will appear close to the airplane symbol. BALT (Barometric Altitude Hold) – This will set Altitude Hold mode at the CURRENT Altitude.There’s no way to manually pre select a different altitude, Altitude mode here will always lock atyour current altitude. RALT (Radar Altitude Hold) – Not implemented CPL (Coupled mode) – This mode is a generic way to name all modes that are Coupled tosomething (TACAN, ILS or WAYPOINT). What you are coupled to depends on the mode thathas been selected on the HSI screen. To change Coupling mode, select either “TCN”, “ILS” or“WPT” on the HSI, to toggle between modes. NOTE: Of course, to use WPT mode, you firsthave to create a flight plan! Without a flight plan, the only modes available for coupling will beTCN and ILS.Note the “CPL TCN” or “CPL ILS” on the airplane symbol. To select a Steering Course towards thestation, use the CRS bug, and check the small “CSEL” readout on the HSI. By pressing the “CSEL”button on the HSI, instead, you can toggle on/off the visualization of the CRS indication for the HSI.Pressing A/P button again, will exit from the Autopilot mode.FSX: Accel F-18 Cockpit Manual, pg 19
IFF Mode – Identification Friend or FoeThis is a cryptographic identification system that enables military aircraft to distinguish friendlyaircraft, boats, and vehicles from enemies and to determine their bearing and range. Cryptographicservices are not implemented in FSX so this has no effect.TCN Mode –VOR (TACAN) NavigationTACtical Air Navigation, or TACAN, is a more accurate version of VOR/DME navigation thatprovides range and bearing information for military aviation. TCN Mode places the UFC into ascreen where you can enter VOR frequencies as either standard frequencies or TACAN channels.The radio is smart enough to figure out your intentions. FSX doesn’t use TCN information, so allinformation is relayed in standard VOR/DME format.FSX F/A-18 UFC in TCN/VOR ModeTo set a VOR frequency of 110.5 via TACAN, look at the chart in the appendix for a list of TACANchannel frequencies. You will see that 110.50 equals a TACAN channel of ‘42X’. Begin by setting theUFC in TCN mode. Press 4-2-ENTER on the UFC keypad and then select ‘X’ by pressing the littlebutton to the left of the ‘X’ display. It should become active with a ‘ : ’ symbol.If you want to set the VOR frequency of 110.5 manually, just press 1-1-0-5-0-ENTER and it willautomatically translate the frequency into the appropriate TACAN channel if you enter arecognized frequency. If you are having difficulty, try entering 5 full digits instead of 3 or 4.To set course, you need to use the CRS knob close to the Fuel indicator in the lower left of thecockpit. It can be scrolled with the mouse wheel. To check the CRS, open the HSI screen on one ofthe displays and look at the CRS readout.Notes: It is important to note that the F-18 only has one VHF radio so you can either use it for VORor ILS navigation. There is no OBS2. You will also note that you cannot receive TACAN/VOR/ILSchannels while on the ground, so the display will read ‘OF’ until you get airborne.FSX: Accel F-18 Cockpit Manual, pg 20
ILS Mode – Instrument Landing SystemILS consists of two independent sub-systems, one providing lateral guidance (Localizer), the othervertical guidance (Glideslope or Glide Path) to aircraft approaching a runway. Generally, the pilotwill get the localizer lined up so they are flying the correct heading to land on the designatedrunway. They will then fly level until they intercept the glideslope and then begin descendingtoward the runway.FSX F/A-18 UFC in ILS ModeRate-of-descent formulaRate of Descent Glideslope Angle ( Groundspeed / 60 ) 100* Rate of Descent is in feet per minute,* Glideslope angle is in degrees from the horizontal (Usually 3 degrees)* Groundspeed is in knotsIf the glideslope is the standard 3 degrees then the formula can be further simplified to:Rate of Descent 5 GroundspeedYou set the ILS frequency the exact same way as you do the TCN/VOR. Here is an example ILSapproach: Runway 2 at Maui (PHOG) has an ILS approach frequency of 110.10 MHz on a course of024 degrees. By the way, you can find the most current ILS, VOR, & GPS approach plate online for freeat http://www.airnav.com/airport.Press the ILS key, then press 1-1-0-1-0-ENTER. Set the proper course using the CRS switch in thebottom left of the cockpit near the fuel displays. Bring up the HSI screen on one of the displays (theleft one is standard) and press the ‘ILS’ button. Check the actual course setting on the lower right ofthat display under the ‘CSEL’ text. You can adjust the HSI display with the upper left control on thecenter DDI display (lower-center of cockpit, in front of the flight stick) to either NORM or D-CTR.Fly to the CAMPS intersection and set up your approach at 3000 ft on a heading of 024, followingthe ILS approach plate. Intercept the localizer and glideslope and fly down to the runway and land.FSX: Accel F-18 Cockpit Manual, pg 21
Potential Problems & FixesSome people have noticed they still have problems tuning with the plane selecting the wrong TCNchannel no matter how they input the channel. While this is rare, it can occur. If you get trulyfrustrated, one work around is to adjust the F-18 panel file to include a Cessna 172 Nav Radio stack.You can do this by:1. Exit FSX2. Navigate to the ‘FSX/SimObjects/Airplanes/FA-18/panel’ folder and open the ‘panel.cfg’ filewith notepad.3. At the top of the file, add the term:Window04 Radio Stack4. Scroll down to [Window 03] and find the end of this section.5. Add the following section:[Window04]BACKGROUND COLOR 2,2,2size mm 156,308position 8visible 0ident RADIO STACK PANELzorder 3gauge00 Bendix King Radio!Bendix-King Radio Audio,0, 0,156,31gauge01 Bendix King Radio!Bendix-King Radio Nav-Comm 1, 0, 29,156,59gauge02 Bendix King Radio!Bendix-King Radio Nav-Comm 2, 0, 86,156,59gauge03 Bendix King Radio!Bendix-King Radio ADF,0,142,156,41gauge04 Bendix King Radio!Bendix-King Radio DME,0,180,156,41gauge05 Bendix King Radio!Bendix-King Radio Xpndr,0,217,156,49gauge06 Bendix King Radio!Bendix-King Radio AP,0,262,156,48windowsize ratio 1.000window pos 0.756,0.358window size 0.243,0.6416. Save the file (Ctrl S) using the original file name.7. Restart FSXNow, when you are flying the F-18, you can bring up a Radio Stack window that allows you to setthe frequencies using a more familiar set of radios. This is a low-tech way of getting around thisproblem. Please note, you can also take the Radio Stack information from another aircraft’s panelfile (such as the Lear45 or one of the jumbo jets) if you want a more modern look and feel. Just copyover the pertinent information from their panel file.You can also pause, switch planes in mid-flight, set the NAV radio, switch back to the F-18 and unpause.FSX: Accel F-18 Cockpit Manual, pg 22
D/L Mode – Data LinkData Link is used to securely upload & download navigational data. Since cryptographic services arenot implemented in FSX: Acceleration, this button has no effect (it cannot even be pressed).BCN Mode – NDB (Beacon) NavigationA non-directional beacon (NDB) is a radio transmitter at a known location, used as an
(public domain) FSX: Accel F-18 Cockpit Manual, pg 3 2.) Getting Oriented . Display (HUD) which gives flight data such as speed, altitude, etc. Looking down into the cockpit, you will see three large displays. The one on the upper-left is known as the Master Monitor Display (or MMD) and serves as a primary monitor for the pilot. The one on