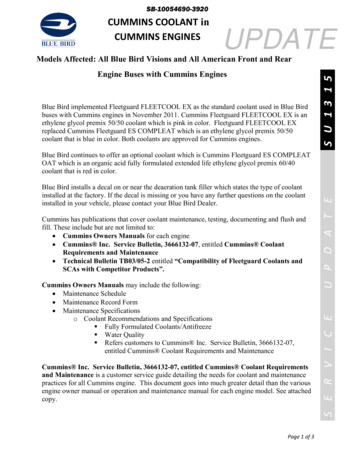
Transcription
PowerSpecTrainingManualSushma B Vishwakarma11/2019Public
Contents Introduction Registration Configure Settings Make Engine Connection Read Engine Data Transfer Engine Data Spec’ing truck (Gearing) License PC Manage Licenses View Report Feature Description HelpPublic2
IntroductionPublic3
IntroductionIntroduction PurposePowerSpec was created by Cummins to be the primary automotive marketing/sales tool, that is used by ourcustomers and sales force to help correctly configure purchased vehicles to optimize performance and fueleconomy to best satisfy the customer. Target UsersCummins Engine Dealers, Distributors, Customers, Fleets and Truck Factory Engineers. Supported Engines (On-Highway only, no Industrial support)2007 engine products (ISX, ISM, ISL, ISC, ISB),2010 engine products (ISX15, ISX12, ISL9, ISC8.3 and ISB6.7)2013 engine products (ISX15, ISX12, ISL9, and ISB6.7)2017 engine products (X15 Efficiency, X15 Performance, X12, B6.7N, L9N, ISX12N)Some of the Natural Gas products (ISL G and ISX12 G) Program DistributionDownload at ts-and-services/powerspecAlso available from Cummins Software Shelf.Public4
RegistrationPublic5
RegistrationRegistration PowerSpec requires users to complete registration when first opening the program Menus on the left-hand side will be unavailable until registration is complete Registration helps Cummins understand who our customers are and their location Internet connection is requiredPublic6
Registration – Continued.1. Enter First Name and Last Name2. Enter Company name3. Enter Phone Number name4. Enter your Email Address5. Select your Region from dropdown selection6. Select your Role from dropdown selection7. Click “Get Activation Key” button8. Retrieve activation key from email9. Enter activation key10. Click OKNote: Selections made for Region and RoleDO NOT affect access to PowerSpec features.Public7
Registration – Continued. Registration is complete and needs to be renewed every year. PowerSpec will notify youwhen it is time to renew. Select your Region by clicking on the region in the map. Your current region setting isdisplayed in the top right corner.Public8
Configuration Settings Data Link Connection Auto Export Report Miscellaneous Options Regional Settings Auto DownloadPublic9
Configure Settings – Datalink ConnectionConfigure Settings Follow the steps below to work on configuration settings:1. Click on the “Advanced” menu2. Click on the “Settings” button at the top of the page3. The Configuration Setting page contains two pages: “General” and “Region”. By default, the “General” pagewill be displayed. In the following slides, the instruction will mention the name of the page when works on aspecific configurable itemPublic10
Configure SettingsConfigure Settings – Datalink Connection / continued Datalink connection needs to be configured prior to connecting to a vehicle Follow the steps below to configure datalink settings:1. On the “General” page, select the type of datalink adapter you are using by clicking on the arrow onthe right side of the box. In order to select a datalink adapter, you must first install the driver for theadapter. Contact the adapter manufacturer for the driver.2. Select an item from the “Device List”, it could be the item with USB most of time3. Select an item from the “Datalink Protocol”. If you don’t know which one to pick, you can select“Auto Detect”.4. Click the “Save” button.Note : PowerSpec is compatible with the following RP1210 devices: Inline Noregon Nexiq DearbornPublic11
Configure SettingsConfigure Settings – Auto Export Report By enabling this feature PowerSpec provides ability to save engine trip report data into desiredlocation automatically when Trip data is read and reset The report will be exported, only the reset Trip data is exported Follow the steps below to set this configurable item1. On the “General” page, click “Enable Auto Export TripReset Data” check box1. Select file format2. Click the “Browse” button to specify your file location3. Click the “Save” button PowerSpec will display the file name and location after Trip is reset when this feature is enabledPublic12
Configure SettingsConfigure Settings – Miscellaneous OptionsOn the “General” page, there are some options to set the following configurable items: Demonstration Mode With demo mode, user can learn PowerSpec functionswithout connecting to a truck Follow the steps below to set demo mode:1.2.3.Click “Demonstration Mode” checkboxClick “Save” buttonA virtual engine is now connected Log Details This function allows user to log more information fortroubleshooting purposes Follow the steps below to log detailed information:1.2.Click “Log All Details” checkboxClick “Save” buttonNote: The log file is located under C:\ProgramData\Cummins\PowerSpec5, file name is Powerspec log.txt. Edit Dataplate With this feature, user can edit dataplate during spec transfer if the unit number is blank Follow the steps below to automatically edit dataplate when Unit Number is blank:1.2.Click “If blank unit#” next to Edit DataplateClick “Save” buttonPublic13
Configure Settings – Region SettingConfigure SettingsClick the “Region” sub menu, there are two options to set the following configurable items: Unit of Measure Follow the steps below to set Unit of Measure:1. Click on the arrow on the right side of thebox to select the “Unit of Measure”2. Click “Save” button Language Follow the steps below to set it:1. Click on the arrow on the right side of thebox to select the “Language”2. Click “Save” buttonPublic14
Configure Settings – Auto DownloadConfigure Settings This option is for the Mexico region only. The function allows user to connect to a truck automatically and read/resetconfigured engine data. Follow the steps below to set this configurable item:1. On the “Region” page, click “Enable Auto Download”check box2. Click the arrow on right side of the Options box to selectwhich options will be executed when AutoDownload ran3. If a LightBox is to be used, click the “Using Light Box”checkbox, and select the “Port” the Lightbox is connectedto4. Click “Save” buttonNote: A LightBox is a optional piece of equipment that ismounted outside of the download location and givesfeedback to the driver on the download process.15
Make Engine ConnectionPublic16
Make ConnectionMake Engine Connection To perform any operation like read data from engine or write data to engine, first the user needs to connect to theengine with PowerSpec. Below are the necessary steps to make an engine connection –1. Select desired configuration setting options as described in the “Configure Settings” section.2. Click on the “Connect” button to establish connection with engine via a RP1210 data link device . Whenconnected successfully, the engine name, Read Data, Transfer Spec, Direct Engine Edit(only for licensed PC)will display in left menu. Clicking the engine icon will display information including the engine type, ECM code, serial number and softwarephase. Action items will also be visible above the engine.17
Read / Reset Engine Data Read / Reset Fault Codes Read / Reset Trip Information Read Feature Settings Read Sudden Deceleration Data Read Dataplate Read Duty Cycle Read AftertreatmentPublic18
Make ConnectionRead / Reset Engine Data After making a successful connection, the user can read data from engine. PowerSpec providesthe ability to read data from engine in the form of reports. By clicking on “Read Data” link, the user can read the following types of data: Fault Codes – Read/ResetTrip Information – Read/ResetFeature SettingsSudden DecelerationData PlateDuty CycleAfter Treatment reports.Note: Some reports are not available for some engine programs All data that is read is automatically saved for later access. The reports will be under the “Reports” menuoption Additionally, reports can be saved in other file formats (eg. excel, pdf, csv) by clicking the “Save As” button Reports may be printed by selecting the “Print” button when viewing the report19
Read / Reset Engine Data – Fault Codes Read Fault codes – Follow the below steps to read Fault Codes from the connected engine –1. Click “Read Data” from left menu2. Click on “Fault Codes” icon(Highlighted in yellow),PowerSpec will display Cummins fault codes (active andinactive) report. Reset Fault Codes – Click the “Reset Faults” button on the top of the Fault codes report page, PowerSpec willreset the inactive Fault codes. Next time when you again click on Fault Codes for the connected engine you can seeonly active fault code.20
Make ConnectionRead / Reset Engine Data– Trip Information Read Trip Information – Follow the below steps to read Trip Information report from the connected engine:.1. Click “Read Data” from left menu2. Click on “Trip” icon(Highlighted in yellow), PowerSpec will display the trip report (Summary, Detail,Operating Mode, One Page).3. Select the report type to display. The trip report has 4 different formats available: Summary (default)DetailOperatingOne Page Reset Trip Information –Click the “Reset Trip” button on the report page. PowerSpec will reset the tripinformation.21
Make ConnectionRead / Reset Engine Data– Feature Settings Read Feature Settings – Follow the below steps to read Feature setting report from the connected engine:.1. Click “Read Data” from left menu2. Click on the “Feature Settings” icon(Highlighted in yellow), PowerSpec will display the Engine Feature Settingreport. User can select the options below from the report to make certain data hide/show. Show data under a disabled feature Hide PTO Data Show multiplexing Data22
Make ConnectionRead / Reset Engine Data - Sudden deceleration Read Sudden deceleration data – Follow the below steps to read sudden deceleration report from the. connected engine:1. Click “Read Data” from left menu2. Click on “Sudden Decel” icon(Highlighted in yellow), PowerSpec will display the Sudden Deceleration datareport.Note: The Sudden Decel report will contain between 1-3 records.23
Make ConnectionRead / Reset Engine Data - Dataplate Read Data Plate .Follow the below steps to read Dataplate report from the connected engine:1. Click “Read Data” from left menu2. Click on “DatePlate” icon(Highlighted in yellow), PowerSpec will display the Engine Data Plate report.24
Read / Reset Engine Data –Duty Cycle Read Duty Cycle –.Make ConnectionFollow the below steps to read Duty Cycle report from the connected engine:1. Click “Read Data” from left menu2. Click on “Duty Cycle” icon icon(Highlighted in yellow), PowerSpec will display the Engine Duty Cycle report. User can set select to view the “2D” or “3D” report format.25
Read / Reset Engine Data – After Treatment Read After Treatment – Follow the below steps to read Aftertreatment report from the connected.Make Connectionengine:1. Click “Read Data” from left menu2. Click on “After Treatment” icon(Highlighted in yellow), PowerSpec will display the Engine After Treatmentreport.26
Transfer Engine Data Create Spec and TransferDirect Engine EditTransfer Existing SpecCreate and Transfer HotSpecPublic27
Transfer SpecTransfer Engine Data PowerSpec enables users to tailor programmable engine features to optimize fueleconomy and vehicle performance. Engine Features are changed by these 3 methods:Transferring a Feature SpecLicense RequiredDirect Engine EditLicense RequiredTransferring a Hot SpecNO License Required Transferring a feature spec requires the user to first create a feature spec. Followthe steps below to create a feature spec:1. Click on “Feature Spec” in left menu2. Click con “Create New” button28
Transfer SpecTransfer Engine Data – Create Spec and Transfer3. Select the engine type from the list by clicking thearrow on the right side of the “Engine Selection”box.Note: The list of available engines may vary based on theRegion selection.4. Select the application type from the list byclicking the arrow on the right side of the“Application Selection” box.Note: The list of application types may vary based on theEngine selection.Public29
Transfer Engine Data – Create Spec and TransferTransfer Spec5. Select “Emission certification standard/level”. For some engines, this field is grayed out and may not be changed.6. Select “Road Condition” (If Applicable) – Sum of Road Condition values must total 100%.7. Enter “Rated Gross combined Vehicle Weight(GCW)” (If Applicable) – The minimum and maximum values forGCW will vary based on engine selection.30
Transfer Engine Data – Create Spec and TransferTransfer Spec8. Select “Engine’s Horsepower” (If Applicable)9. Select “Maximum (peak) torque of the engine” (If Applicable)10. Select Yes or No for “ADEPT Feature Usage”.NOTE: “ADEPT Feature Usage” will only be displayed if engine type is X15 Efficiency, X15 SmartAdvantage Powertrain, ISX15 SmartAdvantagePowertrain, ISX12 SmartAdvantage PowerTrain, X12, X12 SmartAdvantage PowerTrain. The ADEPT features are added to the feature spectemplate when “Yes” is selected.11. Select Yes or No for “Predictive Cruise Control Feature”NOTE: The Predictive Cruise Control features are added to the feature spec template when “Yes” is selected.12. Select “Operational Objective”13. Click Next31
Transfer Engine Data – Create Spec and TransferTransfer Spec14. PowerSpec will use the application information previously supplied to create a feature and parameter set. Reviewthe page to confirm the parameter settings values. Make any needed changes.Note: The “Transfer” button will bedisabled if you are not connected to aengine or not licensed15. Click on the “Save” button.16. Enter a name for the feature spec, click “Save” button.17. Click on “Transfer” button at the top of the page to transfer the spec to the connected vehicle.18. Once the transfer is finished, PowerSpec will show the message below. Click OK.32
Transfer SpecTransfer Engine Data - Create Spec and Transfer19. PowerSpec will generate a Change Report listing all the parameters that were changed. The report will show thePrevious, Target, and New values. If a parameter cannot be changed, the Note field will contain an explanation.20. Be default, the report will contain only the parameters that were changed. Click the “Mode” button to display a list ofall parameters, including the ones that did not change.21. Click the “Print” button to print thereport22. Click the “Save As” button to save thereport in a different format typePublic33
Transfer SpecTransfer Engine Data – Direct Engine Edit The Direct Engine Edit feature allows a licensed user to select only the parameters in theconnected engine they wish to change. PowerSpec reads the current parameter values from the connected vehicle and populatesthe template with them Follow the steps below to change parameters using Direct Engine Edit1. Make a successful engine connection2. Select “Direct Engine Edit” from the leftmenu3. Click on “Edit FeatureSettings”(highlighted in red).Public34
Direct Engine EditTransfer Engine Data - Direct Engine Edit4. PowerSpec will read the parameter values from the connected engine and display them in the spec template.5. Change the desired parameter values. You may chose to save the spec, but it is not required.6. Click the “Transfer” button at the top of the page.5. Once the transfer is finished, PowerSpec will show below message.35
Direct Engine EditTransfer Engine Data - Direct Engine Edit6. PowerSpec will generate a Change Report listing all the parameters that were changed. The report will show thePrevious, Target, and New values. If a parameter cannot be changed, the Note field will contain an explanation.7. Be default, the report will contain only the parameters that were changed. Click the “Mode” button to display a list ofall parameters, including the ones that did not change.8. Click the “Print’ button to print the report9. Click the “Save As” button to save the reportin a different format typePublic36
Transfer SpecTransfer Engine Data – Transfer Existing Spec An existing feature spec may be transferred to a connected engine. Follow the steps below to transfer an existing feature spec.1.2.3.4.Make a successful engine connection.Select “Transfer Spec” from left menu.Select a spec from existing list of specs by clicking on the spec title.The transfer process will begin, a message will be displayed when complete.Public37
Hot SpecTransfer Engine Data - HotSpec PowerSpec offers the ability to create a HotSpec which can be transferred to anengine from a PC with NO license. HotSpecs can only be created from a licensed PowerSpec PC, and can only be editedby the HotSpec creator. The Hotspec may then be sent to a user with NO PowerSpec license and transferredto an engine Follow the below steps to create and transfer a HotSpec1. Select “Feature Spec” from the left menu2. Select a spec from the list you wish to make aHotSpec by clicking on the spec title.3. The spec will open. Click on “Export” icon atthe top of the page.4. Select “Export spec(s) as HotSpec” option38
Hot SpecTransfer Engine Data - HotSpec5. Enter the expiration date for the HotSpec inthe “Expires In” box. Expired HotSpecscannot be transferred.6. Check the “Read Trip Data” box to read theTrip data from the engine when the Hotspecis transferred.7. Check the “Reset Trip Data” box to reset thetrip data when the HotSpec is transferred.8. Check the “Save Trip Data” box to save acopy of the Trip Report. Click the “Browse”button to selection the location for the TripReport.9. Select the PC IDs from “Registered PC IDList” that you want to attach to the HotSpecand move to the target PC ID list by draggingand dropping them.Note:To select all PC IDs, click the button. The button will remove all.The HotSpec can only be imported to PCs with the PC IDs listed in the Target PC ID List.Specs copied to the Target List will appear italicized and have an asterisk ( * ) by the name.Public39
Hot SpecTransfer Engine Data - HotSpec10. You can registered new PC IDs byclicking on “Registered New PC IDs”button at the top of the page.11. The register PC ID window will open12. Click on the “Register PC ID” button13. Type in the PC ID in the “Type PC ID”box. After you enter 8 alpha-numericcharacters, the cursor will tab to thedescription box.14. Enter a description of the PC15. Click the “Register” button when all newPC IDs have been entered.16. PowerSpec will return to the ExportHotSpec windowPublic40
Hot SpecTransfer Engine Data - HotSpec17. The newly added PC IDs will now appear in theRegistered PC ID List18. Click the “Export” button19. Browse to the location to save the HotSpec, thenclick the “Save” button.The HotSpec may now be sent to any PC listed in theTarget PC ID list.To import the HotSpec to another PC, follow thesesteps:1. Select “Feature Spec” from left menu2. Click on the “Import” button3. Navigate to the location of the HotSpec4. Select the HotSpec file5. Click “Open” button6. The HotSpec is now added to the feature spec listNote: HotSpecs will have a special “hot” iconand are transferred the same way as regular specsPublic41
Spec’ing Vehicle Recommendations / Assessment / Performance Evaluator Manage Gearing Specs Compare Specs42
Spec’ing Vehicle – RecommendationsSpec’ing VehiclePowerSpec offers users the ability to create a gearing profile. Based on that, PowerSpec will generate a brief overviewreport with Cummins Gearing recommendations and guidelines. PowerSpec also evaluates the driveline combinationwith your profile, then provides assessment.Follow the steps below to see a Gearing recommendations Gearing Recommendations1. Run PowerSpec2. Click “Gearing” link on the left menu. You willsee Gearing Spec list page3. Click “Create New” button4. Make selection and enter data on the firstpage then click “Next” button5. Make selections and enter data on thesecond page then click “Next” button6. See next slide for screenshots7. Click “Next” button to get assessment43
Spec’ing Vehicle – Recommendations - continueSpec’ing Vehicle44
Spec’ing Vehicle – AssessmentSpec’ing Vehicle Gearing Assessments1. Continue from previous slide2. Make selections for your drive line data (transmission, axle ratio and tire size)3. PowerSpec will display the assessments right below the output data. In this case, the spec meets the minimumrequirements but didn’t meet the operational objective. PowerSpec provides suggestionsInput data:1. Cruise Speed2. Transmission data3. Tire Size4. Axle data45
Spec’ing Vehicle – Assessment - continueSpec’ing VehicleInput data:1.2.3.4.Cruise SpeedTransmission dataTire SizeAxle dataOutput data:1.RPM at cruise2.Startability3.GradeabilityAssessment:1.If a spec meet Cummins minimumrequirement2.If a spec meet the desired operationalobjective (in this case, it failed)3.SuggestionEngine RPM graph:The engine RPM fall into balance, which does notmeet user’s operational objective (fuel economy)46
Spec’ing Vehicle – Performance EvaluatorSpec’ing Vehicle Performance Evaluator1. Continue from previous slide2. In order to use the evaluator, the assessments on the calculator pageneed to be all green3. Click “Next” button4. Select “Run Performance Evaluation” then click “Next” button5. Drag the slide bar until a message pops up.6. Click “OK” button7. The evaluator provides top gear grade for maintaining cruise speed,the maximum grade at top gear and gear down8. See next page for screenshots47
Spec’ing Vehicle – Performance Evaluator - continueSpec’ing Vehicle48
Spec’ing VehicleSpec’ing Vehicle – Manage Gearing Specs / Create – Edit specIn order to share a spec with others or keep a record for your own use, PowerSpec allows the user to save the specs to its localdatabase. The specs can be exported, imported, deleted or printed.Follow the steps below to manage your Gearing specs: Create a Gearing Spec1. You are 90% done to have a spec created from previous slides.From the calculator page, click the “Next” button. You can chooseto skip the performance evaluation.2. On the Vehicle Gearing report page, click “Save” button. Enter aname for your spec, click the “Save” button again. Edit a Gearing Spec1. After saving a spec, you will return to the Gearing spec list page. You can click the spec name you just saved.PowerSpec will open the Vehicle Gearing report page with your spec.2. You can click “Edit” button to go to the calculator page.49
Spec’ing VehicleSpec’ing Vehicle – Manage Gearing Specs – Import / Export Export Gearing SpecThere are two ways to export a Gearing Speca. From Gearing Spec list page1. Pick a spec and click on it, but not title2. Click “Export” button and specify the file path.3. Click “Save” buttonb. From Vehicle Gearing Report page1. Pick a spec and click its title2. Once on the Vehicle Gearing Report page,click “Export” button.1. Specify the file path then click the “Save” button Import Gearing Spec1. From Gearing Spec list page, click “Import” button2. Navigate to the folder where your Gearing spec located, and select a spec.3. Click “Open” button50
Spec’ing Vehicle – Manage Gearing Specs / Delete specSpec’ing Vehicle Delete a Gearing Spec1. From Gearing Spec list page2. Pick a spec and click on it, but not title. You can pick multiple specs too by clicking the check box at front of aspec3. Click the “Delete” button4. Click on “Yes” in message box asking are you sure you wan to delete the spec51
Spec’ing Vehicle – Compare Gearing SpecsSpec’ing Vehicle PowerSpec allows user to compare two Gearing specs. Follow the steps below to do so1. Run PowerSpec2. Click “Gearing” link on the left menu. You will see Gearing Spec list page3. Pick two specs that have the same engine type by clicking the check box at front of a spec4. Click “Compare” button5. PowerSpec will display the graphs on top of the comparing page vertically and the rest of data side by side52
Spec’ing Vehicle – Compare Gearing Specs - continueSpec’ing VehicleEngine RPM graph comparisonProfile comparison53
Spec’ing Vehicle – Compare Gearing Specs - continueSpec’ing VehicleProfile data comparison54
Spec’ing Vehicle – Compare Gearing Specs - continueSpec’ing VehicleInputcomparisonOutput comparison55
Spec’ing Vehicle – Compare Gearing Specs - continueSpec’ing VehicleAssessment comparison56
License PCPublic57
License PCLicense PC PowerSpec requires a license to perform actions that write changes to the engine: Transfer Feature Spec Direct Engine Edit Unlicensed PowerSpec users can still connect to engines and read all data Follow the steps below tolicense PowerSpec PC1. Install PowerSpec and completethe Registration2. Click “Advanced” in left menu3. Click on “Licensing” button4. Note the PC ID5. Contact your local CumminsDistributor/Dealer to request alicense. They will need your PCID.Public58
License PCLicense PC-Continued 6. When notified your license hasbeen created, click the “Obtain”button (internet connectionrequired)7. The License status should nowshow “Licensed”8. The title bar should now show“Licensed”9. If you do not have an internetconnection, uncheck the box“Check if internet connected”10. Request your 24 digit license keyfrom the Distributor/Dealer andenter it into the 4 boxes11. Click the “Obtain” buttonNote: PowerSpec will notify you one month prior to the license expiration date.Public59
Manage Licenses Create regular/administrator license Create an administrator license Search a license Edit a license Renew a license Delete a licensePublic60
Manage LicenseManage LicensesPowerSpec administrators are responsible for maintain licenses for their customers. They can create, edit,renew, and remove licenses. The following table maps the functions for each type of license.PrivilegeLicense TypeUser LevelDefault RoadRelay LicensePowerSpec LicensePowerSpec AdminCummins CareGlobal Admin1 Read Dataxxxxxx2 Reset Trip and Faultsxxxxxxxxxxxx5 Transfer RoadRelay Specxxxxx6 Create RoadRelay Hot Specxxxxx7 Create Engine Hot Specxxxx8 Create CE Hot Specxxxx9 Transfer Engine Specxxxxxxxx11 Create a regular Licensexxx12 Transfer license among Adminsxxx13 Renew regular licensexxx14 Renew Administrator Licensesxx15 Transfer Licenses across a regionxx16 Search Admin info from a regionXx3 Transfer par file4 Transfer Hot Spec10 Direct Engine Edit17 Create Admin licensexPublic61
Manage License – Log inManage License Login is required for PowerSpec administrator to manage the licenses PowerSpec administrator uses their PC credential to log in Follow the steps below to login to PowerSpec administration page1. Run PowerSpec2. Go to “Advanced” then click “Administration” button3. Enter your PC password then click “Login” buttonPublic62
Manage License – Log in - continueManage License63
Manage LicenseManage License – Create regular / administrator license License is required for writing data to a truck Follow the steps below to create a license1. Run PowerSpec2. Go to “Advanced” then click “Administration” button3. Login4. Click “Create New” button5. Fill all fields. Make sure the license type is PowerSpec user.6. Click the “Submit” buttonPublic64
Manage License – Create regular / administrator license - continueManage License65
Manage License – Create an administrator licenseManage License Administrator License requires additional info: WWID, distributor code and an approval from marketing Only PowerSpec global administrator can create an administrator license Follow the steps below to create an administrator license1. Run PowerSpec2. Go to “Advanced” then click “Administration” button3. Login4. Click “Create New” button5. Fill all fields.6. Set the license type as “Administrator”.7. Click the “Submit” buttonPublic66
Manage License – Create an administrator license - continueManage License67
Manage License – Search LicenseManage License Follow the steps below to search a license1. Run PowerSpec2. Go to “Advanced” then click “Administration” button3. Enter your PC password then click “Login” button4. Click the “Search” button5. Enter a first/last name or phone number. You can also enter a PCID6. Click the magnifying glass buttonPublic68
Manage License – Search License - continueManage License69
Manage License – Edit LicenseManage License Follow the steps below to search a license1. Run PowerSpec2. Go to “Advanced” then click “Administration” button3. Enter your PC password then click “Login” button4. Click the “Search” button5. Enter a first/last name or phone number. You can also enter a PCID6. Click the magnifying glass button7. Once PowerSpec displayed the search result, click the license8. You can modify the fields that are editable9. Click the “Submit” button to savePublic70
Manage License – Renew LicenseManage License Follow the steps below to search a license1. Run PowerSpec2. Go to “Advanced” then click “Administration” button3. Enter your PC password then click “Login” button4. Click the “Search” button5. Enter a first/last name or phone number. You can also enter a PCID6. Click the magnifying glass button7. Once PowerSpec displayed the search result, click the license8. Change the expiration year9. Click the “Submit” button to savePublic71
Manage License – Delete LicenseManage License Follow the steps below to search a license1. Run PowerSpec2. Go to “Advanced” then click “Administration” button3. Enter your PC password then click “Login” button4. Click the “Search” button5. Enter a first/last name or phone number. You can also enter a PCID6. Click the magnifying glass button7. Once PowerSpec displayed the search result, click the license8. Click the “Remove” button9. Click “Yes” button on the confirmation window10. Click “OK” on the success
PowerSpec was created by Cummins to be the primary automotive marketing/sales tool, that is used by our customers and sales force to help correctly configure purchased vehicles to optimize performance and fuel economy to best satisfy the customer. Target Users Cummins Engine Dealers, Distributors, Customers, Fleets and Truck Factory Engineers.

