Transcription
SonicWall NSv Series on MicrosoftAzureGetting Started Guide
Contents1Introducing NSv Series . . . . . . . . . . . . . . . . . . . . . . . . . . . . . . . . . . . . . . . . . . . . . . . . . . . . . . . . . . . . . . . 4Feature Support Information . . . . . . . . . . . . . . . . . . . . . . . . . . . . . . . . . . . . . . . . . . . . . . . . . . . . . . . . . . . . 5Node Counts per NSv Platform . . . . . . . . . . . . . . . . . . . . . . . . . . . . . . . . . . . . . . . . . . . . . . . . . . . . . . . . . . . 6Product Matrix and Requirements . . . . . . . . . . . . . . . . . . . . . . . . . . . . . . . . . . . . . . . . . . . . . . . . . . . . . . . . 7Github Repository . . . . . . . . . . . . . . . . . . . . . . . . . . . . . . . . . . . . . . . . . . . . . . . . . . . . . . . . . . . . . . . . . . . . . 7Backup and Recovery Information . . . . . . . . . . . . . . . . . . . . . . . . . . . . . . . . . . . . . . . . . . . . . . . . . . . . . . . . 7Exporting and Importing NSv Configurations . . . . . . . . . . . . . . . . . . . . . . . . . . . . . . . . . . . . . . . . . . . . . . . 8Upgrading to a Higher Capacity NSv Model . . . . . . . . . . . . . . . . . . . . . . . . . . . . . . . . . . . . . . . . . . . . . . . . 8Creating a MySonicWall Account . . . . . . . . . . . . . . . . . . . . . . . . . . . . . . . . . . . . . . . . . . . . . . . . . . . . . . . . . 8Installing NSv Series on Azure . . . . . . . . . . . . . . . . . . . . . . . . . . . . . . . . . . . . . . . . . . . . . . . . . . . . . . . . 10Supported NSv Series Models on Azure . . . . . . . . . . . . . . . . . . . . . . . . . . . . . . . . . . . . . . . . . . . . . . . . . . 10Task List for NSv Azure VM Setup . . . . . . . . . . . . . . . . . . . . . . . . . . . . . . . . . . . . . . . . . . . . . . . . . . . . . . . . 11Installing NSv on Azure . . . . . . . . . . . . . . . . . . . . . . . . . . . . . . . . . . . . . . . . . . . . . . . . . . . . . . . . . . . . . . . . 11Configuring HA in Azure . . . . . . . . . . . . . . . . . . . . . . . . . . . . . . . . . . . . . . . . . . . . . . . . . . . . . . . . . . . 16Deploying an Active/Active HA Pair . . . . . . . . . . . . . . . . . . . . . . . . . . . . . . . . . . . . . . . . . . . . . . . . . . 20Accessing Your NSv in the Azure Portal . . . . . . . . . . . . . . . . . . . . . . . . . . . . . . . . . . . . . . . . . . . . . . . . . . . 27Updating Your Dashboard and Accessing the NSv Resource Group . . . . . . . . . . . . . . . . . . . . . . . . 27Finding the Public IP Address of Your NSv . . . . . . . . . . . . . . . . . . . . . . . . . . . . . . . . . . . . . . . . . . . . . 29Logging into Your NSv for SonicOS Management . . . . . . . . . . . . . . . . . . . . . . . . . . . . . . . . . . . . . . . 29Viewing and Configuring Security Rules . . . . . . . . . . . . . . . . . . . . . . . . . . . . . . . . . . . . . . . . . . . . . . . 30Forwarding Traffic to Your NSv in Azure . . . . . . . . . . . . . . . . . . . . . . . . . . . . . . . . . . . . . . . . . . . . . . . . . . . 32Testing Traffic Through Your NSv in Azure . . . . . . . . . . . . . . . . . . . . . . . . . . . . . . . . . . . . . . . . . . . . . . . . . 36Troubleshooting Installation Configuration . . . . . . . . . . . . . . . . . . . . . . . . . . . . . . . . . . . . . . . . . . . . . . . . 38Licensing and Registering Your NSv . . . . . . . . . . . . . . . . . . . . . . . . . . . . . . . . . . . . . . . . . . . . . . . . . . . . 41Registering the NSv Appliance from SonicOS . . . . . . . . . . . . . . . . . . . . . . . . . . . . . . . . . . . . . . . . . . . . . . 41Registering with Zero Touch Deployment . . . . . . . . . . . . . . . . . . . . . . . . . . . . . . . . . . . . . . . . . . . . . . . . . 43Deploying from CSC Management . . . . . . . . . . . . . . . . . . . . . . . . . . . . . . . . . . . . . . . . . . . . . . . . . . . 43Getting the Latest Firmware for the NSv . . . . . . . . . . . . . . . . . . . . . . . . . . . . . . . . . . . . . . . . . . . . . . 44Deploying from GMS On-Premises . . . . . . . . . . . . . . . . . . . . . . . . . . . . . . . . . . . . . . . . . . . . . . . . . . . 44Getting the Latest Firmware for the NSv . . . . . . . . . . . . . . . . . . . . . . . . . . . . . . . . . . . . . . . . . . . . . . 45Registering an NSv Manually in a Closed Network . . . . . . . . . . . . . . . . . . . . . . . . . . . . . . . . . . . . . . . . . . 45Deregistering Your NSv . . . . . . . . . . . . . . . . . . . . . . . . . . . . . . . . . . . . . . . . . . . . . . . . . . . . . . . . . . . . . . . . 46Converting a Free Trial License to Full License . . . . . . . . . . . . . . . . . . . . . . . . . . . . . . . . . . . . . . . . . . . . . 47SonicOS Management . . . . . . . . . . . . . . . . . . . . . . . . . . . . . . . . . . . . . . . . . . . . . . . . . . . . . . . . . . . . . . . 49Managing SonicOS on the NSv Series . . . . . . . . . . . . . . . . . . . . . . . . . . . . . . . . . . . . . . . . . . . . . . . . . . . . 49Using SonicOS on an Unregistered NSv . . . . . . . . . . . . . . . . . . . . . . . . . . . . . . . . . . . . . . . . . . . . . . . . . . . 49Using System Diagnostics in SonicOS . . . . . . . . . . . . . . . . . . . . . . . . . . . . . . . . . . . . . . . . . . . . . . . . . . . . . 52Check Network Settings . . . . . . . . . . . . . . . . . . . . . . . . . . . . . . . . . . . . . . . . . . . . . . . . . . . . . . . . . . . . 53Using the Virtual Console . . . . . . . . . . . . . . . . . . . . . . . . . . . . . . . . . . . . . . . . . . . . . . . . . . . . . . . . . . . . 54Connecting to the Console with SSH . . . . . . . . . . . . . . . . . . . . . . . . . . . . . . . . . . . . . . . . . . . . . . . . . . . . . 54SonicWall NSv Series Azure Getting Started GuideContents2
Navigating the NSv Management Console . . . . . . . . . . . . . . . . . . . . . . . . . . . . . . . . . . . . . . . . . . . . . . . . 56System Info . . . . . . . . . . . . . . . . . . . . . . . . . . . . . . . . . . . . . . . . . . . . . . . . . . . . . . . . . . . . . . . . . . . . . . 58Management Network or Network Interfaces . . . . . . . . . . . . . . . . . . . . . . . . . . . . . . . . . . . . . . . . . 59Test Management Network . . . . . . . . . . . . . . . . . . . . . . . . . . . . . . . . . . . . . . . . . . . . . . . . . . . . . . . . . 60Diagnostics . . . . . . . . . . . . . . . . . . . . . . . . . . . . . . . . . . . . . . . . . . . . . . . . . . . . . . . . . . . . . . . . . . . . . . 61NTP Server . . . . . . . . . . . . . . . . . . . . . . . . . . . . . . . . . . . . . . . . . . . . . . . . . . . . . . . . . . . . . . . . . . . . . . 62Lockdown Mode . . . . . . . . . . . . . . . . . . . . . . . . . . . . . . . . . . . . . . . . . . . . . . . . . . . . . . . . . . . . . . . . . . 63System Update . . . . . . . . . . . . . . . . . . . . . . . . . . . . . . . . . . . . . . . . . . . . . . . . . . . . . . . . . . . . . . . . . . . 64Reboot Shutdown . . . . . . . . . . . . . . . . . . . . . . . . . . . . . . . . . . . . . . . . . . . . . . . . . . . . . . . . . . . . . . . 64About . . . . . . . . . . . . . . . . . . . . . . . . . . . . . . . . . . . . . . . . . . . . . . . . . . . . . . . . . . . . . . . . . . . . . . . . . . 65Logs . . . . . . . . . . . . . . . . . . . . . . . . . . . . . . . . . . . . . . . . . . . . . . . . . . . . . . . . . . . . . . . . . . . . . . . . . . . . 65Using SafeMode on the NSv . . . . . . . . . . . . . . . . . . . . . . . . . . . . . . . . . . . . . . . . . . . . . . . . . . . . . . . . . . . . 65Enabling SafeMode . . . . . . . . . . . . . . . . . . . . . . . . . . . . . . . . . . . . . . . . . . . . . . . . . . . . . . . . . . . . . . . 66Disabling SafeMode . . . . . . . . . . . . . . . . . . . . . . . . . . . . . . . . . . . . . . . . . . . . . . . . . . . . . . . . . . . . . . . 67Configuring the Management Network in SafeMode . . . . . . . . . . . . . . . . . . . . . . . . . . . . . . . . . . . . 68Installing a New SonicOS Version in SafeMode . . . . . . . . . . . . . . . . . . . . . . . . . . . . . . . . . . . . . . . . . 71Downloading Logs in SafeMode . . . . . . . . . . . . . . . . . . . . . . . . . . . . . . . . . . . . . . . . . . . . . . . . . . . . . 72Glossary: Azure Networking . . . . . . . . . . . . . . . . . . . . . . . . . . . . . . . . . . . . . . . . . . . . . . . . . . . . . . . . . . 74SonicWall Support . . . . . . . . . . . . . . . . . . . . . . . . . . . . . . . . . . . . . . . . . . . . . . . . . . . . . . . . . . . . . . . . . . 76About This Document . . . . . . . . . . . . . . . . . . . . . . . . . . . . . . . . . . . . . . . . . . . . . . . . . . . . . . . . . . . . . . . . . 77SonicWall NSv Series Azure Getting Started GuideContents3
1Introducing NSv SeriesThis SonicWall NSv Series on Azure Getting Started Guide describes how to install SonicWall NSv on MicrosoftAzure and provides basic configuration information.To jump directly to the installation instructions, go to Installing NSv Series on Azure on page 10.SonicWall NSv on Azure MarketplaceThe SonicWall Network Security Virtual Series (SonicWall NSv Series) is SonicWall’s virtualizednext-generation firewall appliance that provides Deep Packet Inspection (DPI) security and segmentation invirtual environments. SonicOS running on the NSv Series offers the feature functionality and security featuresof a physical appliance, with comparable performance. SonicOS Virtual is a fully featured 64-bit SonicOSpowered by SonicCore.Topics: Feature Support Information on page 5 Node Counts per NSv Platform on page 6 Product Matrix and Requirements on page 7 Github Repository on page 7 Backup and Recovery Information on page 7 Exporting and Importing NSv Configurations on page 8 Upgrading to a Higher Capacity NSv Model on page 8 Creating a MySonicWall Account on page 8SonicWall NSv Series Azure Getting Started GuideIntroducing NSv Series4
Feature Support InformationThe SonicWall NSv Series on Azure has nearly all the features and functionality of a SonicWall NSa hardwareappliance running SonicOS 6.5.4 firmware.SonicWall GMS 8.4 and higher versions are supported for management of SonicWall NSv Series virtualappliances. The SonicOS 6.5 NSv Series About SonicOS book contains the list of features not supported on NSv.The Feature Support List table lists key SonicOS features and whether or not they are supported in deploymentsof the NSv SeriesFeature Support ListComponentFeatureStatusNetwork InterfacesOverride MAC AddressNot supportedNetwork InterfacesDHCPv6 Prefix Delegation (PD)Not supportedNetwork InterfacesIPv6 ManagementSupportedNetwork Interfaces6rdNot supportedNetwork InterfacesPortshield GroupsNot supportedNetwork InterfacesL2 Bridge ModeNot supportedNetwork InterfacesNative BridgeNot supportedNetwork InterfacesWire Mode v4Not supportedNetwork InterfacesWire Mode v6Not supportedNetwork InterfacesPPPoENot supportedNetwork InterfacesPPTPNot supportedNetwork InterfacesL2TPNot supportedNetwork InterfacesTap ModeNot supportedNetwork InterfacesLink AggregationNot supportedNetwork InterfacesPort RedundancyNot supportedNetwork InterfacesIP UnnumberedNot supportedNetwork InterfacesVLAN TranslationNot supportedNetwork InterfacesUsers IPv6SupportedNetwork InterfacesDHCP ServerNot supportedNetwork InterfacesVLAN InterfacesNot supportedNetwork InterfacesJumbo FramesNot supportedFirewall SettingsGlobal BWMNot supportedFirewall SettingsQoS MappingNot supportedFirewall SettingsMulticastNot supportedSwitchingNot supportedAnti spamNot supported3G/4G ModemNot supportedWirelessNot supportedSonicPointsNot supportedVirtualAssistNot supportedHigh AvailabilityActive/PassiveSupportedHigh AvailabilityStateful SyncNot supportedSonicWall NSv Series Azure Getting Started GuideIntroducing NSv Series5
Feature Support ListComponentFeatureStatusHigh AvailabilityFirmware SyncNot supportedHigh AvailabilityActive-Active DPINot supportedWAN AccelerationNot supportedSSL VPNSSL VPN for g PageUnsupported OptionsPartially supportedExternal Storage SupportNot supportedNOTE: Per Microsoft, “Azure does not support any Layer-2 semantics.” Therefore, SonicOS Layer 2functionality is disabled in NSv deployments in Azure. Consequently, NSv appliances operating in Azure donot support VLAN interfaces and DHCP Server functionality.See work/virtual-networks-faq azure-virtual-machines for more information.For information about supported features, refer to the SonicOS 6.5.4 NSv Series administration documentation.This and other documents for the SonicWall NSv Series are available by selecting NSv Series as the Product umentation.Node Counts per NSv PlatformThe node count is the maximum number of nodes/users that can connect to the NSv at any one time, and isdisplayed on the System Status page in the MONITOR view.Maximum Node Counts Per PlatformPlatformMaximum Node CountNSv 1010NSv 2525NSv 5050NSv 100100NSv 200 and higherUnlimitedFor reference, node counts are calculated by SonicOS as follows: Each unique IP address is counted. Only flow to the WAN side is counted. GVC and SSL VPN connections terminated to the WAN side are counted. Internal zone to zone is not counted. Guest users are not counted.A log event is generated when the node count exceeds the limit.SonicWall NSv Series Azure Getting Started GuideIntroducing NSv Series6
Product Matrix and RequirementsThe following table shows the hardware resource requirements for the SonicWall NSv Series virtual appliances.Product 00Maximum Cores1222224816Minimum Total Cores22222222Management Cores11111111Maximum Data Plane Cores111113715Minimum Data Plane Cores11111111Network Interfaces22222488Supported IP/Nodes102550100No limit No limit No limit No limitMinimum Memory Required4G4G4G4G6G8G10G12GMinimum Hard Disk/Storage35G35G35G35G35G35G35G35G1. If the actual number of cores allocated exceeds he number of cores defined in the above table, extra cores willbe used as CPs. Multiple CP support is introduced in 6.5.4.v.Github RepositorySonicWall NSv Azure templates are available in the github repository: https://github.com/sonicwall emplatesBackup and Recovery InformationIn certain situations, it might be necessary to contact SonicWall Technical Support, use SafeMode, or deregisterthe NSv appliance: If the splash screen remains displayed, this can indicate that the disk is corrupted. Please contactSonicWall Technical Support for assistance. If the disk is not recoverable, then the NSv appliance needs to be deregistered with MySonicWall. SeeDeregistering Your NSv on page 46 for information. If SonicOS does not boot up, you can go into SafeMode and download the log files, upload a new SonicOSimage, or take other actions. For information about SafeMode, see Using SafeMode on the NSv on page65. If SonicOS fails three times during the boot process, it will boot into SafeMode. Verify that the minimumrequired memory is available and allocated based on the NSv model. If it still cannot boot up, downloadthe logs while in SafeMode and contact SonicWall Technical Support for assistance.SonicWall NSv Series Azure Getting Started GuideIntroducing NSv Series7
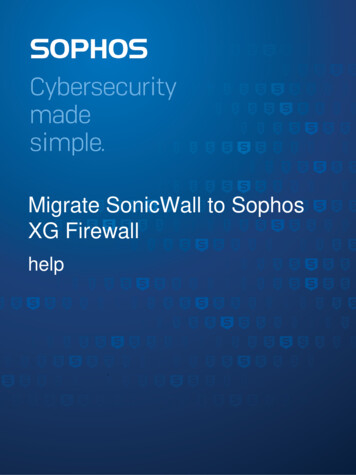
Exporting and Importing NSvConfigurationsMoving configuration settings from SonicWall physical appliances to the NSv Series is not supported. However,configuration settings may be moved from one NSv to another. See the SonicOS 6.5 NSv Series Updatesadministration book and the SonicOS 6.5.4 NSv Series Upgrade Guide on the Technical Publications portal formore information about exporting and importing configuration settings. Go mentation/ and select “NSv Series” as the product.Upgrading to a Higher Capacity NSv ModelIt is possible to move up to a higher capacity NSv model, but not down to a lower capacity model. Forinstructions refer to the SonicOS 6.5.4 NSv Series Upgrade Guide on the Technical Publications portal. Go mentation/ and select “NSv Series” as the product.For details on the number of processors and memory to allocate to the VM to upgrade, refer to Product Matrixand Requirements on page 7.Creating a MySonicWall AccountA MySonicWall account is required to obtain the image file for initial installation of the NSv Series virtualfirewall, for product registration to enable full functionality of SonicOS features, and for access to licensedsecurity services. For a High Availability configuration, MySonicWall provides a way to associate a secondary NSvthat can share security service licenses with your primary appliance.NOTE: MySonicWall registration information is not sold or shared with any other company.To create a MySonicWall account:1 In your web browser, navigate to https://www.mysonicwall.com.2 In the login screen, click the SIGN UP link.SonicWall NSv Series Azure Getting Started GuideIntroducing NSv Series8
3 Complete the account information, including email and password.NOTE: Your password must be at least 8 characters, but no more than 30 characters.4 Enable two-factor authentication if desired.5 If you enabled two-factor authentication, select one of the following authentication methods: Email (one-time passcode) where an email with a one-time passcode is sent each time you loginto your MySonicWall account. Microsoft/Google Authentication App where you use a Microsoft or Google authenticatorapplication to scan the code provided. If you are unable to scan the code, you can click on a linkfor a secret code. Once the code is scanned, you need only click on a button.6 Click on CONTINUE to go to the Company page.7 Complete the company information and click CONTINUE.8 On the Your Info page, select whether you want to receive security renewal emails.9 Identify whether you are interested in beta testing new products.10 Click CONTINUE to go to the Extras page.11 Select whether you want to add additional contacts to be notified for contract renewals.12 If you opted for additional contacts, input the information and click ADD CONTACT.13 Click DONE.14 Check your email for a verification code and enter it in the Verification Code* field. If you did not receivea code, contact Customer Support by clicking on the link.Click DONE. You are returned to the login window so you can login into MySonicWall with your new account.Next Steps Installing NSv Series on Azure on page 10 Licensing and Registering Your NSv on page 41SonicWall NSv Series Azure Getting Started GuideIntroducing NSv Series9
2Installing NSv Series on AzureTopics: Supported NSv Series Models on Azure on page 10 Task List for NSv Azure VM Setup on page 11 Installing NSv on Azure on page 11 To install from Azure Marketplace: on page 11 Configuring HA in Azure on page 16 Accessing Your NSv in the Azure Portal on page 27 Forwarding Traffic to Your NSv in Azure on page 32 Testing Traffic Through Your NSv in Azure on page 36 Troubleshooting Installation Configuration on page 38Supported NSv Series Models on AzureNSv Models (VM Sizes) on AzureSonicWall NSv ModelAzureInterface Count1Core CountNSv 10Standard D2 v222NSv 25Standard D2 v222NSv 50Standard D2 v222NSv 100Standard D2 v222NSv 200Standard D2 v222NSv 400Standard D3 v244NSv 800Standard D4 v288NSv 1600Standard D5 v28161. The maximum number of interfaces supported on an NSv instance is defined by thetype of Azure VM. For example, if more than 2 interfaces are required for an NSv200, use the NSv200 with an Azure VM supporting a higher number of interfaces.NOTE: The maximum number of NICs supported by SonicWall NSv is always eight for all models. But thetotal number of interfaces in an NSv instance maybe constrained by the Azure VM.For Azure sizing and pricing information, see: virtual-machines/linux/ hines/windows/sizes-generalSonicWall NSv Series Azure Getting Started GuideInstalling NSv Series on Azure10
Task List for NSv Azure VM SetupThe process for setting up an NSv Azure virtual firewall is summarized in three main tasks:1 Install the NSv Azure virtual firewall Installing NSv on Azure on page 112 Register the NSv on MySonicWall Registering the NSv Appliance from SonicOS on page 413 Configure traffic forwarding to the NSv Forwarding Traffic to Your NSv in Azure on page 32 Testing Traffic Through Your NSv in Azure on page 36Installing NSv on AzureSonicWall NSv is deployed on Azure by using a solution template. The template is a JSON file which is loadedinto Azure via a web page. Templates are a means to deploy VMs in Azure while also creating/modifyingexisting resources. Templates use the Azure Resource managers to support not just the deployment of the NSvbut also of other virtualized network functions.To install from Azure Marketplace:1 In your browser, navigate to https://portal.azure.com/ and log into your Microsoft Azure account.2 Navigate to SonicWall NSv on Azure Marketplace -security-vpn-router, click GET IT NOW, and then click Continue to display the SonicWall NSv(Firewall/Security/VPN/Router)-BYOL page.3 On the SonicWall NSv (Firewall/Security/VPN/Router)-BYOL page, click Create.SonicWall NSv Series Azure Getting Started GuideInstalling NSv Series on Azure11
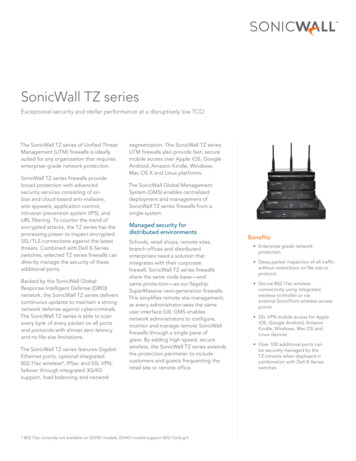
The Basics screen of the NSv configuration window is displayed.4 On the Basics screen, configure the following options: Subscription – Select the Azure subscription on which to deploy the resources for this NSvinstance. Resource group – Create new or select an existing resource group from the list.A resource group is a user defined friendly name for a collection of resources. If you aredeploying on Azure for the first time, click Create new. If you already have a network configuredand some virtual machines, then you might wish to use an existing resource group. If you aredeploying for test purposes, consider creating a new resource group so you can easily delete theresources, if needed. If you select Create new, type a name for this resource group. If you select Use existing, select the resource group to use from the associated drop-downlist. Region – Select the Azure location where the resources will be deployed. VM Name – Type in a descriptive name for this NSv instance. Consider using lowercase letters,numbers and hyphens, as this name is used to create the default DNS Prefix which has somerestrictions. You can, however, adjust the DNS Prefix as needed.NOTE: The SSH username is set to management by default. This is the user name foraccessing the NSv console using SSH. This is not the NSv administrator user name, but is auser name created as part of an NSv Azure deployment. Authentication type – Select either SSH public key or Password as the authentication method forthe above management SSH username. The default for the template is Password.SonicWall NSv Series Azure Getting Started GuideInstalling NSv Series on Azure12
If you selected Password for Authentication Type, type the desired password into thePassword and Confirm password fields. The password must be between 12 and 72characters in length and contain at least three of the following character types: Uppercase character Lowercase character Number Special character (non-alpha-numeric, e.g. !@# % &*() }{" : ? ) If you selected SSH public key for Authentication Type, type the SSH RSA public key filename as a string into the SSH Public Key field.5 Click Next to continue.The Instance Details screen is displayed.6 Select Virtual machine size, then select the row with the Azure equivalent for the NSv model you want todeploy in the Choose a size screen. Click Select.VM Size in AzureNSv ModelStandard D2 v2NSv 10Standard D2 v2NSv 25Standard D2 v2NSv 50Standard D2 v2NSv 100Standard D2 v2NSv 200Standard D3 v2NSv 400Standard D4 v2NSv 800Standard D5 v2NSv 1600SonicWall NSv Series Azure Getting Started GuideInstalling NSv Series on Azure13
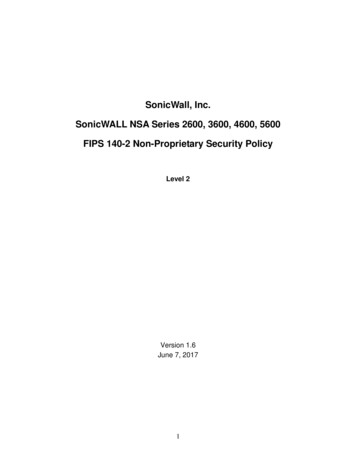
7 Select Virtual Network to configure the virtual network. Create new under Choose virtual network isselected by default and the Create virtual network settings as displayed.Under Create virtual network: Name – This is the name of virtual network the NSv will be deployed on. Leave the default, VNET. Address Space – The template default is 10.1.0.0/16. This is a network address in CIDR formatrepresenting the virtual network address space. Accept the default or optionally configure adifferent address space, using the same format.8 Click OK.9 Select Subnets to configure the subnets for the WAN and LAN zones. WAN subnet name – The name of the WAN subnet. The default is WAN-X1. If you have anexisting network on Azure you may wish to change the value. WAN-X1 Address range– A sub-network of the Address space configured in Step 7, defined forWAN traffic. e.g. 10.1.0.0/24. LAN subnet name – The name of the LAN subnet. The default is LAN-X0. If you have an existingnetwork on Azure you may wish to change the value. LAN- X0 Address range – A sub-network of the Address space configured in Step 7, defined forLAN traffic. e.g. 10.1.1.0/24.SonicWall NSv Series Azure Getting Started GuideInstalling NSv Series on Azure14
10 Click OK.11 Select Public IP Address. Create new is selected by default and the Create public IP address settings aredisplayed. You also have the option to select an existing public IP address to reassign it for use with yourNSv. Under Create public IP address, accept the pre-populated name or type a different name into theName field. For SKU, select Basic or Standard. The default is Basic. For Assignment (if displayed), select Dynamic or Static. The default is Dynamic.12 Click OK.13 In the DNS Prefix for the public IP Address field, configure the DNS name for the NSv. This must be aunique DNS name for accessing the management interface of the NSv virtual firewall. When the NSv VMis created, the WAN will have a public IP and will be assigned the DNS name defined here.14 In the Management source IP field, type in the public IP address that is allowed to access this NSv virtualfirewall for HTTPS and SSH management.You can find out your public IP address by typing what is my IP into Google or another search engine in adifferent browser window/tab. Additional addresses can be added later in Azure.SonicWall NSv Series Azure Getting Started GuideInstalling NSv Series on Azure15
15 Select Storage Account. Create new is selected by default, displaying the Create storage accountsettings. You also have the option to select an existing storage account. For a new storage account, type in a unique Name for the storage account using only lowercaseletters and numbers. Select the desired options for Account kind, Performance, and Replication. Click OK.16 Click Review create at the bottom of the Instance Details screen.The Summary is displayed.17 Confirm the settings and then click Create.Azure begins the deployment process and displays the Azure Dashboard page.You can click the Notifications icon at the top to display the Deployment in progress notificationwindow, then click Deployment in progress to view the progress.When finished, the notification window displays Deployment succeeded message.See Accessing Your NSv in the Azure Portal on page 27 for information about accessing the pages and settingsfor your NSv virtual machine available in the Azure portal.The next step is to register your NSv virtual firewall on MySonicWall. See Registering the NSv Appliance fromSonicOS on page 41 for information about registering your NSv.Once you have registered the NSv, see Forwarding Traffic to Your NSv in Azure on page 32 and Testing TrafficThrough Your NSv in Azure on page 36 for information about forwarding traffic to it.Configuring HA in AzureThis section provides a step-by-step introduction on deploying NSv with High Availability (HA) on Azure.Currently NSv is only available as BYOL (Bring your own License) version. This means you must already have alicense available where an user purchases a license outside of Azure, as is done with hardware appliances.SonicWall NSv Series Azure Getting Started GuideInstalling NSv Series on Azure16
There are two different ways to implement HA on Azure, either Active/Passive, or Active/Active. Active/Passiveclosely resembles Active/Passive of a SonicWall appliance with the exception that the new primary has to signalto Azure that it is the primary to move the VIP (Virtual IP Addresses) – there are no MAC addresses in Azure.Likewise, the HA link needs to be terminated on L3 interfaces because of the lack of multicast support in Azure.Active/Passive HA supports both SPI state synchronization and config sync. As with other virtual firewallimplementations of stateful high availability, failover may take several minutes.The solution to slow failover is to deploy the NSv instance in Active/Active. Likewise in the non-virtual world,Active/Active does not support Stateful Packet Inspection (SPI) state sync, although this may not be asimportant anymore in a world of Deep Packet Inspection (DPI). But unlike Active/Active on a SonicWallhardware appliance, config sync is also not supported. HA Active/Active is more an architecture than a feature,and has some similarities to the Firewall Sandwich (FSW). An outside load balancer, preferably the MicrosoftAzure Load Balancer, is used to direct traffic on the WAN side to one or multiple Active/Active high availabilitypairs. On egress, the NSv marks flows by swapping the src-ip with dynamic NAT. Config sync can be achieved viainheritance on
next-generation firewall appliance that provides Deep Packet Inspection (DPI) security and segmentation in virtual environments. SonicOS running on the NSv Series offers the feature functionality and security features of a physical appliance, with comparable performance. SonicOS Virtual is a fully featured 64-bit SonicOS powered by SonicCore .