Transcription
WhitepaperConnecting Time Matters/Billing Matters andQuickBooksCaren SchwartzTime & Cents Consultants, LLC
While many firms will choose to utilize the full capabilities of Billing Matters, otherfirms will use QuickBooks for the accounting side of managing the business. Ifyour firm chooses to use QuickBooks, this white paper will help you in the setupand running of the accounting. This white paper is not intended to give detailedadvice on setting up Billing Matters for purposes of creating invoices or to givetax advice or replace your accountant. It is assumed you have a workingknowledge of QuickBooks and Billing Matters.It is recommended that you work with someone knowledgeable in Billing Mattersand QuickBooks to setup your system and use this paper as a guideline forassistance in setup and in processing transactions.At the present time this paper does not cover entering expenses into BillingMatters and sending them to QuickBooks as bills to be paid. The instructionsassume you are linking on a cash basis and posting in detail.Please note that all instructions are based on Time Matters/Billing Matters v9 andQuickBooks v2008. The general instructions are applicable to all versions butkeystrokes and screen views may be different.Why Choose QuickBooksFirms choose to use QuickBooks accounting for several reasons, including: Already familiar with QuickBooks Accountant uses QuickBooks and likes getting the data in that format Downloading of transactions from online bank or credit card Payroll processingWhy Use Billing MattersFirms choose to use Billing Matters for their billing because of limitations in thebilling aspects of QuickBooks, including: Billing of one client at a time. Not easy to show prior balances and payments on a QuickBooksinvoice. Can not show trust funds on invoices No sort capability for items on invoice Interest must be handled on statements or separate invoices Limitations of bill layouts in QuickBooks Limited number of simultaneous users Granularity of securityQuestion to AskOnce you have made the decision to use Billing Matters for your billing andQuickBooks for your accounting, there are some basic questions that must beanswered before you can start. How many computers need to link Billing Matters and QuickBooks?
Do I want to link or do I want to print reports from Billing Matters andmanually enter the data into QuickBooks?Do I want to keep QuickBooks on a cash or accrual basis?How do I want to track income in QuickBooks – by matter, by activity,by timekeeper?Will reimbursed expenses be tracked as an asset, an expense orincome?Are we billing by contact, matter or contact – matter?Have we modified the Area 5/ User 7 field on the contact form (contactbased billing) or matter form (matter based billing)? Does the fieldcontain information that has to be moved to another location?Getting Started in Billing MattersOnce the firm and the accountant have agreed on the answers to thesequestions you can begin to use the Billing Matters and QuickBooks link.When you start linking to QuickBooks, you may have historical transactions inBilling Matters that has either already been entered in QuickBooks or will beentered as beginning balances. You will also want to deposit all payments thathave been received within Billing Matters if the deposits should not be transferredto QuickBooks.FIRST - MAKE A BACKUP!If you have not been posting to another accounting system, you will need to clearout the transactions from Billing Matters before you start linking. To determine ifthis will need to be done go to Report – Standard Reports – Transactions and runthe Billing (AR) GL Distribution Report. Use the Filter Tab to set a date range tolimit the report to transactions prior to the QuickBooks transfer start date youwish to use.
If the report shows no transactions you are ready to proceed. If transactions arelisted, that you do not want to send to QuickBooks you will need to post thetransactions. If the transactions are not able to be posted you may find it easierto turn off the accounting link, setup the appropriate General Ledger accountsbased on account names and then post before proceeding.In order to setup the General Ledger Accounts, go to File – Setup – General –Program Level Setup (Alt-Shift-P). Click on Billing and make sure that ActivateAccounting is not checked. If you need to de-activate accounting, you will need toexit Billing Matters and then reopen the program.When you re-start, go to File – Setup – Codes – Billing Codes and make sureyou have codes that can be used for Flat Fee Time and Flat Fee Expenses. Ifyou do not have codes for this purpose create them.
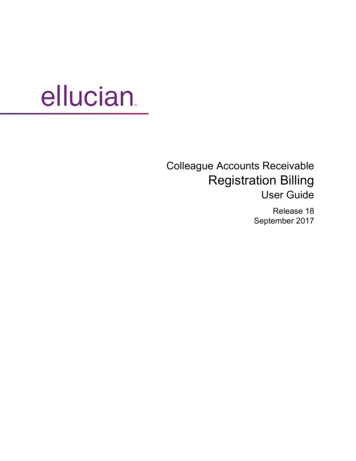
On the Options tab, enter a description in the General Ledger box. I recommendFlat Fee Time and Flat Fee Expenses.Now, return to the Billing section under Program Level Setup. Click on Inv &Allocations. Here you will see how you have the allocations setup, whether asClient, BillCode or Staff. This will determine where in the program you need to goto setup General Ledger accounts. Make sure you assign your Default BillingCodes for Flat Charge Allocations for Fees and Expenses.
If you have set the Receipt Allocation Method to Staff, you will need to go toDatabase – Staff, click on the Options tab and assign a general ledger account toeach staff. At this point, this is just a text field.If you have set the Receipt Allocation Method to BillCode, you will need to go toFile – Setup – Codes – Billing Codes, click on the Options tab and assign ageneral ledger account to each Billing Code. Again, this is just a text field.If you set the Receipt Allocation Method to Client, you will need to assign aGeneral Ledger account to the Billing Preferences for each client. The easiestway to do this is to setup the account you wish to use on a Billing PreferencesTemplate. Go to File – Setup – Templates – Billing Preferences. Choose atemplate to change or create a new template and click on the AccountsReceivable tab. Under General Ledger, fill in the GL Account field with text. Click
OK to save and then click on Close to close the Billing Preferences Templatewindow.To copy the General Ledger account from the Billing Preferences Template to allexisting clients: Open the Matter list (if doing Contact – Matter or Matter Billing) OR Open the Contact list (if doing Contact billing). Then click on the small arrow next to the Process Icon (looks like twopieces of paper with a checkmark on it.).
Click on Change Billing Preferences and Choose the option to Tag AllRecords.In the box Billing Preferences Template to apply choose the BillingPreferences Template you previously modified.Locate GL Account in the Available Preferences column. Highlight theGL Account field and click on Add to move the GL Account into thePreferences to Apply column. Click OK and wait while the contacts ormatters are updated.You will also need to assign General Ledger accounts on the Accounting tab andto your Bank Accounts.For the Accounting Tab use ALT-SHIFT-P to go to Program Level setup. Clickon Billing and then Accounting. Enter a text description in each of the GeneralLedger Accounts boxes. As you change each line, you may receive a message“Changing this GL Account after posting to the GL is not recommended.Continue?” Click on Yes to continue. You may also receive a warning when youfinish and click on OK. Confirm that you want to make the changes.
To setup the Bank Accounts go to File – Setup – Rates and Accounts –Accounts. Open each account. For Trust Accounts assign a GL Asset Accountand a GL Liability Account. For Regular Bank Accounts assign a GL AssetAccount. For Credit Card Accounts assign a GL Liability Account.
You are now ready to clear your General Ledger by going to Report – StandardReports – Transactions – Billing (AR) GL Distribution Detail. If appropriate set adate filter. Preview the Report and go to the very end. If the report ends withnumbers that are equal in both columns, you will probably be able to post thetransactions. If there are errors the last page(s) of the report will indicate theerrors you need to fix before you can post the report. You can print the report orsave it to a PDF before closing. You will NOT be able to recreate this report afterposting. When you close you will be asked if you want to post the report, say yes.Make sure that you have NOT customized the User7 field on the Contact orMatter form (depending on whether billing by contact or matter/contactmatter). This field will be used for the link to QuickBooks. If you have datain this field, it is important that you move the data out of the field beforeyou start working with the Billing Matters – QuickBooks link.Getting Started in QuickBooksFIRST – MAKE A BACKUP!Before you connect Billing Matters and QuickBooks you want to make sure yourchart of accounts is properly setup in QuickBooks. Within QuickBooks you willwant to make sure you have the following accounts:- Bank Account for each General Bank Account- Trust Bank Account for each Trust Bank Account- Trust Liability Account for each Trust Bank Account- Suspense Account – used to track money received but not yet applied toan invoice- Accounts Receivable Account- Undeposited Funds Account – see note below- Exchange Account – this should be a bank account- Income Accounts –o As appropriate based on how income will be trackedo Account for recording interest received from clients – even if youdon’t currently charge interest. This can be a generic incomeaccount.o Account for recording finance charges received from clients – evenif you don’t currently assess finance charges. This can be the sameas the interest income account.- Sales Tax Accounts –if you charge sales tax, you must have at least aliability account setup for sales tax. It should not be the real QuickBookssales tax account.NOTE: It is important that this is the “true” QuickBooks Undeposited FundsAccount that QuickBooks creates. To insure this, click on Customers – EnterSales Receipts. When the sales receipt screen opens you can click on the X inthe upper right hand corner to close the sales receipt. Then go to your Chart of
Accounts and make sure you see an Undeposited Funds Account listed as anOther Current Asset type of account. If you do not see it listed, click on IncludeInactive at the bottom of the Chart of Accounts. If the account shows on the listwith an X next to it, right click on the account and choose Make Active.It is recommended that you setup a “global” customer and vendor to facilitate theGeneral Ledger activity transfer from Time Matters to QuickBooks. If you will betransferring in summary format, these are mandatory. I generally create them asTM Customer and TM Vendor.It is also recommended that you setup a user called TMLink. This will facilitatetracking of changes made in QuickBooks by Billing Matters when a user is notlogged in to QuickBooks.In order to connect to QuickBooks, you need to know the path to yourQuickBooks database. To locate the path, open QuickBooks and hold the Ctrlkey while pressing the number 1 on the keyboard. (Do not use the number 1 onthe numeric keypad.). On the screen that opens you will see the path to yourdatabase.
Linking Billing Matters and QuickBooksWhenever you will be using Billing Matters and QuickBooks on the samecomputer, and want both programs open at the same time, you must first openQuickBooks and then open Billing Matters. When you are ready to closeQuickBooks, or if you need to switch to single user mode in QuickBooks, or if youwant to switch QuickBooks companies, you must first close Billing Matters.Make a new backup of Time Matters/Billing Matters and QuickBooks. Donot overwrite previous backups.Open Billing Matters and go to Program Level Setup – Billing – Initial Setup. Setthe Select Accounting Link to QuickBooks. Then click on Set Up Link Options.Choose whether you will be using the Billing Server for QuickBooks or a regularlink to QuickBooks 2004 or later. Note you must be running QuickBooks Pro,Premier or Enterprise.The primary purpose of the Billing Server for QuickBooks is to allow multipleBilling Matters Users to use the real-time link with QuickBooks regardless ofwhether or not they have QuickBooks installed. The Billing Server also permitsmore than five Users to access the QuickBooks Company File. Detailedinformation on Setting up the QuickBooks Billing Server can be found in the helpfile by searching for “QuickBooks Server”. If you use Billing Server you will needto know the computer name of the computer that holds the QuickBooksdatabase, as well as the path to the QuickBooks database.You will need to close Time Matters/Billing Matters and then reopen the program.Make sure that QuickBooks is open and that you are logged in to QuickBooks asthe Administrator. Go to Program Level Setup – Billing – Initial Setup - Set UpLink Options – File Locations. Navigate to the path to the database in theQuickBooks Company File box.
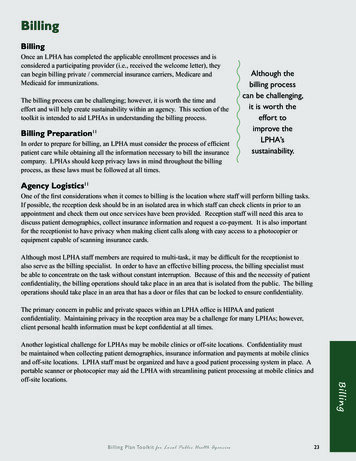
Click on Test Link.A screen will come up showing Initializing the QuickBooks link, followed bya QuickBooks – Application Certification screen,Click on yes, always; allow access even if QuickBooks is not running.Login as:.In the Login as box choose TMLink. This unique user you will help providean audit trail within QuickBooks of the transactions created by the BillingMatters Link when the user of the link is not specifically logged in toQuickBooks.Click on Continue.
When the Access Confirmation screen appears, click on Done. You should receive a Link Successful message. Click OK and wait for theprocessing to finish.When it completes a message will appear showing the QuickBooks linkhas been successfully established. Be patient as this may take a littlewhile.
Click OK and you will be returned to the Billing Matters – File Locations tab. It isrecommended you exit Billing Matters and then restart the program to insure thatall changes are saved. When you return go to Program Level Setup – Billing –Initial Setup – Link Options – General.Set whether you are going to transfer Summary Only or Detail by Customer.Detail by Customer is recommended since it provides more information andmakes it easier to cross-check the information in QuickBooks against BillingMatters if needed.Use the drop down to choose the AR Global Customer and AR Global Vendorfrom the QuickBooks database.Click on the Client Options tab and select your preferences. Since Billing Mattershas more fields for contact/matter information and breaks out the address morecompletely, it is recommended that you always start Matters in Billing Mattersand send them to QuickBooks and that you do not send changes fromQuickBooks to Billing Matters.
If desired you can go to the Matching tab and change the template settings forContacts or Matters, depending on whether you are billing by Contact or Matter.(Contact-Matter Billing is billing by Matter.) Generally I find this to beunnecessary.If you do not need to change the templates, or when you are finished, click onOK to save your changes.Proceed to the Inv & Allocations section of the Billing setup. Make sure yourReceipt Allocation Methods and your Default Billing Code for Flat ChargeAllocation are setup properly. For Fees you can use whichever method is mostappropriate for your business. For Expenses I recommend using an allocationmethod of Bill Code.Go to the Accounting section of Billing setup. Insure that your Accounting Basisand Billing (AR) Posting Level are properly setup. Cash Basis and Detail Postingare recommended. If you choose to post on an Accrual Basis you will need tomanually apply payments to customers in QuickBooks after the payments areposted from Billing Matters to QuickBooks in order to have accurate reports inQuickBooks. The discussions in the rest of this document assume you are linkingon a cash basis and using Billing Matters to track accounts receivable.Assign the General Ledger Accounts. The Refunds/Fund Withdrawals should beassigned to the Exchange Bank Account.
When you finish filling in the fields and click on OK you will receive a warningabout Changing System Level General Ledger Accounts. Click OK.When this is finished you should setup links for your Bank Accounts and for Staff,Billing Codes and Clients, as appropriate.To setup General Ledger accounts for your bank and credit card accounts go toFile – Setup – Rates and Accounts – Accounts. Open each of your accounts andlink to the appropriate account in your chart of accounts. Bank Accounts shouldlink to the appropriate Bank Account.
Trust Bank Accounts should be linked to the Client Trust Bank Account and theClient Trust Liability Account.Receipt Allocation Method - StaffIf you set your Receipt Allocation Method (under File – Setup – General –Program Level Setup – Billing – Inv & Allocations) to Staff then you will need toassign a General Ledger account to each staff person. This will be an incomeaccount. When money is received for work done by the staff person the incomewill be allocated to this assigned account. If you are allocating income based onStaff it is recommended that you make the Staff field on the Billing form aRequired field. This is done by opening the Billing Form and right clicking on theStaff field and choosing Customize Field. The click the Required box. This willeliminate problems caused by someone failing to fill in the field.To setup the General Ledger account go to Database – Staff. Open each staffperson in turn and click on Options. Fill in the GL Account from the drop downlist.
Receipt Allocation Method – Bill CodeIf you set your Receipt Allocation Method to Bill Code then you will need toassign a General Ledger account to each bill code. When money is received forwork done on a Billing item that is associated with this Bill code the income willbe allocated to the assigned General Ledger account. Time based Bill Codes willbe linked to Income accounts. Expense based Bill Codes should be linked to theReimbursable Client Expenses account, which is generally an asset account.
If you are allocating income based on Bill Code it is recommended that you makethe Bill Code field on the Billing form a Required field. This is done by openingthe Billing Form and right clicking on the Bill Code field and choosing CustomizeField. The click the Required box.To setup the General Ledger accounts go to File – Setup – Codes – BillingCodes. Open each Billing Code in turn and click on Options. Fill in the GLAccount from the drop down list.If you setup Receipt Allocation for Fees and Expenses differently you only needto setup General Ledger Accounts for the appropriate Bill Codes with oneexception. Regardless of your Receipt Allocation Method you need to assign aGeneral Ledger account to the codes you entered for Flat Fee Time and Flat FeeExpense.Receipt Allocation Method - ClientIf you set your Receipt Allocation Method to Client then you will need to assign aGeneral Ledger account to each Client. This is most easily done through BillingPreferences. When money is received for work done on the Client the income willbe allocated to the assigned General Ledger account.To setup your system to assign General Ledger accounts to new clients you willwant to set Billing Preferences to reflect the appropriate account. You can setupmultiple Billing Preferences Templates by going to File – Setup – Templates –Billing Preferences. To modify an existing template double click on it. To add anew template click on the Plus sign. Once the template is open you will need togo the Accounts Receivable tab and assign a GL Account in the appropriate box.This should be an income account. Note that there is only one box for GLAccount on the Billing Preferences. This means that if you choose a Receipt
Allocation Method of Client for Fees and for Expenses everything for each clientwill go to the same GL Account.To setup General Ledger accounts for existing Clients (Contacts or Matters) youcan edit the Billing Preferences of the Client by right clicking on the client andclicking on Billing – Billing Preferences. You can then go to the AccountsReceivable tab and choose a GL Account.Alternatively, after setting up a Billing Preferences template with the appropriateGL Account, you can go to the Client list and tag those you wish to change. Youcan then go to Process – Change Billing Preferences.Choose the Billing Preference Template to Apply and from the AvailablePreferences column choose GL Account. Add this to the Preferences to Applycolumn by clicking on the Add button in the middle of the screen. Click on OKand wait for the changes to complete.
Sales TaxIf you will be charging Sales Tax, you will also need to assign GL Accounts toyour sales tax items. Go to File – Setup- Rates and Accounts – Sales TaxRates. Open each rate and assign a GL Account. This will be an Other CurrentLiability account, but not the “real” QuickBooks Sales Tax Liability Account. Alsochoose the appropriate Tax Vendor.Using the LinkOnce you have setup the connection between Billing Matters and QuickBooksyou can enter time and expenses, generate bills and enter transactions as you
would normally. Assuming you are linking on a cash basis, what will go over toQuickBooks are the transactions entered into Billing Matters. These includepayments, deposits, refunds, payments to funds, etc. Some of these transactionswill require special handling in QuickBooks.Nothing will be sent to QuickBooks until you run and post the Billing (AR) GLDistribution Detail Report. (This assumes you have setup your system to post indetail not in summary.) This report is found under Report – Standard Reports –Transactions. It is recommended that you run the report, review it and postwhenever you will be taking money to the bank or need to update the informationin QuickBooks.Connecting Time Matters Contact/Matter to QuickBooks CustomerIt is important to have your clients in both Time Matters and QuickBooks. EachTime Matters Contact (if doing Contact Billing) or Matter (if doing Matter orContact/Matter Billing) should be connected to a QuickBooks Customer. Thisconnection is made by opening the Contact or Matter and going to the User 7field which should now be labeled Customer. Click on the dots at the end of theCustomer field to open the link to the QuickBooks Customer list. The SelectQuickBooks Customer screen will open. If the Matter already exists inQuickBooks, highlight it in the list and click OK.If the Matter is not already setup as a Customer in QuickBooks click Add. TheCreate/Edit QuickBooks Customer screen will open. Fill in the Customer fieldwith the name you wish to have appear in QuickBooks and then click on OK tosave. Then choose this name from the Select QuickBooks Customer screen andclick OK.
TransactionsPaymentA Payment is entered anytime a client gives you money that will be going into anoperating bank account. When you make a payment Billing Matters will create ajournal entry:Debit: Undeposited FundsCredit: Income and/or Reimbursed Client Expense – if paying a billSuspense – if payment is not allocated to an invoice.If you are not creating deposits in Billing Matters then when you openQuickBooks you will need to go to Banking – Make Deposits to choose the itemsto be deposited into the bank account.Note: You may also want to include the Matter Name on all transactions in theSuspense Account to make it easier to identify balance issues in the account.Credit and Write offWhile some firms use Credit and Write off interchangeably; a good rule is to usea Credit when giving a reduction against charges not yet billed and to use aWrite-off to decrease the client’s outstanding balance. When transferring toQuickBooks on a cash basis, these entries have no impact on QuickBooks, andthey will not show in the Billing (AR) GL Distribution Detail Report.RefundA Refund transaction is used to return money to the client when, for example, thecase is closed and the client has a credit balance. The entry sent to QuickBookswill be:Debit: Suspense
Credit: Exchange AccountThe entry is set to the Exchange Account rather than the Bank Account, sinceyou need to issue a check and QuickBooks does not allow checks to be createdfrom journal entries.When you go to QuickBooks you will notice a negative balance in your ExchangeAccount. Open the Write Checks screen in QuickBooks and create a check fromthe Bank Account. The check should be written to the client and the Accountshould be Exchange Account. To facilitate reports it is helpful to include theMatter name in the Customer:Job field.After you have recorded the check the Exchange Account should have a zerobalance.Note: In order to have the Customer:Job as Brown v Brown but have the nameprint as Susan Brown you may need to edit the Customer:Job within QuickBooks.Open the customer record and change the first line of the Addresses: Bill To fieldto the name that should print. To prevent this change from impacting BillingMatters, it is important that you did NOT check QuickBooks Changes Updated toTime Matters in the QuickBooks link setup on the tab - Client Options.You may also want to include the Matter Name on all transactions in theExchange Account and the Suspense Account to make it easier to identifybalance issues in these accounts.Reverse PaymentA Reverse Payment is primarily used when a check, previously received into theOperating Account, has been returned by the bank. The entry sent toQuickBooks will be the reverse of what was sent when the check was received.
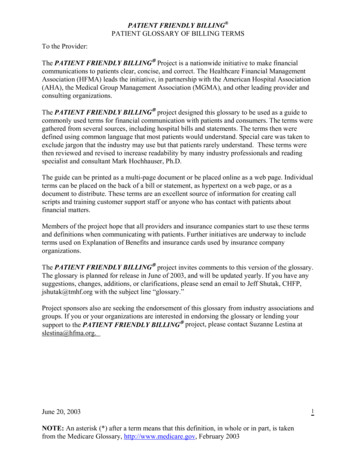
Debit: Income and/or Reimbursed Client Expense – if paying a billSuspense – if payment is not allocated to an invoice.Credit: Undeposited FundsSince in QuickBooks you can not deposit a negative amount, this entry requiressome special handling. A suggested procedure within QuickBooks is:1. Lists – Chart of Accounts to open the Chart of Accounts2. Double click on the Undeposited Funds account in the list to open theaccount3. Locate the Reverse Payment transaction in the register. The Memo willshow Reverse Payment – matter name and the amount of the reversedpayment will be in the Decrease column.4. Right click on the transaction and choose Edit General Journal Entry5. On the line showing the account as Undeposited Funds change theaccount to the Bank Account the money was taken from.6. Add the Matter name under the Name column if desired7. Click on Save & Close to save your changes.Before Change:
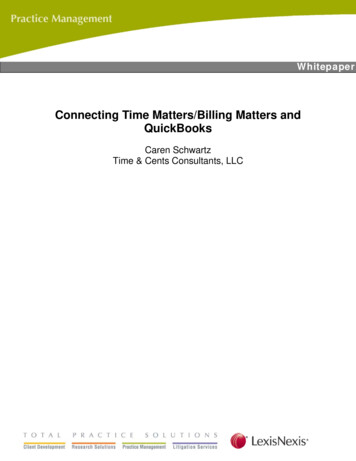
After Change:Bank DepositBank Deposits group the individual items that are being deposited to the bankinto a single batch. This makes it easier to reconcile your bank statement inQuickBooks because the deposits will match the bank statement rather than be aseries of individual items.When using the link Bank Deposits are optional as the same thing can beachieved within QuickBooks.The entry that will go to QuickBooks willDebit: Bank AccountCredit: Undeposited FundsWhen you go into QuickBooks you will need to go to Banking – Make Depositsand record a zero amount deposit to clear out the deposit amount that wastransferred over from Billing Matters against the amounts that were created fromthe deposits received into QuickBooks. It is recommended that you Deposit thiszero balance transaction into the Exchange Account to avoid zero based entriesin the regular bank account that may confuse the reconciliation or reportingprocesses.If you do not use Bank Deposit in Billing Matters, you will go to QuickBooks andMake Deposits directly into the Bank Account at the time you take the money tothe bank.Pay to FundsA Pay to Funds transaction is used to reflect money being deposited into theClient Funds Account. Since this money does not belong to the firm, it isespecially important that this money is properly tracked.The entry that will go to QuickBooks willDebit: Undeposited Funds
Credit: Trust Liability AccountWhether you are recording deposits in Billing Matters or in QuickBooks, you willneed to perform the same steps as described in the section above titled BankDeposits, substituting the Trust Bank Account for the Bank Account.If you want to be able to run reports of Client Trust Balances within QuickBooksyou will need to edit the transaction within QuickBooks to include the MatterName in the Name field of all transactions in the Trust Liability Account.Note: You may also want to include the Matter Name on all transaction in theExchange Account and the Suspense Account to make it easier to identifybalance issues in these accounts.Withdraw FundsWithdraw Funds is used when removing money from the Client Trust Account fora purpose OTHER THAN paying your firms bill. This may include refundingexcess Trust Funds to the client or paying a third party from the Trust Account.Since a check will need to be written from QuickBooks, extra processing isrequired within QuickBooks.The entry that will go to QuickBooks willDebit: Trust Liability AccountCredit: Exchange AccountThe entry is set to the Exchange Account rather than the Client Trust Account,since you need to issue a check and QuickBooks does not allow checks to becreated from journal entries.When you go to QuickBooks you will notice a negative balance in your ExchangeAccount. Open the Write Checks screen in QuickBooks and create a check fromthe Client Trust Account. The check should be written to the appropriate vendorand the Account should be Exchange Account. To facilitate reports it is helpful toinclude the Matter name in the Customer:Job field.After you have recorded the check the Exchange Account should have a zerobalance.
Apply Funds to A/RAn Apply Funds to A/R transaction is created to move money from the ClientFunds Account for purposes of paying the firm invoice. If you have checkedAutomatically Apply Payments to new charges on Bills in the Billing Preferencesfor the client, this transaction will be created automatically if there is money in theClient Fund
tracking of changes made in QuickBooks by Billing Matters when a user is not logged in to QuickBooks. In order to connect to QuickBooks, you need to know the path to your QuickBooks database. To locate the path, open QuickBooks and hold the Ctrl key while pressing the number 1 on the keyboard. (Do not use the number 1 on the numeric keypad.).