Transcription
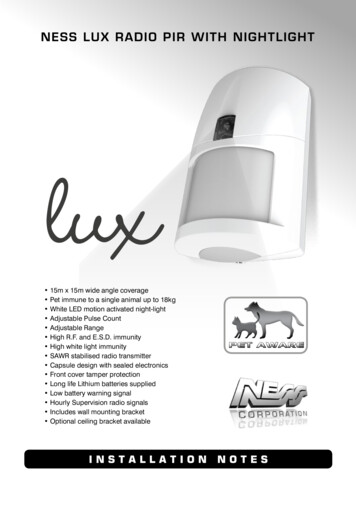
15m x 15m wide angle coverage Pet immune to a single animal up to 18kg White LED motion activated night-light Adjustable Pulse Count Adjustable Range High R.F. and E.S.D. immunity High white light immunity SAWR stabilised radio transmitter Capsule design with sealed electronics Front cover tamper protection Long life Lithium batteries supplied Low battery warning signal Hourly Supervision radio signals Includes wall mounting bracket Optional ceiling bracket available
IntroductionNess LUX PET AWARE Radio PIR is a unique wireless motion detector with a white LED night-light.Featuring 15m x 15m detection coverage, superior pet rejection, high RF immunity, white light immunity,adjustable range, adjustable pulse count and extremely long battery life.The 3V Lithium batteries supplied are expected to give up to 10 years service under normal conditions.For safety and convenience, LUX’s night-light function provides a motion-activated cone of light to helpyou find your way at night. The night-light operates for 25 seconds when activated and will remain litas long as it detects motion, while the built-in ambient light sensor helps save power by enabling thenight-light only in the dark.Ness LUX’s “capsule” design protects sensitive electronic components and provides easy access tothe dipswitches and batteries.LUX PET AWARE PIR’s unique Opposing Fields lens technology ensures highsensitivity to large targets and excellent rejection of household pets. This gives ita superior ability to discriminate between household pets and unwanted humanintruders allowing you to secure your home with your pets indoors.LUX PET AWARE is suitable for a single pet weighing up to 18kg in weight ormultiple pets weighing less than a total of 10kg.2 x CR123A LithiumbatteriesWhite night-light LEDBlue alarm LED also glows behindthe lensAmbient light sensorbehind lensDipswitchesTamper switchLUX frontLUX rear2
Separating the Back HousingStandard Swivel BracketRemove the LUX capsule from the back housingto access the batteries and switches.The Standard Swivel Bracket supplied can beused to wall mount the LUX and provides tilt andswivel adjustment.3 Pull to separate2 Push locking tab1 Remove lock screw if fittedFIG 1.FIG 2. Installation of the Standard SwivelBracket.Product ContentsDirect Wall Mounting1 x LUX Radio PIR & back housing1 x Standard Swivel Bracket & screws1 x Blanking Plug2 x CR123A Lithium batteries1 x PIR locking screwIf mounting direct to the wall without a bracket, firstfit the blanking plug supplied to seal the bracketmounting hole in the back housing.Drilling points for flat wall or corner mounting areprovided on the inside of the housing.Blanking Plug3
Mounting LocationAlways install the detector away from metalsurfaces which may shield radio transmissions.Before permanently mounting the detector, it isrecommended that you conduct a radio test withthe detector temporarily mounted in the intendedposition.The Ness LUX PET Radio PIR is designed forindoor use only and can be installed in wall orcorner mount locations.The Standard Swivel Bracket supplied allows wallmount installation with vertical tilt and horizontalswivel for adjusting coverage to suit the chosenmounting height.Use the signal strength meter on the alarm panelas a guide to the best mounting position. Often,a small change in position can have a dramaticeffect on radio performance due to environmentaleffects on radio signals.The optional Deluxe Swivel Bracket allows LUX tobe ceiling mounting.LUX can also be installed direct to the wall withouta bracket. In this case, the mounting height shouldbe carefully chosen to provide the correct detection coverage for the room size.Pet RejectionAlways ensure the detector has a clear line of sightof the area to be protected as infra-red energy doesnot pass through solid objects, (including glass).The Ness LUX PET Radio PIR should be installedat heights between 2.1m and 2.4m.The lower detection zones are optimised to rejectpet detection while the upper detection zones areoptimised for detecting humans.Mount the detector in a location where an intruderis most likely to walk across the coverage pattern.Corner mounting usually gives the best detectioncoverage.If using the Standard Swivel Bracket, ensure thatLUX PET is not tilted downwards to prevent theupper detection zones from intersecting the floor.As with all PIR detectors, it is advisable to choosemounting positions which avoid direct sunlight,heating or cooling sources and avoid areas ofhigh humidity which may cause condensationon the lens.Installing the detector lower than 2.1metresmay result in false detection of pets.Tilting the coverage downwards may result infalse detection of pets.CORRECT. Upper zones are off the floor.WRONG. Too much tilt means the upperzones will detect pets.2.4m max.2.1m min.Install at least 2.1m away from furniture to prevent detection of climbing pets.4
InstallationDetection Coverage1 Remove the lock screw at the bottom of the LUXassembly (if fitted) then push the lock tab and liftthe capsule out of the back housing. See Fig 1.At the recommended mounting height of 2.1mto 2.4m, LUX detector coverage is up to 15m(HI range setting) or 12m (LOW range setting).2 If using the Standard Swivel Bracket supplied,screw the bracket’s base to the wall in yourchosen location then fit the back housing overthe bracket and secure it with the locking discand small screw provided. Do not fully tightenthe locking screw until you adjust the backhousing’s angle as required. See FIG 2. TheStandard Swivel Bracket is designed for wallmounting only.The vertical creep zone is disabled in this model.Installation is similar using the optional DeluxeSwivel Bracket - with the added benefit of wallor ceiling mounting. Take care to keep the upperdetection zones off the floor.If mounting direct to the wall without abracket, first fit the blanking plug supplied toseal the bracket mounting hole in the backhousing.3 Prepare your Ness control panel or receiver toreceive a Learn signal from the LUX Radio PIR.(Refer to the control panel or receiver’s manualsfor instructions on programming/learning radiodevices.)2.1m4 Insert both batteries, observing correct polarity.On power-up, LUX sends a Learn signal to thecontrol panel/receiver.0.3m5 LUX will be in Walk-Test Mode for one hourafter power-up (ignoring the setting of theSleep switch) allowing you to walk-test detectorcoverage and radio transmission.1m3m6m15mWalk-TestingLUX will be in Test Mode for one hour after powerup. During this time it will ignore the setting of theSleep switch allowing you to walk-test detectorcoverage and radio transmission.6 Clip the LUX capsule into the back housing inserting the top clip first.7 Wait approximately 30 seconds for the detectorto adjust to the environment.In this mode, the white night-light LED will operateeven under bright ambient lighting - serving as ahighly visible walk-test LED (unless disabled bythe LIGHT dipswitch).8 Walk test the coverage by walking slowlyacross the protected area. The blue alarmLED indicates alarm detection and radiotransmission. During Walk-Test Mode the whitenight-light LED will also turn on, unless disabledby the LIGHT dipswitch.Note 1. The blue Alarm LED will always operatein the first hour after power-up regardless of thesetting of the Alarm LED switch.Adjust the coverage as required by tilting thedetector horizontally or vertically on the swivelbracket. If LUX is direct mounted without abracket, the installer’s choice of mountingheight and position will entirely determine thecoverage.Note 2. LUX can also be walk-tested by switching the SLEEP switch to the 2sec position.During Test Mode your pets may be allowed intothe room to walk-test the pet rejection. If the petsare falsely detected, check that the detector isnot tilted downwards, ensure that RANGE is seton LOW and if necessary change PULSE to 3-4.9 When you have finished walk testing, secure thedetector to the back housing using the lockingscrew provided (small countersunk screw).5
SettingsNess LUX custom settings are set by turning dipswitches 1-6 on or off. The dipswitches are easily accessible by removing LUX from the back housing.Use a small screwdriver or pen tip to set the switches.2sec2min SLEEPDRKLHT Light LevelONOFF LightONOFF Alarm LED1-2HI3-4PulseLOW RangeLightSLEEPEnable/Disable the night-light.Sets the detector’s re-trigger interval.ON2sec The detector will “sleep” for 2 secondsafter being triggered.This mode should only be used forwalk-testing coverage as it will reducethe battery life if left on permanently.OFF The night-light is disabled.Note: If battery A is not installed or is flat the nightlight will not work regardless of the switch setting.2min Normal operating mode. The detectorwill “sleep” for 2 minutes after beingtriggered. (Default)This battery-saving mode limits unwanted radiotransmissions by waiting until there has beenno detectable movement in the area for at least2 minutes before it will trigger and transmit anew alarm.The Sleep time applies only to alarm transmissions. The night-light will turn on every timethe detector detects movement (if enabled bythe LIGHT switch and if the ambient lighting issuitably low).Alarm LEDEnable/Disable the blue Alarm LED.Note. The blue LED will always operate in TestMode regardless of this switch setting.ONPulseSets the detector’s pulse count.Sets the light level at which LUX’s ambient lightsensor will enable the night-light.The night-light will operate only whenthe ambient lighting is very low or neartotal darkness. (Default)LHTThe night-light will operate when theambient lighting is semi-dark.The Alarm LED is enabled. (Default)OFF The Alarm LED is disabled.1–21–2 Pulses or walk steps should causean alarm. (Default)3–43–4 Pulses or walk steps should causean alarm.This setting is recommended for onepet over 10kg or multiple pets of anysize.Light LevelDRKThe night-light will function and drawpower from battery A. (Default)RangeSets the maximum detection range.HILOW615m x 15m max. coverage.12m x 12m max. coverage. Recommended setting. (Default)
BatteriesBattery PolarityNess LUX is supplied with 2 x CR123A Lithiumbatteries which have an expected service life of upto 10 years of normal use in domestic installations(SLEEP switch setting, 2Min).Note that LUX is supplied with both batteries fittedin reverse for safe transportation.Note the correct polarity when inserting the batteries. Installing the batteries in reverse will not harmthe unit but it will not operate correctly.LUX’s dual battery system allows the motion detector and radio transmitter to operate independentlyof the night-light.The motion detector and radio transmitter will drawpower from either battery, but battery A must beinstalled to power the night-light.Battery ABattery A (top) provides power for the Night-Light,Motion Detector and Radio Transmitter.Battery BBattery B (bottom) provides power for the MotionDetector, Radio Transmitter and blue alarm LED.2 sec 2min SLEEPCorrect polarityDRKLHT Light LevelONOFF LightONOFF Alarm LED1-2HI3-4PulseLOW RangeTest Mode is 1 hourLow Battery SignalModel: LUX PIRThe blue alarm LED will flash every 3 seconds toindicate a low battery condition. This continuesfor 4 minutes each time the detector is triggered.The detector also transmits a low battery signal tothe control panel.Battery ABattery BLow battery condition is triggered when the batteryvoltage sinks to approximately 2.6 volts under load.Both batteries should be replaced immediately.Tamper SignalBoth batteries must be installed to maximiseservice life.The onboard tamper switch transmits a Tampersignal when the detector is removed from theback housing.Spare batteries are available from Ness Corporation or resellers.Your Ness control panel may beep and alert youto a tamper alarm condition. Replace the detectorin the back housing to restore the tamper switch. Ifnecessary refer to your control panel’s manual forinstructions on resetting the tamper alarm.Always replace both batteries at the same time.Use only CR123A 3V Lithium. Part No. 142-028.Batteries are sold individually.Programming to a Control PanelNess LUX sends a Learn signal to the receiver/control panel when either battery is inserted.Refer to your Ness control panel or receiver’smanuals for instructions on “learning” LUX.7
SpecificationsDimensions112(h) x 72(w) x 48(d) mmMounting height2.1m – 2.4mCoverageUp to 15m x 15m @ 90 Detector zones20 dual element zonesPulse countSelectable 1–2 or 3–4RangeSelectable High/Low. 15m max./12m max.Pet ImmunitySingle pet up to 18kg or multiple pets up to 10kg totalSensorDual element pyroelectricAlarm indicationBlue alarm LEDNight-LightWhite LED with adjustable threshold, Dark/Dim LightAlarm period5 secondsWarm up period30 secondsOperating voltage3V DCBattery2 x CR123A LithiumQuiescent current 14µARadio frequency304MHz / 868MHz depending on regionTransmit power100µWCompatibilityNess radio-enabled control panels, Ness MCR receiver, Ness SCR receiverNess Corporation manufacturing processes are accredited to ISO9001 quality standards and all possible care and diligence hasbeen applied during manufacture to ensure the reliable operation of this product. However there are various external factors thatmay impede or restrict the operation of this product in accordance with the product’s specification.These factors include, but are not limited to:1. Erratic or reduced radio range. Ness radio products are sophisticated low power devices, however the presence of in-bandradio signals, high power transmissions or interference caused by electrical appliances such as wireless routers, cordlessphones, computers, TVs and other electronic devices may reduce the range performance. While such occurrences are unusual,they are possible. In this case it may be necessary to either increase the physical separation between the Ness receiver and otherdevices or if possible change the radio frequency or channel of the other devices.2. Unauthorised tampering, physical damage, electrical interruptions such as mains failure, electrical spikes or lightning.DOCUMENT PART NUMBER 890-437Revised September 2012For products:106-170 Ness LUX Radio PIR Pet Aware 304MHz106-172 Ness LUX Radio PIR Pet Aware 868MHzwww.nesscorporation.comNational Customer Service CentrePh: 1300 551 991 2012 Ness Corporation Pty Ltd ABN 28 069 984 372Specifications may change without notice.8
an alarm. (Default) 3-4 3-4 Pulses or walk steps should cause an alarm. this setting is recommended for one pet over 10kg or multiple pets of any size. range Sets the maximum detection range. HI 15m x 15m max. coverage. LOW 12m x 12m max. coverage. recom-mended setting. (Default) 2sec 2minSLEEP DRK LHT LIGHT LEVEL ON OFF LIGHT ON OFF ALARM LED


