Transcription
FRONT LOAD WASHER OWNER'S MANUALMANUEL DE L’UTILISATEUR DE LA LAVEUSE ÀCHARGEMENT FRONTALTable of ContentsWasher Safety . 2Washer Safety . 2Internet Connectivity Guide . 3Choosing the Right Detergent . 4Choosing the Right Detergent . 4Adding Laundry Products . 4Washer Maintenance and Care . 5Cleaning the Washer Location . 5Water Inlet Hoses . 5Washer Care. 5Clean Washer Cycle Reminder . 6Removing the Dispenser . 6Cleaning Load & Go Containers (onsome models) . 7Nonuse and Vacation Care . 7Winter Storage Care . 7Transporting Your Washer. 8Reinstalling/Using Washer Again . 8Cleaning the Drain Pump/DrainingResidual Water (on some models) . 8Additional Cleaning . 9Installation Instructions. 9Requirements . 9Tools and Parts . 9Location Requirements . 10Drain System . 11Electrical Requirements . 12Installation . 12Unpacking . 12Connect Drain Hose . 13Connect Inlet Hoses . 14Level Washer . 15Complete Installation Checklist . 16W11355369AW11355370A-SPTable des matièresSécurité de la laveuse . 17Sécurité de la laveuse . 17Guide de connexion Internet . 18Choix du détergent approprié . 19Choix du Détergent Approprié . 19Ajouter les produits de lessive . 19Entretien et réparation de la laveuse . 20Nettoyage de l'emplacement de la laveuse . 20Tuyaux d’arrivée d’eau. 20Entretien de la laveuse . 20Rappel de lancement du programme CleanWasher (nettoyage de la laveuse) . 22Retrait du distributeur . 22Récipients Load & Go (sur certainsmodèles) . 23Non utilisation et entretien avant lesvacances . 23Entretien pour entreposage hivernal . 23Transport de la laveuse. 23Réinstallation/réutilisation de la laveuse . 23Nettoyage du filtre de la pompe de vidange/ Vidange de l'eau résiduelle (sur certainsmodèles) . 24Nettoyage supplémentaire . 24Instructions d’installation. 25Spécifications . 25Outils et pièces . 25Exigences d’emplacement (laveuse) . 25Système de vidange . 26Spécifications électriques . 27L’installation . 28Déballage . 28Raccordement du tuyau de vidange . 29Raccordement des tuyaux d’alimentation . 29Établissement de l’aplomb de la laveuse . 31Liste de vérification pour installationterminée . 32
WASHER SAFETYYour safety and the safety of others are very important.We have provided many important safety messages in this manual and on your appliance. Always read and obey all safetymessages.This is the safety alert symbol.This symbol alerts you to potential hazards that can kill or hurt you and others.All safety messages will follow the safety alert symbol and either the word “DANGER” or “WARNING.” Thesewords mean:DANGERWARNINGYou can be killed or seriously injured if you don'timmediately follow instructions.You can be killed or seriously injured if you don’t followinstructions.All safety messages will tell you what the potential hazard is, tell you how to reduce the chance of injury, and tell you what canhappen if the instructions are not followed.IMPORTANT SAFETY INSTRUCTIONSWARNING: To reduce the risk of fire, electric shock, or injury to persons when using your appliance, follow basic precautions,including the following: Read all instructions before using the appliance. Do not wash articles that have been previously cleaned in,washed in, soaked in, or spotted with gasoline, dry-cleaningsolvents, or other flammable or explosive substances, asthey give off vapors that could ignite or explode. Do not add gasoline, dry-cleaning solvents, or otherflammable or explosive substances to the wash water.These substances give off vapors that could ignite orexplode. Under certain conditions, hydrogen gas may be producedin a hot-water system that has not been used for 2 weeks ormore. HYDROGEN GAS IS EXPLOSIVE. If the hot-watersystem has not been used for such a period, before using awashing machine, turn on all hot-water faucets and let thewater flow from each for several minutes. This will releaseany accumulated hydrogen gas. As the gas is flammable,do not smoke or use an open flame during this time. Do not allow children to play on or in the appliance. Closesupervision of children is necessary when the appliance isused near children. Before the appliance is removed from service or discarded,remove the door. Do not reach into the appliance if the tub or agitator ismoving. Do not install or store this appliance where it will beexposed to the weather. Do not tamper with controls. Do not repair or replace any part of the appliance or attemptany servicing unless specifically recommended in the usermaintenance instructions or in published user-repairinstructions that you understand and have the skills to carryout. Do not use replacement parts that have not beenrecommended by the manufacturer (e.g. parts made athome using a 3D printer). See the Installation Instructions for grounding requirementsand installation.SAVE THESE INSTRUCTIONSWARNINGCertain internal parts are intentionally not grounded and may present a risk of electric shock only during servicing.Service Personnel – Do not contact the thermostat bracket while the appliance is energized.2
Internet Connectivity Guide for Connected Appliances OnlyIMPORTANT: Proper installation of your appliance prior to use is your responsibility. Be sure to read and follow the installationinstructions that came with your appliance.Connectivity requires Wi-Fi and account creation. App features and functionality are subject to change. Data rates may apply. Onceinstalled, launch the app. You will be guided through the steps to set up a user account and to connect your appliance.You Will Need: A home wireless router supporting Wi-Fi, 2.4Ghz with WPA2 security. If you are unsure of your router’s capabilities, refer to the routermanufacturer’s instructions. The router to be on and have a live internet connection. The 10–character SAID code for your appliance. The SAID code is either printed on a label on the appliance or found on the LCDscreen.Federal Communications Commission (FCC) Compliance NoticeThis device complies with Part 15 of the FCC Rules. Operation is subject to the following two conditions:1. This device may not cause harmful interference, and2. This device must accept any interference received, including interference that may cause undesired operation.Changes or modifications not expressly approved by the party responsible for compliance could void the user’s authority to operate theequipment.Industry Canada (IC) Compliance NoticeThis Device complies with Industry Canada License-exempt RSS standard(s). Operation is subject to the following two conditions:1. This device may not cause interference.2. This device must accept any interference, including interference that may cause undesired operation of the device.Under Industry Canada regulations, this radio transmitter may only operate using an antenna of a type and maximum (or lesser) gainapproved for the transmitter by Industry Canada. To reduce potential radio interference to other users, the antenna type and its gainshould be so chosen that the equivalent isotropically radiated power (e.i.r.p.) is not more than that necessary for successfulcommunication.To comply with FCC and Industry Canada RF radiation exposure limits for general population, antenna(s) used for this transmitter mustbe installed such that a minimum separation distance of 20 cm is maintained between the radiator (antenna) and all persons at all timesand must not be co-located or operating in conjunction with any other antenna or transmitter.If this equipment does cause harmful interference to radio or television reception, which can be determined by turning the equipment offand on, the user is encouraged to try to correct the interference by one of the following measures: Reorient or relocate the receiving antenna. Increase the separation between the equipment and receiver. Connect the equipment into an outlet on a circuit different from that to which the receiver is connected. Consult the dealer or an experienced radio/TV technician for help.3
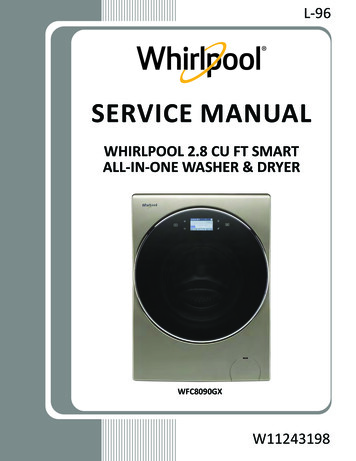
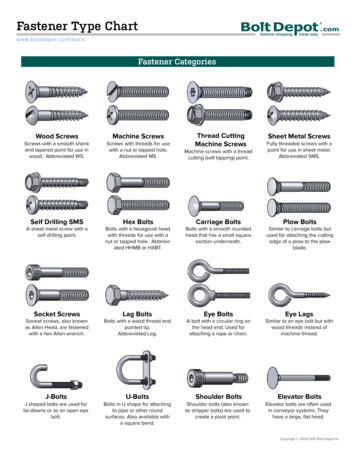
CHOOSING THE RIGHTDETERGENTUse only High Efficiency detergents. The package will be marked“HE” or “High Efficiency.” Low-water washing creates excessivesudsing with a non-HE detergent. Using non-HE detergent willlikely result in longer cycle times and reduced rinsingperformance. It may also result in component failure and, overtime, buildup of mold or mildew. HE detergents should be lowsudsing and quick-dispersing to produce the right amount of sudsfor the best performance. They should hold soil in suspension so itis not redeposited onto clean clothes. Not all detergents labeledas High Efficiency are identical in formulation and their ability toreduce suds. For example, natural, organic, or homemade HEdetergents may generate a high level of suds. If you use one ofthese and see an “Sd” or “Sud” error code appear in the display,consider using a different HE detergent. Always follow thedetergent manufacturer’s instructions to determine the amount ofdetergent to use. Do not go over the Max line on the dispenser.IMPORTANT: Do not overfill, dilute, or use more than themanufacturer-recommended quantity of fabric softener. Do not fillpast the “MAX” line. Overfilling dispenser will cause fabric softenerto immediately dispense into washer. Do not spill or drip any fabric softener onto the clothes. Do not use liquid fabric softener dispenser balls in this washer.They will not dispense correctly. Do not use fabric softener sheets, as they can stain the load.Adding HE detergent to Optimal Dispense Drawer (on somemodels):This compartment holds up to14.3 oz. (424 ml) of liquid HEdetergent allowing you to avoidhaving to refill detergent foreach load. Also, this will usejust the right amount ofdetergent required for aparticular load/cycle.Adding Laundry ProductsNOTE: Do not add single-dose laundry packets, Oxi-typeboosters, color-safe bleach, or fabric softener crystals todispensers. They will not dispense correctly.Adding HE detergent to basket:Single-dose laundry packets, Oxitype boosters, color-safe bleach, orscented crystals can be added tothe drum prior to adding laundry.When using single-dose laundrypackets, make sure that the bulkdispenser is disabled (on somemodels) or off.Adding HE detergent to Load & Go dispenser (on somemodels):Use only High Efficiency (HE) liquid detergents. The bulkdispensers will hold about 67.6 oz. (2 L) or 33.8 oz. (1 L) of liquidHE detergent, depending on dispenser, or enough for many loadsof laundry.To fill bulk dispensers (on some models):NOTE: Follow the manufacturer’s instructions to determine theamount of laundry products to use.Adding liquid chlorine bleach to single-load dispenser:Add liquid chlorine bleach tothe bleach compartment. Donot overfill, dilute, or use morethan 2 3 cup (165 mL). Do notuse color-safe bleach or Oxi inthe same cycle with liquidchlorine bleach.IMPORTANT: Always measure liquid chlorine bleach. Use a measuring cupwith a pour spout; do not guess. Do not fill beyond the “MAX” line. Overfilling could causegarment damage. Do not use thickened, easy-pour, or no-splash bleach whenrunning the Clean Washer with affresh cycle, as excess sudsmay occur. On some models: Do not add liquid chlorine bleach to the bulkdispenser. Slowly close dispenser drawers. Make sure the drawers areclosed completely (on some models).Adding liquid fabric softener to single-load dispenser:Pour a measured amount of liquidfabric softener into liquid fabricsoftener compartment. Alwaysfollow manufacturer’s directions forcorrect amount of fabric softener,based on your load size. Disablethe 1-Liter Load & Go dispenser ifnot used to dispense detergent (onsome models).Fabric softener is always dispensed in the last rinse, even ifExtra Rinse is selected.4Open the dispenser drawer by pulling on the handle at the base ofthe washer. If desired, the drawer can be completely removedfrom the washer.Locate the Load & Go bulk dispenser. Gentlypull up on the tab located on the bulk dispenserlid to lift the fill door.Fill to the “MAX” line (see illustrations at right)with HE liquid detergent or liquid fabric softener(1-liter dispenser only). Close fill door. It will clickinto place. Make sure the concentration settingis correct (see the online “Cycle Guide”).It is recommended that you rinse out the Load &Go containers when refilling, when changingdetergent types or concentrations, or when thewasher will not be used for an extended period.For instructions on cleaning the dispensercartridge, see “Washer Care” in the “WasherMaintenance and Care” section of your Owner’sManual.Adding HE detergent to single-load dispenser:Pour a measured amount of HEdetergent into detergentcompartment. For powdereddetergent, lift the selector to the highposition. For liquid detergent, pushdown the selector to the low position.Do not overfill; adding too much detergent may cause detergentto be dispensed into the washer too early.
IMPORTANT: Disable the Load & Go option before starting a single load(on some models). Do not add single-dose laundry packet to dispenser drawer.Powdered detergent:Liquid detergent:Lift the selector to the highposition. Add directly to thecompartment.Push down the selector to thelow position. Add directly to thecompartment.WASHER MAINTENANCE ANDCARECleaning the Washer LocationKeep washer area clear and free from items that would blockairflow. This includes clearing piles of laundry in front of thewasher.Water Inlet HosesReplace inlet hoses after 5 years of use to reduce the risk of hosefailure. Periodically inspect and replace inlet hoses if bulges,kinks, cuts, wear, or leaks are found.When replacing your inlet hoses: Mark the date of replacement on the label with a permanentmarker. Check that the old washers are not stuck on the washer inletvalves. Use new washers in the new inlet hoses to ensure a properseal.Washer CareRecommendations to Help Keep Your WasherClean and Performing at Its Best1. Always use High Efficiency (HE) detergents and follow the HEdetergent manufacturer’s instructions regarding the amount ofHE detergent to use. Never use more than the recommendedamount because that may increase the rate at whichdetergent and soil residue accumulate inside your washer,which, in turn, may result in undesirable odor.2. Use warm or hot water washes sometimes (not exclusivelycold water washes), because they do a better job ofcontrolling the rate at which soils and detergent accumulate.3. Always leave the washer lid open between uses to help dryout the washer and prevent the buildup of odor-causingresidue.4. Periodically clean residue from all interior surfaces of thewindow. For better care, wipe the entire inside of the door witha damp cloth.Cleaning Your Front-Loading WasherRead these instructions completely before beginning the routinecleaning processes recommended below. This WasherMaintenance Procedure should be performed, at a minimum,once per month or every 30 wash cycles, whichever occurssooner, to control the rate at which soils and detergent mayotherwise accumulate in your washer.Cleaning the Door Seal1. Open the washer door and remove any clothing or items fromthe washer.2. Inspect the gray-colored seal between the door opening andthe drum for stained areas, soil buildup, or lint. Pull back theseal to inspect all areas under the seal and to check forforeign objects or lint.3. If stained areas, soil buildup, or lint are found, wipe downthese areas of the seal using either of the following twoprocedures:a. affresh Machine Cleaning Wipes Procedure:i. When the cycle is complete, gently pull back therubber door seal and clean the entire surface with thetextured side of an affresh Machine Cleaning Wipe.b. Dilute Liquid Chlorine Bleach Procedure:i. Mix a dilute bleach solution, using 3/4 cup (177 mL)of liquid chlorine bleach and 1 gallon (3.8 L) of warmtap water.ii. Wipe the seal area with the dilute solution, using adamp cloth.iii. Let stand 5 minutes.iv. Wipe down area thoroughly with a dry cloth and letwasher interior air dry with door open.IMPORTANT: Wear rubber gloves when cleaning with bleach. Refer to the bleach manufacturer’s instructions for properuse.Cleaning the Inside of the WasherThis washer has a special cycle that uses higher water volumes incombination with affresh Washer Cleaner or regular liquidchlorine bleach to thoroughly clean the inside of the washer.Steam washer models also utilize steam to enhance cleaning inthis special cycle.IMPORTANT: Do not use thickened, easy-pour, or no-splashbleach when running the Clean Washer with affresh cycle asexcess suds may occur.NOTE: Read these instructions completely before beginning thecleaning process.Begin Procedure1. Clean Washer with affresh Cycle Procedure(Recommended for best performance):a. Open the washer door and remove any clothing or items.b. Use an affresh Machine Cleaning Wipe or a soft, dampcloth or sponge to clean the inside door window.c. Add an affresh Washer Cleaner tablet to the washerdrum.d. Do not add the affresh Washer Cleaner tablet to thedispenser drawer.e. Do not add any detergent or other chemical to the washerwhen following this procedure.f. Close the washer door.g. Select the Clean Washer with affresh cycle.h. On some models: Select the FanFresh /Fresh Hold /Fresh Spin option to help dry the washer interior afterthe cycle is complete.NOTE: The washer remembers your last option selection andwill use it for future wash cycles until you deselect that option.i. Touch and hold Start/Pause to begin the cycle. See the“Description of Clean Washer with affresh CycleOperation” section.5
2. Chlorine Bleach Procedure:a. Open the washer door and remove any clothing or items.b. Open the dispenser drawer and add liquid chlorine bleachto the Max level in both the bleach compartment and thefabric softener compartment. Either traditional or HEchlorine bleach can be used.IMPORTANT: Do not use thickened, easy-pour, or no-splashbleach as excess suds may occur.NOTE: Use of more liquid chlorine bleach than isrecommended above could cause washer damage over time.c. Close the washer door and the dispenser drawer.d. Do not add any detergent or other chemicals to thewasher when following this procedure.e. Select the Clean Washer with affresh cycle.f. On some models: Select the FanFresh /Fresh Hold /Fresh Spin option to help dry the washer interior afterthe cycle is complete.NOTE: The washer remembers your last option selection andwill use it for future wash cycles until you deselect that option.g. Touch and hold Start/Pause to begin the cycle. See the“Description of Clean Washer with affresh CycleOperation” section.NOTE: For best results, do not interrupt cycle.Description of Clean Washer withOperationaffresh Cycle1. The Clean Washer with affresh cycle will determine whetherclothing or other items are in the washer.2. If no items are detected in the washer, it will proceed with thecycle.a. If any items are detected in the washer, “rL” (removeload) will be displayed. The door will unlock. Openwasher and remove any garments from the washer drum.b. Touch Power to clear the “rL” code.c. Touch and hold Start/Pause to restart the cycle.3. Steam models only: During the first 20 minutes of the cycle,it will activate the steamer but the drum will not spin or fill withwater. You may see condensation on the door window duringthis initial phase. If you are using an affresh Washer Cleanertablet, it will not dissolve completely during the steam phase.This is normal.After the cycle is complete, leave the door open slightly toallow for better ventilation and drying of the washer interior.Cleaning the DispensersAfter a period of using your washer, you may find some residuebuildup in the washer’s dispensers.For the Single-Load or Optimal dispenser: Remove the drawerand wipe the surfaces with an affresh Machine Cleaning Wipe ora damp cloth, and towel dry either before or after you run theClean Washer with affresh cycle. Use an all-purpose surfacecleaner, if needed.For the Load & Go dispenser: Lift the handle on the dispenserhousing and pull to remove it from the washer cabinet; then rinsethe dispenser thoroughly with running water. Wipe the outsidedispenser surface with an affresh Machine Cleaning Wipe or adamp cloth, and towel dry. Use an all-purpose surface cleaner, ifneeded.Replace the dispenser in the washer cabinet and make sure that itis correctly seated.IMPORTANT: Dispensers are not dishwasher-safe.6Cleaning the Outside of the WasherIMPORTANT: To avoid damaging the washer’s finish, do not useabrasive products.Use an affresh Machine Cleaning Wipe or a soft, damp cloth orsponge to wipe up any spills. Occasionally wipe the outside ofyour washer to help keep it looking new. Use an affresh MachineCleaning Wipe or mild soap and water.Clean Washer Cycle ReminderNOTE: Not all models have the Clean Washer with affresh cyclereminder light.The Clean Washer with affresh message will flash at the end of awash cycle when the washer has run 30 wash cycles. This is areminder to run the Clean Washer with affresh cycle.If the Clean Washer with affresh cycle is not run, the messagewill stop flashing at the end of a wash cycle after running threemore regular wash cycles. After 30 more wash cycles arecompleted, the Clean Washer with affresh message will againflash at the end of a wash cycle as a reminder.Removing the DispenserOptimal Dispenser Drawer (on some models)To remove:1. Pull dispenser drawer out until it stops.2. Press down on the release tab and pull straight out to removethe dispenser.3. Lift off cover panel by pulling straight up.
To replace:1. Slide cover panel back onto posts on dispenser.2. Align edges of dispenser with guides in washer; then slidedispenser back into slot.Cleaning Load & Go Containers(on some models)IMPORTANT: Containers are not dishwasher-safe.It is recommended that you rinse out the Load & Go containerswhen refilling, when changing detergent types or concentrations,or when the washer will not be used for an extended period.1. Pull the dispenser drawer out until it stops.2. Lift out the Load & Go containers.3. Lift the fill lid and flush interior thoroughly with warm water.Single-Load Dispenser Drawer (on some models)To remove:1. Pull dispenser drawer out until it stops.2. Press down on the release tab and pull straight out to removethe dispenser.4. Allow to air dry.Nonuse and Vacation CareOperate your washer only when you are home. If moving, or notusing your washer for a period of time, follow these steps:1. Unplug or disconnect power to washer.2. Turn off water supply to washer to avoid flooding due to waterpressure surges.HELPFUL TIP: Attach a reminder note to the washer to turnthe water back on before washer's next use.3. Clean the dispensers. See “Cleaning the Dispensers.”3. Lift off cover panel by pulling straight up.Winter Storage CareIMPORTANT: To avoid damage, install and store washer where itwill not freeze. Because some water may stay in hoses, freezingcan damage washer. If storing or moving during freezing weather,winterize your washer.To winterize washer:To replace:1. Position cover panel back onto posts on dispenser. Applyslight pressure on cover panel to seat it.2. Align edges of dispenser with guides in washer; then slidedispenser back into slot.1. Shut off both water faucets; disconnect and drain water inlethoses.HELPFUL TIP: Attach a reminder note to the washer to turnthe water back on before washer’s next use.2. Remove drain pump filter.3. Put 1 qt. (1 L) of R.V.-type antifreeze in drum and run washeron Normal cycle for about 2 minutes to mix antifreeze andremaining water.4. Unplug washer or disconnect power.7
Transporting Your Washer1. Shut off both water faucets. Disconnect and drain water inlethoses.2. If washer will be moved during freezing weather, follow“Winter Storage Care” directions before moving.3. Disconnect drain hose from drain system and from back ofwasher.4. Unplug power cord.5. Place inlet hoses and drain hose inside drum.6. Bundle power cord with a rubber band or cable tie to keep itfrom hanging to the ground.IMPORTANT: Call for service to install new transport bolts. Do notreuse transport bolts. Washer must be transported in the uprightposition. To avoid structural damage to your washer, it must beproperly set up for relocation by a certified technician.Cleaning the Drain Pump/DrainingResidual Water (on some models)IMPORTANT: Make sure the washer is off before cleaning thedrain pump filter.NOTE: Perform the following procedure occasionally.1. Open the dispenser drawer by pulling on the handle at thebase of the washer. This will reveal the drain pump filter.Remove the drawer by releasing the tab on each side.Reinstalling/Using Washer AgainWARNINGWith your finger, push down on tab on right side of drawer,and up on tab on left side of drawer.Electrical Shock HazardPlug into a grounded 3 prong outlet.Do not remove ground prong.Do not use an adapter.Do not use an extension cord.Failure to follow these instructions can result in death,fire, or electrical shock.2. Place a broad, flat container beneath the drain pump filter tocollect the drain water. Release the black hose from the hoseclip, remove the plug, and drain the hose into the container.Empty the container. Repeat this procedure if necessary untilall the water has drained. Make sure that the black hose iscompletely dry, replace the plug, and secure the hose in theclip.NOTE: If water does not drain well, push in hose slightly toremove any possible kinks.To reinstall washer after nonuse, vacation, winterstorage, or moving:1. Refer to Installation Instructions to locate, level, and connectwasher.2. Before using again, run washer through the followingrecommended procedure:To use washer again:1.2.3.4.5.8Flush water pipes and hoses.Reconnect water-inlet hoses.Turn on both water faucets.Plug into a grounded 3-prong outlet or reconnect power.Run washer through Heavy Duty/Power Wash cycle to cleanwasher and remove antifreeze, if used. Use only HEdetergent. Use half the manufacturer’s recommended amountfor a medium-size load.3. Lay a cotton cloth beneath the drain pump filter to absorb anywater still in it. Then remove the drain pump filter by turning itcounterclockwise.
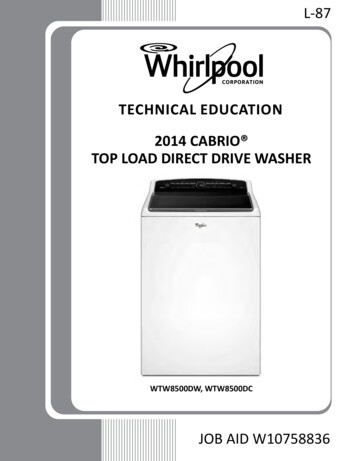
4. Remove large clumps of lint by hand from the filter and placelint in a suitable waste container. Remove remaining residuefrom the filter by rinsing with water.INSTALLATION INSTRUCTIONSREQUIREMENTSTools and PartsGather required tools and parts before starting installation.Tools Needed:5. Reinsert the drain pump filter by turning it clockwise. Makesure to turn it in as far as it will go, with the filter handleremaining as close as possible to the vertical position.6. Replace and close the dispenser drawer. Make sure to insertboth rails simultaneously when replacing the drawer. You willhear a clicking sound that indicates the rails have engaged. Toensure proper placement of the drawer, pull out fully. Thedrawer should be fully engaged and the rails locked in place.Make sure the drain hose is secured in the hose clip andtucked underneath the cutout.Adjustable or open endwrenches 1/2″ (13 mm), 5/8″(16 mm), and 9/16″ (14.3 mm)LevelWood blockRuler or measuring tapeAdjustable pliers thatopen to 1 9/16″ (39.7 mm)FlashlightBucketParts Supplied:NOTE: All parts supplied for installations are in the washer.Additional CleaningGently pull back the rubber door seal and clean any stained areas,soil buildup, or lint with the textured side of an affresh MachineCleaning Wipe.Drain hose with clamp, U-form,and cable tieParts Needed: (if not supplied with washer)NOTE: Various inlet hoseoptions are available; checkyour Quick Start Guide forordering information.Inlet hoses with flat washers9
Available Access
W11355369A W11355370A-SP FRONT LOAD WASHER OWNER'S MANUAL MANUEL DE L'UTILISATEUR DE LA LAVEUSE À CHARGEMENT FRONTAL Table of Contents Washer Safety.2 Washer Safety.2 Internet Connectivity Guide.3 Choosing the Right Detergent.4 Choosing the Right Detergent.4 Adding Laundry Products.4 Washer Maintenance and Care.5 Cleaning the Washer Location.5 Water Inlet Hoses.5