Transcription
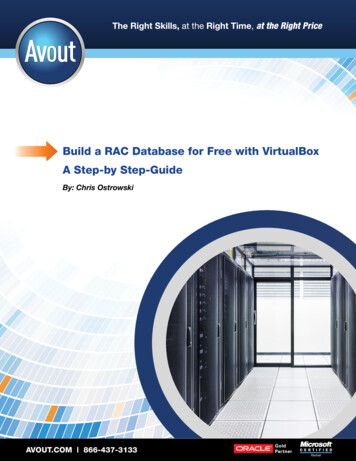
This RAC installation article is based on RAC Attack hands-on learning labhttps://en.wikibooks.org/wiki/RAC Attack - Oracle Cluster Database at Home/RAC Attack 12cThe article performs the following task:1. Deploying Oracle Grid Infrastructure 12cR1 (12.1.0.2.0)2. Deploying Oracle database software 12cR1 (12.1.0.2.0)3. Using Oracle ASM with udev rulesBelow the hardware details Windows 7 64 bit 8 CPUs 16Gb memory, 8GB is used for the RAC 50Gb for VDI (Dynamic Allocation) 30Gb for ASM disk (Fixed Size)Below are the software components The VirtualBox for Windows: https://www.virtualbox.org/wiki/Downloads The Oracle Linux (OEL 7.2 OS -- V100082-01.iso) : https://edelivery.oracle.com/linux The Oracle Database 12c R1 for Linux enterprise-edition/downloads/index.html1. Complete the Installation of Oracle VM VirtualBox2. Run VirtualBox Manager.3. From the main screen, choose File Preferences Network.4. Double click on VirtualBox Host-Only Ethernet Adapter. VirtualBox will suggest a defaultaddress of 192.168.56.1. Please update the settings as shown and click Ok twice.12cR1 RAC OEL 7.2Page 1
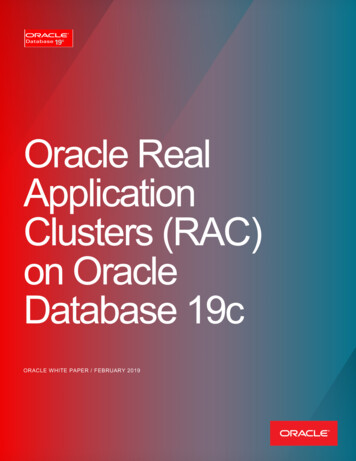
IPv4 Address: 192.168.78.1IPv4 Network Mask: 255.255.255.05. In VirtualBox, from the main screen, click the New icon in the upper left hand corner.12cR1 RAC OEL 7.2Page 2
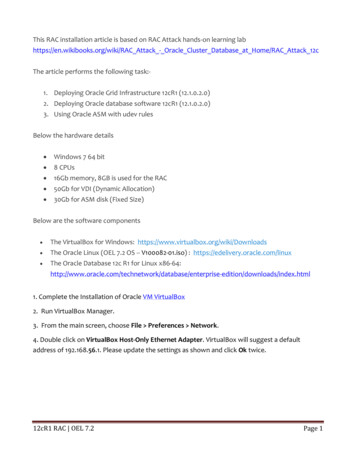
6. Set the memory size. I have set to 4G.7. Create virtual hard drive.12cR1 RAC OEL 7.2Page 3
8. Leave VDI selected and click next.9. Leave dynamically allocated selected and click Next.12cR1 RAC OEL 7.2Page 4
10. Type in the full path or choose through the browse icon the Location for the disk file to becreated. Have named the file “racnode1.vdi” and all the vdi files created are in location“D:\rac12c\”.12cR1 RAC OEL 7.2Page 5
11. From the main screen, select the virtual machine racnode1 and click the Settings icon in theupper left hand corner.12cR1 RAC OEL 7.2Page 6
12. Open the Storage sub-menu. Delete the Empty disk under the IDE Controller.13. Click on the Add CD/DVD/Optical Device.12cR1 RAC OEL 7.2Page 7
14. Locate and open the Oracle Linux 7 64.iso (V100082-01.iso) file.12cR1 RAC OEL 7.2Page 8
15. Open the Network sub-menu. Under the Adapter 1 tab, change the Attached to: dropdown toHost-only Adapter.16. Choose the Adapter 2 tab. Check the box for Enable Network Adapter. Change the Attached to:dropdown to Internal Network and type the name “rac-priv” in the Name field.12cR1 RAC OEL 7.2Page 9
17. Choose the Adapter 3 tab. Check the box for Enable Network Adapter. Change theAttached to: dropdown to NAT.18. Select the Shared Folders tab. Click Add Shared Folder. Enter the path where you havedownloaded the Oracle installation media and enter a name for your folder.12cR1 RAC OEL 7.2Page 10
19. Open the USB sub-menu. Uncheck the Enable USB Controller check box.20.Click on Start to boot the virtual machine.12cR1 RAC OEL 7.2Page 11
21. The Oracle Linux install screen will automatically come up.22. Select the language and click on “Continue” .12cR1 RAC OEL 7.2Page 12
23. Next is the “Installation Summary” screen.24. Select the “Installation Destination”. If you are happy with automatic partitioning ofthe whole disk, click “Done” button to return to previous screen.12cR1 RAC OEL 7.2Page 13
25. On “Software Selection” screen select “Server with GUI” for your “Base Environment”.Then select extra software you want to install by selecting it in “Add-Ons for SelectedEnvironment”. For Oracle software installation and general development on OracleLinux 7 please choose the below option and click “Done” button.12cR1 RAC OEL 7.2Page 14
26. Select the “Network & Host Name” section from “Installation Summary”.12cR1 RAC OEL 7.2Page 15
27. Select Ethernet (enp0s3), the “Public IP” and click on Configure. In earlier releases ofOEL we had eth0, eth1, eth2, which is now enp0s3, enp0s8, enp0s9a. Click the “Connect Automatically” checkbox in General Tabb. Click on IPv4 Settings and select “Manual” method.c. Click “Add” and type “192.168.78.51” for the address and “255.255.255.0” forNetmaskd. Type 192.168.78.51, 192.168.78.52 in DNS servers and “racattack” in search domain.e. In Hostname type “racnode1.racattack”.f. Click on Save12cR1 RAC OEL 7.2Page 16
28. Select Ethernet (enp0s8) and click on “Configure”a. Click on “Connect Automatically” checkbox in General Tabb. Move to “IPv4 Settings” , change to “Manual” method and click on “Add”c. Type “172.16.100.51” in Address and “255.255.255.0” in Netmaskd. Save the settings12cR1 RAC OEL 7.2Page 17
29. Select Ethernet (enp0s9) and click on “Configure”a. Click on “Connect Automatically” checkbox in General Tabb. Move to “IPv4 Settings” , change to “Automatic (DHCP) addresses only”method12cR1 RAC OEL 7.2Page 18
12cR1 RAC OEL 7.2Page 19
30. Click on “Begin Installation” and the screen changes to “CONFIGURATION” window.31. Set the “ROOT PASSWORD” and “USER CREATION” while the installation is going on.12cR1 RAC OEL 7.2Page 20
32. Completion Screen: - After the Oracle Linux is successfully installed, go ahead andreboot it. After reboot you would need to complete “License Information”.12cR1 RAC OEL 7.2Page 21
12cR1 RAC OEL 7.2Page 22
33. Turn off and disable the Firewall. “systemctl” and “systemd” have replaced chkconfigand init under OEL7.34. Change the setting of SELinux to “disabled” by editing “/etc/selinux/config”.12cR1 RAC OEL 7.2Page 23
35. Check the “ntpd” status. Either configure NTP, or make sure it is not configured so thatCTSSd can synchronize the times of RAC node. In my installation I de-configured NTP.# systemctl disable ntpd# mv /etc/ntp.conf /etc/ntp.conf.orig36. Verify that all the network interfaces are up.12cR1 RAC OEL 7.2Page 24
37. Configure DNS.12cR1 RAC OEL 7.2Page 25
Original “/etc/named.conf” file before any changes -Add “192.168.78.51” to “listen-on port 53” and “192.168.78.0/24” to “allow-query” and “allowtransfer”.12cR1 RAC OEL 7.2Page 26
At the end of file add the “zone” and “reverse zone” as shown below.Create the zone file for the racattack domain on racnode1.12cR1 RAC OEL 7.2Page 27
Create the reverse zone fileVerify the changes made to “/etc/named.conf” file as shown below. In case of any errors, rectify itand re-check.12cR1 RAC OEL 7.2Page 28
Enabled the named service and started itCheck the forward and reverse lookup using “nslookup” command.12cR1 RAC OEL 7.2Page 29
12cR1 RAC OEL 7.2Page 30
38. Install the database preinstall package “oracle-rdbms-server-12cR1-preinstall”.Select the “Devices Optical Drives oracle linux 7 64.iso”12cR1 RAC OEL 7.2Page 31
Run the following commands.Make a backup copy of file, delete the content and add the below lines to /etc/yum.repos.d/publicyum-ol7.repo.Install the “oracle-rdbms-server-12cR1-preinstall” package. It performs all prerequisite setup likeinstalling required rpms, creating oracle user, required groups, setting parameters in/etc/sysctl.conf etc.12cR1 RAC OEL 7.2Page 32
One thing to note is, Oracle user limit does not reflect values in /etc/security/limit.conf if oraclerdbms-server-12cR1-preinstall RPM is used. The file to be checked is -preinstall.conf”.12cR1 RAC OEL 7.2Page 33
39. Unmount/Eject the device (oracle linux 7 64.iso) and Make the VirtualBox guestadditions available to the OS by clicking Devices- Install Guest Additions.12cR1 RAC OEL 7.2Page 34
40. After the guest addition, the Shared Folders added in step 18 should be visible. Thefolder is visible as /media/sf 12cR1.41. Create the directories in which the Oracle Software will be installed and add oracle to“vboxsf” group.12cR1 RAC OEL 7.2Page 35
42. Create Virtualbox Shared Storage (ASM Disks)a. Shutdown the server.b. In the VirtualBox Manager, select the machine racnode1, click Settings - Storage.c. Select Controller SATA and click on the Add Hard Disk button. Click “Create new disk”.12cR1 RAC OEL 7.2Page 36
12cR1 RAC OEL 7.2Page 37
43. Repeat the same steps to create three more disks:44. Make all the asm devices sharable: from VirtualBox Manager, click File - Virtual MediaManager.12cR1 RAC OEL 7.2Page 38
Repeat the same above steps for all the asm*.vdi disk.12cR1 RAC OEL 7.2Page 39
45. Start the racnode1 and you must see 4 disks named /dev/sd*.46. Once the new disks are visible in the server, add primary partition on each of them using“fdisk”.12cR1 RAC OEL 7.2Page 40
47. Add the following to the "/etc/scsi id.config" file to configure SCSI devices as trusted.Create the file if it doesn't already exist.# echo “options -g” /etc/scsi id.configCheck if scsi id returns data.# /usr/lib/udev/scsi id –g –u –d /dev/sdbPrepare the “/etc/udev/rules.d/99-oracle-asmdevices.rules” by running the below script.#!/bin/bash#file /createOracleAsmUdevRules.shi 1# ol7 / rhel7cmd "/usr/lib/udev/scsi id -g -u -d"for disk in sdb sdc sdd sde ; docat EOF /etc/udev/rules.d/99-oracle-asmdevices.rulesKERNEL "sd?1", SUBSYSTEM "block", PROGRAM " cmd /dev/\ parent", \RESULT " cmd /dev/ disk ", SYMLINK "asm-disk i", OWNER "oracle", GROUP "dba", \MODE "0660"EOFi (( i 1))done12cR1 RAC OEL 7.2Page 41
Load updated block device partition tables.Test the rules are working as expected.Restart UDEV Service.12cR1 RAC OEL 7.2Page 42
48. Clone VirtualBox VMa. Shutdown the VM.# shutdown –h nowb. Clone the disk racnod1.vdi: from VirtualBox Manager, click File - Virtual MediaManager.12cR1 RAC OEL 7.2Page 43
12cR1 RAC OEL 7.2Page 44
Once the copy is complete, click Close to exit from the Virtual Media Manager.12cR1 RAC OEL 7.2Page 45
49. In VirtualBox, click New icon in the upper left corner to create the new VM.12cR1 RAC OEL 7.2Page 46
12cR1 RAC OEL 7.2Page 47
50. Open the Network sub-menu. Under the Adapter 1 tab, change the Attached to:dropdown to Host-only Adapter.51. Choose the Adapter 2 tab. Check the box for Enable Network Adapter. Change theAttached to: dropdown to Internal Network and type the name “rac-priv” in the Namefield.52. Choose the Adapter 3 tab. Check the box for Enable Network Adapter. Change theAttached to: dropdown to NAT.12cR1 RAC OEL 7.2Page 48
53. Open the USB sub-menu. Uncheck the Enable USB Controller check box.54. Select the Shared Folders tab. Click Add Shared Folder. Enter the path where you havedownloaded the Oracle installation media and enter a name for your folder.12cR1 RAC OEL 7.2Page 49
55. Click on Controller SATA and “Choose existing disk” to add the asm disk vdi file.56. Repeat the operation to add all asm disks and then click OK to save the modifications.12cR1 RAC OEL 7.2Page 50
57. Review the summary of new virtual machine.58. Start the “racnode2” and login as root.12cR1 RAC OEL 7.2Page 51
59. On the top right had side end you would see “Ethernet” setting. Choose one and clickon “Wired Settings”.60. Below is the screen-shot for enp0s3 (Public IP). Click on the right end bottom mark.12cR1 RAC OEL 7.2Page 52
61. Change the Address to “192.168.78.52” for enp0s3.62. In the similar way change the Address to “172.16.100.52” (Private-IP) for enp0s8.12cR1 RAC OEL 7.2Page 53
63. For enp0s9 uncheck “Connect Automatically”64. On terminal as root type “nmtui” (NetworkManager Text User Interface)65. Change the Hostname12cR1 RAC OEL 7.2Page 54
66. Delete the UUID entry for ifcfg-enp0s[389].# sed –i –e ‘/UUID/d’ ifcfg-enp0s[389]12cR1 RAC OEL 7.2Page 55
67. Reboot the server and then verify all the network interfaces are up and ASM devices arevisible.68. Check the firewall status (should be inactive) and stop the DNS.12cR1 RAC OEL 7.2Page 56
69. Delete the “racattack.zone” and “racattack.revzone” from /var/named.70. Edit the “/etc/named.conf” and change .51 to .52 and the end of the file as below.12cR1 RAC OEL 7.2Page 57
71. Review the “/etc/resolv.conf”.72. Start DNS and check the forward and reverse lookup using “nslookup” command.12cR1 RAC OEL 7.2Page 58
73. Check that both the master on racnode1 and slave on racnode2 DNS servers areworking. Run all the below statements to verify correct configuration of both DNSservers :[root@racnode2 ]# dig @racnode1 racnode1.racattack[root@racnode2 ]# dig @racnode1 racnode2.racattack[root@racnode2 ]# dig @racnode1 racnode1-vip.racattack[root@racnode2 ]# dig @racnode1 racnode2-vip.racattack[root@racnode2 ]# dig @racnode1 racnode1-priv.racattack[root@racnode2 ]# dig @racnode1 racnode2-priv.racattack[root@racnode2 ]# dig @racnode1 rac-cluster-scan.racattack[root@racnode2 ]# dig @racnode2 racnode1.racattack[root@racnode2 ]# dig @racnode2 racnode2.racattack[root@racnode2 ]# dig @racnode2 racnode1-vip.racattack[root@racnode2 ]# dig @racnode2 racnode2-vip.racattack[root@racnode2 ]# dig @racnode2 racnode1-priv.racattack[root@racnode2 ]# dig @racnode2 racnode2-priv.racattack[root@racnode2 ]# dig @racnode2 rac-cluster-scan.racattack12cR1 RAC OEL 7.2Page 59
74. When both nodes have started, check they can both ping all the public and private IPaddresses using the following commands.12cR1 RAC OEL 7.2Page 60
75. Install the Grid Infrastructurea. Install the following package for the Oracle Grid media as root user on both the nodes.b. Setup the passwordless ssh for as Oracle user./sshUserSetup.sh –user oracle –hosts “racnode1 racnode2” –noPromptPassphrase –advanced –exverify –logfile /home/oracle/sshsetup.logc. At this point you can run the “runcluvfy.sh” (optional)12cR1 RAC OEL 7.2Page 61
d.Run the Grid Infrastructure runInstaller as Oracle[oracle@racnode1 grid] ./runInstallere. Below are the screen-shots for the configuration.12cR1 RAC OEL 7.2Page 62
12cR1 RAC OEL 7.2Page 63
f. In the SCAN Name box, enter “rac-cluster-scan.racattack”. In the central box,
12.05.2016 · ise-edition/downloads/index.html 1. Complete the Installation of Oracle VM VirtualBox 2. Run VirtualBox