Transcription
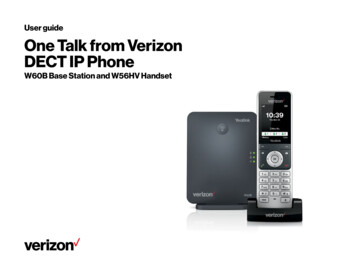
User guideOne Talk from VerizonDECT IP PhoneW60B Base Station and W56HV Handset
User guideTable of contentsWelcome. 6Initial setup. 6Charging the handset battery. 6Setting up the base station. 6Startup. 6Viewing E911 location information. 7Registering handsets. 7Multiple handset and base station support. 7Registering additional handsets . 7Mobile phone numbers . 7De-registering handsets. 7Selecting a base station. 7Renaming a base station. 8Handset user interface. 8Checking system status. 8Base station status. 8Handset status. 8Line status. 8Getting to know your handset. 9Hardware components and shortcut keys. 9Getting to know your base station. 10Hardware components. 10Icon descriptions. 11Understanding the handset LCD screen. 12Customizing your handset. 12Personalizing handset name. 12One Talk—W60B user guidePREVIOUS CONTENTS NEXT2
User guideLanguage preferences. 12Date and time. 12Volume adjustment. 12Ring tone preferences. 12Advisory tone settings. 13Switching silent mode. 13Backlight. 13Screen saver. 14Keypad light. 14Voice mail setup. 14Locking and unlocking keypad. 14Basic Call Features. 15Placing calls. 15Answering and ending calls. 15Redialing last number. 15Muting and un-muting calls. 15Placing calls on hold and resuming calls. 15Moving calls. 15Transferring calls. 15Forwarding calls. 15Conference calling. 16Parking calls. 16Call history.17Viewing call history on your handset.17Adding an entry to the blacklist from call history.17Deleting a single entry from call history.17Deleting all entries in a call history list.17One Talk—W60B user guidePREVIOUS CONTENTS NEXT3
User guidePlacing a call from call history.17Contact management.17Adding contacts to your directory.17Searching for contacts. 18Placing a call from the directory. 18Editing contacts in the directory. 18Deleting contacts. 18Speed dialing. 18Blacklist. 19Shortcuts. 20Other calling features. 20Call waiting. 20Do Not Disturb (DND). 20Anonymous call rejection. 21Placing internal handset intercom calls. 21Troubleshooting.22Base station issues.22Handset status and issues.22Registration issues.22Call issues.22Paging issues.22Audio issues.22Display issues.22Update and reset issues. 23Resetting the system PIN. 23Menu structure. 23One Talk—W60B user guidePREVIOUS CONTENTS NEXT4
User guideImportant customer information.24WEEE warning.24Customer feedback.24GNU GPL information.24Copyright.24Warranty.24Important 911 emergency response information.25Declaration of conformity.25Important safety precautions.25Danger–electric shock and fire. 26One Talk—W60B user guidePREVIOUS CONTENTS NEXT5
User guideWelcomeAC power optionThe Verizon One TalkSM DECT IP Phone W60Bundle gives your business a full-featured,high-performance Session Initiation Protocol(SIP) cordless phone system that integrates withyour smartphones and tablets. The W60B BaseStation can be paired with up to five W56HVHandsets. And because it supports integratedOne Talk service features, it lets your users’mobile devices and cordless handsets worktogether with one number.Setting up the base stationConnect the Ethernet cable from your basestation’s internet port to your Ethernet wall jackor directly into your router port. Next, plug yourbase station’s power adapter into a wall outlet.Be sure to use the Verizon-supplied poweradapter (5V/600 mA). A third-party poweradapter might damage the base station.The base station can be set up on your desktopusing the base stand or mounted on a wall.PoE optionInitial setupMACMACSNIf your W60B Base Station and W56HV Handsetwere not connected and set up by yourIT administrator, verify the following withyour administrator:SNStartupAfter your phone is powered on, the system bootsup and performs the following steps: You have a One Talk number. Your user information has been updated in theOne Talk Admin Portal with your 911 addressand email address. Your number has been included in any businessgroup features.Charging the handset batteryThe handset battery comes partially charged andthe handset should automatically turn on onceyou insert the battery. If the handset doesn’tautomatically turn on, pressto turn it on.To make sure the handset battery gets a fullcharge, plug the charging cradle into a poweroutlet and place the handset in the cradle. Besure to only use the supplied charging-cradlepower adapter (5V/600 mA). With the batterycharged, you’ll be able to use the handset tomonitor the progress of the base stationinitialization and registration process.One Talk—W60B user guideConnect the Ethernet cable from your basestation’s internet port directly into the port ofan IEEE 802.3af–compliant PoE data router.For this option, you don’t need a power adapter,but you do need to make sure your hub/switchis PoE compliant.1. DHCPDesktop setup option2. Automatic phone initializationMACSNMACSN59mmBy default, the phone attempts to contact aDynamic Host Configuration Protocol (DHCP)server in your network to obtain valid IPv4 or IPV6network settings.59mmWall-mount setup optionConnecting the base station to powerand EthernetWhen your One Talk phone is connected to thenetwork and powered on, it will automaticallystart the initialization process. The LCD screendisplays “Initializing, please wait during thisprocess.” The phone finishes the initialization byloading the saved configuration.After starting up and confirming the 911 address,the phone is ready for use.You have the option to power your base stationwith either AC power (wall outlet) or Power overEthernet (PoE). Your system administrator willadvise you which option to use.PREVIOUS CONTENTS NEXT6
User guideViewing E911 location informationEnhanced 911 (E911) is a location technology thatenables emergency responders to know thegeographical location of a caller who dials 911.Your One Talk service administrator will configureyour location using the One Talk Admin Portal.Contact your administrator if your E911 addressis inaccurate or if your phone location changes.To view your 911 address, pressto highlightShow Address and then press4. After the handset finds the base station,press OK.5. Enter the base station PIN (default: 0000) andpress the Done soft key to finish registration.4. From the list of handsets displayed on the LCDscreen, highlight the desired handset nameand press OK.Registering handsetsMultiple handset and base stationsupport5. When the screen prompts “De-registerHandset,” press the Yes soft key to de-registerthe handset or the No soft key to cancel.To use a handset with a specific base station,the handset needs to be registered to that basestation. Additionally, each base station and itsOne Talk phone number must be registered withthe Verizon network.Do the following to register an additional handsetto a base station:1. Hold downLED blinks.on the base station until itsand use or to select2. PressSettings Registration Register Handset.3. Choose the desired base station andpress OK.One Talk—W60B user guide1. Press thenavigation key on the handset toenter the main menu.3. Enter the base station PIN (default: 0000) andpress the Done soft key.Registering additional handsetsDo the following to de-register a handset from abase station:2. Select Settings- Registration- De-reg.Handset., useHandsets included as part of a W60 bundle willalready be registered to the base station includedin that bundle. You can register additionalhandsets to that base station. A single basestation can support up to five handsets. You canalso register a handset to up to two differentbase stations.De-registering handsetsSelecting a base stationTo register a handset to multiple base stations,press the OK navigation key, select Settings Registration Register Handset and repeatsteps 2 through 5 above. Be sure to choose abase station that is not already selected or elseit will overwrite the existing selection.Mobile phone numbersA mobile telephone number can only beregistered to a single base station and a basestation can only support a single mobiletelephone number.Also, a handset can support up to two differentmobile telephone numbers if registered to twodifferent base stations. This gives you the optionto choose which number to use.A handset registered to multiple base stationscan only use one base station at a time. You canchoose to have it automatically select a specificbase station to use or select one that has thestrongest signal.Do the following to select your preference:1. Pressto enter the main menu.2. Select Settings- Registration- Select Base.3. Use or to highlight the desired base stationfrom one of the registered base stations listedor highlight Bestbase (the option for strongestsignal strength) and press the Select soft key.4. After successfully finding and connecting tothe base station, the handset will display “Baseselected successfully!”PREVIOUS CONTENTS NEXT7
User guideRenaming a base stationDo the following to check the base station status:Do the following to rename a base station usingyour handset:1. Press1. Pressto enter the main menu.2. Select Settings- Registration- Select Base.to enter the main menu.2. Select Status- Base.3. The LCD screen will display the base stationstatus information and the Network option.3. Use or to highlight the base station tobe renamed.a. Useor to scroll through and view thestatus information.4. Press the Rename soft key and enter the newname in the Rename field.b. To view the network information, selectNetwork and press the Enter soft key.5. Press the Save soft key to save the basestation’s new name.Note: Pressing thenavigation key lets youenter special characters. Pressingthenavigation key allows you to switch todifferent input modes.Handset user interfaceYou can customize your handset by pressingto enter the main menu. Some configurationoptions are only accessible to the administrator.The default administrator password is “0000”.Checking system statusLine statusPress the Line soft key while the handset is idleto see its status. The LCD screen will display allthe lines currently registered to the base station,using icons to indicate the line status. The currentstatus of the line is visible and displays “Available”next to each line if not in use.Handset statusYou can check the handset status if the handsetdoes not register to a base station. Do thefollowing to check the status: Pressto enter the main menu. Select Status- Handset. When the LCD screen displays the handsetstatus information, use or to scroll throughthe status information.Handset status information includes handsetmodel, hardware version, handset firmwareversion, International Portable User Identity (IPUI)code, subscriber number (SN) code and area.Base station statusUsing a registered handset, you can view thefollowing system status information for yourbase station: IPv4 status or IPv6 status Firmware version MAC address Device certificate status Radio fixed part identity (RFPI) Network informationOne Talk—W60B user guidePREVIOUS CONTENTS NEXT8
User guideGetting to know your handsetHardware components and shortcut keys1234ItemDescriptionEarpiece speakerOutputs call audio through theearpiece when not using thespeakerphone or a headset.Power indicator LEDIndicates the status of phonepower and call status, messagestatus and charging status. Incoming call: flashes red fast Voice mail or missed call:flashes red slow Battery charging: solid redLCD screenLeft dash soft keyDisplays information about calls,messages, soft keys, time, dateand other relevant data, such as: Signal strength Battery status Caller ID Call history Incoming caller information Menus Line statusChecks the line status.6Speakerphone keyAnswers an incoming call inspeakerphone mode and togglesthe speakerphone on and off.7Message keyAccesses missed calls andvoice mails.8Navigation arrow keysNavigates menu options, as wellas the following: Left arrow decreasesringer volume. Right arrow increasesringer volume. Up arrow places an intercom callto other handsets. Down arrow accessescontact directory.9OK keyEnters menu and confirmsmenu actions.10Call keyInitiates and answers calls inearpiece mode. Also lets you viewthe last number dialed and thenredial that number.One Talk—W60B user guide1112DescriptionEnd/power keyAsterisk key1Ends current calls, rejectsincoming calls and lets you returnto a previous menu screen.Also, holding it down powers onor powers off the handset.2Allows you to enter specialcharacters. Additionally, holdingit down for a few secondstoggles the handset in and outof silent mode.3Allows you to switch betweeninput modes.13Pound key14Transfer keyTransfers a call to another party.15Mute keyMutes and unmutes thehandset speaker.Accesses call history.Right dash soft key5Item1617Additionally, holding it down for afew seconds can lock or unlockthe keypad.MicrophonePicks up audio during earpieceand hands-free calls.Headset jackAllows you to plug in a 3.5 mmheadset audio jack.4567891011121314151617PREVIOUS CONTENTS NEXT9
User guideGetting to know your base stationHardware components1234ItemDescriptionPaging/sync key Locates a misplaced handset. Registers a handset Resets the base station tofactory settings.Registration LEDIndicates the mode of thebase station: Fast-flashing green—Basestation is in paging mode. Slow-flashing green—Basestation is in registration mode. Solid green—At least onehandset is registered tobase station. Off—Base station is poweredoff or no handsets areregistered to it.Network status LEDIndicates the network status: Slow flashing green—Networkis unavailable. Solid green—Networkis available. Off—Base station ispowered off.Power indicator LEDIndicates base stationpower status: Slow flashing green—Basestation is undergoing a firmwareupdate process. Solid green—Base station ispowered on. Off—Base station ispowered off.One Talk—W60B user guide1234PREVIOUS CONTENTS NEXT10
User guideIcon descriptionsThe icons described below will appear on thehandset LCD display.Icons1 2 3 4 5DescriptionThe internal registration number of the handsetEarpiece mode onIconsDescriptionCall holdCall muteEarphone mode onConference callSpeaker mode onDo not disturbKeypad lockIntercom callVoice mailShared line is idle.Silent mode onAvailable line idleCall forwardContact iconReceived callsMissed callPlaced callsOne Talk—W60B user guidePREVIOUS CONTENTS NEXT11
User guideUnderstanding the handset LCDscreenCustomizing your handsetPersonalizing handset name411. Pressto enter the main menu and selectSettings- Handset Name.22. Change the name in the Rename field to aname you want.3. Press the Save soft key to save the new name.3Note: Press # to change type case from thesentence-case default to either all uppercase, alllowercase or numbers.Language preferences571. Signal strength, including no reception, weakreception or strong reception (green barsindicate Eco mode ) Useorto adjust the ringer volum
After your phone is powered on, the system boots up and performs the following steps: 1. DHCP By default, the phone attempts to contact a Dynamic Host Configuration Protocol (DHCP) server in your network to obtain valid IPv4 or IPV6 network settings. 2. Automatic phone initialization When your One Talk phone is connected to the
