Transcription
Version 1: Spring '13Database.com WorkbookLast updated: February 15, 2013 Copyright 2000–2013 salesforce.com, inc. All rights reserved. Salesforce.com is a registered trademark of salesforce.com, inc., as are othernames and marks. Other marks appearing herein may be trademarks of their respective owners.
Table of ContentsTable of ContentsAbout the Database.com Workbook.1Database.com Workbook Concepts.2Part 1: Database.com Fundamentals.3Tutorial 1: Creating a Database and Test Database.3Step 1: Log In to Database.com.3Step 2: Create a Test Database.4Step 3: Create an Object to Store Data.6Step 4: Create Custom Fields for the Album Object.7Summary.8Tutorial 2: Using Workbench.8Step 1: Launch Workbench.8Step 2: Insert Data Records with Workbench.9Step 3: Query Data Records with Workbench.10Step 4: Update Data Records with Workbench.12Summary.13Tutorial 3: Creating and Relating Objects.13Step 1: Create and Relate a Detail Object.13Step 2: Insert and Query Detail Object Records.15Step 3: Add a Validation Rule.16Step 4: Test the Validation Rule.17Step 5: Create a Roll-up Summary Field in a Master Object.18Summary.19Tutorial 4: Managing Users, Data Visibility, and Data Sharing.19Step 1: Create a New User and Profile.19Step 2: Toggle Object Visibility.21Step 3: Set Field Level Security.22Step 4: Specify Organization-Wide Default Sharing Rules.22Using Hierarchies.24Summary.24Tutorial 5: Using Workflow Logic.25Step 1: Create a Workflow Rule.25Step 2: Send an Outbound Message.25Step 3: Set Up Network Security.27Step 4: Test the Outbound Messaging.27Summary.29Tutorial 6: Creating and Deploying Change Sets.29Step 1: Connect to the Production Database.29Step 2: Configure a Deployment Connection.29Step 3: Create and Upload an Outbound Change Set.30i
Table of ContentsStep 4: Validate and Deploy Inbound Change Set.31Step 5: Disallow Inbound Changes.32Summary.32Tutorial 7: Using Custom Business Logic and Database Triggers.32Step 1: Create a Trigger.33Step 2: Logically Test the Trigger.34Step 3: Programmatically Test the Trigger.35Step 4: View Recycle Bin Records and Restore Them.36Step 5: Move the Trigger and Unit Tests to Production.37Summary.37Part 2: External Application Integration.38Tutorial: Creating a Java Web Application to Access the Database.38Prerequisites.38Step 1: Configure OAuth on Database.com.38Step 2: Download and Compile the Java Application.39Step 3: Configure and Run the Java Application.40Step 4: Run the Application.41Step 5: Test the Application.41Step 6: Investigate How It Works.44Summary.45Next Steps.46ii
About the Database.com WorkbookAbout the Database.com WorkbookThe Database.com Workbook walks you through creating a database via a series of tutorials. The tutorials are centered aroundbuilding a very simple system for a music store. You’ll start developing the database from basic building blocks; that is, you’llfirst build objects for keeping track of audio tracks, which are the store’s merchandise. You’ll continue by adding securityprofiles and the relationships between the objects, such as a master-detail relationship. Next, you’ll add business logic: validationrules to ensure data integrity, workflow rules to spot unusual conditions, and data sharing settings to control access. Once thedatabase and business logic are complete, you’ll have a complete database system.Each of the tutorials builds on the previous tutorial to advance the database’s development and simultaneously showcase aparticular feature of the platform. It might sound like a lot, but it’s all quite easy—as you’ll soon see.What is Database.com?Database.com is a cloud database that makes it easy to build collaborative, mobile enterprise applications. Secure sharing ofdata is at the heart of collaborative enterprise applications. The sophisticated identity and access management capabilities inDatabase.com ensure that you can get the right data, to the right people, at the right time, with the right access permissions.This workbook is intended to help you explore and learn about some of the unique capabilities of Database.com. Please lookfor other articles and future versions of this workbook which will highlight the Database.com unique social API set and theability to create custom APIs using Apex REST.Tip: You’ll find the latest version of this workbook, as well as snippets of the code that you can easily copy, onlineat: www.database.com/workbook.Intended AudienceThis workbook is intended for experienced developers new to the Database.com platform. The workbook’s code examples arein Java, so familiarity with Java is helpful, though all the programming tasks can also be done with .NET, Ruby, and otherdevelopment tools.Before You BeginThis workbook is designed to be used with a Base Edition organization, or Base org for short. Base orgs are multipurposeenvironments with all of the Database.com features and permissions that allow you to develop and test your database.1.2.3.4.5.In your browser go to www.database.com.Click Signup.Fill in the fields about you and your company.In the Email Address field, make sure to use a public address you can easily check from a Web browser.The Username field is also in the form of an email address, but it does not have to be the same as your actual email address,or even an email that you use. It’s helpful to change the username to something that describes the use of the organization.In this workbook we’ll use admin-user@workbook.db.6. Enter the Captcha words shown.7. Read and then select the checkbox for the Master Subscription Agreement and supplemental terms.8. Click Sign Up.9. After signing up, you’ll be sent an email with a link that you must click to verify your account. Click the link.10. Now supply a password, and a security question and answer.1
About the Database.com WorkbookDatabase.com Workbook ConceptsTo reflect the added functionality provided by metadata-driven features, Database.com uses different terminology comparedto a relational database.Relational Database TermEquivalent Term in ieldRowRecordIn a relational database, tables contain columns (to define the data types) and rows (to store the data). You relate tables toother tables by using primary keys and foreign keys, which map the rows of one table to the rows of another table.In Database.com, an organization is the equivalent of a database, but with built-in user identity, security, and social features.Objects contain fields and records. You relate objects to other objects by using relationship fields, such as lookup relationships andmaster-detail relationships, instead of primary and foreign keys.2
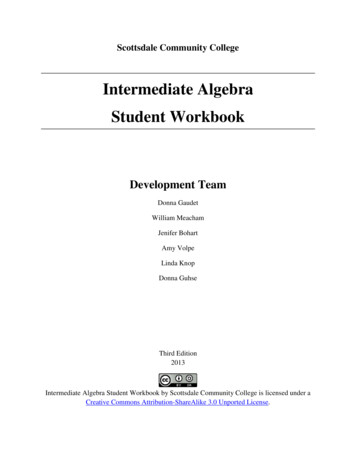
Part 1: Database.com FundamentalsPart 1: Database.com FundamentalsIn this part of the Database.com Workbook, you learn how to create a database, a test database, and objects that store datawithin the database. You’ll also learn how to create and manage users, set up user authentication, write database triggers, andconfigure workflow and data sharing.To show you how the pieces work together, each tutorial builds on the same scenario: managing albums and tracks for anonline music business. You’ll create a simple database that stores album and track data in two related objects. The story unfoldsas you continue working—so let’s begin!Tutorial 1: Creating a Database and Test DatabaseIn this tutorial, you create a database in the cloud. After signing up for Database.com, you’ll get your first look at theDatabase.com Console, and then use it to create both a test database environment for development and an object to store data.Step 1: Log In to Database.comIf you haven’t already created a Database.com organization, do so now by following the procedure at Before You Begin onpage 1.If you’re not already logged in to your production database, log in now.1. Go to login.database.com.2. Enter your user name and password.That’s it—you’re now logged in to your production database. The first thing you’ll see is the System Overview page.3
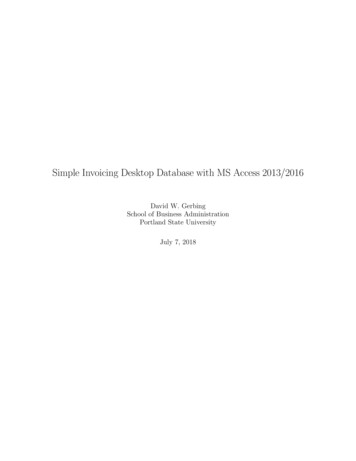
Part 1: Database.com FundamentalsHere’s a quick guide to the System Overview page.1. The primary section provides a dashboard of what’s happening in your database. It provides quick summaries and handylinks to your schema’s objects and storage usage, business logic, such as database triggers and classes, API statistics, andyour users.2. The setup tree menus on the left provide access to the primary aspects of Database.com functionality, as well as administrationconfiguration where you can manage users, data security, logs, and more.3. The right-hand sidebar provides you with helpful links to documentation related to Database.com.You can log in to the production database again at any time by navigating to login.database.com.Step 2: Create a Test DatabaseSeveral databases are necessary during a typical Application Development Life Cycle (ADLC). These are development, test,and production databases. The cycle usually goes something like this:1. Developers make a structural copy of the current production database, load it with a minimal amount of data, and thenuse this as a development database to support new development efforts.2. Once the development iteration completes, Quality Assurance (QA) engineers make a copy of the development databaseand use it to test the latest version of the application.4
Part 1: Database.com Fundamentals3. Once QA testing completes, administrators roll the latest database changes into the production database to support theadded application features.4. The cycle repeats with each development effort.After you sign up and first log in to Database.com, you are automatically working with your production database, also referredto as your production organization. To support the typical ADLC, Database.com allows your organization to create testdatabases.Now create a test database to use in subsequent tutorials in this workbook.1.2.3.4.Click Administration Setup Data Management Test Database.Click New Test Database.For Name, enter Workbook. Ensure that Type is set to QA Database, and accept the defaults for everything else.Click Start Copy.Note: There are two types of test databases. A QA test database is a copy of your current production databaseconfiguration and code, but no data. A staging test database replicates all of your data as well. By default, you cancreate a single test database with Database.com. If you need additional test databases, please contact salesforce.comsupport.Test database creation time varies. You’ll get email from Database.com once the process completes.When Database.com creates a test database, it creates a user in the test database by appending . testdatabasename toyour production database username. For example:Production UsernameWorkbook Test Database db.workbookThe password for the corresponding administrator account in the test database will be the same as it is in production. Onceyou receive an email that the test database is ready, you can use the Database.com Console to connect to the test database.Navigate to the default deployment connection.1. Open a new browser window and load the URL test.database.com.2. Enter the test database username and password, and log in.Once you connect to your test database, look at the top right portion of your screen and confirm that you see an indicator thatyou are using your test database.5
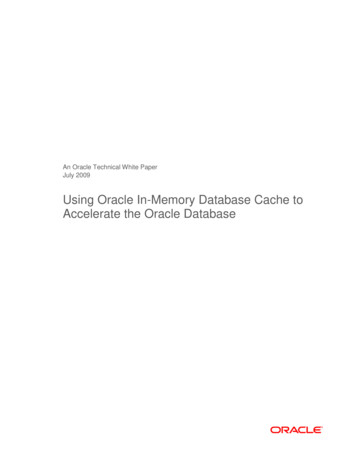
Part 1: Database.com FundamentalsStep 3: Create an Object to Store DataIf you are familiar with relational databases, you’ll understand the concept of tables—structures that store data. A table containsone or more columns (fields) and zero or more rows of data (records).With Database.com, the traditional table data structure is referred to as an object. Every object in Database.com has a fewstandard fields, and can have custom fields that you create to store various types of data (numbers, text, dates, and so on).Create an object in your test organization called Album that will be used to store data about music albums.1. Click App Setup Create Objects.2.3.4.5.6.Click New Custom Object.For Label, type Album, then press TAB to set the Object Name.For Plural Label, type Albums.Select Starts with a vowel sound.For Record Name, type Album Name and set its Data Type to Text.6
Part 1: Database.com Fundamentals7. Leave all other values as they are.8. Click Save to finish creating the object.You now have an object that can store data. The Album object has a field called Album Name that can store text strings andthat you can set.All Database.com objects automatically include an ID field that contains a unique identifier for each record in the object. Thisfield is analogous to a typical primary key in a relational database table. Objects also include other standard fields, such asCreated By, Last Modified By, and Owner. Database.com automatically manages these fields.Step 4: Create Custom Fields for the Album ObjectThe Album object already has an Album Name field. In this step, you add two custom fields to go along with the standardfields that are already in the object.Create the Released On field.1. If you’re not already viewing the Custom Object-Album page, click App Setup Create Objects and then click Albumon the Custom Objects page.2. Scroll down to the Custom Fields & Relationships section.3. Click New to launch the New Custom Field wizard.Notice the many different data types that Database.com supports.4. For this field’s Data Type, select Date, and click Next.5. For Field Label, enter Released On, then press TAB to set the Field Name, and then click Next.6. Click Save to accept the security defaults.Create the Description field.1.2.3.4.5.In the Custom Fields & Relationships section, click New.For Data Type, select Text Area (Long), and click Next.For Field Label, enter Description.For Length, enter 5000.Click Next to accept the remaining defaults, and click Save to accept the security defaults.7
Part 1: Database.com FundamentalsYou now have an object that can store the name, release date, and description of music albums, as well as other standard fielddata such as each data record’s owner—which by default is the user who created the data record. Later on, we’ll add anotherfield to Album called Price and automatically calculate each album’s price based on the aggregate price of individual musictracks.Note: For each object and field in Database.com, there is a label (the name you assigned) and an API name (by default,a system-generated name). The API names for custom objects and fields end with a “ c” suffix to prevent namingconflicts with system objects and fields. Standard fields do not have this suffix. The following tutorials reference theseAPI names when building formulas and coding database triggers.Leave the Database.com Console open so that you can quickly switch back to it in subsequent tutorials.SummaryCongratulations—you’ve created your production and test database environments. You’ve also learned about objects, fields,records, and default values as you created your first object, Album, to store information about music albums.Now let’s learn how to browse and manage data using Workbench.Tutorial 2: Using WorkbenchIn this tutorial, you learn how to manage and query records in Database.com objects using Workbench. Workbench is apowerful, web-based suite of tools that administrators and developers can use to interact with environments built onDatabase.com. You’ll see how you can use Workbench to describe, query, and manipulate database objects. Along the way,you'll learn more about Database.com.Note: Workbench is a free, open source, community-supported tool (see the Help page in Workbench). Salesforce.comprovides a hosted instance of Workbench for demonstration purposes only—salesforce.com recommends that you donot use this hosted instance of Workbench to access data in a production database. If you want to use Workbenchfor your production database, you can download, host, and configure it using your own resources.Step 1: Launch WorkbenchBefore launching Workbench, make sure you are logged in to your test database in only one browser tab.To get started with Workbench, use the hosted version. In a new browser tab, navigate to: workbench.developerforce.com.Once Workbench loads, it presents a login screen. Use this screen to connect to your database.1. For Environment select Sandbox.2. Accept the terms of service and click Login with Salesforce.Once you successfully establish a connection to your test database using Workbench, you land on the Select page, which youcan use to quickly jump to whatever interests you in your database.8
Part 1: Database.com FundamentalsFor example, let’s display summary information about our Album object.1. For Jump to, select Standard & Custom Objects.2. For Object, select Album c, the API name for the Album object.3. Click Select.The Describe page reveals useful metadata that corresponds to the chosen object. Expand the component folders to reviewtheir contents. Attributes displays general information about an object, including its API name.Child Relationships lists information for all related objects, including relationships to system objects.Fields lists information for all standard and custom fields in an object, including each field’s label, API name, and datatype.Record Type Infos is an array of the record types supported by this object. You don’t need access to all the returned recordtypes to see them here. This object contains all of the existing fields of RecordTypeMapping except layoutId andpicklistForRecordType.Step 2: Insert Data Records with WorkbenchYou can use Workbench to insert data into the Album object by creating a few records. To insert the first record, completethe following steps:1. With the Album c object selected on the Standard & Custom Objects page, click data Insert.2. On the Insert page:a. For Object Type, select Album c.b. Select Single Record.c. Click Next.3. On the following Insert page:a.b.c.d.For Description c, enter Great cover art.For Name, enter Who’s Next.Leave OwnerId empty so that Database.com auto-assigns your user Id to this field.For Released On c, enter 1971-08-14.9
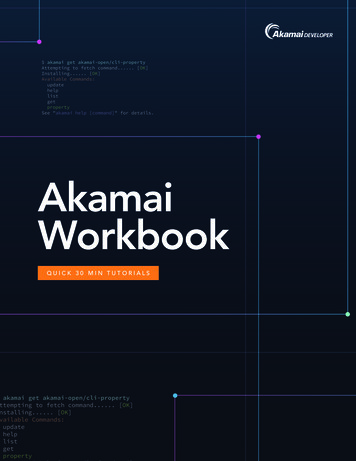
Part 1: Database.com Fundamentalse. Click Confirm Insert.Workbench returns a message upon completion. Your Salesforce Id value will be different than the one shown here.Now repeat these steps to create more records with the following data so that you have some varying data to work with in thenext part of this tutorial.Description cNameReleased On cA classicHelp!1965-08-06Great rock operaThe Wall1979-11-30Step 3: Query Data Records with WorkbenchNow let’s learn how to query Database.com with Workbench to retrieve records in an object. To build your first query, completethe following steps.1. On the Workbench main menu, select queries SOQL Query to display the Query page.2. For Object, select Album c.3. Build a database query by selecting multiple fields in the Fields selection box. You can select more than one field by holdingdown the CTRL key and clicking the field names. For this example, select the following fields and notice how they appearin the query field. IdDescription cNameReleased On c10
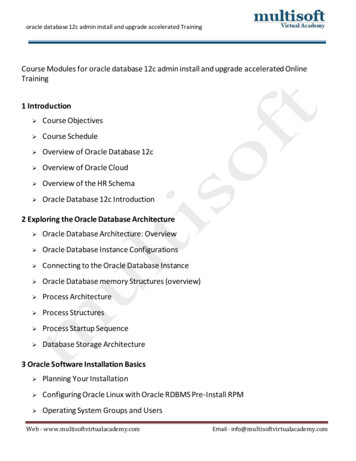
Part 1: Database.com Fundamentals4. Edit the query that Workbench builds to rearrange the order of the columns in the SELECT list. When you are finished,the query resembles the following:SELECT Id, Name, Description c, Released On c FROM Album c5. Click Query to execute the query.Here’s what your query results look like in Workbench (your Ids will be different).The Database.com query language is SOQL. Notice that SOQL is similar to SQL, so getting started with SOQL is easy ifyou already understand SQL.Note: In our scenario, we only have three records in the Album object. When querying larger data sets, considerusing the LIMIT clause in a SELECT statement to limit the number of records in a query’s return set.Now let’s add a few bells and whistles to your first query.1. On the SOQL Query page, the current query should still be present. In Sort results by:, choose Released On c.Your query now looks like the following (reformatted below for readability).SELECT Description c, Id, Name, Released On cFROM Album cORDER BY Released On c ASC NULLS FIRST2. Click Query to run the new query and notice that the query results are now ordered by the Released On c field inascending order.11
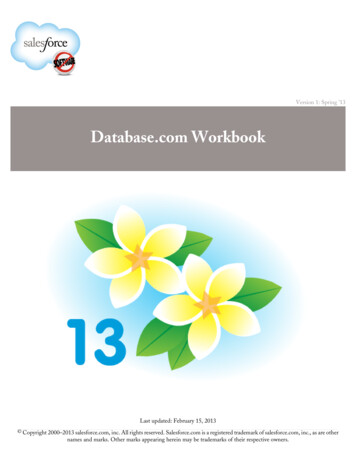
Part 1: Database.com FundamentalsLet’s enhance the query a bit more, so that it shows only specific records that meet a condition. Use Filter results by: to seeif you can build the following query, one that shows albums that were released before 1970–01–01.SELECT Description c, Id, Name, Released On cFROM Album cWHERE Released On c 1970-01-01ORDER BY Released On c ASC NULLS FIRSTWhen you execute the query, you’ll only see one record in the result set, the data record for the album named “Help!” Thedescription for this album can be more helpful (pun intended), and indicate that this particular record corresponds to theNorth American release of the album and not the British release.Next you’ll learn how to update a data record quickly using Workbench.Step 4: Update Data Records with WorkbenchWorkbench makes it easy to manage data records in Database.com. You’ll now use Workbench to improve the album descriptionthat we discovered in the previous step.Picking up from where you left off in the previous step, notice that the Id field for each record in a query’s result set is actuallya hyperlink. If you hover over a link, text appears that provides you with links to Update, Delete, Undelete, or Purge theassociated data record. The View in Salesforce link opens the record in the Database.com console. If you click the Id linkitself, Workbench loads a detail page for the record.In this step, we want to update the record.1. Click the Update link to display the Update page.2. Update the Description c field so that it is North American release.12
Part 1: Database.com Fundamentals3. Once you’ve made the change, click Confirm Update to execute the update.You’ve finished this tutorial! Leave Workbench open so that you can quickly switch back to it in subsequent tutorials.SummaryIn this tutorial, you learned how to work with data in your organization’s data objects using Workbench, an open source toolthat you can use to access Database.com databases. Specifically, you learned how to insert, query, and update records in anobject. In the next lesson, you’ll switch back to the Database.com Console and continue build
Production Username Workbook Test Database Username admin-user@workbook.db admin-user@workbook.db.workbook The password for the corresponding administrator account in the test database will be the same as it is in production. Once you receive an email that the test database is ready, you can use the Database.com Console to connect to the test .