Transcription
Commvault Backup as aService (Fully Managed IaaS)Quick Start Guide4th August 2020
ContentsGetting Started with Commvault .3Step One – Initial application setup. 9Step Two – Configuring your Service Catalog . 11Step Three - Adding your Hypervisor . 15Step Four – Onboarding your first tenant . 17Post Setup. 22Generating your first tenant usage report . 252
Getting Started with CommvaultThis Quick Start Guide will enable you to set up a simple Data Center – Backup as a Service(BaaS) offering and perform data protection, recovery and billing operations.This guide is intended for service providers that provide Fully Managed Infrastructure as aService (IaaS) or consolidate multiple customers onto shared compute infrastructure. If youprovide dedicated resources to customers see – Quick Start Guide (Self-Service) for quick startsetup.The Data Center – Backup as a Service is intended to protect Virtual Machines, Servers and alimited set of applications, located within your data center. There are three (3) Service Levels –Essential, Standard and Premium. This guide will also cover the creation of additional backupcopies (i.e. offsite Disaster Recovery copies).Note: This guide provides a starting point for your BaaS service. You are free to extend or modifyyour service levels in accordance with your customer needs.DATA CENTER BACKUP AS A SERVICE- Application Aware refers to Microsoft Volume Snapshot Service (VSS) supported applications .- Full application agents refers to Commvault Backup agents installed in guest VM or server.- RPO refers to Recovery Point Objective, the frequency by which backups are run.Protected workloads will reside on VMware or Hyper-V hypervisors only, with limited use offilesystem and application agents where customer required.Before you begin, let’s start with a quick understanding of the Commvault components.3
KEY COMPONENTSCommand Center: The Commvault Command Center is the HTML5-based administration portalfor all Commvault operations. Command Center allows you, the MSP to manage your environmentand offer self-service capability to your end-users (tenants).CommServe (CS): The CommServe is the central management component of the datamanagement environment (basically the brain). It coordinates and executes all CommCelloperations, maintaining Microsoft SQL Server databases that contain all configuration, security,and operational history for the Commvault environment.MediaAgent (MA): The MediaAgent is responsible for data movement (Backup and Restore). Itprovides high-performance data movement and manages the data storage libraries. TheCommServe server coordinates MediaAgent tasks. For scalability and resiliency, there can bemore than one MediaAgent in a CommCell environment.Virtual Server Agent (VSA): The Virtual Server Agent is a software module that is installed on acomputer to protect a specific type of data (i.e. A Hypervisor). Different agent software isavailable to manage different data types on a client. Software agents are not required on virtualmachines when using the VSA.Downloading the Commvault SoftwareTo get started, you can download the Commvault software trial before your final account andlicense details are generated. Point your browser at learn.commvault.com/trials and click theSTART YOUR 30-DAY TRIAL BUTTON (link).NOTE: The reason you are asked for contact details is so that Commvault can provide yousupport during your trial. Rest assured Commvault keeps your privacy secure and will not releasethese details or use them for anything other than facilitating your trial support activation (seeCommvault Privacy Policy).Commvault documentation is available at the link below, but this guide Is structured to get youup and running quickly by linking you to the relevant information in Commvault documentation.documentation.commvault.com4
Once you submit your information with the Download my trial button you will receive credentialsto cloud.commvault.com/store where you can download the Commvault Express installer .This small bootstrap installer will be used to quickly download the latest Commvault softwareonto your server (sizing details for your server are included in this guide below).NOTE: The bootstrap installer will need a functioning Internet connection to perform theinstallation. If you do not have an Internet connect, execute the installer on a PC that hasconnectivity and choose Download package to install on a different computer, then copy thefiles to your trial server.See information below to size your environment before beginning your install.For trial assistance, you can: Consult the Trial Quick Start Installation (pdf) Email trials@commvault.com Call Commvault (Telephone-Based Support )ye s yo u c a n c a ll du r i n g yo u r t r i a l se tupYour BaaS environment may range from an initial incubation trial to a planned large-scaleProduction footprint. There are two (2) configurations provided below: Small to minimize your initial costs and infrastructure requirements to get your BaaSplatform running. Use this if your compute platform is new and still growing as well. Large to start with 100TB of client data in an already established compute platform to beprotected.Small Environment Requirements for up to 15 TB of Client DataCommvault recommends you start your CommServe with a system that can handle your initial 6month expected workload, so get started with a virtual or physical server, with: Microsoft Windows Server 2019 (all editions) or 2016 (all editions) 4 CPU/vCPU cores 16GB RAM 100GB Diskspace for CommServe software and MS SQL database ( e.g. E:\)This will handle up to 25 physical servers, 100 virtual machines, and 200 laptops.You will also need at least one Media Agent to perform backup and restoration operations frombackup media (disk, cloud, tape).NOTE: In the Data Center – Backup as a Service (BaaS) catalog all backups are held on diskbased devices in either the Primary or the Secondary data center. If you are implementing aHybrid Cloud BaaS service, head to partners.commvault.com for an equivalent Build Guide forCloud solutions.5
To get started quickly – you can install the Media Agent on your CommServe, you simply need toADD the following components to the specification (above): Your media agent will be performingdata movement, deduplication, and storing index caches. 2 CPU/vCPU cores 16GB RAM 10GB Diskspace in software installation directory (E:\) 200GB Diskspace for storing Job Results (e.g. F:\) 200GB Diskspace for storing Deduplication Database (DDB) (e.g. G:\) 400GB Diskspace for storing Index Cache (e.g. H:\)This will permit protection of 5-15TB of client data before requiring a scaling up of resources.NOTE: Please review the I/O requirements for the Deduplication Database and Index Cache drives(Hardware Specifications ). These I/O requirements are mandatory and directly impact theperformance of your backup solution.Large Environment Requirements for up to 100 TB of Client DataCommvault recommends you start with a system that can handle your initial 6 month expectedworkload, so get started with a virtual or physical server, with : Microsoft Windows Server 2019 (all editions) or 2016 (all editions) 12 CPU/vCPU cores 64 GB RAM 300 GB Disk for Commvault software (E: \), CommServe MS SQL data base (F:\) logs (G:\)This will handle up to 2500 physical servers, 5000 virtual machines, and 10000 laptops.See Hardware Specifications for the CommServe Server You will also need at least one Media Agent to perform backup and restoration operations frombackup media (disk, cloud, tape). Commvault recommends deploying at least two (2) MediaAgents to provide resiliency and continued service when one MA is unavailable (DeduplicationTwo Partitioned Mode )In this configuration you will need to build out two (2) separate (physical or virtual) Media Agentwith the following specs: 12 CPU/vCPU cores 64 GB RAM 400GB Diskspace for Commvault software Job Results (E:\) 1.2TB Diskspace for hosting Deduplication Database (DDB) (F:\) 1TB Diskspace for hosting Index Cache (G:\)6
NOTE: Please review the I/O requirements for the Deduplication Database and Index Cache drives(Hardware Specifications ). These I/O requirements are mandatory and directly impact theperformance of your backup solution.This configuration will permit protection of 160TB of front-end client data before requiring ascaling up of resources.For custom sizing please reach out to your local Commvault account representative.NOTE: Commvault defines a front-end TB (FETB) as a TB of written client data, prior toCommvault compression or deduplication. FETB is measured at the client, before Commvaultmoves it from the client to backup store.Installing the Commvault SoftwareYou may follow the Trial Quick Start Guide for installation instructions. The instructions beloware identical but will continue to build out your services catalog. To get started it isrecommended to have a 100GB dedicated volume (i.e. E:\) to install the Commvault software anddatabase.1.Copy the CommvaultExpress R80 SP19 ddMonthYY.exe file to the CommServe2.Log on as an Administrator (local or domain)3. Execute install file, read EULA, and select I Agree then to continue4. Select Install packages on this computer then to continue5. Change installation path as E:\Program Files\Commvault\Contentstore then tocontinueNote: If you do not have a separate volume you may leave the default installation path on C:\ foryour initial trial deployment.Installation will now begin. As an indicator, installation on an Amazon m5a instance (4 x vCPU,16GB RAM) takes 35 mins to complete. Once complete – click thehttps://commserve/adminconsole URL to launch your default browser and complete initialsetup, and then click Finish to close the installer.NOTE: You have not yet installed SSL certificates in your CommServe, so accept any browserwarnings related to unsecure communications. You can correct this error after install by followingConfiguring Secured Access for Web Applications (Command Center) Creating a default administrator account.After installation, a default CommServe-local Commvault administrator account is automaticallycreated, enter the required information for your Commvault administrator (Note: per-useradministrative accounts are recommended for traceability)7
1.Enter an Email address(NOTE: This will create an account on the Cloud Services website)2.Enter a Password3. Click Create account buttonNote: If you already have a Commvault Cloud Services account, please use your existingusername and password.Your password will need to comply to these conditions: Be at least 8 characters long Include at least one number Include at least one lower-case character Include at least one upper-case character Include at least one special characterOnce the software has registered, you will be redirected to the Commvault Command Center login page. Enter the credentials you used to register the CommCell and click Login.Note: Your username is admin -or- the email address used during registration.The remaining steps will take place in the Commvault Command Center.Click OK to accept the Commvault trial warning.8
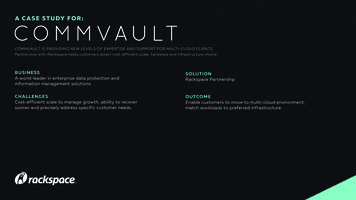
Step One – Initial application setupWhen you log into the Command Center for the first time, a wizard will guide you through theinitial application setup. After you complete this core setup, you can complete quick start setupspecific to the applications you protect (e.g. Hypervisors, Databases). See Completing the CoreSetup Wizard (Command Center) for more detail.Note: It is recommended to have a default backup library ready before commencing applicationsetup. You will need: A local drive (*attached to CommServe) -or- Network Attached Storage (NAS) share foryour backup data with no more than 15TB of client data to protect (Small environments). A dedicated local SSD drive (*attached to CommServe ) with 600GB free size for DDBand Index Cache (see Hardware Requirements )*during initial platform setup below, it is assumed that you only have one data mover orMediaAgent, which is the CommServe itself. As your platform scales the data movement functionwill normally reside on a separate server.Note: Initial setup will define a default server backup plan, this is used to protect yourCommvault infrastructure. You will configure your customer-facing backup plans separately.Performing initial Setup1.Click Let’s get started button2.Add storage by supplying the following information and clicking Save Name: SystemDefault (prefix is used to indicate system usage) MediaAgent: (select your CommServe)9
Type: Select Local or Network Backup location: select/create a folder to store data when it is backed up(e.g. G:\ SystemDefault) Deduplication DB location: select/create a folder to store the DeduplicationDatabase (e.g. F:\ SystemDefault-DDB)3. Create a default server backup plan by supplying the following information and clickingSave Plan name: Default (prefix is used to indicate system usage) Copies (backup copies that will be held)i. Primary SystemDefault 1 Months retention RPO - Runs every 1 Days Start time – 09:00 PMNote: This is a default server backup plan used to protect your Commvault infrastructure. You willconfigure your customer-facing backup plans separatelyYou have now finished initial setup – click Dashboard (left) to view your configured CommCell.Get notified of critical eventsAt a minimum, the platform administrator should be notified of any critical events requiringattention. To provide email server information for Commvault alert delivery, perform the following:1.Click Guided setup menu (left-pane)2.Click Configure email quick task (right)3. Supply your company SMTP server, port and authentication details(if required in your organization)4. Click Test email and confirm you receive the test email (see status in top of window)5. Click SaveCommvault will notify the administrator of critical and anomalous events by default.(Alerts and Notifications – Predefined Alerts )Alternatively, you can forward alerts from the Commvault system to your centralized EventManagement system using SYSLOG or SNMP .Downloading the latest softwareWhile you perform further setup, the Commvault system can download the latest software ontoyour CommServe, from your Guided setup page:1.Click Download/copy software2.Leave default as ‘Download software using – Internet’3. Leave default as ‘Latest hotfixes for the service pack’4. If you have Linux systems to protect, add Unix – Linux X86 64 to your download5. Click the Download button10
The latest software will be useful if you have a need to push application agents to clients to beprotected. This is covered below in Installing Application Agents on Clients (optional).Running your first DR backupWhile the software downloads, let’s run your first Disaster Recovery backup.1.Type Disaster into the top-bar search box, click Manage System Maintenance2.Click the DR backup (Daily) tile3. Click the icon to perform a DR backup to default location C:\DR4. Select Full (default) and Enable database backup compression (default) and click Run job5. Click view job details to monitor backup progress real-time -orType Jobs in left-pane search and select Jobs menu.Configure offsite DR backupsWhen the initial DR backup is complete, it is recommended to navigate back to Manage System Maintenance DR backup (Daily) and click theicon to configure at least one ofthe following: A network share location for the Backup metadata destination Upload backup metadata to Commvault Cloud (recommended) Upload backup metadata to a Cloud library (recommended)Commvault will retain one (1) database copy for FREE in Commvault controlled cloud (Azure).Commvault recommends configuring a Cloud library for retention of at least fourteen (14) days,this allows recovery from an event that may go unnoticed for a period of 1-2 weeks.Step Two – Configuring your Service CatalogThe next step in configuring your multi-tenanted Backup as a Service (BaaS) platform isconfiguring your Service Catalog. Commvault implements your Service Catalog as Plans. A Plandefines what to protect, how often and where to keep backup copies.The table below summarizes the Commvault recommended Data Center Backup as a Service(BaaS) plans for Essential, Standard, and Premium. Essential is the most basic offering withfeatures and monthly cost increasing with each service level.PlansService PlanPrimary copy, RetentionSecondary copyRPOEssentialPrimary-Site1, 15 days-24 HoursStandardPrimary-Site1, 30 days-24 HoursPremiumPrimary-Site1, 15 daysSecondary-Site1, 30 days8 Hours11
Premium-OffsitePrimary-Site1, 15 daysSecondary-Site1 30 days8 HoursStandard-OffsitePrimary-Site1, 30 daysSecondary-Site1, 30 days24 HoursThese Service Plans will be sufficient for protecting your Virtual Machine, Server and Applicationworkloads both on-premises and at remote sites (co-location facilities). Long Term Retentionoptions have been excluded from initial setup.Adding your StorageBefore your service plans can be created, you will need your storage locations provisioned andavailable to Commvault. You will require a Primary storage location in the same data center asthe protected workloads, and another at a Secondary or remote location.These storage locations may be – Cloud , disk , or tape.Adding Disk Storage1.Navigate to Storage Disk menu2.Click Add (right)3. Enter a Name (i.e. Primary-Site1)4. Select the CommServe as the MediaAgent5. Select a Type (Local or Network)6. Provide a Backup Location7.Provide a Deduplication DB location8. Click SaveAdding Cloud Storage1.Navigate to Storage Cloud menu2.Click Add (right)3. Enter a Name (i.e. Secondary-Site1)4. Select a Type (i.e. S3 Compatible Storage)5. Select the CommServe as the MediaAgent6. Enter S3 endpoint hostname/address7.Enter Bucket name to store backup data in8. Provide Credentials9. Provide a Deduplication DB location10. Click SaveCommvault recommends leveraging disk-based libraries for all your data-center BaaS backupcopies and cloud (or tape) libraries for long-term retention or archival data only.Follow the links above for the process to add your Disk and/or Cloud Storage.NOTE: Each Storage location will require an ideally dedicated SSD drive to locate theDeduplication DataBase (DDB) and Index cache data on. The size of the SSD drive is dependent12
on the amount of client data being sent to the Storage Pools, see Hardware Specifications forDeduplication Mode .In the example above, there is a Primary-Site1 disk backup stored locally and a Secondary-Site1cloud copy created for offsite / Disaster Recovery retention.You may now proceed to Plan creation (below).Adding your PlansYou may now configure your Service Plans by performing the following:1.Navigate to Manage Plans2.Click Create plan (right) Server backup3. Supply the Plan name (see table below)4. Click Add to add backup destination copies as required by service (see table below)a.You will need to perform an Add for both your Primary and Secondary copy.5. Set the RPO – Backup Frequency6. Click Save buttonRepeat for each Service Plan detailed (below). Other options may be left as default.Tip: Using a numeric prefix to each plan enables tracking of your services eriodSecondaryCopy1 EssentialPrimaryPrimary-Site11 Months--1 Days2 StandardPrimaryPrimary-Site11 Months--1 DaysSecondaryLocationRetentionRPOPeriod13
3 PremiumPrimaryPrimary-Site115 DaysSecondarySecondarySite11 Months8 Hours4 Standard( Offsite)PrimaryPrimary-Site11 MonthsSecondarySecondarySite11 Months1 Days5 Premium( LTR 1y)1PrimaryPrimary-Site115 DaysSecondarySecondarySite11 Months8 Hours5 Premium( LTR 7y)2PrimaryPrimary-Site115 DaysSecondarySecondarySite11 Months8 Hours1Secondary copy - Extended retention rule: Monthly Fulls, retained for 12 months2Secondary copy - Extended retention rule: Yearly Fulls, retained for 7 yearsExtended retention is configured by enabling the Extended retention rules for a backupdestination and selecting the required backup Type and Retention period (see below)See Plans for more details, including Setting Default Plans for new infrastructure.14
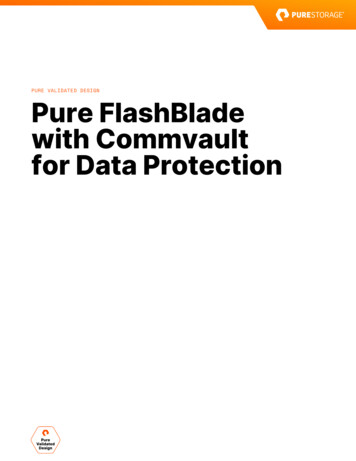
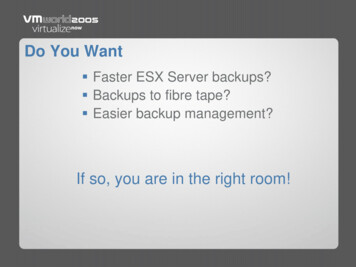
Step Three - Adding your HypervisorNow that you have finished the core setup it’s time to setup for Infrastructure as a Service (IaaS)platform for protection. The following stepswill enable the Virtualization solution andadd your Hypervisor hosts for protection.Note: In this setup, you will be offering FullyManaged Infrastructure, you (the MSP) areresponsible for the virtual machine OperatingSystem (OS) and hosted applications.Restore requests are expected to occur viarequests to your Service Desk, with someself-service options available.To add your Hypervisor for protection:1.Click Guided Setup (left-pane)2.Click Virtualization3. Select vendor either VMware vCenter or Microsoft Hyper-V and supply thefollowing information and click Save Server name (of hypervisor access point) Hypervisor display name (i.e. MSP.IO – Fully Managed Infrastructure) Username (of hypervisor administrator) Password (of suitable administrator account on hypervisor) Access nodes (this is CommServe for initial setup)4. Provide a VM group Name (i.e. Essential VMs) and matching Plan (i.e. 1 Essential), andclick Finish buttona.Select the specific VMs you would like to be protected on this plan(if you have VMs already provisioned)A backup will be started automatically for selected VMs, you will be redirected to the Active jobsmonitor to view the progress. Only the first VM group creation will trigger a backup.TIP: It is recommended that Infrastructure within your Hypervisor platform are grouped (byResource Group, VM Folder) or tagged to identify customer service plan (see below for VMwarevCenter tagging example).If tags or grouping are utilized, Commvault can auto-discover new Virtual Machines and protectthem with appropriate service plan. Where tags are not available, Commvault has a broadselection of metadata to map hosts to a service plan (see Add rule options above).A backup will be initiated immediately after creation of the VM group.15
While the backup is running, navigate to Protect Virtualization VM groups and create the aVM group for each service level (see below)NamePlanEssential VMs1 EssentialStandard VMs2 StandardPremium VMs3 PremiumStandard VMs (with Offsite)4 Standard ( Offsite)Premium VMs (with 1-year LTR)5 Premium ( LTR 1y)1Premium VMs (with 7-year LTR)5 Premium ( LTR 7y)2NOTE: Adding a VM Group via the Protection Virtualization menu will not initiate a backup forevery group. It is recommended a first backup is run for each VM Group once configured.Setting backup typeAfter your first backup is complete, consider reviewing the backup type configured in your VMGroups. You should now create additional VM groups for each serviceConsider a staggered approach: Essential plans receive crash consistent protection only. Standard plans receive file-system application consistent protection Premium plans receive application aware protection (needs service account on host)To configure the backup type:1.Navigate to Protect Virtualization Hypervisors VM Group Configuration TAB2.Click Edit in the Settings tile3. Choose the appropriate backup typeWARNING: Customer self-service new VM restore capability is not available for Fully Managedinfrastructure, full VM recovery to an alternate host will require a Service Desk request.Best PracticesIf utilizing storage array snapshot technology, it is recommended to place Virtual Machine (VMs)in dedicated datastores or volumes aligned to their service level.The reason for consolidating hosts on common service plans is that a storage array snapshot willcapture ALL VMs in each datastore. Co-locating all VMs with common service levels will reducethe size and overall footprint of the storage snapshot.16
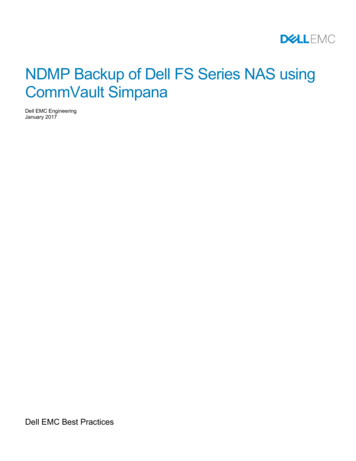
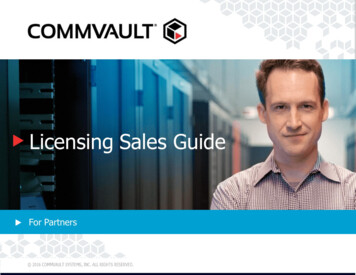
Step Four – Onboarding your first tenantCommvault utilizes a virtual construct called ‘Companies’ to represent a tenant within the sharedCommvault platform. To onboard a new tenant for Backup as a Service (BaaS) you will create a‘Company’ with an associated administrator and users.Creating a companyTo onboard your first tenant, perform the following:1.Navigate to Manage Companies menu2.Click Add company (right)3. Enter the following details and click Save Company name Email (of the tenant administrator) Contact name (of the tenant administrator) Plans (select all service plans tenant can use) Company alias enter a short alias for the tenant Associated SMTP enter the email domain fortenant Send welcome email toggle, leave enabled(default) Ensure Auto discover applications is disabled(default)Application auto-discovery: Auto discover applications will run a scan on all systems within thetenant every twenty-four (24) hours. If a supported application is identified, its Commvaultsoftware agent will be pushed installed on the host. This feature should be disabled, as onlyPremium customers receive application-agent based protection.Tenants are emailed a welcome email and one-time password setup link – if welcome email isenabled. If you will be configuring Single Sign On (SSO) authentication for your tenants, it isrecommended to disable Send welcome email, as the users will use a previously suppliedpassword.You can customize the email template to customize branding and welcome information perCompany – see Adding an Email Template .Enabling tenant solutionsWhen your tenant admin logs into Command Center, they will be prompted to enable protectionfor one or many solutions. Customize which solutions will be displayed, as follows:1.Click the Company name2.Click Edit on Supported solutions General setting3. Enable File server, Virtualization and Databases17
Tailoring the user experienceIn our BaaS solution, you will offer Virtual Machine, File-server and Database backup only. Performthe following to disable the user interface options associated with other data types:1.Navigate to Manage Customization2.Click the Navigation tile, under Navigation preferences3. Uncheck the following menu items that are not required for your Fully Managed IaaSBaaS service, for the Tenant admin, Tenant user, Restricted user columns:a.Guided setupb. Protect – Virtualization – Hypervisors VM Groups, Laptops, Applications (all)c.Activated. Orchestratee.Manage – Plans, Regionsf.Networkg.Web console – My datah.My Apps4. Click the initial landing tab, select Company dashboard for the Tenant admin5. Select Virtual machines for the Tenant user.6. Select Company dashboard for Restricted user7.Click Save, click Yes to confirm save.Note: Be aware these changes affect all tenants that are consuming your service. If you would liketo make changes specific to a Company, use the Navigation preferences tile in the individualcompany.Activating an authcode for client installationCommvault recommends activating Authorization Code(s) or authcode for client registrationfor each tenant. Please see Enabling Authorization Code for a Company to complete this task.Simply toggle the Requires authcode for installation within the Company General settings.Creating a tenant userIn order to validate you company setup, it is useful to have a default company user, to test theuser experience. To create a new local user for your initial tenant:1.Type Users in top-bar search box, choose Manage Security Users shortcut2.Drop-down the Companies list and choose the Company.3. Click Add user (right)4. Leave User Type as Local user5. Enter a Full name, Username, Email6. Select company \Tenant Users as the User Group7.Enter a Password8. Click Save18
You can test this user now – Logout, Login as the new user.Your user will be logged into Protect Virtualization Virtual machines, no infrastructure will belisted as the user has not been assigned self-service privileges.Creating a custom roleIn order to restrict your users and administrators to only perform in-place recovery, you will needto create a custom role. Restricting tenants from out-of-place recovery is important to ensureyou tenants can’t provision new Virtual Machines (VMs) via restore – as this could directly affecttheir monthly invoice.To create the custom role:1.Type Roles in the top-bar search box, choose Manage Security Roles shortcut2.Click Add role (top-right)3. Type VM Owner in the Name field4. Check the Visible to all checkbox5. Select the following permissions and click Savea.Client – Agent Schedulingb. Client – Data Protection/Management Operationsc.Client – Browsed. Client – In Place Recovere.Client – Out-of-Place Recoverf.Client – In Place Full Machine RecoveryOnboarding a Virtual Machine to a tenantNow that you have one or many Companies (i.e. tenants) configured, you can assign protectedVirtual Machines to the appropriate tenant.1.Login as admin to Command Center.2.Click Dashboard (left-pane)3. Click VMs4. Click the Name of the Virtual Machine you want to assign5. Click the Configuration tab6. Click Edit in the Security tile7.Select the Associations tab anda.Assign tenant \Tenant Users group as an VM Owner .8. Select the Owners tab anda.Assign tenant \ Tenant Admins group.Note: There is no method to automatically assign VM owners or permissions. It is the duty of theMSP to perform this action after initial successful b
Virtual Server Agent (VSA): The Virtual Server Agent is a software module that is installed on a computer to protect a specific type of data (i.e. A Hypervisor). . This small bootstrap installer will be used to quickly download the latest Commvault software onto your server (sizing details for your server are included in this guide below).