Transcription
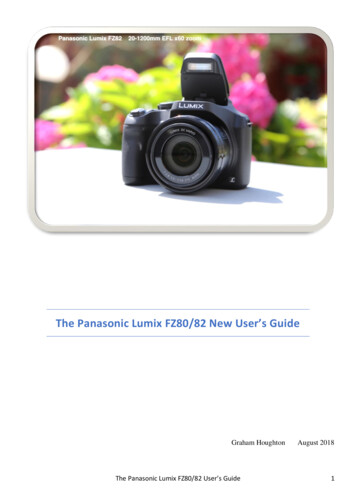
The Panasonic Lumix FZ80/82 New User’s GuideGraham HoughtonThe Panasonic Lumix FZ80/82 User’s GuideAugust 20181
Table of ContentsPreface . 3The iA Intelligent Auto Mode . 5Auto Focus, Face/Eye Detection and Face Recognition . 6Menu Items Adjustable in the iA Mode . 12Taking Images Using the Program Auto Exposure Mode (P) . 13Taking Images Using the Aperture Priority Mode . 14Taking Images Using the Shutter Priority Mode. 15Taking Images Using the Fully Manual Exposure Mode. 16Using the Constant Preview Mode in Manual Mode . 17Assigning One Push AE in the Manual Exposure Mode . 17Setting Up Your Camera to Meet Your Photographic Needs. 18Cursor Button, Menu/Set Button Operation . 18DISP Button Operation . 18Long Exposures – The Undocumented Feature . 18Using Close-up Lenses on the Panasonic Lumix FZ80/82 . 20Using Flash . 21Type of Light Source . 22Using External Flash Units . 25a touch of bounced flash with catch light panel raised to add accent to the eyes. . 26Manual Flash . 28Flash Sync Speed . 29Putting It Altogether, Outdoor Flash . 29Accessories . 31Sample Image Gallery . 32The Panasonic Lumix FZ80/82 User’s Guide2
PrefaceYou don't want excellent pictures from your Panasonic Lumix FZ80/82– you demand outstanding pictures,after all your Panasonic Lumix FZ80/82 is one of the most advanced digital bridge cameras that Panasonichave produced.The Panasonic Lumix FZ80/82 boasts many features like the 18.1 mega- pixel MOS high sensitivity sensor,the 20mm – 1200mm (35mm equivalent) lens, USB charging, 4K shooting and 10 frames per secondshooting mode.The Panasonic Lumix FZ80/82 has enough customisable features to satisfy the most avid of amateurphotographers.This fantastic piece of opto-mechatronics is only let down by the hard to read documentation that comes withthe camera in the form of the basic user’s manual or the advanced guide found when you search for, anddownload, the advanced user guide.You know what you want to find out is in there, however it is so hard to find and you don't know where tostart. Furthermore, the “official” manual doesn't offer very much information regarding the basics of digitalphotography or photography in general.This is where this field guide about the Panasonic Lumix FZ80/82 will help.It explains the purpose of each of the Panasonic Lumix FZ80/82 functions and controls, how you should usethem and, more importantly, why.So, if you can't understand what basic settings to set up your camera with, because you don't understand, forexample, how changing ISO or focus default method will affect your images, then you need this guide.I don't assume any superior knowledge and won't talk down to you, either.This guide isn't packed with pages and pages of check lists on how to take travel picture, wedding pictures,sports pictures etc., but will endeavour to give you the information that you will need to take great images onyour own.The Panasonic Lumix FZ80/82 User’s Guide3
The first step is to familiarise yourself with the camera, the first pages of this guide will ensure you will dothat.As you gain more experience and new skills you'll be eager to know how to improve your exposures, finetune the colour balance and use some of the essential tools of photography such as using the pop upelectronic flash correctly and how to use the camera in a wide range of photographic lighting conditions.The Panasonic Lumix FZ80/82 is not only very easy to use, it's also easy to learn to use as long as you havemy little guide book to help you along the way.The Panasonic Lumix FZ80/82 User’s Guide4
The iA Intelligent Auto ModeThis, fully automatic, mode is recommended for thoseusers new to the camera or simply want to use the camerain a “point and shoot” mode.The camera uses “scene” type recognition and automaticexposure determination to expose the images.By default, the camera is factory set to the more advanced iA mode and is generally the mode that Irecommend new users begin with.It has features which are invaluable when wanting to get great images and video from this camera.The option however to go back to the basic mode is available via the REC set up menu.This advanced mode allows you the user to adjust the exposure (effectively exposure compensation), the hueor tint of the image to apply either a warming or cooling tint to the image and a method to control theamount of foreground to background sharpness (known as depth of field).Begin by rotating the top mode control dial to the iA position, aligning the iA symbol against the whiteindex on the flash head.When you point the camera at the subject the image processor will attempt to determine what type of scenethat the lens is imaging on the sensor.It looks for things colour and light intensity patterns and facial features to set the optimal exposureconditions.You can see the scene type that has been selected by looking at the top left hand side of the LCD (or EVF ifenabled). Initially the icon will be displayed with a blue colour for about two seconds and then will turn red.The possible icons that will appear are;It is advised to check that the scene being captured is correctly interpreted by the camera.Sometimes the scene recognition software incorrectly determines the scene being imaged.If this is the case switch to the SCN scene mode and select the most applicable scene type for the scenebeing photographed.The Panasonic Lumix FZ80/82 User’s Guide5
The LCD screen showing the location of displayed iconsWhen recording video the possible icons that may appear are;Auto Focus, Face/Eye Detection and Face RecognitionWhen shooting in the fully automatic mode iA the camera will select the most appropriate focus method.In this mode, face detection is active (as shown in the image above) and eye detection software attempts tolocate and focus on the eye closest to the camera.Face detection and eye detection in operation on the FZ80/82This eye detection mode is automatic and focusses on the nearest eye to the camera. This method cannot bechanged.The Panasonic Lumix FZ80/82 User’s Guide6
When in this mode the camera adjusts the exposure to give the best image based upon the metering from theface.If face recognition has been turned on and faces have been registered if the camera detects a subject whichhas been previously registered, then an “R” is displayed on the upper right corner of the display.The icon could be the i-Portrait, i-Night Portrait or the i-Baby icon depending upon the subject recognised.If you experience some of your images not being recorded as you saw them at the time of shooting orimages of a similar subject appear to be recorded differently to each other then it is worth having a look athow the iA method recorded them.Panasonic do state that, in some scene types, you should watch the indicated icon when you shoot in thismode and if the wrong scene type is detected then you should select the most appropriate mode from theSCN mode dial setting and menu choice.To see how the image was detected by the camera, with the memory card still inserted in the camera, selectthe green playback button on the back of the camera body.Using the left or right navigation buttons of the 4-way controller scroll through to the image in question.The playback mode selected to display image informationWhen you have selected the image that you want to review you can see how the camera detected the scenetype. In the image above the camera correctly identified that this was a close-up scene and selected the IMacro mode and below it identified the i-Landscape mode setting optimal parameters for this scene.The Panasonic Lumix FZ80/82 User’s Guide7
If the camera doesn’t recognise a scene type, then it reverts to a default setting and determines the exposurewithout adjusting other parameters such as saturation of colour or aperture.no scene type detected here in this image, default parameters appliedA lot of thought has gone into the automatic scene detection algorithms and they are becoming very reliablein selecting the correct scene type for the image being recorded.The Panasonic Lumix FZ80/82 User’s Guide8
If the subject is being photographed where there is light shining behind the subject, which would cause thesubject to be recorded with a dark appearance, the camera applies backlight compensation to lighten therecorded image.The iA mode offers a few more features which I suggest that you experiment with to understand thebenefits of being able to alter the automatically selected parameters.The iA mode adds three additional controls for image adjustment; colour tint, background defocus andbrightness correction.the three additional image adjustment controlsAll three modes can be accessed by either the touch screen interface, touching first the iA tab to fly out theother menu options and then selecting the one to be adjusted.Colour tint can quickly be accessed by using the WB button on the 4-way navigation pad.Brightness can be quickly accessed by pressing in the top control wheel of the camera.Background defocus can be quickly accessed by a double press in of the top control wheel of the camera.All three controls can be applied to an image, if so required.Colour tint allows you to add either a warming or cooling effect to the image if you feel that the Auto WhiteBalance (AWB) has not achieved the image look that you desire.The Panasonic Lumix FZ80/82 User’s Guide9
the colour tint controlOnce accessed the tint can be applied using either the top control wheel, or if youprefer the left or right navigation buttons on the 4-way pad.The image on the LCD, or EVF, shows the change being made. The value will remainset until you turn off the camera or change to another mode.This feature is useful for warming up scenes shot in cloudy, or overcast lighting, as the AWB is the onlywhite balance pre-set available to iA/iA users.the brightness (exposure compensation) controlBrightness control, or as I would prefer to rename it exposure compensation, allows you to change thebrightness of an image if the automatic metering of the camera has over reacted causing light scenes to godark or dark scenes to be light.These scenes are typically those shot in lighting such as in snow or at beach scenes or where there is a largeratio between foreground subject and background.The Panasonic Lumix FZ80/82 User’s Guide10
To correct for these errors in metering this control allows for 3 or – 3, f-stops of exposure compensation in1/3 f-stop increments.Push in the top control wheel to access the control and then use the top control wheel, left or right navigationbuttons on the 4-way navigation buttons or using the touch control to drag the slide bar to change the appliedvalue.The final control, the background defocus, allows you to change the aperture which the camera hasautomatically selected.This automatic value will have been determined by the camera evaluating the image data from the sensor forscene type and both scene brightness and any subject movement occurring in the image.It will select the most appropriate aperture, a small one (usually F8) for landscapes and a large one forportraits (usually F2.8), however, you can over-ride this and select the aperture that you want to use in yourimage.By changing the aperture, you are adjusting the depth of field (DOF) achieved in the image. Large aperturesresult in very small depths of field whilst smaller apertures give larger depths of field.Armed with this knowledge you can achieve the desired look for the background focus by changing thebackground blur.Thus, a subject can be made to stand out in isolation from the background, such as in a flower study orportrait, or you can apply more depth of field when shooting smaller wildlife to ensure as much of thesubject is in focus as possible.the background defocus controlWhilst you can change the aperture (f-stop) value the camera will determine the shutter speed and ISO andthese cannot be adjusted.The Panasonic Lumix FZ80/82 User’s Guide11
Again, the value for the f-stop can be changed with the top control wheel, the left and right navigationbuttons on the 4-way controller or by touching and dragging the f-stop indicator on the touch screen.As you change the aperture you may see the shutter speed change and the image on the LCD or EVF willgive a true indication of the background is being rendered by the lens at the aperture set.If you see the scale has red colouring, then you cannot set the exposure in this range.As these two modes, iA and iA , are especially designed for either new users to the camera or for use insituations where a “point and shoot” mode might be preferred, the amount and degree of exposure parameteradjustment is reduced accordingly.Exposing the new user to the advanced features of the camera would not make for a sensible introduction tophotography with this device.Menu Items Adjustable in the iA ModeIn the (REC) menu:[Photo Style], [Aspect Ratio], [Picture Size], [Quality], [AFS/AFF/AFC], [Burst Rate], [4K PHOTO], [AutoBracket], [Self Timer], [i-Handheld Night Shot], [i-HDR], [Time Lapse Shot], [Stop Motion Animation],[Shutter Type], [Conversion], [Colour Space], [Stabiliser], [Face Recognition.], [Profile Setup]In the (Motion Picture) menu:[Photo Style], [Snap Movie], [Rec Format], [Rec Quality], [AFS/AFF/AFC], [Continuous AF],[Conversion], [Wind Noise Canceller], [Zoom Mic]In the (Custom) menu:[Silent Mode], [Half Press Release], [Pinpoint AF Time], [Pinpoint AF Display], [Focus/Release Priority],[AF MF], [MF Assist], [MF Assist Display], [MF Guide], [Peaking], [Histogram], [Guide Line], [CentreMarker], [Highlight], [Zebra Pattern], [Monochrome Live View], [Constant Preview], [Dial Guide], [LVFDisp.Style], [Monitor Disp. Style], [Monitor Info. Disp.], [Rec Area], [Remaining Disp.], [Auto Review],[Fn Button Set], [Zoom lever], [Lens Position Resume], [Lens Retraction], [Q.MENU], [Video Button],[Touch Settings], [Touch Scroll], [Menu Guide]In the (Setup) menu all the items may be set.The Panasonic Lumix FZ80/82 User’s Guide12
Taking Images Using the Program Auto Exposure Mode (P)In the iA mode we have seen that the camera attempts to recognise a scene type and set exposureparameters which would enhance that mode.In landscape mode, for example, the camera may select a small aperture to increase the depth of fieldrecorded, if the lighting situation allows. It also enhances blues and greens in the subject giving better skyand ground contrast.If we turn the top mode dial to the “P” position we still have automaticcontrol of the exposure being determined by the camera however, scenedetermination is turned off.Using this mode may eliminate some of the incorrectly exposed images thatsometimes happen in the iA mode when scene determination fails to selectthe appropriate type.In this mode, the exposure is determined by the camera metering system and depending upon scenebrightness will set an exposure for this image.Metering can be set to the most appropriate type for the scene being recorded. I will cover metering later inthis guide.The camera will normally select a wide aperture to keep exposure times fast. This is to eliminate, if possible,hand shake and subject motion blur.If you wanted to change this aperture/shutter speed combination to increase depth of field for example byselection a smaller aperture, then this can be achieved using a feature referred to as “program shift”.When you half depress the shutter button to activate focus and metering then as the aperture/shutter speedcombination is being displayed on the LCD screen (in yellow) if you then rotate the back control dial youwill enter this mode.You can adjust the combination of aperture and shutter speed and the aperture will stay locked in at thisvalue until you either turn off the camera or rotate the control wheel until the indication turns off.The camera adjusts exposure by changing the shutter speed. This value of aperture remains in memory evenif you select another mode and then return to the “P” mode.Essentially you have set the camera into “Aperture priority mode”Program shift is indicated by a double headed arrow visible on the lcd screen.When using the longer focal lengths the maximum aperture will only be f5.9 so program shift range islimited to f5.9 to f8. I would not recommend using program shift other than at the lower zoom settings up to50mm where the range will be f3.9 to f8.Program Shift is not available in the following cases:When recording 4K photosWhen recording with [Post Focus]When the ISO sensitivity is set to []The Panasonic Lumix FZ80/82 User’s Guide13
Taking Images Using the Aperture Priority ModeAperture priority is selected by the user when the main exposure driving reason is one of the need for depthof field (DOF). Selecting a wide aperture (like F2.8) produces a shallow depth of field and converselyselecting a small aperture (like F8.0) will give deeper depth of field.Selecting a large aperture, a long focal length and placing the subject close to the camera with the subject farfrom the background is the usual way to produce images with great differentiation of subject frombackground.This can be used to great advantage in portraiture and wildlife.Selecting a large aperture/long focal length for reduced depth of fieldAperture priority is selected by rotating the top mode control dial to the“A” position.Use the back-control wheel to set the aperture.The range of adjustment is from F2.8 to F8.0 at the wide angle (20mm EFL) length setting.As this camera model does not have a constant aperture zoom lens it means that as the zoom length ischanged from wide angle to a telephoto position the minimum aperture will change depending upon thezoom level set. At full zoom of 1200mm EFL the maximum aperture is just f5.9.Focal length2050902004001200Maximum aperture availableF2.8F3.9F4.7F5.5F5.6F5.9The Panasonic Lumix FZ80/82 User’s Guide14
Taking Images Using the Shutter Priority ModeShutter priority mode is usually selected when the main exposure driving reason is one of controlling subjectmotion.By selecting a fast shutter speed (like 1/2000 sec) subject motion may be completely frozen whilstconversely selecting a longer exposure (like 1/8 sec) will allow a degree of subject motion blurring such asyou might see in images of flowing water or clouds streaking across a skyscape image.A longer exposure allows some creative subject motion blurShutter priority is selected by rotating the top mode control dial to the “S”position.Use the back-control wheel to set the shutter speed or the side control wheelThe range of adjustment is from 1 second to 1/16000 sec if the electronicshutter is used and 4 seconds to 1/2000 sec when the mechanical shutter isused.The camera automatically adjusts aperture to give the correct exposure (and possibly ISO if Auto ISO isselected).The Panasonic Lumix FZ80/82 User’s Guide15
Taking Images Using the Fully Manual Exposure ModeManual exposure mode is normally selected when both control of depth of field using the aperture controland subject motion control using the shutter speed is required.Manual mode is selected by rotating the top mode control dial to the “M” position.By using the back-control wheel, you can change the value of the selected control.The range of adjustment is from 1 second to 1/16000 sec if the electronic shutter isused and 4 seconds to 1/2000 sec when the mechanical shutter is used and the aperture can be adjusted fromF2.8 to F8.0 only when using the 20mm EFL zoom position.Exposure is indicated by the exposure meter at the centre, bottom of the LCD display screen.If shutter speed and aperture values have been set for image condition reasons, as mentioned previously,then ISO is used adjust the exposure to give a “0” meter indication.It is important to recognize that this ‘exposure meter’ is an estimate of the exposure recommended by thecamera metering system.The metering mode and subject type will affect the outcome of the image and as such it is import to alsounderstand how and when adjustments should be applied to correct for the situations.For example, it may be necessary to set the exposure meter to read with a few of the indicator bars (whichare 1/3 F-stop increments) on the plus side if shooting scenes where the background has a higher brightnessthan the principal foreground subject.A useful feature now incorporated into the FZ80/82 is the ability to have the ISO adjust automatically togive the correct exposure.This allows you to change camera position without the additional worry of resetting the ISO to give thecorrect exposure. If you have set iISO in the aperture priority mode, then this will become Auto ISO in themanual mode.The camera only supports exposures up to 4 seconds with the mechanical shutter so long night timeexposures are not possible with this camera.The Panasonic Lumix FZ80/82 User’s Guide16
Using the Constant Preview Mode in Manual ModeWhen recording images in the manual mode the image on the LCD screen (or EVF) is automaticallyadjusted by the camera to give an image of ‘normal’ brightness for you to be able to view it.There is however a mode, the “constant preview mode” which can be set which enables you to see the resultof the ISO, aperture and shutter speed combination – a real time view of the depth of field and the affect thatthe shutter speed has on image motion. This mode is set to “ON” in the Custom Set Up menu (spanner C)on page 5/9 under Constant Preview.When this mode is enabled you will see any changes you make to any one of these parameters. This is usefulto be able to preview the effect of changing the controls on your image.The caveats are that if you set ISO to AUTO you will not see any change as the camera will adjust ISOevery time you make a change to aperture or shutter speed and you cannot use this in the pre-burst mode of4K photo mode.If you find this a useful feature when you shoot a lot of the time in the manual exposure mode, then it maybe worth programming a function button to switch on the mode rather than having to go into the menu.Leaving it set to on may cause you to feel nauseous if the shutter speed is set low due to the very slowrefresh rate of the screen and the image motion blur effect.By assigning it to, say, the Fn2 button you can toggle this effect on and off just when you want to see theeffect of changing either the shutter speed or the aperture has on the resulting image.Assigning One Push AE in the Manual Exposure ModeThe Panasonic Lumix FZ80/82 User’s Guide17
Setting Up Your Camera to Meet Your Photographic NeedsEveryone’s preferences will be different as to how to set up the controls of the FZ80/82 to make the cameraideally suited to your style of photography.Panasonic have created several programmable buttons and controls to enable specific adjustments to becreated to meet your needs.In most cases function buttons, can be re-assigned from their default operation to one where you would gaingreater advantage.The Fn2 button is one where you have the greatest degree of freedom as to which function to assign to it.Fn2 by default engages the 4K post focus feature. If you do not use this mode, then reassigning this buttonto a feature that you use more frequently is useful.It maybe that you want to use this button to quickly access the facility to move the AF area and set its size oryou may want to use this button as the switch to a monochrome live view in the EVF.You can also re-map the on screen Fn buttons (Fn4 – Fn8) to provide access to your own controls. Thesehowever are not as accessible as the physical buttons Fn1 – Fn3.These re-assignments are made in the Custom (spanner C) menu under the Fn Button Set option.Cursor Button, Menu/Set Button OperationThe 4-way cursor button is used to navigate through menus, either up/down orleft/right.Selection is made by depressing the Menu/Set button in the middle of the cursorcontrol. When “Cursor Button Lock” is assigned to a FN button it is possible todisable the Menu/Set operation of this button thus preventing changes being made.DISP Button OperationThe DISP (display) button can be used to cycle the content of the LCD or EVF through six different screendisplays for the LCD and four displays for the EVF. Each depress of the button steps the display on by onescreen.The six LCD display screens displayed in the image recording mode;with informationwithout information levelwithout informationImage set up informationwith information levelturned offThe EVF cycles through the first four of these displays, omitting the image set up and blank screens.Long Exposures – The Undocumented FeatureThe Panasonic Lumix FZ80/82 User’s Guide18
The longest exposure available with the FZ80/82 is just 4 seconds. This poses severe limitations for thosewanting to make longer time exposures for scene like cloud scape, silky motion water and waterfalls etc.By using the “Artistic Night Scene” (number 15 of the scene types) it is possible to extend exposures up to60 seconds.Obviously in daylight the light must be reduced by using neutral density filters.These will be of the order of around 10 stops (ND1000) in bright sunshine or the ND2-ND400 variable MDfilter in overcast situations.The ISO is fixed at ISO 80. Begin by using auto focus or manual focus to establish the focal point beforeswitching over to manual focus and then installing the ND filter as the camera may be unable to focus withthis reduced light through the filter.Then set the shutter speed until the exposure meter is reading 0EV. The use of the EV compensation caneffectively change the aperture (within the range available for the zoom setting applied)This video explains the whole process in detail.The Panasonic Lumix FZ80/82 User’s Guide19
Using Close-up Lenses on the Panasonic Lumix FZ80/82Close-up photography can often be very rewarding and opens new ways of being creative.The camera itself will focus to within a few centimetres of the subject.In some instances, this may all you may require. In other situations, like wildlife for example, you may notbe able to get so close to your subject. To overcome this, you need to use a supplemental lens to the maincamera lens.This has the effect of reducing the focus distance of the main lens. (see how close-up lenses work innewsletter week ending xx/xx/2018 for more details).Although it is possible to purchase cheap sets of close-up lenses I do not recommend them as the opticalquality in some cases is quite poor. An achromatic lens is the best solution.These lenses are constructed from two or more elements and reduce colour fringes and edge distortion.The most popular type is the Raynox lens system available in two strengths the M150 and M250. The 250 isquite powerful and more difficult to use and has very shallow depth of field when used at highmagnification. For that reason, I recommend the M150 lens.To establish the working distances of the cameralens and supplementary lens combination I useda simple rig so that I could measure the subjectto the front of the camera lens. I did this a theclosest focus distance and again at the infinityfocus position.I created a simple chart to illustrate the size ofimage versus the zoom setting and focusposition.If you purchase your own lenses it may be worthconstructing your own chart.Zoom Setting in mm (EFL)50At Minimum focus cmsA
The Panasonic Lumix FZ80/82 User's Guide 3 Preface You don't want excellent pictures from your Panasonic Lumix FZ80/82- you demand outstanding pictures, after all your Panasonic Lumix FZ80/82 is one of the most advanced digital bridge cameras that Panasonic