Transcription
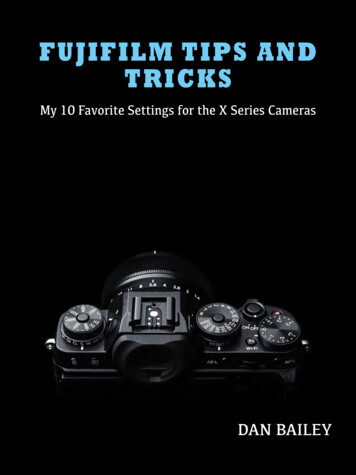
FUJIFILM TIPS ANDTRICKSMy 10 Favorite Settings for the X Series CamerasDAN BAILEY
What is it About These Cameras?I first shot with one of the Fujifilm X cameras back in late 2011, and was instantly hooked.It was the X10, and I fell in love with the form factor, the ergonomic design and the quality and look of the imagery.At that time, I had been a Nikon shooter for over 20 years, but this little camera set meon a path that not only rekindled my love for photography, it ignited a whole new styleof creativity. In more ways than one, moving to Fuji completely transformed my entirecraft.I now use Fujifilm X Series cameras full time in my photography. The irony with all ofthis is that my X-T2 looks and feels a whole lot more like my first Nikon than any of myNikon DLSRs ever did. Also, before I switched to digital, I used Fuji slide film, so in moreways than one, I feel as if I’ve come full circle with my photography and started off in anexciting new direction.I hear similar stories from Fujifilm shooters around the world. There’s something aboutthese little cameras that intrigues us and ignites our passion for photography in a waythat no DSLR could. It’s not just the size, the incredibly sharp lenses, the vintage-stylebodies, or the gorgeous looking imagery, it’s the whole package.X Series cameras represent a perfect blend of engineering, design and color science.The beauty of this combination is that it makes us WANT to hold these cameras in ourhands and take more pictures. What more could you ask?
Fun and PowerfulNot only are the Fuji X Series cameras extremely fun to use, they’re amazingly capabletools that produce professional quality results. They’re also very easy to operate, sincemany of the primary controls are easily accessible via top-deck dials, Fn buttons or QMenu items.While some of the main features are fairly straightforward, these cameras contain anumber of extremely useful and powerful features that may not be apparent to you. Ofcourse, you can find explanations for every single feature in your camera manual, butthat’s not exactly the most engaging read, now is it?With that in mind, I’ve put together this mini-guide to help you get the most out of yourFuji X Series camera. With almost five years of use with Fujifim X cameras and extensiveexperience with a number of models, I’ve gotten to know the system quite well. Duringthat time, I’ve figured out my favorite settings and modes that help me capture the bestimages possible for the style I’m shooting at any given time, and since I love helpingother photographers succeed with their own image making, I’m happy to share themwith you.While the exact specifications vary between the particular models, most of these 10 tipsapply to all of the current Fuji cameras, from the X-T2 and X-Pro 2, all the way down tothe X70. Some of them apply to the X-A(x) models, and with firmware updates, some ofthese settings and modes are even found on older models, like the original X100.Yet another great thing about the Fujis; the lower end models are not “dumbed down”like they are with many other camera systems. Sure, things like AF performance andbuffer size might be different across the range, but with regards to how you shoot andhow your images look, you can expect similar or the exact same results no matter whichmodel you’re using.Again, these are just my own tips. You might have a comletely different shooting style.As you become more familiar with your camera, you’ll come up with your own favoritesettings and methods of configuring the Fn buttons and the Q Menu. I encourage that.In the end, it’s about how your photos look and whether they excite you and your viewers. Cameras are simply tools and these tips are ways to use those tools in order to getthe best results. The more you know your gear, the better photographer you’ll be.I hope these tips help you get there.
1. AutofocusUtilizing a hybrid system that makes use of both contrast and phase detection sensors,as well as intelligent, predictive algorithms, Fuji’s autofocus system is extremely capable.It’s powerful enough to track moving subjects and shoot fast action, even at high framerates. I’m utterly amazed at how fast and accurate the X-T2’s autofocus is! That said,even the X-T1, X-Pro 2 and X-T10 will outperform many DSLRs in this area.In addition to the standard AF-S and AF-C modes, the Fuji cameras have three focusmodes: Single, Zone and Wide/Tracking.Single AFSingle AF is simple- it’s one point that you select from any one of the AF points in yourviewfinder, using the focus point selector on the back of the camera. Most models havea 77-AF point grid; with the X-T2 and X-Pro 2, you can choose 325 or 169 AF points.You can use this mode in either AF-S, if your’re shooting still subjects, or in AF-C, ifyou’re tracking moving subjects. You can change the size of the selected point via therear command dial. When using Single AF in AF-C mode in Continuous High, your gridis limited to the 3x5 area in the center of the frame, which correspond to the 15 PhaseDetect AF points on the sensor. (Both the X-T2 and X-Pro 2, have a Phase Detect grid of169 points in a 13x13 array that covers almost 40% of the frame.I use Single AF mode when I need to be very precise and ensure that the camera isfocusing on the right piece of subject matter. An example would be when focusing onsomething very small inside the viewfinder or something that lacks a significant amountof contrast compared to the rest of the scene.
Zone AFZone AF was added in the 4.0 firmware update and it greatly expanded the focusingcapabilities of the X Series cameras. Instead of a single AF point, Zone AF gives you agroup of points. You can change the size and shape of the group to fit your subject matter, your options being a 3x3, 3x5 or 5x5 grid. With the X-T2 and X-Pro 2, the options area 3x3, 5x5 or 7x7 grid. The 7x7 grid covers nearly 40% of the frame, whch helps it trackmoving subjects all the way across the frame.Once you select the size of your focusing zone, you can move the entire grid around theframe via the focus point selector. The advantage of using Zone AF is that the camerawill automatically choose which AF point or points to use when focusing on your subject,even if your subject is moving. It works in both AF-S mode, for still or slowly movingsubjects, and AF-C mode for subjects that move more quickly.Zone AF is my preferred setting and I keep my my cameras in this mode so that whenI turn them on, I’m ready to shoot a wide variety of subject matter. Zone AF is the mostversatile AF mode because you don’t have to be as precise when you initially select yourfocus point, and it will continue to track subjects as they move across different AF pointsthrough the zone.As with Single AF, when shooting in Continuous High, your zone is limited to the 3x5Phase Detect pixel grid. With the X-T2 and X-Pro 2, you have either a 3x3, 5x5 or 7x7grid in Continuous High.
Wide/Tracking AFThis mode basically drops the AF system into Full Auto. It’s great for complicated scenes,unpredictable subject matter or when you’re shooting multiple moving subjects. If you’reunsure about which focus point to set or if you’d rather not worry about AF and justshoot, Wide Tracking usually does a very good job.Wide/Tracking works in both AF-S and AF-C mode. On Fuji cameras that have Full Automode, like the X-T10 and X70, when you flip that switch, the camera automatically defaults to Wide/Tracking.Face DetectionFace Detection on the X Series cameras works extremely well and I just leave it on all thetime, with the Eye Detection AF setting to Auto. Note, Face Detection doesn’t work inContinuous High, and Eye Detection doesn’t work in AF-C mode.
2. RAW JPEGWe all know how awesome the straight Fuji JPEGs look, that’s one of the main reasonswe love these cameras so much, right? Shooting JPEGs cuts down on your workflow,produces much smaller files, and makes your shooting experience much more simple.With the impressive quality of the X-Trans sensor and Fuji’s image processor, you canpoint, click, and pretty much be sure that you’ve captured a great image.That said, there are some occasions when you want to shoot RAW. As good as thesecameras are, some exposure situations simply have too much contrast for any camera tohandle properly. For maximum control for capturing images in tricky light, you’ll be ableto preserve, rescue and adjust your tones much more effectively by shooting in RAW.The X Series cameras produce incredible RAW files with a tremendous amount of tonalinformation. However, you should know that the unique color profile of your selectedfilm simulations will disappear when you import your photos into Lightroom. By default,Adobe applies its own standard color profile, so if you were specifically going for theVelvia or Astia look, for example, you’ll lose this look when you import the photo intoyour catalog.The way to get around this is to shoot in RAW JPEG and then set Lightroom to importthese types of files as separate images. This is my preferred method. If I’m shooting inRAW with my Fuji cameras, I’m almost always shooting in RAW JPEG so that I can preserve the look of my selected film simulation. Note, if you don’t have Lightroom configured to treat RAW and JPEGs separately, Lightroom will merge your RAW JPEG filestogether as one image and the JPEG will just disappear and be gone forever. It will stillexist on your memory card, but not in your Lightroom catalog.Even if the light was tricky on capture, the JPEG still might look acceptable, and I havethe RAW for insurance, in case I need to make some more radical adjustments. I maynot be able to perfectly replicate the exact look of the film sim, but at least I have thatfor reference. With some images, it doesn’t really matter; I might not have been goingfor a specific film look on capture, I was just trying to shoot a photo with the most detailpossible.
3. Film SimulationsThe built-in film simulations are another thing I love about the Fuji X Series cameras.These special color profiles were engineered to replicate some of the classic Fuji filmsof the 80s and 90s. I started shooting back in the film days, and I actually used Velvia,Provia and Astia on a regular basis. In this way, I’ve come full circle with my photography,because I can now select these looks right in-camera.Velvia was my number one favorite film and it’s my number one favorite film sim.I love the rich color palette and powerful blacks that Velvia gives when shooting landscapes, sunsets, and even broad scenes in midday light. I find that under great light, justabout any kind of outdoor photography works great with Velvia.I shoot all of my aerials many of my outdoor subjects as straight JPEGS in Velvia modeand I absolutely love how they look. If I get the exposure right, I rarely have to do anytweaking in Lightroom or Iridient- they’re already vibrant and wonderfully bold. In thisway, I feel like I’m back to shooting film again. By the way, the name Velvia was originallycreated as a shorted version of “Velvet Media.”VELVIA
VELVIA
VELVIAVELVIAI also love the slightly more subdued look of Astia, and it works much better thanVelvia for shooting overcast scenes and when photographing portraits. I use Astia a lotin my photography.ASTIA
ProNegStd looks great for portraits and I often use it to incorporate a softer colorpalette to my imagery.ProNegStdClassic Chrome, based on a famous non-Fuji film, does an amazing job under overcastskies and in the shade. I use it when I just want something simple and, well “classic.”Classic Chrome has a wonderful quality that blends a high degree of tonality in theshadows and lower contrast in the brighter end of the histogram.Classic Chrome
I also use the various Monochrome simulations, especially when the available light isn’tvery dramatic or if the scene lacks color, like on overcast days or during the middle ofthe day. This gives me a better chance of walking away with a great image, even if theshooting conditions aren’t ideal.The X-T2 and X-Pro 2 both have a new ACROS black and white film sim, and it’s simplygorgeous. ACROS features expanded tonal depth and a more complex grain structurethat looks awesome, even at very high ISO settings.
4. Preview Picture ModeThis very useful setting showed up in a firmware update after the X-T1 had been out forawhile. Found in the Screen Setup Menu, Preview Picture Effect has two options, ONor OFF. The default setting is ON, which allows you to see the scene in your viewfinderwith your currently selected film simulation applied.OFF shows you your scene without the effect of the film sim. This gives you a muchmore accurate view of the world in front of your camera. With the film sim applied, youdon’t always expereince how good the EVF actually is. Looking through the electronicviewfinder with Preview Picture Effect OFF is almost like looking through an opticalviewfinder.This option is extremely useful for situations when you want the most realisim in yourviewfinder, i.e., when photographing night skies or shooting in RAW. Check out this useful setting; it will give you new appreciation for the awesome technology built into thesecameras.5. Preview EXP/WB in manual modeThis preview option, found in the Screen Setup menu, lets you preview exposure andwhite balance changes in your viewfinder. This mode is ON by default, and I like to keepit that way.One of the huge advantages of mirrorless cameras is that you’re able to view real timechanges to your exposure in the LCD and EVF, because you’re drawing the view directlyfrom the sensor. This means what you see on the LCD is EXACTLY what you’ll get whenyou take the photo. In most situations, you’ll WANT to see this stuff, because it removesthe uncertainly, especially when shooting in tricky light.Turning this setting OFF essentially makes your Fuji act more like a DSLR, where whatyou see may NOT be what you get. Unless you like the mystery of tricky exposures, youshould keep this set to EXP/WB ON.
6. AF MFAnother addition that appeared in a recent firmware update, AF MF is a very usefulfeature. By turning this setting ON, you gain a huge perk when focusing: If you keep theshutter pressed halfway down with your finger after autofocusing, you can then turn thefocus ring on your lens and manually fine tune you focus.As good as modern AF systems are, they can be fooled. Say you’re trying to photographa subject that’s situated within dense foliage, like a bird or flower. The camera’s AF mightgrab the branches in front of your subject, but that’s not what you want. With the camera set to AF MF, you can get 90% there with the AF, then go the last 10% by focusingmanually.There are numerous situations where this could come in handy. You should keep thismode ON all the time.
7. MF AssistThe Fuji X series cameras have that wonderfully classic old school vibe, with their retrostyled bodies and compact primes. This often inspires photographers to go out andshoot with a “traditional” mentality.Translation: They’re fun to shoot using manual exposure and manual focus. With theirhigh resolution screens and electronic viewfinders, you get a pretty immersive viewthrough the eyepiece, especially if you’re using one of the EFV models.Turn Preview Picture Mode OFF, and you might even forget that you’re actually lookingthrough a tiny TV screen, especially on the X-T1 and X-T2. The EVF on these modelshave a bigger viewfinder magnification ratio than just about any camera on the market,even most DSLRs.Also, with the right adaptor, you can even use old manual focus lenses from other camera systems with excellent results. Even though I sold all of my Nikon DLSR gear, I keptmy old manual 10mm f/2.5 and 50mm f/1.8 and bought a Nikon to Fuji adaptor.A friend of mine has an old Canon FD 200mm f/4 he uses on his X-T1. Not only is itincredibly sharp, it’s quite small for a 200mm lens. Effectively, this gives him a manualfocus lens 300mm f/4 that’s very compact and a lot of fun to use.It can be hard to focus manually since we don’t have the fresnel/split image focusingscreens that were used in old SLR cameras. Thankfully, mirrorless technology allows forsome very useful tools that help you in this area. The Fuji X Series cameras have threeMF Assist options: Normal, Digital Split Image and Focus Peak Highlight, and the FocusAssist Button/Menu option.NormalThis is the default mode. It’s simply manual focus through the viewfinder, as if you wereusing a standard bright SLR screen. This is the most basic focusing mode, because whatyou see is what you get. If you need help focusing, you can always crank up the brightness level in your EVF or LCD, or turn Picture Preview Effect mode OFF.
Digital Split ImageWith a nod back to the old split image screens found on most SLR cameras, this modedisplays a small black and white split image over the phase detect array in the middleof your viewfinder. This makes it very easy to determine exactly when your subject is infocus. It even replicates the classic fresnel effect when you’re getting close.Focus Peak HighlightAutofocus systems work by detecting edge contrast on your subject matter. When thegreatest amount of contrast is detected, the camera determines that the subject is infocus. Focus Peak Highlight essentially does the same thing for manual focus. It createsa highlight of clearly visible pixels around your edges that adjust in intensity dependingon how close you are to achieveing sharp focus. You can change the color of your peaking highlights, with your choices being white, red and blueBeing the most “digital” of the three modes, Focus Peak Highlight is an acquired tastewith some photographers. While it may be a little distracting at first, once you get usedto it, you’ll see that Focus Peak Highlight works extremely well when you need to focusquickly, and it’s very effective in low light situations. I often use this mode when tryingto focus in dim conditions, and I find the colored modes tend to stand out a little betterthan white.Focus Assist Button and Focus Check Menu OptionThe Focus Assist Button is an essential tool. It is used to both confirm the sharpness ofcaptured images during palybabck and assist when focusing manually by zooming in ona specific area in the frame.By turning on the Focus Check Menu option, the camera automatically zooms in whenyou turn the focusing dial when the Focus Mode selector is set to MF. You can turn thisoption OFF, but I usually leave my cameras set to ON; I figure if I’m manually focusing,I need all the help I can get! For the most “traditional” experience, though, you maywant to turn it OFF.Note: The X-T1 is the only model with a dedicated “Focust Assist” button. To activatethis option on all other X Series cameras, press the rear command dial. Again, use thisto zoom in to 100% so you can check sharpness of images you just shot.
8. Fn Button Settings and Q MenuAll of the X series camera have 7 customizable Fn buttons. (The X70 has 8.) These canbe set to control a wide range of parameters, including Focus area, AF mode, FilmSimulation, White Balance, Face Detection, Self Timer, Movie, Wireless Communication,Image Size, RAW, Preview Picture Effect Mode, and ISO.You can totally customize the operation of your camera according to your personal preference and shooting style. Same goes for the Q Menu, which gives you instant accessto 16 additional options. This means you don’t have to go digging in the menus when aquick shooting situation presents itself, you just hit the Q button to find your setting orclick the corresponding Fn button.To customize the Fn buttons on most X Series cameras you, simply press and hold eachbutton until it brings up the settings box. You can choose whatever setting you want forthat particular Fn button. To customize the Fn buttons on the X-T2 and X-Pro2, you’llneed to go into the Button/Dial Setting in the Set Up (Wrench) menu and select theFn/AE-L/AF-L Button Settings option.To customize the Q Menu, press and hold the button, then scroll to any slot and click tochoose the function for that slot. Again, you’ll set these based on your own style, andyou’ll probably find yourself tweaking them from time to time. Here’s how I have mineset.Fn ButtonsWith most of my Fujis, I always set the 4 Thumb Pad Fn Buttons to AF Area Selection.This gives me the most control for choosing which AF point(s) I’ll use when I’m shooting.That leaves me with at least 3 Fn buttons left. This is where it gets a little tricky, becauseeach camera has a different set of controls on the top deck. For example, the X-T1 andX-Pro 2 have dedicated ISO dials so with those cameras, I don’t need to use up a Fnbutton for ISO.With this in mind, I always set one Fn button to select Film Simulation, and for my nonISO dial bodies, I set one for ISO. For the remaining two or three, I’ll mix it up. Depending on what I’m shooting, my favorite options are AF Mode, RAW (to select RAW JPEG),Preview Picture Effect and Wireless Communication.X-T2 and X-Pro 2 both have the new AF joystick, which opens up those four thumb padbuttons to other settings, although I leave these on the default settings with my X-T2.You can change them out, but I recommend leaving one set to Drive, (DRV) as it hasmultiple fuctions, depending on your current Drive Dial settings.
Q MenuMy Q Menu settings vary beween cameras,but these are the most common settings Ilike to keep active:AF ModeWhite BalanceImage QualtiyImage SizeAdvanced FilterShutter TypeSelf TimerFace DetectionFlash ModeFlash CompensationEVF/LCD BrightnessMovie ModeMF AssistSound and Flash OffH-ToneS-Tone
9. Shutter TypeThe Electronic Shutter (ES) option allows for ultra hight shutter speeds that far exceedwhat the camera’s mechanical shutter is capable of. Another feature that was added in afirmware update, the ES option lets you shoot at speeds up to 1/32,000 sec. This greatlyexpands the versatility of the X Series cameras. With the X-T2 and the Boost Grip, youcan shoot at 14fps in ES mode.Also, since the electronic shutter has no moving parts, it’s completely silent. You canchange the sound of the electronic shutter in the Sound Set-up menu, and you can eventurn it off, which allows you to shoot freely in situations where shutter noise might bea problem. This can be a huge benefit when photographing wildlife, during events orwhen shooting alongside a film crew.Another benefit of the ES is that it doesn’t cause any vibrations in the camera. Eventhough mirrorless cameras don’t have mirrors that move up and down, the shutter canstill cause slight vibration. This can be critical when shooting macro or when using lowshutter speeds.This photo was shot under bright sunlight with an exposure of 1/10,000 sec at f/1.2
Also, since the AF points on mirrorless cameras are positioned right on the sensor, usingthe ES can theoretically give you slight improvement in AF performance when trackingmoving subjects, because the sensor is not temporarily blacked when the shutter fires.However, I haven’t tested this, nor have I seen any tests done with Fuji cameras to confirm, so I don’t know how much AF performance, if any, is gained by using the ES.For all it’s benefits, the ES comes with some important limitations you should be awareof. Number one, setting the camera to ES automatically disables the hot shoe. Thismeans no flash, even if you attach a sync cord or try to use any kind of radio trigger. Thiscan be very frustrating if you don’t know what’s going on.Believe me, the first time this happened, I was trying to do some flash photography andI simply could not get any of my lights to fire, no matter how I configured them. It tookme quite awile to finally trace the problem back to my camera being set to MS ES. Ifyou shoot flash with your Fujis on a regular basis, you’ll probably want to keep your cameras set to MS, depending on your shooting situation.The other main issue is that electronic shutters currently operate as “Rolling Shutters,”which means they scan the scene from top to bottom instead of capturing the entirescene at once. This can produce distortion when trying to photograph subjects thatare moving extremely fast. If you’ve ever tried to shoot a propellor with your iPhone,you know what I mean. The same thing happens when your Fuji is set to ES.“Global” electronic shutters operate by scanning the entire scene, which prevents thesekinds of artifacts and distortion. They’re drastically more expensive, which is why thesetypes of shutters are currently not used in mass produced cameras. As technology comesdown in price, perhaps we’ll see them incorporated into cameras like the X Series modelin the future.
10. T ModeThis is one of the hidden gems in the Fuji cameras. All of the X Series models have a “T”setting on the shutter speed dial, located between “1” and “B.” By setting the shutterdial to T, you gain full control of all shutter speeds via the front or rear command dialdepending on which dial you have set to control shutter speed.With the first generation of X Series, T Mode only allowed you to set speeds between2-30 seconds. The firmware 4.0 update changed this so that in T mode, you can now usethe command dial to set any shutter speed. Combine this with Electronic Shutter (ES)menu option and you can use the dial to select any exposure time between 1/32,000sec and 30 seconds.T Mode is AWESOME, because it speeds things up dramatically. You can shoot in Manual or Shutter Priority mode without having to mess with the shutter speed dial. Withthe lens set to “A,” you’re in Shutter Priority; when you’re manually selecting apertureon the lens, you’re in Manual.With your left hand on the aperture ring and your right finger on the command dial, Tmode makes shooting in Manual mode a breeze. It’s even fast enough to shoot actionand fast breaking scenes in tricky light.Add the Histogram to your viewfinder, turn Preview Manual Exposure/WB ON in theScreen Setup menu, and you speed things up even more, because you’ll be able to seethe effects of your exposure adjustments in real time. And since we’re talking about theScreen Set-up menu, I like to add the Virtual Horizon Level to my viewfinder as well. Itlooks a bit intrusive at first, but it’s an easy way to make sure your pictures come outstraight.
Bonus TipPerhaps what I love most about the Fuji X Series cameras is that they have such a high“fun factor.” They add tremendous joy to both the physical aspect and technical craftof photography. In my view, photography is a form of personal creative expression, soit should be fun. To me, there’s nothing more fulfilling than being outside and exploringthe world with my camera, and nothing is going to help drive my creativity further thanhaving equipment I truly enjoy using.This is what attracted me to the X Series cameras in the first place, and it’s one of themain reasons I switched from using DSLRs. It wasn’t entirely about not wanting to carryheavy cameras anymore. Fuji cameras rekindled my love for photography. After almostfive years, that feeling is still going strong. I hope it’s that way with you.So in the spirit of fun, here’s my bonus tip: Miniature Mode. In case you haven’t foundthis setting yet, it’s the second option in the Advanced Filter menu. Just below “ToyCamera,” which is another good one, Miniature Mode breaks the frame up into threesections horizontally, and whatever part of the frame you focus on stays sharp while theother two thirds of the frame get blurred out. Basically, it recreates the look of a tilt lens.I love shooting in Miniature Mode and I’ve used it for a variety of subject matter. I especially love it for photographing dreamy landscapes and forest scenes. Sometimes whenI’m struggling with how to shoot a particular scene, I’ll switch to this mode and see whathappens. More often than not, the results are pretty .I’ll say it again. pretty fun.
Final ThoughtsI hope this mini-guide encourages you to explore all the features the X Series camerashave to offer. Feel free to contact me if you have any questions about shooting withthese cameras, or if you have any questions about photography in general. I’m alwayshappy to connect with other photographers and give recommendations about gear orshooting methods.Email through my website is fine, but you might get a quicker response from me onInstagram, Twitter or Facebook.Thank for reading and thanks for singing up for my newsletter. I hope the content I shareeach month helps you in your photographic journey.-Dan Bailey
About The AuthorDan Bailey has been a full time adventure, outdoor and travel photographer since1996. His immersive, first person style of shooting often places him right alongsidehis subjects as he documents the unfolding scene and searches for the perfect convergence of light, background and moment.He has written six eBooks and two print books: Outdoor Action and AdventurePhotography, published by Focal Press, and Adventure Photography, a FalconGuides title co-published by Backpacker Magazine. His blog was recently rated asone of the Top 100 Photography Blogs on the Planet.An official Fujifilm X-Photographer, Dan’s client list includes Outdoor PhotographerMagazine, Alaska Airlines, Salsa Cycles, National Geographic Adventure, Outside,Patagonia, Outdoor Research, Backpacker Magazine and Coleman. He regularlygives photo presentations and leads photography workshops throughout the year.Dan currently lives in Anchorage, Alaska, where he spends his free time exploringgravel bars in his little yellow Cessna, hiking and skiing in the mountains and touringon his mountain bike.Visit his website at danbaileyphoto.com
ways than one, I feel as if I've come full circle with my photography and started off in an exciting new direction. I hear similar stories from Fujifilm shooters around the world. There's something about these little cameras that intrigues us and ignites our passion for photography in a way that no DSLR could.
