Transcription
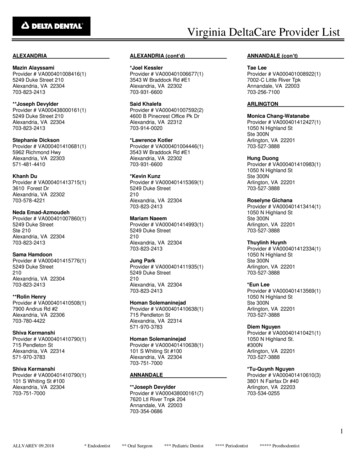
DOC - 0000Effective Date: 5/1/2018Quick Guide onFDR Go Plus MobileSystemPage 1 of 13PurposeThe document is a review of the basic operations of the FDR Go Plus system.FPD LocK LeverFlat Panel Detector LockThe detectors can be locked in the storage bin during periods of inactivity.1) Locking the Detectorsa) Place the detector in the assigned storage bin.i) Rear Slot: 24 x 30 cmii) Middle Slot: 14 x 17 Inchesb) Move the Lever to the forward position. The bolt will slide forward,locking the detectors in place.c) Manual release of the detector lock is not possible.d) FPdLoc displays on the X-ray Control Panel when the locking mechanismis activated.2) Unlocking the Detectorsa) Depress the Registration Key and the assigned Password Numberat the same time.b) FPdLoc will disappear from the X-ray Control Panel and thelocking mechanism will retract, releasing the detectors.c) Depressing the Password Number key first and then the Registrationkey will cause failure of the detector lock. The detector lock will not retract.Start-Up Procedure1) Unplug the FDR Go Plus unit from the wall outleta) All status indictor lights on the X-ray Control Panel will turn OFF.2) Turn the Power Switch to the ON positiona) The Battery indicator on the X-ray Control Panel will activate.3) PID Securitya) If PID security is activated, enter the Password.b) Upon successful entry, the start-up process will continue.The system locks are released and the unit is ready for travel.Confidential and Proprietary Information -- Use, Duplicationor Distribution of this document without permission fromFUJIFILM Medical Systems U.S.A., Inc., is strictly prohibited.Battery LevelFUJIFILM Medical Systems U.S.A., Inc.419 West Avenue Stamford, CT 06902(800) 431-1850 Fax (203) 351-4713
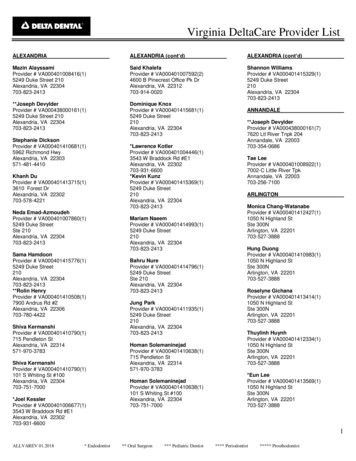
DOC - 0000Effective Date: 5/1/2018Quick Guide onFDR Go Plus MobileSystemPage 2 of 13Status Indicator4) Depress the DR Buttona) The DR Button will turn Blue when activated.b) The FDX Console software will automatically start.c) If security is activated, enter the Username and Password.d) The Status indicator lamp will illuminate when startup is complete.DR Button5) Tube WarmupTube warmup is a recommended procedure.a) Refer to Tube Warm-up procedure referenced in this document.Workflow1) Workflowa) Register a Patient study from the RIS screen.b) Select the required Exposure menu. The KV and mAs valueswill register on the X-ray Control panel.c) Prep for Exposure(1) X-Ray Prep:(a) Depress the Hand Switch to the first level.(i) The Blue flashing indicators on the X-ray Control Panel,Tube Column and Hand Switch will turn Green.(b) Ensure the Exposure Ready light is Green.d) Complete the Exposure(1) Depress the Hand Switch to the Final Level.(a) At the time of exposure, the X-Ray Exposure Lampwill illuminate and a beep will be heard.(b) The KV & mAs indicators will blink for (5) seconds.(c) The Dose value will display on the X-ray Control Panel.e) Study Completion and Distribution(1) Select the Exam Complete button to send the study to PACSConfidential and Proprietary Information -- Use, Duplicationor Distribution of this document without permission fromFUJIFILM Medical Systems U.S.A., Inc., is strictly prohibited.FUJIFILM Medical Systems U.S.A., Inc.419 West Avenue Stamford, CT 06902(800) 431-1850 Fax (203) 351-4713
Quick Guide onFDR Go Plus MobileSystemDOC - 0000Effective Date: 5/1/2018Page 3 of 13Shutdown Procedure1) Shut Down the FDX Console softwarea) The DR Button will turn OFF when the shutdown process is complete.b) Turn the Power switch to the OFF position and plug in the unit.c) System charging will initiate based on charging requirements.Charging Procedures1) FDR Go Plus ChargingThis section is a review of the available charging options.a) Automatic ChargingWhen the unit is connected to a wall outlet with the Key Switch setto the ON position, automatic charging of the system will occur.(1) Procedure:(a) Plug the unit into a wall outlet.(b) Automatic charging will start at the programmed time.(c) System charging is indicated by blinking charging indicatorson the tube column.(d) The battery indicator on the X-ray Control Panel will cyclebetween 1 & 5 bars until 90% charge level has been reached.Charging Indicatorb) Manual ChargingThis procedure is the most efficient method to restore the system to full charge.(1) Procedure:(a) Shut down the FDX Console and wait for the DR Button to turn OFF.(b) Set the Power switch to the OFF position.(c) Connect the unit to a wall outlet.(d) When charging is required, the following activity will occur:(i) Blue Status Indicators on the X-ray Control Panel and tubecolumn will start to blink.(ii) The Battery Indicator will continually cycle between 1 & 5 bars.(e) When the charge level of 90% or greater has been reached,the Battery level indicator will display (5) solid bars.Confidential and Proprietary Information -- Use, Duplicationor Distribution of this document without permission fromFUJIFILM Medical Systems U.S.A., Inc., is strictly prohibited.Battery Charge Level90% or higherFUJIFILM Medical Systems U.S.A., Inc.419 West Avenue Stamford, CT 06902(800) 431-1850 Fax (203) 351-4713
DOC - 0000Effective Date: 5/1/2018Quick Guide onFDR Go Plus MobileSystemPage 4 of 132) DEVO II Detector Battery ChargingDetector batteries can be charged with a dedicated Battery Chargeror Docking Station.(1) Battery Charger(a) Insert the Battery into the charger.(b) If properly inserted, the battery charging indicatorswill turn green.(c) Charging Indicators:(i) Charging: Green status lights continually blink.(ii) Charged: (3) solid status lights are displayed.(2) Docking Station(a) Refer to the documentation supplied with the equipment.3) FDR Go Plus Charged Level Indicatorsa) Low Charge indicator(1) The CHRG (Low Battery Notification Lamp) will startto blink when the battery indicator is on the last bar.b) Charge Indicator (90%)(1) Battery Indicator displays (5) solid bars, indicating thebattery is 90% charged or higher.(2) All blinking status indicators are OFF.c) Full Charge Indicator (100%)(1) The Charging Lamp illuminates when the batterycharge level reaches 100%.d) No System Charge (Battery charge level displays no bars)If there are no visible battery level indicators, a Full systemcharge is recommended.The charging durations are as follows:(1) 5 hours 90% charge.(2) 8 Hours 100% charge.(3) Charging automatically stops after 10 continuous hours.Confidential and Proprietary Information -- Use, Duplicationor Distribution of this document without permission fromFUJIFILM Medical Systems U.S.A., Inc., is strictly prohibited.FUJIFILM Medical Systems U.S.A., Inc.419 West Avenue Stamford, CT 06902(800) 431-1850 Fax (203) 351-4713
Quick Guide onFDR Go Plus MobileSystemDOC - 0000Effective Date: 5/1/2018Page 5 of 134) Additional Radiography FunctionAfter the battery indicator stops blinking, if additional radiography is needed,approximately 10 more exposures are possible when radiography parametersare set to General Chest Radiography.1) Procedure:a) Turn the Key Switch to the OFF position.b) Turn the Key Switch back to the ON position while pressingthe User Setting button.c) When the LED is blinking on the battery indicator, Low BatteryRadiography is possible.d) When the system is charged and restarted, automatic connectionto the primary battery will occur.5) Auto-Power-off FunctionWhen the key switch is left in the ON position, the Auto-Power-Off function shutsdown several system components after a period of inactivity, conserving battery power.1) Process:a) When Auto-Power Off is initiated, [at]-[off] will display on the X-ray Control Paneluntil the shutdown process is complete.b) The status indicator lamp on the X-ray Control Panel and the status lights on the tubecolumn slowly light up blue, indicating the system is partially shut down.c) The battery indicator lamp on the X-ray Control Panel will be dim, no bars visible.6) Wake the system from the Auto-Power-Off StateThe Auto Power Off function results in a partial shutdown of system components.The unit can be restored to active status by activating one of the locking devicesor using the Key Switch.1) Activation options:Activation of the locks is accomplished by touching the designated Release locks.a) Brake Release Bar (Drive Handle).b) Arm Lock Release (Collimator).c) Collimator Release (Grip Handle).d) Arm Lock Release Lever.2)Key Switcha) Cycle the Key Switch between the ON and OFF positions.Confidential and Proprietary Information -- Use, Duplicationor Distribution of this document without permission fromFUJIFILM Medical Systems U.S.A., Inc., is strictly prohibited.FUJIFILM Medical Systems U.S.A., Inc.419 West Avenue Stamford, CT 06902(800) 431-1850 Fax (203) 351-4713
DOC - 0000Effective Date: 5/1/2018Quick Guide onFDR Go Plus MobileSystemPage 6 of 137) DR Long Time Radiography ModeUsing this option, techniques can be adjusted above the programmed range.a) Select a registered Exposure menu.b) Select and hold the mAs button for (3) continuous seconds.DR Long Time Radiography Mode is activated when the LED illuminates.c)d)e)f)Set the preferred KV and mAs parameters.Maximum available mAs: 320 mAs @ 40-65 KV.Maximum KV: 133KV @ 140 mAs.When registering a new menu, the DR Long Time Radiography Mode is disabled.The Green LED button is dim.8) Cassette Radiography ModeThis option is used to activate CR Cassette Radiography.1) Depress the Cassette Radiography Mode button for (3) seconds.The LED on the Cassette Radiography mode button illuminates andthe system switches to Cassette Radiography mode.2) The following tabs automatically highlight:a)b)c)d)40 KV @ 0.32 mAs (default KV & mAs display)Small Focal SpotCassette Radiography ModeKey Pad # 1.c. Small Focal Spota. KV & mAsd. Keypad #1c. CR Radiography modeConfidential and Proprietary Information -- Use, Duplicationor Distribution of this document without permission fromFUJIFILM Medical Systems U.S.A., Inc., is strictly prohibited.FUJIFILM Medical Systems U.S.A., Inc.419 West Avenue Stamford, CT 06902(800) 431-1850 Fax (203) 351-4713
DOC - 0000Effective Date: 5/1/2018Quick Guide onFDR Go Plus MobileSystemPage 7 of 133) Adjust the KV & mAs parameters.4) Prep and complete the exposure.5) The system will return to normal operating mode upon selection of anExposure menu. The Green LED indicator will dim.9) System Travel ( Loss of Power)When system power is not available, system locks do not activate.In order to move the unit, the following procedure is required.1) Procedure:a) Press the Emergency Stop Button.b) Press and hold the Emergency Release button.c) The unit can be safely moved by grasping the hand grip.d) When the Emergency Release button is released, systemlocks will activate, restricting movement of the system.restriEmergencyRelease10) Obstruction DetectorIf the Obstruction Detector is damaged, the obstruction detection functionmay remain ON (activated), restricting system movement.1) Procedure:a) Turn the key to the OFF position.b) Turn the key switch back to the ON while pressing thecollimator lamp button.c) Continue to press the collimator lamp until the systemstarts up and emits a sound.d) The obstruction detector cancel function is disabled when thekey switch is turned to the OFF position.11) TUBE Warm-Up Procedurea) Switch the system to Cassette Radiography Mode by holding downthe cassette radiography mode button until the green LEDilluminates.b) Press the Zero [0] button on the numeric keypad until the greenLED illuminates. The system will switch to Tube Warm-up mode.c) Tube Warmup Display:i) 50 - N1(1) 50: Initial KV displayii) N1: Determines the number of exposures.This is the default value when using Tube Warm-Up Procedure 1.Confidential and Proprietary Information -- Use, Duplicationor Distribution of this document without permission fromFUJIFILM Medical Systems U.S.A., Inc., is strictly prohibited.FUJIFILM Medical Systems U.S.A., Inc.419 West Avenue Stamford, CT 06902(800) 431-1850 Fax (203) 351-4713
Quick Guide onFDR Go Plus MobileSystemd) [tUbeUP]a) System is configured for Tube Warm-up modee) CR Radiography Mode Button: Activef) Zero [0] button: ActiveDOC - 0000Effective Date: 5/1/2018Page 8 of 13d. Tube Warm-up mode: Activatedf. Zero Buttone. CR Radiography Modeg) Tube Warm-Up Procedure 1:When completing daily tube warm-up, Tube Warm-up Procedure 1 is therequired warm-up protocol.Warmup exposures are taken until the KV for typical first exposure of theday is reached.h) Tube Warm-up Protocol:a) Close the collimator blades.b) Set the KV to 80.c) mAs: N1 ( do not modify)d) Make the 1st exposure.i) The KV display will blink for a few seconds and change to 90 KV.ii) Wait 60 seconds between exposures.e) Repeat the process until the desired KV is reached.f) Exit the tube warmup mode by pressing a Keypad number between [1] and [9].g) The [tUbeUP] is cleared from the console display and the systemswitches to Cassette Radiography mode.h) Registering a menu will return the system to normal DR mode.Confidential and Proprietary Information -- Use, Duplicationor Distribution of this document without permission fromFUJIFILM Medical Systems U.S.A., Inc., is strictly prohibited.FUJIFILM Medical Systems U.S.A., Inc.419 West Avenue Stamford, CT 06902(800) 431-1850 Fax (203) 351-4713
Quick Guide onFDR Go Plus MobileSystemDOC - 0000Effective Date: 5/1/2018Page 9 of 1312) Dose Reduction ConceptsMinimizing Dose requires evaluation of pre-exposure technical parametersand post exposure results.1) Smart QAa) Automatic exposure alerts for examinations with reference valuesoutside of the programmed range2) “S” Value and Exposure Index Reference Chartsa) Use the reference ranges to adjust KV and mAs values to an optimal range3) ALARA: As Low As Reasonable Achievable4) Image Gently: Pediatric Dose Reduction Program5) Image Wisely: Adult Dose Reduction Program13) X-ray Control PanelConfidential and Proprietary Information -- Use, Duplicationor Distribution of this document without permission fromFUJIFILM Medical Systems U.S.A., Inc., is strictly prohibited.FUJIFILM Medical Systems U.S.A., Inc.419 West Avenue Stamford, CT 06902(800) 431-1850 Fax (203) 351-4713
Quick Guide onFDR Go Plus MobileSystemDOC - 0000Effective Date: 5/1/2018Page 10 of 13Illuminates when system is ready for X-rayRadiography Ready Indicator Lamp 3X-Ray Irradiation Indicator Lamp This button will flash at the time of exposure4Warning Indicator Lamp 5Malfunction Indicator Lamp Illuminates when the system does notfunction correctly.Red warning indicator displays on consoleIlluminates if system malfunctions6Focus Mode Button Focal spot size controlled by exposure menuLarge Focus: LED OffSmall Focus: LED Illuminated7Display for Dose and otherinformation8Information Button Displays Dose value after each exposureDisplays User Setting optionsDisplays info based on selected functionsDisplays APR Code for the active menuPress to view all User Setting options9KV Display/Tube VoltageAdjust KV parametersAdjusts User Setting default parameters10mAs Display/Current-Time ProductButton11Collimator Lamp Button 12Travelling Warning Sound Button 13DR Long Time Radiography ModeButton Switches system to DR Long time mode(LED Illuminated) Normal Mode( Not Illuminated)1Standby Indicator Lamp2Confidential and Proprietary Information -- Use, Duplicationor Distribution of this document without permission fromFUJIFILM Medical Systems U.S.A., Inc., is strictly prohibited.Activates during system PrepAdjust mAs valuesAdjusts User Setting parametersDisplays Error CodesSwitches collimation Lamp On or OFFUsed is combination with the Key switch toactivate the Obstruction Detector CancelFunctionUsed to set the volume of the sound emittedduring x-ray exposure or when radiographypreparation is finishedFUJIFILM Medical Systems U.S.A., Inc.419 West Avenue Stamford, CT 06902(800) 431-1850 Fax (203) 351-4713
Quick Guide onFDR Go Plus MobileSystemDOC - 0000Effective Date: 5/1/2018Page 11 of 13 14Added Filter Button15Cassette Radiography ModeButton LED illuminates when added filter isinserted No added filter: No LED Added Filter 1: LED Illuminated Added Filter 2: LED BlinkingSwitches system to Cassette Radiographymode. ( LED Illuminated)DR Radiography mode: (Not Illuminated)User Settings Button Switches the system to User Setting When the keyless entry(option) is used, thisbutton functions as the enter keyRegisters anatomical programs and varioussettingsWhen Keyless entry( option), this buttonfunctions as the Enter KeyKeypad for data entry1617Registration Button 18Keypad 19Power Plug Connection Lamp Illuminates when the power plug is connectedto a wall outlet20Charging Lamp 21Battery Indicator Blinks when system is chargingSolid indicator when system is at 100 % FullChargeIndicates the Battery Charge Level22Low Battery Notification Charge indicator blinks when the batteryindicator is on the last bar14) System Safety1) To move the unit, firmly grip the grip bar with both hands and thenmove forward.2) Do not move the system over any steps or bumps greater than 2 cm, orslopes steeper than 7 degrees, Always stop the system on a level surfaceand avoid sloped surfaces.3) Do not lay your hands on the bar retaining cover when holding the grip bar.If you hold the grip bar while laying your hand on the cover, a force may applytoward the rear, causing the mobile system to suddenly accelerate and move forward.Confidential and Proprietary Information -- Use, Duplicationor Distribution of this document without permission fromFUJIFILM Medical Systems U.S.A., Inc., is strictly prohibited.FUJIFILM Medical Systems U.S.A., Inc.419 West Avenue Stamford, CT 06902(800) 431-1850 Fax (203) 351-4713
DOC - 0000Effective Date: 5/1/2018Quick Guide onFDR Go Plus MobileSystemPage 12 of 1315) Support Documents1) Quick Guide on Console Workflow (FDX V11.0)a) This document is a detailed workflow manual for the FDX Consoleb) Document number: DOC-00380102) FDR Go Plus Operation Guide # M503-E076a) Detailed Operation manual for the FDR Go plusb) Document Number:3) FDR GO (Plus Version) Reference Guidea) Additional information on operation basicsb) Document number: # 503-E07216) System Components1) Back Panela) Note: Several of the slots and accessory components have openings in thebottom.Emergency StopHand SwitchEmergency ReleaseCard ReaderLAN ConnectionFlat Panel DetectorPower CordKey SwitchRear Slot: 24 x 30Middle Slot: 14 x 17Front Slot: GridAccessoryCompartmentConfidential and Proprietary Information -- Use, Duplicationor Distribution of this document without permission fromFUJIFILM Medical Systems U.S.A., Inc., is strictly prohibited.FUJIFILM Medical Systems U.S.A., Inc.419 West Avenue Stamford, CT 06902(800) 431-1850 Fax (203) 351-4713
Quick Guide onFDR Go Plus MobileSystemDOC - 0000Effective Date: 5/1/2018Page 13 of 13b) Inch Modec) Tube ColumnConfidential and Proprietary Information -- Use, Duplicationor Distribution of this document without permission fromFUJIFILM Medical Systems U.S.A., Inc., is strictly prohibited.FUJIFILM Medical Systems U.S.A., Inc.419 West Avenue Stamford, CT 06902(800) 431-1850 Fax (203) 351-4713
Quick Guide on FDR Go Plus Mobile System DOC - 0000 Effective Date: 5/1/2018 Page 7 of 13 Confidential and Proprietary Information -- Use, Duplication FUJIFILM Medical Systems U.S.A., Inc. or Distribution of this document without permission from 419 West Avenue Stamford, CT 06902 FUJIFILM Medical Systems U.S.A., Inc., is strictly prohibited.