Transcription
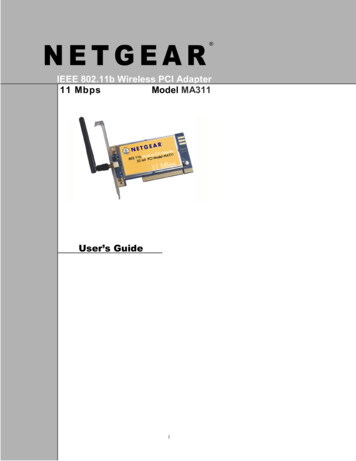
NETGEAR IEEE 802.11b Wireless PCI Adapter11 MbpsModel MA311User’s Guidei
2002 by NETGEAR, Inc. All rights reserved.Trademarks 2002 NETGEAR, Inc. NETGEAR , the Netgear Logo, the Gear Guy, and Everybody's connecting are trademarks orregistered trademarks of Netgear, Inc. in the United States and/or other countries. Microsoft, Windows, and the Windows logoare trademarks, or registered trademarks of Microsoft Corporation in the United States and/or other countries. Other brandand product names are trademarks or registered trademarks of their respective holders. Information is subject to changewithout notice. All rights reserved.Certificate of the Manufacturer/ImporterIt is hereby certified that the Model MA311 Wireless PCI Adapter has been suppressed in accordance with the conditions setout in the BMPT- AmtsblVfg 243/1991 and Vfg 46/1992. The operation of some equipment (for example, test transmitters) inaccordance with the regulations may, however, be subject to certain restrictions. Please refer to the notes in the operatinginstructions.Federal Office for Telecommunications Approvals has been notified of the placing of this equipment on the market and hasbeen granted the right to test the series for compliance with the regulations.VCCI StatementThis equipment is in the Class B category (information equipment to be used in a residential area or an adjacent area thereto)and conforms to the standards set by the Voluntary Control Council for Interference by Data Processing Equipment andElectronic Office Machines aimed at preventing radio interference in such residential areas.When used near a radio or TV receiver, it may become the cause of radio interference. Read instructions for correct handling.Federal Communications Commission (FCC) Compliance Notice: Radio Frequency NoticeThis device complies with part 15 of the FCC Rules. Operation is subject to the following two conditions:1.This device may not cause harmful interference.2.This device must accept any interference received, including interference that may cause undesired operation.Note: This equipment has been tested and found to comply with the limits for a Class B digital device, pursuant topart 15 of the FCC Rules. These limits are designed to provide reasonable protection against harmfulinterference in a residential installation. This equipment generates, uses, and canradiate radio frequency energy and, if not installed and used in accordance with theinstructions, may cause harmful interference to radio communications. However,there is no guarantee that interference will not occur in a particular installation. Ifthis equipment does cause harmful interference to radio or television reception,which can be determined by turning the equipment off and on, the user is encouraged to try to correct theinterference by one or more of the following measures: (1) Reorient or relocate the receiving antenna, (2)Increase the separation between the equipment and receiver, (3) Connect the equipment into an outlet on acircuit different from that to which the receiver is connected, (4) Consult the dealer or an experienced radio/TVtechnician for help.Federal Communications Commission (FCC) Radiation Exposure StatementThis equipment complies with FCC radiation exposure limits set forth for an uncontrolled environment. In order to avoid thepossibility of exceeding the FCC radio frequency exposure limits, human proximity to the antenna shall not be less than 20 cm(8 inches) during normal operation.Canadian Department of Communications Radio Interference RegulationsThis digital apparatus (Model MA311 Wireless PCI Adapter) does not exceed the Class B limits for radio-noise emissionsfrom digital apparatus as set out in the Radio Interference Regulations of the Canadian Department of Communications.SM-MA311NA-2ii
CONTENTSCHAPTER 1: INTRODUCTION . 1FEATURES AND BENEFITS .1APPLICATIONS .1RELATED NETGEAR PRODUCTS .2CHAPTER 2: INSTALLING THE DRIVERS AND UTILITY FOR WINDOWS 98, ME, 2000, ANDXP. 3CHAPTER 3: HARDWARE INSTALLATION. 7PACKAGE CONTENTS .2HARDWARE DESCRIPTION. ERROR! BOOKMARK NOT DEFINED.INSTALLING THE WIRELESS PCI ADAPTER .7CHAPTER 4: VERIFYING DRIVER INSTALLATION . 8Verifying Driver Installation under Windows 98 .8Verifying Driver Installation under Windows Me .8Verifying Driver Installation under Windows 2000 .8Verifying Driver Installation under Windows XP .8CHAPTER 5: INSTALLING THE DRIVERS AND UTILITY FOR WINDOWS NT. 10Installing Drivers Software for Windows NT .10Verifying Driver Installation .11CHAPTER 6: WIRELESS LAN CONFIGURATION . 15WLAN CONFIGURATION UTILITY .15System Tray Applications (for all Windows users) .17WLAN Utility Parameter Modification .18Profile.19Security (WEP) .21ADAPTER PROPERTIES CONFIGURATION.24Device Properties Page .24Device Properties Modification .25CHAPTER 7: WIRELESS NETWORK FUNDAMENTALS . 27WIRELESS NETWORK CONFIGURATION .27Ad-hoc Mode (Peer-to-Peer Workgroup).27Infrastructure Mode.27SERVICE SET IDENTIFICATION (SSID) .28AUTHENTICATION AND WEP ENCRYPTION .28WIRELESS CHANNEL SELECTION .29APPENDIX A: HARDWARE SPECIFICATIONS . 30iii
CHAPTER 1: INTRODUCTIONWith NETGEAR's MA311 802.11b Wireless PCI Adapter, you can effortlessly network anydesktop PC and avoid the hassles of traditional Ethernet wiring. This adapter helps you create awireless network for sharing your broadband cable or DSL Internet access among multiple PCs inand around your home or office. It is designed for desktop computers equipped with PCI slotsrunning Microsoft Windows, and is equipped with auto-sensing capability that allows packet transferat 11 Mbps for maximum throughput, or will automatically adjust at the lower speeds for distance orfor operating in a noisy environment.Features and BenefitsQuickly networks your employees without the time or expense of Ethernet cabling.Networks from any location in and around the home or office.Gives you constant access to corporate resources, e-mail and the intranet.Supports the vast majority of desktop PCs.Direct Sequence Spread Spectrum (DSSS) technology provides robust, interference-resistantand secure wireless connectivity.Supports 1, 2, 5.5, and 11 Mbps data rates.Connects seamlessly to wired Ethernet and PC network LANs to augment existing networksquickly and easily.Provides greater flexibility to locate or move networked PCs.Enables wireless networking to eliminate the cost of cabling.Plug and Play makes it easy to install.Features low power consumption.Reliable IEEE 802.11b standards-based wireless technology.Delivers up to 11 Mbps speed rate. Wireless nodes negotiate to operate in the optimal datatransfer rate. In a noisy environment or when the distance between the wireless nodes is far,the wireless nodes automatically adjusts to operate at the optimal speed.Supports data encryption up to 128-bit shared key method. You can also select 64-bit or noencryption for faster data transfer rate.Supports multiple operating system platforms, including Microsoft Windows 98, Windows NT,Windows Me, Windows 2000 and Windows XP.ApplicationsNETGEAR's MA311 Wireless PCI Adapter offers a fast, reliable, cost-effective solution for wirelessclient access to the network in applications like these:1.Remote access to corporate network informationE-mail, file transfer and Intranet access.2.Difficult-to-wire environmentsHistorical or old buildings, asbestos installations, and open areas where wiring is difficult todeploy3.Frequently changing environmentsRetailers, manufacturers, and those who frequently rearrange the workplace or changelocations1
4.Database accessDoctors, nurses, retailers needing mobile database access while in the hospital, retail storeor office campus5.SOHO (Small Office and Home Office) usersSOHO users needing easy and quick installation of a small computer networkPackage ContentsThe product package should contain:MA311 802.11b Wireless PCI Adapter with an integral antennaMA311 Resource CD with Windows DriversQuick Installation GuideSupport Information CardWarranty and Registration CardPlease call your reseller or customer support in your area if there are any wrong, missing, ordamaged parts. You can refer to the Support Information Card for the telephone number ofcustomer support in your area. You should keep the Support Information Card, along with theoriginal packing materials, and use the packing materials to repack the MA311 Wireless PCIAdapter if you need to return it for repair.To qualify for product updates, product support, and product warranty registrations, register onlineon the NETGEAR Web page at: http://www.NETGEAR.com.Related NETGEAR productsMA401 802.11b Wireless PC CardPS111W 802.11b Wireless-Ready Print ServerME102 802.11b Wireless Access PointMR314 802.11b Wireless Cable/DSL RouterMA701 802.11b Wireless Compact Flash Card2
CHAPTER 2: Installing the Drivers and Utility for Windows98, Me, 2000, and XPImportant: Please install the MA311 drivers and utility BEFORE installing the MA311hardware. Make sure the MA311 Adapter is NOT plugged into the PCI slot while you areperforming the following procedures.NT users: Please see “Chapter 5: Installing the Drivers and Utility for Windows NT”1.Power ON your computer. Insert the MA311 PCI Adapter Resource CD into theCD-ROM drive. Click Start, Run and type ‘d:\setup’ if ‘d’ is the designation of yourCD drive.2.When the Welcome screen appears, click Next.3
3.The Choose Destination Location screen displays the default Destination Folder. Ifyou want to change the default folder, you can click Browse and choose a differentdestination folder. Click Next to go to the next screen.4
4.The Select Program Folder screen appears. Accept or change the default foldername and click Next to continue.5
5.Click Finish to complete the utility installation.The next chapter, Chapter 3: Hardware Installation, explains how to complete theMA311 PCI Adapter installation.6
CHAPTER 3: Hardware InstallationInstalling the Wireless PCI AdapterImportant: Be sure to install the MA311 drivers and utility BEFORE installing the MA311hardware1.2.3.4.5.Turn the power OFF and unplug the power cord from your computer.Remove the PC cover.Choose an available PCI slot (PCI slots are the shorter slots) and remove the correspondingback plate from the PC chassis.Insert the MA311 PCI Adapter into the PCI slot and fasten the adapter card to the computerchassis by reinstalling and tightening the screw removed in step 3.Power ON your desktop PC.The Found New Hardware Wizard dialog box appears. Windows will automatically detect theMA311 PCI Adapter and look for the driver. (only applies to Windows 98, Me, 2000 and XP)6.7.8.For Windows 2000, a Digital Signature Not Found message may appear. Click Yes toproceed.For Windows XP, a Windows Logo Testing Not Found dialog box may appear. Click ContinueAnyway to proceed.Click Finish to complete the installation.The Hardware Installation is complete. Your MA311 PCI Adapter is now ready for use.The Wireless LINK LED on the MA311 indicates the wireless link condition of the station withanother wireless node or the associated access point.LINK LEDSolid Green – Associated with the Access Point or 802.11 Ad-Hoc wireless workstationBlinking Green – Not connecting to the Access Point or Ad-Hoc wireless workstationTry re-installing the card in your PC if the LINK LED behaves differently.7
CHAPTER 4: Verifying Driver InstallationAfter the utility and the hardware installation are finished, Windows automatically installs thenecessary drivers (Windows 98, Me, 2000 or XP).Verifying Driver Installation under Windows 981.2.3.4.5.From the Windows 98 desktop, double-click My Computer.Double-click Control Panel. Double-click the System icon.Click on the Device Manager folder tab.Double-click Network Adapter. There should be no yellow exclamation mark or red cross-signon the MA311 PCI Adapter selection.Double-click MA311 PCI Adapter. The Device Status windows should indicate that the MA311PCI Adapter is working properly.The installation of the MA311 PCI Adapter driver in Windows 98 is complete. Proceed to Chapter 6:Wireless LAN Configuration.Verifying Driver Installation under Windows Me1.2.3.4.5.From the Windows Me desktop, double-click My Computer.Double-click Control Panel. Double-click the System icon.Click on the Device Manager folder tab.Double-click Network Adapter. There should be no yellow exclamation mark or red cross-signon the NETGEAR MA311 PCI Adapter selection.Double-click MA311 PCI Adapter. The Device Status windows should indicate that the MA311PCI Adapter is working properly.The installation of the MA311 PCI Adapter driver in Windows Me is complete. Proceed to Chapter 6:Wireless LAN Configuration.Verifying Driver Installation under Windows 20001.2.3.4.From the Windows 2000 desktop, double-click My Computer.Double-click Control Panel. Double-click the System icon.Click on the Hardware folder tab. Click the Device Manager button.Double-click Network Adapter. There should be no yellow exclamation mark or red crosssign on the MA311 PCI Adapter selection.5. Double-click MA311 PCI Adapter. The Device Status windows should indicate that theMA311 PCI Adapter is working properly.The installation of the MA311 PCI Adapter driver in Windows 2000 is complete. Proceed toChapter 6: Wireless LAN Configuration.Verifying Driver Installation under Windows XP1. From the Windows XP desktop, double-click My Computer.2. Double-click Control Panel. Double-click the System icon.3. Click on the Hardware folder tab. Click the Device Manager button.8
4. Double-click Network Adapter. There should be no yellow exclamation mark or red crosssign on the MA311 PCI Adapter selection.5. Double-click MA311 PCI Adapter. The Device status window should indicate that theMA311 PCI Adapter is working properly.The installation of the MA311 PCI Adapter driver in Windows XP is complete. Proceed to Chapter 6:Wireless LAN Configuration.Important: By default, Windows XP uses its own utility to configure your wireless networksettings; if you prefer to use the MA311 configuration utility, please change this setting inthe Wireless Networks tab in Wireless Network Connection Properties.9
CHAPTER 5: Installing the Drivers and Utility forWindows NTMicrosoft Windows NT 4.0 is not a Plug and Play operating system and does not automaticallydetect and prompt you for installation of the PCI adapter driver. The driver installation has to beinitiated manually.Installing Drivers Software for Windows NT1.2.3.4.5.6.Install the MA311 PCI Adapter into your desktop system. (See “Chapter 3: InstallingHardware” steps 1 to 5)Power ON the computer.From the Windows NT desktop, double-click My Computer.Double-click Control Panel. Double-click the Network icon.Click on the Adapter tab and click the Add button to continue.The Select Network Adapter dialog box opens, listing a number of network adapter cards.Insert the MA311 PCI Adapter Resource CD into the CD-ROM drive. Click Have Disk .10
7.In the Insert Disk dialog box, enter D:\ or D:\winnt in the field provided, assuming that D: isthe driver letter for the CD-ROM drive. Click OK.8.The Select OEM Option dialog box opens listing two options from which to choose. SelectNETGEAR MA311 PCI Adapter and click OK.9.If other cards in your system use TCP/IP bindings, the Microsoft TCP/IP Properties dialog boxwill open. Set any necessary TCP/IP configurations and click Close.10.Click Yes when prompted if you want to reboot the system.Verifying Driver Installation1.2.From the Windows NT desktop, double-click My Computer.Double-click Control Panel. Double-click the Device icon.11
3.A list of devices installed in the system will be shown. Scroll down the list to locate theNETGEAR MA311PCI Adapter entry. The PCI adapter entry should indicate that the MA311PCI Adapter is started.Installation of the MA311 PCI Adapter driver in Windows NT is complete. Continue now to thesection below, Installing Utility Software for Windows NT.Important: The I/O Address and IPQ settings should be unique and not conflict with anyother device settings in your system. If there is a system resource conflict, pleasecheck Windows NT Diagnosis and find a free I/O address and IRQ.Installing Utility Software for Windows NT1.While the MA311 Resource CD is still in the CD-ROM drive, run the setup.exeprogram at the root of the CD.2.When the Welcome screen appears click Next.12
3.The Choose Destination Location screen displays the default Destination Folder. Ifyou want to change the default folder, you can click Browse and choose a differentdestination. Click Next to go to the next screen.13
4.Click Finish to complete the installation.The MA311 Configuration Utility installation is now complete. Proceed to configuring the wirelessparameters.14
CHAPTER 6: Wireless LAN ConfigurationWLAN Configuration UtilityA wireless LAN configuration utility program is provided to give you information on your wirelessnetwork such as signal quality and link conditions, and to let you modify the various configurablewireless parameters.Important: By default, Windows XP uses its own utility to configure your wireless networksettings; if you prefer to use the MA311 configuration utility, please change this setting inthe Wireless Networks tab in Wireless Network Connection Properties.For Windows XP UsersAfter installing the MA311 PCI Adapter, Windows XP will display a Wireless Network Connection #message.Click on the message and the XP Connect to Wireless Network dialog box will appear. Click on anavailable wireless infrastructure network (Access Point), as seen in the Connect to WirelessNetwork dialog box.15
You may click on the Advanced button to perform advanced configuration.16
For more information on using the XP Wireless Network Configuration utility please refer toWindows XP Help pages.System Tray Applications (for all Windows users)Note: The SysTray (System Tray) resides on one end of the taskbar in the Microsoft Windowsdesktop. It displays interface icons for memory-resident applications that execute in the backgroundcontinuously, such as the clock, speaker volume, and virus detection.The wireless LAN configuration utility installation for the MA311 PCI Adapter adds a status reportingand configuration utility icon in the SysTray. Once you have completed the installation, the WindowsSysTray should show the following icon in different colors. This icon indicates different statusconditions, depending on the operating mode of the MA311 PCI Adapter.Icon colorRedYellowGreenAd-hoc modeThe wireless adapter has notinitiated communication withany other wireless node.Not applicableThe wireless adapter hassuccessfully communicatedwith another wireless node.Infrastructure modeThe wireless adapter is not able to link to anyaccess point or the link between the wirelessadapter and the access point is lost.The link condition between the wirelessadapter and the associated access point isweak.The wireless adapter has established goodcommunication with an access point and thesignal quality is strong.17
WLAN Utility Parameter ModificationDouble-clicking on the wireless SysTray icon activates the wireless LAN configuration utility for theMA311 PCI Adapter. You can click on any of the folder tabs in the NETGEAR MA311 PCI AdapterUtility dialog box to modify the operational parameters.StatusConnected toNetwork modeChannelTransmit RateEncryptionData Transmitted/ReceivedSignal StrengthIndicates the SSID and MAC address of the associated access point whenthe MA311 PCI Adapter is configured in Infrastructure mode.Indicates the network mode of the MA311 PCI Adapter (Infrastructure or802.11 Ad-hoc).Only valid in 802.11 Ad-hoc mode, this indicates the wireless channelcurrently in use.Indicates the data transfer rate between the wireless node and the device itis communicating with.Indicates whether the encryption of this device is enable or disable.Indicates the number of successfully Transmitted and Received packets.Indicates the signal strength of the radio frequency signal received by thiswireless node.18
Link QualityIndicates how well the wireless node is communicating with the associatedaccess point or another wireless node.ProfileThe Profile field allows you to set values for all parameters by selecting a previously defined profile.To create a profile, go to the Profile field, type in a Profile Name and set the correspondingparameters (SSID, WEP, etc.). After changing parameters, Save the profile and click the Activatebutton to put it into effect. If one of the profiles is no longer used, you may remove it by clicking theDelete button. You can have multiple profiles and modify a profile at any time.ConfigurationNetwork modeSSIDConfigurable between 802.11 Ad-hoc and Infrastructure modes. In 802.11 Ad-hocmode, the wireless nodes form their own local network where the end nodescommunicate peer-to-peer without an access point. In Infrastructure mode, thewireless searches all available wireless channels to associate with an access point.Enter a 32-character (maximum) Service Set ID in this field; the characters are casesensitive. When the wireless node is operating in Ad-hoc mode, this field operates asthe Basic Service Set ID (BSSID). All wireless nodes in the same network should use19
Transmit RateChannelPreamble TypeFragmentationThresholdRTS/CTSThresholdthe same BSSID.When in Infrastructure mode, this field defines the Extended Service Set ID (ESSID).The ESSID assigned to the wireless node is required to match the access pointESSID for the wireless node to communicate with the access point.Allows you to define the data transfer rate. The default value is Fully Automatic. In thiscase, the best transfer rate is negotiated between the wireless node and the device itis communicating with. This could be another wireless node or an access point. Otherpossible values for this field are 1 Mbps, 2 Mbps, 5.5 Mbps, and 11 Mbps.Only valid in 802.11 Ad-hoc mode, this field defines which wireless channel to use. InInfrastructure mode, the wireless node automatically searches through all availablewireless channels for an access point to be associated with. It is not necessary toselect the wireless channel when operating in Infrastructure mode.Sets the number of preamble bits sent out by this wireless node before the actual databits. The Long type is set for 144 bits. The Short type is set for 72 bits.The packet length used for fragmentation. Packets larger than the size programmed inthis field will be fragmented. The Fragment Threshold value must be larger than RTSThreshold value. The default value for Fragment Threshold is 2432.The packet size the wireless node uses to determine if it should use the CSMA/CDmechanism or the CSMA/CA mechanism for packet transmission. With the CSMA/CDtransmission mechanism, the transmitting station sends out the actual packet as soonas it has waited for the silence period. With the CSMA/CA transmission mechanism,the transmitting station sends out a RTS packet to the receiving station and waits forthe receiving station to send back a CTS packet before sending the actualpacket data.20
Security (WEP)To prevent unauthorized wireless stations from accessing data transmitted over the network, theWLAN Utility offers highly secure data encryption, known as WEP, making your data transmissionover air more secure.To activate the WEP Encryption, check the WEP Enabled check box. An Encryption window, asshown above, will appear. The instructions are as follows:1.Check the box in Enable Encryption (WEP Key)2.Pull down the Encryption Length list and select either 64-bit or 128-bit encryptionmethod.3.Specify the WEP keys, as described below:For 64-bit encryption:Hexadecimal: 10 hexadecimal digits in the range of “A-F”, “a-f” and “0-9” (e.g.11AA22BB33)For 128-bit encryption:Hexadecimal: 26 hexadecimal digits in the range of “A-F”, “a-f” and “0-9” (e.g.00112233445566778899AABBCC).21
After entering the WEP keys in the key field, click the OK button and then click the Applybutton on the Configuration tab to make the setting take effect.Important: The WEP key must be set up exactly the same on the Wireless LANstations as they are on the wireless Access Points.SecurityEnableEncryption(WEP Key)Key LengthKey 1Key 2Key 3Key 4Enables the data encryption for the wireless node. To disable the dataencryption (by unchecking the box) is to not use any encryption; this isalso called Open System data encryption. To enable encryption is to usethe Shared Key data encryption method.The key length must be the same between all wireless nodes andaccess points in the same network. The possible values for the dataencryption level are 64 bits and 128 bits. The 64-bit data encryption isalso called 40-bit data encryption by some vendors. For furtherinformation on data encryption, please refer to Chapter 7: WirelessNetwork Fundamentals in this reference guide.Keys used to encrypt/decrypt wireless data. When set to 64-bit (alsocalled 40-bit) or 128-bit data encryption mode, you may specify up tofour different keys to encrypt wireless data.22
Site SurveySSIDMac AddressChannelSignalWEPModeSSIDs of each access point that is accessible by this wireless node.Mac Addresses of each access point.Wireless channel used by each access point.Signal strength of each access point to this node.Indicates whether WEP encryption of each access point is enable ordisable.Indicates the network mode: Infrastructure or 802.11 Ad-hoc mode23
AboutAboutIndicates the release information of the wireless LAN configuration utilitysoftware, firmware, and the wireless nodes hardware.Adapter Properties ConfigurationDevice Properties PageWhen running Windows 98 or MeWireless parameters for the MA311 PCI Adapter can be modified from the Network control window.1.2.From the Windows desktop, right-click the Network Neighborhood icon. When a pop-up menuopens, click on the Properties tab.The Network window opens. Click the NETGEAR MA311 PCI Adapter selection in thecomponent window. Click the Properties button.24
3.A window pops up displaying three folder tabs. Click on the Advanced folder tab. Theproperty screen opens displaying a number of configurable parameters. These parameters areshown in the Device Properties Parameters table 6-1 below.When running Windows 2000Configuring the network adapter properties for Windows 2000 is different from all other Windowsoperating systems.1.2.3.From the Windows desktop, right-click My Computer and select Property. When the SystemProperty window appears, click on the Hardware tab. Then click on the Device Manager.In the Device Manager dialog box, double-click Network adapters to show all networkadapters. Double-click NETGEAR MA311 PCI Adapter.The NETGEAR MA311 PCI Adapter Properties window opens. Click on the Advanced foldertab. The list of configurable parameters appears. These parameters are shown in the DeviceProperties Parameters table 6-1 below.When running Windows XPConfiguring the network adapter properties for Windows XP is different from all other Windowsoperati
customer support in your area. You should keep the Support Information Card, along with the original packing materials, and use the packing materials to repack the MA311 Wireless PCI Adapter if you need to return it for repair. To qualify for product updates, product support, and product warranty registrations, register online