Transcription
Second GradeFables UnitWaldorf Curriculumwww.waldorfcurriculum.com 2006
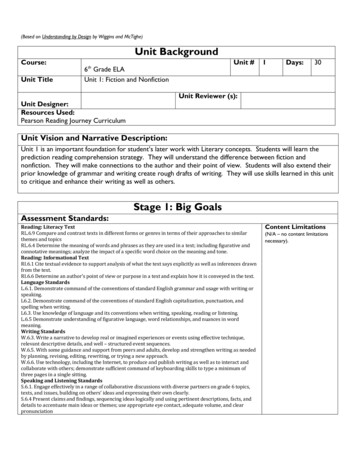
FablesProgram of StudyAs a Nature Studies unit, in addition to writing, illustrating, and retelling the fablesstudied, there will be an emphasis on taking Nature walks and keeping a nature journalthroughout the unit. The art skills used in this unit will beWeek One: Crayon DrawingWeek Two: Pencil SketchingWeek Three: Watercolor PaintingWeek Four: Clay and Beeswax Modeling
Booklist:Essential BooksThe Fables of AesopJoseph JacobsFrom Nature Stories to Natural ScienceDonna SimmonsThe Ant and the Grasshopper(do not substitute other retellings)Amy Lowry PooleThe Emperor’s New Clothes(do not substitute other retellings)Marcus SedgwickOther ResourcesCrayon DrawingDrawing with Your Four to Eleven Year OldWatercolor PaintingPainting in Waldorf EducationDonna SimmonsDick Bruin and AttieLichthartClay & Beeswax ModelingLearning About the World through ModelingArthur AuerSuggested Read-Alouds for BedtimeOld Mother West WindThornton BurgessKindness: A Treasury of Buddhist Wisdomfor Children and ParentsSarah Conover
Setting Up Your Plan BookI think it works best to use a three ring binder as a plan book – have a daily plan pageand a daily journaling page face to face (so punch the holes in the daily plan page onthe right hand side of the paper). This way, you can alter the template you use if youfind it isn’t working for you without having to throw out the whole book. You also canlook back at exactly what you did that day to help you recall the day’s events, as you’rejournaling. Then flip the page and use the journaling you just did to help you sketch outthe next day.You will need two three ring binders, paper (either computer paper and a hole punch ora pack of lined paper), four dividers, a pack of file folders and a filing cabinet or crate.One binder is for the unit you are currently teaching (A). The other binder is for theupcoming unit (B). You can print out a cover page and slide it down in the clear plasticcover to identify each with the name of the unit. In binder A, set up the four dividers.On top is your notes for the unit. If you purchased one of our units, it goes there. Ifyou wrote down your own notes, they go there. After the first divider (labeled WeekOne) put your plan book pages for the first week. The Weekly Plan goes on top – afterthat, the pages for each day. After the second divider (labeled Week Two) put yourplan book pages for the second week. And so on.In binder B, simply keep a stack of paper on which to write your notes and brainstorm.I like to keep it by my bedside as I often think of teaching ideas while drifting off tosleep. When the first unit ends, move all the papers from binder A into a file folder,labeled with the name of the unit and the dates and the child you taught it to, and file itaway. Move the notes you made from the binder B into the binder A. Now use binder Bto prepare for the next unit.
Weekly PlanHeadThis week we will be working on:Day One -Day Two -Day Three -Day Four -Day Five –HeartThis week we will be working on:HandsThis week we will be working on:
Daily PlanDate:Circle Time ources:Breakfast:Lunch:Snack:Dinner:
FablesJournaling PageWeek One:
FablesJournaling PageWeek Two:
FablesJournaling PageWeek Three:
FablesJournaling PageWeek Four:
FablesUnit IntroductionEach week for four weeks you will be studying two fables. There will also be acumulative project, for a total of 9 fables in the unit. Each fable will undergo a threeday process of study as described in From Nature Studies to Natural Science, page 11:presentation – sleepretelling – artistic expression – sleepgoing deeper or elaboratingThe purpose of this process is for your child to become fully engaged with the story onall levels. For example, you would tell the first fable of the week on Monday. Tuesdayyour child retells the story and you add it to your main lesson book or act it outdramatically. This can be a lot of fun with different colored silk scarves to act as the“costumes.” On the third day, Wednesday, you will elaborate on the fable by anotherround of artistic expression (such as beeswax modeling) or by a field trip. This usuallyconsists of visiting the animal characters in the fables at a nature center, zoo, or petstore, or by a Nature walk where you will see the animals and their traits in action. It isan important component of the Fables unit that your child learns the “soul qualities” ofdifferent animals, such as fox sly, crow loud and obnoxious, donkey stubborn,etc. This is revisited in fourth grade; you are laying the foundation here for the Manand Animal unit (see pages 74-80 of From Nature Studies to Natural Science).“If you realize that art has always had a relation to the spirit, you will understandthat both in creating and appreciating it, art is something through which one entersthe spiritual world.”Rudolf Steiner
FablesUnit OutlineEach week for four weeks you will be studying two fables. There will also be acumulative project, for a total of 9 fables in the unit. The list of fables studied follows.You can feel free to substitute other fables or alternate retellings of these stories (withthe exception of the two picture books specified).Week One:The Lion & the MouseThe Fables of Aesop“Little friends may prove great friends.”The Fox & the GrapesThe Fables of Aesop“It is easy to despise what you cannot get.”Week Two:The Tree and the ReedThe Fables of Aesop“Obscurity often brings safety.”page 26page 76page 88The Bald Man & the FlyThe Fables of Aesoppage 47“You will only injure yourself if you take note of despicable enemies.”Week Three:The Crow and the PitcherThe Fables of Aesop“Little by little does the trick.”page 129The Ant and the Grasshopper as retold by Amy Lowry PooleWeek Four:The Serpent & the FileThe Fables of Aesop“It is useless attacking the insensible.”The Frog & the OxThe Fables of Aesop“Self-conceit may lead to self-destruction.”Cumulative ProjectThe Emperor’s New Clothes as retold by Marcus Sedgwickpage 67page 57
FablesWeek One: Crayon DrawingFables studied this week:The Lion & the MouseThe Fables of Aesop“Little friends may prove great friends.”page 26The Fox & the GrapesThe Fables of Aesop“It is easy to despise what you cannot get.”page 76Materials:set of Stockmar block beeswax crayonsstick beeswax crayons, if desired, for writing – or a graphite pencil may be usedlined paper, if needed, for handwriting practiceblank main lesson booksketchpads, one each for child and parent (plain cover, unlined pages)nature journals, one each for child and parent (fancier cover, unlined pages)The Lion & the MouseDay One Read an Autumn poem to your child such asThe Wind and the LeavesCome, little leaves, said the wind one day,Come over the meadows with me and play.Put on your dresses of red and gold,For summer is gone and the days grow cold.Soon as the leaves heard the wind's loud callDown they came fluttering, one and all.Over the fields they danced and flew,Singing the soft little songs they knew.Dancing and whirling the little leaves went,Winter had called them, and they were contentSoon fast asleep on their earthly beds,The snow laid a coverlet on their heads.
(Traditional)ORColourThe world is full of colour!'Tis autumn once againAnd leaves of gold and crimsonAre lying in the lane.There are brown and yellow acornsBerries and scarlet hawsAmber gorse and heatherPurple across the moors!Green apples in the orchard,Flushed by a glowing sun;Mellow pears and bramblesWhere coloured pheasants run!Yellow, blue and orange,Russet, rose and red A gaily coloured pageant An Autumn flower bed.Beauty of light and shadow,Glory of wheat and rye,Colour of shining waterUnder a sunset sky!Adeline White Do a Nature walk, introduce nature journals.Do some preliminary sketches of things that you see. Focus on choosing crayonsin colors which represent the season.When you return to the classroom, tell the story “The Lion & the Mouse.” Do notdiscuss the story at this time.Begin your bedtime read-aloud this evening. Old Mother West Wind is a classicfor Waldorf second graders! The stories deal with the day to day lives of variousforest animals and their interactions with one another. They are quite realistic.Kindness: A Treasury of Buddhist Wisdom for Children and Parents is quite adifferent book but also nicely complements the Fables unit. It is a collection ofshort, meaningful stories and Jataka tales (stories told by Buddha – also oftenstudied in second grade) with a simply stated moral at the end of each.
Day Two Ask your child to retell the story of “The Lion & the Mouse.” Choose a sentenceor two to add to your main lesson book, describing the events of the story. Haveyour child compose the sentence orally and you write it out on a blank sheet ofpaper (or chalkboard) for her to copy correctly. This may take from 10 to 20minutes. Add an illustration to your page using the beeswax crayons. You should try to fillthe entire page with color but if this is too taxing for your child, create adecorative border around the page and then add and a small picture of thescene. You should decide in advance what scene you think would be easiest foryour child to draw and practice it on your own, so you can guide your child.Here are some notes on beeswax crayon techniques. If necessary, practice thetechniques on scrap paper before adding illustrations to your main lesson book:“Use Short Strokes Instead of Outlines”Children who attempt to draw the form of an object by beginning with its outlineare easily frustrated and put off of drawing altogether because “it doesn’t lookright”. Teach your child to disregard the outline and to instead build a shape bydrawing it from the ground up. A table lamp is the perfect exercise. Focus onshort strokes which show the lamp “growing” out of the table. As you create itsbase, demonstrate how easy it is to correct the look of the base if you find itdoesn’t look quite right. Make it wider or taller as needed. Then create thelampshade, again by working in short strokes from the bottom of the shade upto the top. Then choose another object around your house which “grows” fromthe bottom up or go outside to draw a plant or tree and have your child try thistechnique.“Feel Your Way Along Slowly”As demonstrated yesterday, working slowly will itself lead to working morecarefully and to a greater awareness of the process. Choose a household objectto draw and talk out loud to your child as you go through each step of theprocess. First set the object in front of you and examine it carefully. Perhapsyou have chosen to draw a doll. Which part of the doll will you draw first? Whatcolor will you start with? Will you blend two or more colors to get the shadesyou want? How will you show the patterns in the doll’s clothing and the textureof its hair? Consider each question and, as you make the decision, draw whileyou are talking. This will help your child see how the decisions you have madetake shape on paper. Choose another item for you and your child to draw sideby-side. Work openly with one another. Look at her paper and let the child lookat your paper as you go along. Talk about the decisions you are making andencourage her to do the same as you color together.
“Fill the Entire Page with Color”Begin with a piece of paper no larger than 8 ½ x 11 inches. Sit in front of awindow with your child and look out at the view. (If it’s a snowy day, choosesomething else to draw, like the view into your child’s bedroom from hisdoorway). What do you see first? What’s behind that? And what’s behindthat? What’s above that? And what’s below that? As you and your child drawthe view from the window, talk about how the entire world is full of color. Talkto your child about the many blues of the sky and how it goes on and on. Try toshow all of the colors you see on your paper. Looking at the view, notice how itnever ends. There is no empty white space at its edges. As you draw the view,fill your entire piece of paper with color. Encourage your child to take herdrawing to the very edges of the paper all the way around.“Talk to Your Child Through the Process”The most important thing you can do to teach your child to draw with purpose isto be there as she colors. If your attention is focused on what she is doing, sowill hers be. If you talk to her as she goes, she will talk to you and she will learnto talk to herself about what she is doing. Observe what she’s doing and makecomments. Be careful as you give suggestions that you are not directing herdrawing too much, however; make certain that your presence is a positive one.At the end of the coloring time, look back at the experience. You should feelthat you and your child made a connection and stayed connected, that theexperience was richer for the both of you because it was shared. Evaluate, too,the length of time spent coloring. As long as you both maintain focus, thecoloring can go on for as long as you like. Once your thoughts begin to wander,or the child shows signs of being less focused on her work, put the coloringaway. Adding an accompanying illustration to the main lesson book text usually takesabout 40 minutes if carefully done. For “The Lion & the Mouse” try to focus ontheir opposing colors and shapes (they first appear to be enemies but, in fact,become friends). The mouse should be small, dark, and grey. The lion is large,bright, and golden. Exploring this contrast will help your child to feel the storymore fully.Day Three If possible, take your child to see both a lion and a mouse in real life. For a lionyou will probably have to visit the zoo. A mouse may be found at a pet store.Use your sketch paper to draw the lion and mouse as you observe them. Payspecial attention to the mouse’s sharp teeth, which were used to gnaw at theropes holding the lion and help him get free. Also visit other rodents (guineapigs, gerbils, etc). In fact, if you are lucky, you may see a vole in the wild onone of your Nature walks.
The Fox & the GrapesDay One Because the story is simply presented on the first day, continue the pattern ofdoing a Nature walk for the greater part of the lesson (take your beeswaxcrayons so you can draw with them while you are outside) and then telling thenext fable to be studied towards the end of the lesson. Help your child to makea distinction between sketching for practice (your sketchpads) and a morepolished drawing which goes in your Nature journals. This is similar to the ideaof practicing your sentence on plain lined paper, so your handwriting and spellingare correct, before you put your best work in final draft form in the main lessonbook. Do not give your child the impression that if she can’t draw it “right” thefirst time, she shouldn’t even bother. Many adults have this insecurity abouttheir own work and accidentally pass it on to their children. You should model apositive and cheerful attitude, always walk with sketchpad in hand yourself, andlet her see you make and correct mistakes. Keep it positive! You might alsowant to search for a collection of seasonal or other poetry to keep on hand andmake reading a poem to set the mood before you head out on your walk astandard part of your routine. I have many collections of poetry and canrecommend some books if you have trouble finding one you like at your locallibrary (browse the non-fiction section – Poetry is 811 in the Dewey DecimalSystem). Today you will be telling the story of “The Fox & the Grapes.”Day Two This simple story is easily done in a dramatic fashion with the two of you. Youcan be the tall grapevine with the tantalizing bunch of grapes hanging just out ofreach (drape your arm with a dark purple or bright green silk, depending on thecolor of grapes you’ll be using and hold the bunch with your arm straight out). Yourchild can wear a red silk and be the fox, frantically jumping to try to tastethem. After acting out the scene, add its picture to the main lesson book underthe title “The Fox and the Grapes” as seen in Drawing with Your Four to ElevenYear Old. You can do a one page illustration or a two page spread depending onyour ideas for the composition of the picture. See sample main lesson bookpages on my age/waldorf method.html#mlb. On your main lesson book page you can choose whether to always have your childretell the story and then illustrate it or simply do the illustration (as in this case,where she has retold the story by acting it out). Use a combination oftechniques to keep things fresh and interesting and also to find what works bestfor you. Today’s retelling, dramatic interpretation, and illustration should takeyour entire main lesson block.Day Three Visit a vineyard to see just how high those grapes hang. Search agri-tourismsites online for the location of a vineyard near you – they are becoming quitecommon. If not, you can search the woods for wild grapevines.
FablesWeek Two: Pencil SketchingFables studied this week:The Tree and the ReedThe Fables of Aesop“Obscurity often brings safety.”page 88page 47The Bald Man & the FlyThe Fables of Aesop“You will only injure yourself if you take note of despicable enemies.”Materials:sketchpadsnature journalsgraphite pencilscolored pencilswatercolor pencilsloose sheets of watercolor paperThe Tree and the ReedDay One When you take your Nature walk this morning, take along some plain graphitepencils. Do simple sketches of the shapes of the trees and other plants that yousee. Try to visit as many different plants as you can. As you did last week, youmay want to precede the walk with a poem. Some suggestions:TreesTheTheTheTheTheTheTheTheOak is called the King of Trees,Aspen quivers in the breeze,Poplar grows up straight and tall,Pear tree spreads along the wall,Sycamore gives pleasant shade,Willow droops in watery glade,Fir tree useful timber gives,Beech amid the forest lives.Sara ColeridgeOR
Think like a TreeSoak up the sunAffirm life's magicBe graceful in the windStand tall after a stormFeel refreshed after it rainsGrow strong without noticeBe prepared for each seasonProvide shelter to strangersHang tough through a cold spellEmerge renewed at the first signs of springStay deeply rooted while reaching for the skyBe still long enough tohear your own leaves rustling.Karen I. Shragg Remember as you are sketching that the same guidelines apply as crayondrawing. You are not outlining. Try making a connection between pencilsketching and form drawing. Examine the shape of the tree trunk and looselysketch the general form – is it tall and straight, cone shaped, or does it have abranching form. Then go back and work from the ground up to add moredetails.When you return tell your child “The Tree and the Reed.”Day Two Take another Nature walk, this time in windy weather if you can. Sketch howthe different plants bend and sway. This time, use colored pencils. Then comeback inside and do your main lesson book page for this story. Include asentence or two for the fable and the illustration in colored pencil.Day Three If your child has experienced a hurricane, talk about how strong the winds are.Otherwise you can follow up on this story by taking a Nature walk to observefallen trees – at one of our local parks artists take fallen tree trunks and carvethem into shapes of animals. If your child gets saddened by the thoughts of allthese trees falling and dying, there are several books you can read to talk abouta tree’s life cycle in a positive way. See if your library has A Log’s Life by WendyPfeffer, The Gift of the Tree by Alvin Tresselt or In a Nutshell by Joseph Anthony. You may wish to plant a tree (Autumn is the best time of year to do this). Thebest book to introduce this activity is A Tree is Nice by Janice May Udry, or usethis poemThe Heart of the TreeWhat does he plant who plants a tree?He plants a friend of sun and sky;He plants the flag of breezes free;The shaft of beauty, towering high.
He plants a home to heaven anighFor song and mother-croon of birdIn hushed and happy twilight heard -The treble of heaven's harmony -These things he plants who plants a tree.What does he plant who plants a tree?He plants cool shade and tender rain,And seed and bud of days to be,And years that fade and flush again;He plants the glory of the plain;He plants the forest's heritage;The harvest of a coming age;They joy that unborn eyes shall see -These things he plants who plants a tree.What does he plant who plants a tree?He plants, in sap and leaf and wood,In love of home and loyaltyAnd far-cast thought of civic good -His blessing on the neighborhoodWho in the hollow of His handHolds all the growth of all our land -A nation's growth from sea to seaStirs in his heart who plants a tree.Henry Cuyler Bunner (1855 - 1896) For information on tree planting, check the Arbor Day Foundation website:http://www.arborday.org/Since the moral of the fable is that the smaller, more flexible plants survivebetter you may choose to plant other things instead of picking a tree. If your childdoesn’t comment on this, you may want to spend more time discussing the fableso the moral is clear to her. Or, plant a tree and then remark, maybe we shouldplant some other plants as well. Remember how the reed was able to bend andsurvive the storm? Luckily, it is also the best time of year to plant shrubs andspring bulbs. Bulbs are especially nice because then they will pop up in theSpring to greet you and to make the school year come full circle. If you are renters,see if there’s a place in your community where you could plant these plants, suchas at a school, nursing home, or park.On Day Three, you can also introduce your final pencil sketching material:watercolor pencils. These may be found at any art/craft store – even Wal-Mart.Use a regular sketch pad for the other pencil types but you will want watercolorpaper for these. It is best to spend some time practicing with the mediumbefore you begin to use it in earnest. Make small colored sections on your paperand then practice adding different amounts of water. Blend two differentshades. If you get really excited about watercolor pencils, the best book I canrecommend is Watercolor Pencil Magic by Cathy Johnson. After your explorationtime, take a Nature walk as usual and let your child practice drawing more withyesterday’s colored pencils.
The Bald Man & the FlyDay One Just as you did with the previous story, use a different type of pencil in yourdrawing activities each day. It might be fun to do some people-watching today,instead of a Nature walk, and take along some plain graphite pencils. Trysketching some heads – it is not going to be possible for your child to draw all thefeatures of the human face. I love the illustration on page 46 of The Fables ofAesop but a second grader is too young to draw it. However, you can just work onthe shapes of the heads (again, think about Forms). I think for your illustrationyou may have just the top curve of the man’s bald head with a fly flying aroundit. But you may find that your child really enjoys trying to enjoy different faces andyou should have a really fun day with your practice sketching. Maybe you cango out to lunch together at a sidewalk café and just sit and sketch the passers-by. When your sketching time is done, tell the story of “The Bald Man & the Fly."Day Two Another dramatic reenactment! Find a feather duster, or some other ticklishmaterial, to use as the fly and you can be the fly. Let your child be the man.Tickle her, bother her, and have her finally get frustrated and try to slap you,smacking herself on the head by mistake instead. Tickle her again but this timeshe will refrain, having learned her lesson. Now switch places and let her be thefly. Decide the sentences you are going to use for the main lesson book renditionof the story and copy them out for her. After she has added the sentences toher main lesson book, give her the colored pencils and her sketchpad to practicehow she wants to add the man to the picture. Use the graphite pencils for thelittle black fly. The fly can be drawn very simply (see the illustration on page 46)and you can have some fun with it by drawing circular lines around his head toshow how the fly is swooping around. Since this picture isn’t going to take upmuch space on the page, you might want to push your child to write a longer setof sentences, or you can do a border around the page with your colored pencilsand then a smaller inset with the illustration. Save the actual illustration day fortomorrow.Day Three Cut a piece of watercolor paper to be the size of the inset illustration on yourmain lesson book page. Do your illustration with the watercolor pencils, and tryto take advantage of the unique characteristics of the pencils how easily colorsmay be blended, the combination of clear detail and soft shading. You may wantto do the fly in graphite again so that it stays dark. Then, when the picture isdry, paste it into your main lesson book. Working with the watercolor pencils is a nice transition from pencil sketching towatercolor painting (which we’ll do next week), since the pencils havecharacteristics of both. Encourage all your children to do as many nature walks
(carrying their nature journals, of course – it’s nice for each of them to have one)as possible throughout the unit so that they can practice and become familiarwith all of the media in this unit. Don’t stop using the beeswax crayons – pack alittle case of art supplies to take with you on each walk and have the childrendecide what media would work best for capturing each scene.Along with the drawings and paintings in your nature journals, encourage thechildren to write their thoughts, bits of poetry, and other impressions of thesights and sounds around them. Try to use all five senses: touch, taste, smell,hearing, and sight. This is something you can do with all ages, including preschoolers,but only older children should do some journaling along with their nature sketches.Again, as with the previous week’s lessons, do these exercises yourself, alongside yourchildren. This will give them confidence and it will be good for you, especially inbeing able to assess how readily they pick up a certain skill. Being a beginneryourself helps give you perspective.
FablesWeek Three: Watercolor PaintingFables studied this week:The Crow and the PitcherThe Fables of Aesop“Little by little does the trick.”page 129The Ant and the Grasshopper as retold by Amy Lowry PooleMaterials:sketchpadsnature journalsset of Stockmar watercolor paints (yellow, red, blue)loose sheets of watercolor papertextured handmade paper, or a papermaking kitmasking tapepainting boards (one each for child and parent)¾ inch paintbrushes (one each for child and parent)paper towelsplain spongessmall jarsThe Crow and the PitcherBackgroundThere is a lot of background work you have to do before teaching each artistic methodto your children. This is especially true of the watercolor painting, which is done in avery specific way in the Waldorf method. The CD-ROM which accompanies Painting inWaldorf Education will be of tremendous help to you in teaching this subject. Pleaseview (or review) it and read Chapter One of the book before beginning this unit.Depending on when you have begun using the Waldorf method with your child, feel freeto add in any of the activities from Chapter Two (2.1 through 2.4) that you feel arenecessary to help her have a full experience of painting. It is essential that yourchildren have a firm idea of how colors are blended (which you will have coveredsomewhat in crayon drawing and your work with the watercolor pencils) as well as theemotional nature and moral qualities of each color:
I asked the little boy who cannot see,"And what is colour like?""Why, green," said he,"Is like the rustle when the wind blows throughThe forest; running water, that is blue;And red is like a trumpet sound; and pinkIs like the smell of roses; and I thinkThat purple must be like a thunderstorm;And yellow is like something soft and warm;And white is a pleasant stillness when you lieAnd dream."AnonymousHere are some examples of color conversations. They should be done over and over,since something new will arise from your child each time.“The colors arranged in a wheel can be a source of inspiration for the paintinglessons. The circle is created through two opposite forces, yellow and blue,which are united through intensification and mixing, representing the rising andfalling processes, taking place in nature, calling forth the greatest possible rangeof colors. It is an inexhaustible source. When you pass your eye along all thesedifferent color qualities, images and experiences arise. They can evoke differenttimes of day, different seasons. Randomness disappears and only the essence ofthings is expressed. One’s own fantasy and ideas look after the rest and whilepainting you arrive at an understanding of the language of colors. As educatorswe must learn to speak this language, as fluently as possible to show the pupilthe way in the painting process .The color circle is a world of its own. When you let this totality act upon you,you will soon be absorbed into a harmony. Goethe refers to this impression,which goes beyond the mere senses, as the sense-moral working of color, in thiscase colors working inside and opposite one another.”from Painting in Waldorf EducationColor ConversationsAn abundance of color conversations are possible for the first few years – color tonesand color movements, soul movements, and soul moods. Here are some examples:Paint yellow next to blue at the top of the paper.Paint yellow next to green at the bottom of the paper.Which pairing is more beautiful?
Paint with an emphasis on movement
Week One: Crayon Drawing Week Two: Pencil Sketching Week Three: Watercolor Painting Week Four: Clay and Beeswax Modeling . Booklist: Essential Books The Fables of Aesop Joseph Jacobs From Nature Stories to Natural Science Donna Simmons The Ant and the Grasshopper Amy Lowry Poole (do not substitute other retellings) .

