Transcription
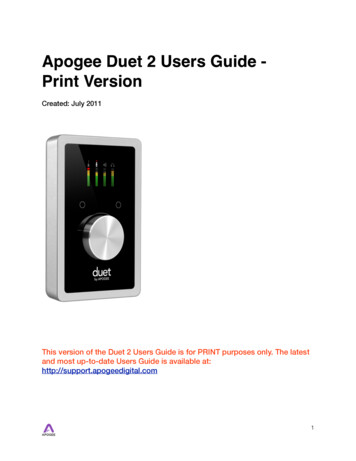
Apogee Duet 2 Users Guide Print VersionCreated: July 2011This version of the Duet 2 Users Guide is for PRINT purposes only. The latestand most up-to-date Users Guide is available at:http://support.apogeedigital.com1
Quick Start5Introduction!5Packaging Contents!5Duet 2 Panel Tour!6OLED Panel Tour!7Connecting to your Mac!7Choosing Duet 2 for Mac Sound I/O!8Configuring the Input!9Using Duet with Logic!12Operation16Multi-Function Controller Knob!16Duet’s OLED Display!16Duet’s Assignable Touchpads!18OS X System Preferences!20OS X Audio MIDI Setup!22Apogee Maestro 2!23Using the AC Adapter!23Maestro 225Devices Sidebar!25Device Icon & ID Button!25Input Tab Window!26Output Tab Window!272
Device Settings Tab Window!28Mixer Tab Window!29System Setup Window!30Menu Bar Menus!31Low Latency Mixing!33Connections39Monitors and Headphones!39Instrument and Mic!39Connecting Two Microphones!40Connecting Two Instruments!41Powered Monitors!43Connecting To A Home Stereo!43Applications44Using Duet with Logic!44Using Duet with Apple’s GarageBand!47Using Duet with Avid Pro Tools 9!48Using Duet with Apple MainStage!50Using Duet with Ableton Live!50Using Duet with Apple Final Cut Pro!51Using Duet with Apple Soundtrack Pro!52Using Duet with MOTU Digital Performer!53Using Duet with Steinberg Nuendo!543
Troubleshooting/FAQsFurther Troubleshooting Resources!5557Specifications58System Requirements59Duet 2 Warranty Information and Legal Notices604
Quick StartIntroductionThank you for purchasing Duet 2. This QuickStart guide describes how to set up Duet 2with your Mac, connect speakers or headphones to play back music and connect micsand instruments to record your own creations with Apple’s Logic Pro or Logic Express.Duet 2 - The new standard in personal recordingDuet set the standard for professional portable recording on the Mac. Duet 2 expandsupon this award-winning legacy with next generation sound quality and groundbreakingnew features that will raise the bar for the personal recording studio. Compact and simpleto use, Duet 2 lets you capture your best take anywhere with ease and withoutcompromise.Packaging ContentsThe following items are included in the Duet 2 box.Software and Firmware for this Apogee Product is available online only at http://www.apogeedigital.com/downloads.php Duet 2 QuickStart Guide Breakout Cable USB Cable Universal Power Adapter for US, UK and EU5
Duet 2 Panel Tour6
OLED Panel TourConnecting to your MacSystem Requirements Intel Mac 1.5 GHz or faster MacOS X 10.6.4 or greater 2 GB minimum RAM, 4 GB recommended7
Install Duet Software1. Remove the protective film from the front panel, otherwise the Touch Pads will not work2. Connect Duet 2’s USB port to a USB port on your Mac using the supplied USB 2cable.3. Go to http://www.apogeedigital.com/downloads.php4. Follow the onscreen steps to get the latest Duet 2 software installer.5. Once you have downloaded the package, double-click the open box icon to run theinstaller.6. You will be required to restart your computer after the install is complete.As Duet 2 is powered through the USB connection, the display’s Home View will illuminate,indicating that Duet is now powered on.Choosing Duet 2 for Mac Sound I/OAfter restarting your Mac, a dialog box will prompt you to choose Duet 2 for Mac soundinput and output. Click Yes.Connect to Headphones or SpeakersConnect headphones to the headphone output on the front of the unit. Connect theprovided breakout cable to I/O Breakout Port on the rear of the unit. Then connect the1/4” speaker outputs of the breakout cable to the inputs of your active (powered) studiomonitors or amplifier.8
Check Audio Playback in iTunesTo verify Duet 2’s output, open iTunes (found in your Mac’s Applications folder), choose asong, and click Play.Adjusting VolumeTo adjust the volume, press Duet 2’s Multi-function Controller Knob until the speaker orheadphone icon is lit on the display’s Home View and turn the knob clockwise to increasethe volume.If you get a message warning about USB current draw, connect Duet 2 to the suppliedApogee AC Power Adapter. For more details about current draw on the USB bus, pleasesee Current Draw on page 23.Configuring the InputConnect the provided breakout cable to Duet 2.9
Connect a microphone or instrument to the breakout cable’s combo jack.Open Apogee Maestro 2 from the Applications folder and select the Input tab.Select the Analog Level setting that corresponds to the device you have connected toDuet 2’s input(s).For example, if you have a microphone connected to the XLR input of the breakout cable’scombo jack, select “Mic” from the Analog Level menu.10
Note: If you are using a condenser microphone that requires phantom power, then selectthe 48V box on the Input tab of Maestro 2.Phantom power is indicated on Duet 2’s display by a red dot above the microphone icon.If you have an instrument connected to the 1/4” input of the combo jack, then select “Inst”from the Analog Level menu.Push the Multi-function Controller Knob until the microphone or instrument icon is lit on theDuet 2’s display and turn the knob to raise or lower Duet 2’s input level*.*See the Duet 2 User’s Guide for a more detailed description of setting recording levels.11
Using Duet with LogicWarning! Apogee's Control Panel within Logic is not compatible with Duet 2Go to the Logic Pro or Logic Express menu and choose Preferences Audio.In the Core Audio pane of the Device tab, select Duet 2 for Output Device and InputDevice.12
Set the I/O Buffer Size to 128.Click Apply Changes at the bottom of the Preferences window.By selecting Duet 2 input and output labels in Logic, the labels you see in Logic’s ChannelStrip input and output slots correspond exactly to Duet 2’s hardware inputs and outputs,making I/O assignment much easier.1. In Logic, choose Options Audio I/O Labels.2. Select the labels in the Provided by Driver column.3. Close the IO Labels window.13
Now close the Logic Pro Preferences window and selectNew Collection Empty Project from the Trackmenu.If you are recording a single microphone or instrument, make the following selections in theNew Tracks dialog box:Number: 1Type: AudioFormat: MonoInput: Input 1Output: 1-2Check the Input Monitoring checkboxCheck the Record Enable checkbox14
Logic will now ask you to name the project and save in on your hard drive.Click the Record button in the transport control at the bottom of the Logic window.You’re now recording with Duet 2!15
OperationMulti-Function Controller KnobDuet’s multi-function controller knob allows you to easily switch between Inputs andOutputs as well as adjust their levels.Duet’s OLED DisplayDuet's OLED display provides full color visual feedback and metering.16
Input levelTo change Duet’s input level (i.e the recording level of mics and instruments), press andrelease the encoder repeatedly until the desired input is highlighted at the top of the OLEDdisplay. Then turn the encoder until the desired recording level is obtained (as seen in yourrecording software).Speaker Output levelTo change Duet’s speaker output level (i.e the listening level of connected speakers), pressand release the encoder repeatedly until the image of the speaker is highlighted on theOLED display. Now, turn the encoder to the desired listening level. The hardware encoderoperates in parallel with any software level controls.Headphone Output levelTo change Duet’s headphone output level (i.e the listening level of connected headphones),press and release the encoder repeatedly until the headphone icon is highlighted on theOLED display. Now, turn the encoder to the desired listening level. The hardware encoderoperates in parallel with any software level controls.17
Duet’s Assignable TouchpadsDuet's two assignable touchpads can be assigned to control many of Duet's settings andparameters. Use them to setup advanced muting functions when recording yourself or totoggle between program and cue during a DJ set. Assigning functions to the touchpads isdone on the Device Settings tab of Maestro.Mute outputsTo mute the speaker and headphone outputs, assign one of the user assignabletouchpads in Maestro 2 to the desired mute function.18
Dim outputsThe Dim function lowers the output volume by 15 dB. This function is convenient whenyou want to briefly lower the playback volume in the speakers or headphones in order tohold a conversation without completely muting the output.Sum to MonoThe Sum to Mono function is used to examine phase relationships on stereo tracks. Whenit is engaged, phase errors become more noticeable. See Sum to Mono (as link) for moreinformation.Toggle Headphone sourceToggle Headphone source is used to switch the Headphone output between Out 1-2, Out3-4 and Mixer. This function is especially useful for digital DJs to switch the headphoneoutput between the House output (sent to Out 1-2) and a cue output (sent to Out 3-4).19
Clear MetersThe Clear Meters function will remove held peak and over indicators on software andOLED meters when Peak Hold or Over Hold (in the System Setup tab window) is set toInfinite.OS X System PreferencesThe OS X System Preferences Sound window provides settings to choose Duet for Macsound input and output. If you didn’t choose Duet for Mac sound I/O in step 3 of theQuickstart guide, you may do so in this window.Go to the Apple menu System Preferences. Open the Sound preference window byclicking on the speaker icon.20
Click on the Output tab and select Duet in the Device window.Click on the Input tab and select Duet in the Device window.21
OS X Audio MIDI SetupOS X Audio MIDI Setup is found in Applications Utilities and provides control of Duet’ssample rate and output level, as well as settings to choose Duet for Mac sound input andoutput. To control Duet’s output level and muting from AMS or from the Mac keyboard, setDefault Output to Duet.Setting Sample RateDuet operates at all standard sample rates between 44.1 kHz and 192 kHz. In mostcases, the sample rate is set by the audio application with which Duet is communicating.For example, when using Duet with GarageBand, Duet’s sample rate is automatically set to44.1 kHz, to match the GarageBand song’s sample rate. For those audio applications thatdon’t include a sample rate setting, such as iTunes, Duet’s sample rate may be set inAudio MIDI Setup or on the System setup tab of Maestro 2.22
Apogee Maestro 2Apogee Maestro software provides the most complete control of Duet, including; Control of all settings Store/recall of configurations Low latency mixingUsing the AC AdapterIf the "Connect AC adaptor" warning is displayed on the top panel OLED, or the "USBcurrent limit" warning (shown below) appears on the Mac desktop, connect the suppliedAC adaptor between Duet's DC power input and a standard wall socket. The AC adaptormay be connected to any AC voltage between 100 and 240 volts AC, thus making itcompatible with virtually any wall socket in the world. Also included with the AC adaptorare NEMA (North America), "Europlug" and British "BS 1363" plug adaptors.Duet 2 is easily powered by any available USB port on your Mac in most applications.However there may be scenarios where connecting the external AC power adaptor ispreferred or required.There are two factors contributing to increased power consumption: output volume into low impedance headphones phantom power for condenser mics.If you have Duet 2 set at a reasonable volume, you are not drawing that much power overthe USB bus and you will be able to connect any microphones that require phantompower. When you are using low impedance headphones and your volume is very high youare drawing more power over the USB bus and may need the AC adaptor to use powerhungry condenser mics.23
Duet 2 has a sophisticated built-in power management system and will notify you with amessage on its display when the use of the external power supply is recommended.In extreme cases (fault conditions, like accidental full volume on headphones) Duet 2 willautomatically reduce the headphone output in favor of continued use of phantom powersuch that a possible running recording session will not be interrupted.24
Maestro 2Devices SidebarAny Maestro-compatible Apogee interfaces connected to the host computer are displayedin the Devices sidebar, regardless of whether the connection is made via Symphony PCIcard, USB or FireWire. Hardware settings are displayed by first selecting one or moreinterfaces in the Devices sidebar and then clicking on a tab.Device Icon & ID ButtonA device icon and ID button is placed adjacent to each row of parameters to identify thehardware unit to which the row belongs. By clicking on the ID button, the correspondinghardware unit’s front panel will illuminate. Each hardware unit is assigned a Peripheral25
Prefix (A-Z, found in Maestro’s Device Settings tab window) which is displayed on the IDbutton.Input Tab Window1. Device Icon & ID Button - see the description above.2. Analog Level - Use this menu to select microphone, instrument, or line input.3. Soft Limit - Use this menu to engage Soft Limit. Soft Limit is Apogee’s proprietaryanalog process for taming transients before A/D conversion. By gently roundingtransients in a transparent manner, it’s possible to maximize level BEFORE the A/Dconversion stage.Soft Limit is most effective with signals with large transients such as drums, percussionand plucked instruments. Soft Limit may not be the appropriate choice for signals suchas bass or organ.4. Input Level - The gain of each input is controlled with these software knobs. The gainlevel is indicated in the value box below the knob.5. Analog Input Meter - This meter displays the level of the analog input after A/Dconversion.6. Group On/Off - Use this to group the gain setting of both inputs so that the multifunction knob on Duet or one software gain knob controls both input gainssimultaneously. If a gain offset is present between inputs when Group is set to On, thisoffset is preserved.7. Phase - Check this box to reverse the polarity of the input signal. Under certaincircumstances, when two mics are used on one source, reversing the polarity of onemic may result in a fuller sound. For example, when top and bottom mic'ing a snaredrum, a fuller sound is obtained when the polarity of the bottom mic is reversed.8. 48 V / Phantom Power- Engage this button for 48 volts phantom power on the XLRconnections. Condenser mics require phantom power to operate.26
Output Tab Window1. Device Icon & ID Button - see the description above.2. Analog Output Meter - This meter displays the level of the analog output before D/Aconversion, in the range -48 to 0 dBFS.3. Speaker Out Selection - This menu selects the software output that is sent to thespeaker outputs.4. Speaker Out Level - This knob controls the speaker output level.5. Headphone Out Selection - This menu selects the software output that is sent to theheadpone outputs.6. Headphone Level - This knob controls the output level of the front panel HP 1 output.7. Dim - Engage dim if you want to lower the output level by 15 dB. This function isconvenient when you want to briefly lower the playback volume in the speakers orheadphones in order to hold a conversation without completely muting the output.Duet's top panel touch buttons may be set to engage Dim on the Speaker outputs, theheadphone outputs or both at the same time. See Device Settings Tab Window.8. Sum to Mono - Engage this to sum the left and right channels of the output to mono.At many points of the production process, this function is useful to check monocompatibility. For example, when recording with a stereo pair of mics, it's always agood idea to sum both channels to mono and check for unevenness in the frequencyrange caused by phase cancellation and reinforcement of particular frequencies. If thesound changes significantly or sounds "hollow" when summed to mono, this mayindicate phase issues caused by a less than optimal mic placement.When mixing, it's also a good idea to check mono compatibility. Beyond questions ofphase, any masking caused by overlapping frequencies is most easily heard whenlistening in mono. Try starting a mix with Sum to Mono engaged - once you havesomething that sounds good, then disengage Sum to Mono and revel at the beautifulstereo mix you've created!27
Duet's top panel touch buttons may be set to engage Sum to Mono on the Speakeroutputs, the headphone outputs or both at the same time. See Device Settings TabWindow.9. Mute - Engage this to mute the output.Device Settings Tab Window1. Device Icon & ID Button - see the description above.2. Peripheral Prefix - Use this drop down menu to assign a letter prefix (A-Z) to eachperipheral device displayed in the Devices Sidebar. The letter prefix is included in allgraphic representations of the peripheral as well as I/O labels in Maestro and CoreAudio compatible applications.3. Touch Button Assignment - Use these menus to select the parameter controlled bythe user assignable touchpads.28
Mixer Tab WindowUse the Mixer Tab Window to adjust the Mix of input and output signals as well asconfigure Low Latency Mixing.1. Device Icon & ID Button - see the description above.2. Pan - This rotary knob pans the input signal between he left and right sides of theMaestro mixer's stereo output.3. Input Level fader - This slider sets the level of the input signal in the Maestro mixer'sstereo output.4. Meter - This bargraph style meter displays the pre-fader input level.5. Level Value Window - The level value, between -48 and 0 dBFS.6. Solo - This button mutes all other channels whose Solo buttons are not engaged.7. Mute - This button mutes the input channel.8. Software Return Fader - This stereo input channel provides level control, metering,and mute/solo functions for the signal from the software application containingplayback. Match your recording software application's mixer output and the SoftwareReturn menu selection. In most cases, the recording software mixer output andMaestro's Software Return will be set to 1-2.9. Mixer Master - This is the level control and meter for the mixer's output.29
System Setup Window1. Sample Rate - This drop down selects the sample rate. Under certain circumstances,(for example, when a DAW session is open) this setting will be overridden by softwaresample rate settings.The following settings determine the behavior of the front panel and Maestro softwarelevel meters.2. Peak Hold - This pop-up menu sets the time that peak indications are held onsoftware and front panel meters.3. Over Hold - This pop-up menu sets the time that over indications are held on softwareand front panel meters.4. Keyboard Volume Control - Peripheral, Audio Output - These drop down menus setthe hardware output to be controlled by the Mac keyboard’s volume control. First,select the hardware peripheral that includes the desired output using the Peripheraldrop down then select the specific audio output using the Audio Output drop down.30
Menu Bar MenusAbout Apogee Maestro - Choose this menu item to display version information.Preferences - Choose this menu item to display Maestro’s Preference panel.Check Launch Maestro automatically when connecting a device to launch Maestro whenthe Mac is started.Check Display Pop-ups to show top panel encoder adjustments.Hide Apogee Maestro 2 - Choose this menu item to hide the Maestro application.Hide Others - Choose this menu item to hide all other open applications.Show All - If any open applications have been hidden, choose this menu item to reveal allopen applications.Quit Apogee Maestro 2 - Choose this menu item to quit Maestro.Close - Choose this menu item to close the Preferences panel when opened.Rescan - Choose this menu item to re-initialize the link between Maestro software andApogee hardware connected to the Mac, in the case where the hardware is correctlyconnected and powered on but not detected in Maestro.31
Minimize - Choose this menu item to minimize the Maestro window to the OS X Dock.Zoom - Choose this menu item to maximize the size of the Maestro window.Choose any of the currently active tabs to open the tab window. Type Command number to open the tab window.32
Low Latency MixingWhile recording, if you notice a delay between the moment you play or sing a note andwhen you hear it in your headphones you are experiencing latency. Maestro’s low latencymixer may help and can be configured by clicking the Mixer tab in Maestro.Maestro Low Latency mixingA bit of background information concerning latency and computer-based digital recordingsetups will help you better understand these functions.When recording with most computer-based digital audio applications, the delay betweenthe input and output of the recording system often disturbs the timing of the musiciansperforming. This delay, known as latency, means that the musician hears the notes playeda few milliseconds after having actually played them. As anyone who has spoken on aphone call with echo knows, relatively short delays can confuse the timing of anyconversation, spoken or musical.33
To illustrate the effect of latency, figure A depicts the typical signal path of a vocal overdubsession. A vocalist sings into a microphone, which is routed to an analog to digitalconverter then to the audio software application for recording. In the software application,the vocalist’s live signal is mixed with the playback of previously recorded tracks, routed toa digital to analog converter, and finally to the vocalist’s headphones. A slight delayaccumulates at each conversion stage, while a much greater amount of delay occursthrough the software application, resulting in the vocalist hearing his performance inheadphones delayed by several milliseconds.By routing the hardware input directly to the hardware output and mixing in playback asshown in Figure B, it’s possible to provide the vocalist a headphone monitoring signal witha much shorter delay.First, the signal being recorded (in this case, a vocal mic) is split just after the A/D stageand routed to both the software application for recording and directly back to the hardwareoutputs without going through the latency-inducing software. This creates a low latencypath from mic to headphones. Next, a stereo mix of playback tracks is routed to the lowlatency mixer and combined with the hardware input(s). This allows the performer to hearhimself while listening to playback tracks without a confusing delay in order to comfortablyrecord overdubs.Note that the software application’s mixer is used to set a stereo mix of playback trackswhile the low latency mixer is used to set the balance between the stereo playback mixand the hardware inputs.34
Working with the Maestro MixerDo I need the Maestro Mixer?The Maestro mixer serves to provide a low latency monitoring mix while recording.Therefore if you’re using Duet to listen to iTunes or audio from another program, there’s noneed to use the mixer. Leave the outputs set to 1-2 or 3-4 to disable the mixer.It’s possible that the latency of your particular recording system is low enough to beunnoticed. The system latency is determined by the recording software’s buffer setting,and if your Mac is powerful enough, it’s possible to set the buffer to a lower value (shorterlatency) without encountering clicks and pops in the audio output. If the latency doesn’tpose a problem while recording, the mixer may be disabled by simply leaving the outputsset to 1-2 or 3-4.Recording software settingsBefore using the Maestro mixer, it’s necessary to change a few settings in your recordingsoftware.35
Software monitoring - Because the signal to be recorded is monitored through theMaestro mixer, the outputs of software tracks actively recording should be muted - afterall, that’s the source of the latency. Most software applications provide an option to turn offsoftware monitoring of recording tracks. In Logic Pro, for example, the software monitoringoption is found in the same Audio preferences window used to select Duet as thehardware device (Logic Pro menu Preferences Audio). Uncheck the SoftwareMonitoring box.Playback mix - In your recording software, set up a mix of all playback tracks and route itto Out L-R. If a master fader controls the global output of the mix, it’s suggested to set thefader to 0 dB.36
Maestro Mixer SettingsInitially, set the Input, Software Return, and Mixer Master faders to 0 dB.On the Output tab of Maestro, set the speaker, headphone, or both outputs to Mixer.37
After making the input selection and setting gain, the signal should be displayed on boththe Input and Mixer Master meters. If the Input’s Over LED lights, reduce the input gain inthe Maestro Control window. If the Mixer Master’s Over LEDs light, reduce the Input fader.Now start playback in your recording software. The playback signal should be displayedon the Software Return and Mixer Master’s meters. Use the Software Return and Inputfaders to establish your desired balance between the input and playback signals. If you’vefound a good balance but the Mixer Master’s Over LEDs light, reduce the Mixer Masterfader.38
ConnectionsMonitors and HeadphonesConnect powered monitors (Duet will not power unpowered monitors) to the 1/4” outputswith the icons labeled OUT-L and OUT-R on the breakout cable.Connect headphones to the 1/4” output with the icon.Instrument and MicConnect an instrument to the combination jack's 1/4" instrument input 139
In Maestro, change Input 1 to instrumentConnect a microphone to the combination jack's XLR input 2In Maestro, change Input 2 to MicConnecting Two MicrophonesConnect microphone #1 to the combination jack's XLR input 1.40
In Maestro, change Input 1 to MicConnect microphone #2 to the combination jack's XLR input 2.In Maestro, change Input 2 to MicConnecting Two InstrumentsConnect instrument #1 to the combination jack's 1/4" instrument input 141
In Maestro, change Input 1 to instrumentConnect instrument #2 to the combination jack's 1/4" instrument input 2In Maestro, change Input 2 to instrument42
Powered MonitorsDuet is also the best way to listen to audio from your Mac, be it from your iTunes library, anInternet radio station, or CD/DVD playback.To connect Duet's line outputs directly to powered monitors (Duet will not powerunpowered monitors), you'll need 2 cables with 1/4" tip-ring-sleeve plugs on one end toconnect to Duet's OUT-L and OUT-R jacks and the appropriate connector on the otherends to connect your monitors.Connecting To A Home StereoTo connect Duet directly to your home audio system, insert 1/4” to RCA adapters in Duet’sOUT-L and OUT-R jacks and use a commonly available RCA to RCA cable to connect tothe AUX or CD input of your receiver.When connecting to a home audio system, set Duet’s output to 0 dBFS (i.e full volume)and use the receiver’s volume control to set playback level.Once audio connections have been made, connect Duet’s USB port to your Mac using theprovided USB 2 cable. Once connected, the dialog box shown below will appear. ClickYes to choose Duet for Mac sound output and input.This selection may also be made in the System Preferences Sound Output panel.In iTunes, select Computer as the sound output. Any audio that is played back in iTuneswill now be routed to Duet and the output will be available on your home audio system.43
ApplicationsUsing Duet with LogicWarning! Apogee's Control Panel within Logic is not compatible with Duet 2Go to the Logic Pro or Logic Express menu and choose Preferences Audio.In the Core Audio pane of the Device tab, select Duet 2 for Output Device and InputDevice.44
Set the I/O Buffer Size to 128.Click Apply Changes at the bottom of the Preferences window.By selecting Duet 2 input and output labels in Logic, the labels you see in Logic’s ChannelStrip input and output slots correspond exactly to Duet 2’s hardware inputs and outputs,making I/O assignment much easier.1. In Logic, choose Options Audio I/O Labels.2. Select the labels in the Provided by Driver column.3. Close the IO Labels window.Now close the Logic Pro Preferences window and selectNew Collection Empty Project from the Trackmenu.45
If you are recording a single microphone or instrument, make the following selections in theNew Tracks dialog box:Number: 1Type: AudioFormat: MonoInput: Input 1Output: 1-2Check the Input Monitoring checkboxCheck the Record Enable checkboxLogic will now ask you to name the project and save in on your hard drive.Click the Record button in the transport control at the bottom of the Logic window.46
Using Duet with Apple’s GarageBandWarning! Apogee's Control Panel within GarageBand is not compatible with Duet2If you have Duet connected when you launch GarageBandChoose GarageBand Preferences.Choose Duet USB for Audio Output and Audio Input47
Using Duet with Avid Pro Tools 9Choose Setup menu Playback Engine.Choose Duet for Current Engine.48
Set the Buffer Size to 128. Click OK.49
Using Duet with Apple MainStageWarning! Apogee's Control Panel within MainStage is not compatible with Duet 2Choose MainStage PreferencesClick on the Audio/MIDI tab Select Duet in the Audio Output and Audio Input menus Set I/O Buffer Size to 128 Close the Preferences window after making settings.Using Duet with Ableton LiveChoose Live PreferencesClick on the Audio tab. Select CoreAudio in the Driver Type menu. Select Duet in both theAudio Input Device and Audio Output Device menus. Set Buffer Size to 128. Close thePreferences window after making settings.50
Using Duet with Apple Final Cut ProChoose Final Cut Pro Audio/Video Settings.Click on the A/V Devices tab. Select Duet in the Audio menu. Click OK.51
Using Duet with Apple Soundtrack ProChoose Soundtrack Pro Preferences.Click on the
Using Duet with Ableton Live! 50 Using Duet with Apple Final Cut Pro! 51 Using Duet with Apple Soundtrack Pro! 52 Using Duet with MOTU Digital Performer! 53 . 7. Install Duet Software 1. Remove the protective film from the front panel, otherwise the Touch Pads will not work 2. Connect Duet 2's USB port to a USB port on your Mac using the .