Transcription
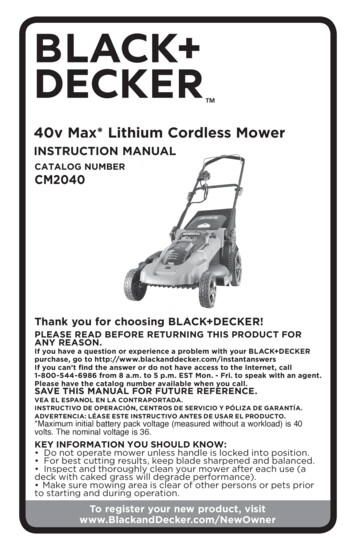
40v Max* Lithium Cordless MowerINSTRUCTION MANUALCatalog NumberCM2040Thank you for choosing Black Decker!Please read before returning this product forany reason.If you have a question or experience a problem with your Black Deckerpurchase, go to http://www.blackanddecker.com/instantanswersIf you can’t find the answer or do not have access to the Internet, call1-800-544-6986 from 8 a.m. to 5 p.m. EST Mon. - Fri. to speak with an agent.Please have the catalog number available when you call.Save this manual for future reference.VEA EL ESPANOL EN LA CONTRAPORTADA.INSTRUCTIVO DE OPERACIÓN, CENTROS DE SERVICIO Y PÓLIZA DE GARANTÍA.ADVERTENCIA: LÉASE ESTE INSTRUCTIVO ANTES DE USAR EL PRODUCTO.*Maximum initial battery pack voltage (measured without a workload) is 40volts. The nominal voltage is 36.key information you should know: Do not operate mower unless handle is locked into position. For best cutting results, keep blade sharpened and balanced. Inspect and thoroughly clean your mower after each use (adeck with caked grass will degrade performance). Make sure mowing area is clear of other persons or pets priorto starting and during operation.To register your new product, visitwww.BlackandDecker.com/NewOwner
SAFETY GUIDELINES - DEFINITIONSIt is important for you to read and understand this manual. The information it containsrelates to protecting YOUR SAFETY and PREVENTING PROBLEMS. The symbolsbelow are used to help you recognize this information.DANGER: Indicates an imminently hazardous situation which, if not avoided, willresult in death or serious injury.WARNING: Indicates a potentially hazardous situation which, if not avoided,could result in death or serious injury.CAUTION: Indicates a potentially haz ard ous situation which, if not avoided, mayresult in minor or mod er ate injury.NOTICE: Used without the safety alert symbol indicates potentially hazardoussituation which, if not avoided, may result in property damage.The following are explanations ofimportant safety hazard pictorials onthe mower.1. User must read andunderstand the instructionmanual.electric lawn mowers, basicsafety precautions shouldalways be followed to reducethe risk of FIre, electric shock,and personal injury, includingthe following:READ ALL INSTRUCTIONS2. To avoid the risk of seriousinjury do not mow up and downslopes. Always mow acrossslopes.To reduce risk of injury: Before any use, be sure everyone usingthis tool reads and understands allsafety instructions and other informationcontained in this manual. Save these instructions and review frequentlyprior to use and in instructing others.3. To avoid the risk of injury tobystanders keep all personsand pets at a safe distance fromthe mower while operating.4. Rotating blades can causeserious injury. Keep hands and feetclear of mower deck and dischargeopening at all times. Always besure blade has stopped (waitfor the blade to stop rotating (approximately3 seconds) after releasing bail handle andremoving the safety key) before removing andreplacing grass catcher, cleaning, servicing,transporting or lifting the mower.5. Objects struck by mowerblade can cause serious injury.Stay behind the handle whenthe motor is running. Alwaysensure persons and pets areclear of the discharge from the mowerwhile operating. Always inspect mowingarea before mowing and remove objectsthat could be thrown by blade. Releasebail handle to turn mower off and wait forthe blade to stop rotating (approximately3 seconds) before crossing walk, roads,patio and gravel drives.DANGER: IMPORTANT SAFEPRACTICES FOR WALKBEHIND MOWERSThis mower is capable of amputating handsand feet and throwing objects. Failure toobserve the following safety instructionscould result in serious injury or death.GENERAL OPERATION1. Read, understand, and follow allinstructions on the mower and in theinstruction manual before starting.2. Do not put hands or feet near or underthe mower. Keep clear of the dischargeopening at all times.3. Only allow responsible adults, who arefamiliar with the instructions, to operatethis mower.4. Clear the area where the mower isto be used of objects such as rocks,sticks, wire, toys, bones, etc., whichcould be thrown by the blade. Objectsstruck by the blade can cause severeinjury to persons. Stay behind thehandle when the motor is running.5. Be sure the area surrounding the moweris clear of bystanders before operating. Allbystanders and pets should be kept at asafe distance. Stop the mower if anyoneenters the area surrounding the mower.6. Do not operate mower barefooted orWARNING: ImportantSafety Warnings andInstructionsWARNING: When using2
while wearing sandals. Always wearsubstantial footwear.7. Do not pull mower backward unlessabsolutely necessary. Always lookdown and behind before and whilemoving backward.8. Never direct discharged material towardanyone. Avoid discharging materialagainst a wall or obstruction. Materialmay ricochet back toward the operator.Release bail handle to turn moweroff and stop the blade when crossinggravel surfaces.9. Do not operate mower without theentire grass catcher, discharge guard,rear guard, or other safety protectivedevices in place and working.Periodically check all guards and safetyprotective devices to ensure they arein good working order and will operateproperly and perform their intendedfunction. Replace a damaged latch,guard or other safety device beforefurther use.10.Never leave a running mower unattended.11.Always release the bail handle tostop the motor and wait until the bladecomes to a complete stop and removethe safety key before cleaning themower, removing the grass catcher,un-clogging the discharge guard, whenleaving the mower, or before makingany adjustments, repairs or inspections.12.Operate mower only in daylight or goodartificial light when objects in the pathof the blade are clearly visible from theoperating area of the mower.13.Do not operate mower while under theinfluence of alcohol or drugs, or whenyou are tired or ill. Always stay alert,watch what you are doing, and usecommon sense.14.Avoid dangerous environments. Neveroperate mower in damp or wet grass,never use mower in the rain. Always besure of your footing; walk; never run.15.Disengage the drive system, if soequipped, before starting the motor.16.If the mower should start to vibrateabnormally, release the bail handle, waitfor the blade to stop and remove thesafety key and battery pack, then checkfor the cause immediately. Vibration isgenerally a warning of trouble.17. Always wear proper eye andrespiratory protection when operatingthe mower.18.The use of any accessory orattachment not recommended for usewith this mower could be hazardous.Only use accessories approved byBlack Decker.19.Never overreach while operating themower. Always be sure to keep properfooting and balance at all times whileoperating the mower.SLOPE OPERATIONSlopes are a major factor related to slipand fall accidents, which can result insevere injury. Operation on all slopesrequires extra caution. If you feel uneasyon a slope, do not mow it.1. Mow across the face of slopes; neverup and down. Exercise extreme cautionwhen changing direction on slopes.2. Watch for holes, ruts, bumps, rocks, orother hidden objects. Uneven terrain couldcause a slip and fall accident. Tall grasscan hide obstacles.3. Do not mow on wet grass orexcessively steep slopes. Poor footingcould cause a slip and fall accident.4. Do not mow near drop-offs, ditches,or embankments. You could lose yourfooting or balance.CHILDRENTragic accidents can occur if the operator isnot alert to the presence of children. Childrenare often attracted to the mower and themowing activity. Never assume that childrenwill remain where you last saw them.1. Keep children out of the mowing areaand under the watchful care of aresponsible adult other than the operator.2. Be alert and turn mower off if a childenters the area.3. Never allow children to operate the mower.4. Use extra care when approaching blindcorners, shrubs, trees, or other objectsthat may block your view of a child.GENERAL SERVICE1. Never operate mower in a closed area.2. Keep all nuts and bolts tight to be sure theequipment is in safe working condition.3. Never tamper with safety devices. Checktheir proper operation regularly.4. Keep mower free of grass, leaves, orother debris build-up. Allow mower tocool before storing.5. If you strike a foreign object, releasebail handle to turn mower off, wait forthe blade to stop and remove the safetykey and battery pack, then inspect themower. Repair, any damage, beforestarting and operating the mower.6. Never make any adjustments or repairswith the motor running or while thesafety key is in the mower.7. Always remove safety key and batterypack before adjusting, cleaning, repairing,inspecting, transporting, storing or leavingthe mower.8. Check grass catcher components and3
the discharge guard frequently and whennecessary replace with Black Deckerrecommended parts only.9. Mower blades are sharp. Wrap theblade or wear gloves, and use extracaution when servicing them.10.Maintain or replace safety andinstruction labels, as necessary. This Class B digital apparatus complieswith Canadian ICES-003.This device complies with Part 15 of theFCC Rules. Operation is subject to thefollowing two conditions: (1) this devicemay not cause harmful interference,and (2) this device must accept anyinterference received, including interferencethat may cause undesired operation.NOTE: This equipment has been testedand found to comply with the limits forClass B digital device, pursuant to part15 of the FCC Rules. These limitsare designed to provide reasonableprotection against harmful interferencein a residential installation. Thisequipment generates, uses and canradiate radio frequency energy and, ifnot installed and used in accordancewith the instructions, may cause harmfulinterference to radio communications.However, there is no guarantee thatinterference will not occur in a particularinstallation. If this equipment does causeharmful interference to radio or televisionreception, which can be determinedby turning the equipment off and on,the user is encouraged to try to correctthe interference by one or more of thefollowing measures:. Reorient or relocate the receivingantenna. Increase the separation between theequipment and the receiver. Connect the equipment into an outleton a circuit different from that to whichthe receiver is connected. Consult the dealer or an experiencedradio/TV technician for help.Changes or modifications to this unit notexpressly approved by the party responsiblefor compliance could void the user’s authorityto operate the equipment. This Class B digitalapparatus complies with Canadian ICES-003. operator is responsible for followingwarnings and instructions in thismanual and on unit. Restrict use ofthis mower to persons who read,understand and follow warnings andinstructions in this manual and on unit.Avoid dangerous environment – don’tuse lawn mowers in damp or wet locations.Don’t Use In Rain.Keep Children Away – All visitorsshould be kept a safe distance fromwork area.Dress Properly – Do not wear looseclothing or jewelry. They can be caughtin moving parts. Use of rubber glovesand footwear is recommended whenworking outdoors.Use Safety Glasses – Always use faceor dust mask if operation is dusty.Use Right Appliance – Do not uselawn mower for any job except that forwhich it is intended.Use of Extension Cords Makesure the extension cord is in goodcondition before using. Always usethe proper size extension cords withthe tool – that is, proper wire size forvarious lengths of cord and heavyenough to carry the current the tool willdraw. Use of an undersized cord willcause a drop in line voltage resultingMinimum Gage for Cord SetsTotal Length of Cord in Feet0-2526-5051-100101-150(0-7,6m) (7,6-15,2m) (15,2-30,4m) (30,4-45,7m)Ampere RatingMore Not moreAmerican Wire GageThan ot RecommendedVolts120Vin loss of power and overheating. Forproper size cords see chart below. CHECK FOR DAMAGED PARTS.Before further use of the mower, aguard or other part that is damagedshould be carefully checked todetermine that it will operate properlyand perform its intended function.Check for alignment of moving parts,binding of moving parts, breakageof parts, mounting, and any otherconditions that may affect theiroperation. A guard or other part that isdamaged should be properly repairedor replaced by an authorized servicecenter unless otherwise indicatedelsewhere in this manual. REPAIRS AND SERVICE. Repairs,maintenance and any adjustmentsnot specified in this manual shouldbe performed by Black Deckerauthorized service centers or otherqualified service organizations, alwayssave these instructionsWARNING: GENERALSAFETY WARNINGS ANDINSTRUCTIONS FOR ALL TOOLS THIS TOOL CAN BE DANGEROUS.Follow all warnings and SafetyInstructions in this manual. The4
using identical replacement parts.WARNING: Some dust created bythis product contains chemicals known tothe State of California to cause cancer,birth defects or other reproductive harm.Some examples of these chemicals are: compounds in fertilizers compounds in insecticides,herbicides and pesticides arsenic and chromium fromchemically treated lumberTo reduce your exposure to these chemicals, wear approved safety equipmentsuch as dust masks that are speciallydesigned to filter outmicroscopic particles. The label on your tool may include thefollowing symbols. The symbols and theirdefinitions are as follows:V.voltsmW.milliwattsnm.wavelength in nonometersA.amperesHz.hertzW.wattsmin.minutesor AC.alternating currentor DC.direct currentno.no load speed.Class I Construction(grounded).earthing terminal.safety alert symbol.Class II Construction(double insulated)./min or rpm.revolutions orreciprocation per minute. Use proper respiratory protection. Read instruction manual before use.Use proper eye protection.Use proper hearing protectionDANGER: ADDITIONALWARNINGS FOR MOWERS Avoid dangerous environment –don’t use lawn mowers in damp or wetlocations. Don’t Force Lawn Mower – It will dothe job better and safer at the rate forwhich it was designed. Don’t Overreach – Keep properfooting and balance at all times. Stay Alert – Watch what you are doing.Use common sense. Do not operatelawn mower when you are tired. Store Idle Lawn Mower Indoors –When not in use, lawn mower shouldbe stored in an indoor dry and lockedup place – out of reach of children.Remove safety key Maintain Lawn Mower With Care –Keep cutting edges sharp and cleanfor best and safest performance. Keep guards in place and inworking order. Keep blades sharp. Keep hands and feet away fromcutting area. Objects struck by the lawn mowerblade can cause severe injuries topersons. The lawn should always becarefully examined and cleared of allobjects prior to each mowing. If lawn mower strikes a foreignobject, follow these steps:1) Stop lawn mower. Release the bailhandle.2) Remove battery and safety key.3) Inspect for damage.4) Repair any damage before restartingand operating the lawn mower. Use identical replacement bladesonly.FUNCTIONAL DESCRIPTION1. Switch box2. Bail handle3. Upper-handle4. Lower-handle5. Upper-handle attachment levers (2)6. Lower-handle attachment levers (2)7. Cut height adjust lever8. Grass collection bag9. Rear door cover10. Battery port11. Battery storage compartment12. Carrying handles13. EdgeMax 21359841110126713125
iMPORtANt SAFEtYiNStRuCtiONS FOR BAttERYChARGERSSAVE THESE INSTRUCTIONS: Thismanual contains important safetyinstructions for battery chargers. Before using charger, read all instructionsand cautionary markings on charger, batterypack, and product using battery pack.WARNING: Shock hazard. Do notallow any liquid to get inside charger.CAUTION: Burn hazard. Toreduce the risk of injury, charge onlydesignated Black Decker batteries.Other types of batteries may burstcausing personal injury and damage.CAUTION: Under certainconditions, with the charger plugged in tothe power supply, the charger can beshorted by foreign material. Foreignmaterials of a conductive nature such as,but not limited to, steel wool, aluminumfoil, or any buildup of metallic particlesshould be kept away from chargercavities. Always unplug the charger fromthe power supply when there is no batterypack in the cavity. Unplug charger beforeattempting to clean. permanently affix charger to anysurface. The charger is intended to useon a flat, stable surface (i.e., table top,bench top).Do not operate charger withdamaged cord or plug — have themreplaced immediately.Do not operate charger if it hasreceived a sharp blow, beendropped, or otherwise damagedin any way. Take it to an authorizedservice center.Do not disassemble charger; take itto an authorized service center whenservice or repair is required. Incorrectreassembly may result in a risk ofelectric shock, electrocution or fire.Disconnect the charger fromthe outlet before attempting anycleaning. This will reduce the risk ofelectric shock. Removing the batterypack will not reduce this risk.NEVER attempt to connect 2chargers together.The charger is designed to operate onstandard household electrical power(120 Volts). Do not attempt to use it onany other voltage.Important safetyInstructIons forbattery packsWARNING: DO NOT attempt to charge the batterypack with any chargers other than theones in this manual. The charger andbattery pack are specifically designed towork together. These chargers are not intended for anyuses other than charging designatedBlack Decker rechargeablebatteries. Any other uses may result in riskof fire, electric shock or electrocution. WARNING: The charger supplied withthis product is intended to be plugged insuch that it is correctly orientated in avertical or floor mount position. Do not expose charger to rain or snow. Pull by plug rather than cord whendisconnecting charger. This will reducerisk of damage to electric plug and cord. Make sure that cord is located so that itwill not be stepped on, tripped over, orotherwise subjected to damage or stress. Do not use an extension cord unlessit is absolutely necessary. Use ofimproper extension cord could result inrisk of fire, electric shock, or electrocution. Do not place any object on top ofcharger or place the charger ona soft surface that might blockthe ventilation slots and result inexcessive internal heat. Place thecharger in a position away from anyheat source. The charger is ventilatedthrough slots in the top and the bottomof the housing. Do not mount charger on wall orWARNING: For safe operation,read this manual and manuals originallysupplied with tool before using the charger.The battery pack is not fully charged outof the carton. Before using the batterypack and charger, read the safetyinstructions below. Then follow chargingprocedures outlined.Read all Instructions Do not incinerate the battery packeven if it is severely damaged oris completely worn out. The batterypack can explode in a fire. Toxic fumesand materials are created when batterypacks are burned. Do not charge or use battery inexplosive atmospheres, such as in thepresence of flammable liquids, gases ordust. Inserting or removing the battery fromthe charger may ignite the dust or fumes. If battery contents come into contactwith the skin, immediately wash areawith mild soap and water. If battery liquidgets into the eye, rinse water over theopen eye for 15 minutes or until irritationceases. If medical attention is needed,the battery electrolyte for Li-ion batteriesis composed of a mixture of liquid organiccarbonates and lithium salts. Contents of opened battery cells maycause respiratory irritation. Providefresh air. If symptoms persist, seekmedical attention.6
battery pack or the charger as long asthe battery is not depleted.WARNING: Burn hazard.Battery liquid may be flammableif exposed to spark or flame. Charge the battery packs only inBlack Decker chargers. DO NOT splash or immerse in wateror other liquids. This may causepremature cell failure. Do not store or use the tool andbattery pack in locations where thetemperature may reach or exceed105 F (40 C) (such as outside shedsor metal buildings in summer).WARNING: Never attempt toopen the battery pack for anyreason. If battery pack case iscracked or damaged, do notinsert into charger. Do not crush,drop or damage battery pack. Donot use a battery pack orcharger that has received asharp blow, been dropped, runover or damaged in any way (i.e.,pierced with a nail, hit with ahammer, stepped on). Damagedbattery packs should be returnedto service center for recycling.WARNING: Fire hazard. Donot store or carry battery sothat metal objects can contactexposed battery terminals. Forexample, do not place battery inaprons, pockets, tool boxes,product kit boxes, drawers, etc.,with loose nails, screws, keys,etc. Transporting batteries canpossibly cause fires if thebattery terminals inadvertentlycome in contact with conductivematerials such as keys, coins,hand tools and the like. The USDepartment of TransportationHazardous Material Regulations(HMR) actually prohibittransporting batteries incommerce or on airplanes (i.e.,packed in suitcases and carry-onluggage) UNLESS they areproperly protected from shortcircuits. So when transportingindividual batteries, make surethat the battery terminals areprotected and well insulatedfrom materials that couldcontact them and cause a shortcircuit. NOTE: Batteries shouldnot be put in checked baggage.Charging ProcedureBlack Decker chargers are designedto charge Black Decker battery packs:LCS36 (2 hrs), LCS436 (6 hrs).1. Plug the charger into an appropriateoutlet before inserting the battery pack.2. Insert the battery pack into the charger.3. The green LED will flash indicatingthat the battery is being charged.4. The completion of chargeis indicated by the green LEDremaining on continuously. Thepack is fully charged and may be used atthis time or left on the charger.Recharge discharged batteries as soonas possible after use or battery lifemay be greatly diminished.Charger DiagnosticsThis charger is designed to detect certainproblems that can arise with the battery packsor the power source. Problems are indicatedby one LED flashing in different patterns.Bad batteryThe charger can detect a weakor damaged battery. The red LEDflashes in the pattern indicated on thelabel. If you see this bad battery blinkpattern, do not continue to charge thebattery. Return it to a service center or acollection site for recycling.Hot/Cold pack delayWhen the charger detects abattery that is excessively hot orexcessively cold, it automatically startsa Hot/Cold Pack Delay, suspendingcharging until the battery has normalized.After this happens, the chargerautomatically switches to the PackCharging mode. This feature ensuresmaximum battery life. The red LED flashesin the pattern indicated on the label whenthe hot / cold pack delay is detected.Important Charging Notes1. Longest life and best performancecan be obtained if the battery pack ischarged when the air temperature isbetween 60 F and 80 F (16 - 27 C).DO NOT charge the battery pack in anair temperature below 40 F ( 4.5 C),or above 105 F ( 40.5 C). This isimportant and will prevent seriousdamage to the battery pack.2. The charger and battery pack maybecome warm to touch while charging.This is a normal condition, and doesnot indicate a problem. To facilitate thecooling of the battery pack after use,avoid placing the charger or battery packin a warm environment such as in aStorage Recommendations1. The best storage place is one that iscool and dry away from direct sunlightand excess heat or cold.2. Long-term storage will not harm the7
metal shed, or an uninsulated trailer.3. If the battery pack does not charge properly:a. Check current at receptacle byplugging in a lamp or other applianceb. Check to see if receptacle isconnected to a light switch whichturns power off when you turn outthe lights.c. Move charger and battery packto a location where the surroundingair temperature is approximately 60 F- 80 F (16 - 27 C).d. If charging problems persist, takethe tool, battery pack andcharger to your local service center.4. The battery pack should be rechargedwhen it fails to produce sufficientpower on jobs which were easily donepreviously. DO NOT CONTINUE touse under these conditions. Followthe charging procedure. You may alsocharge a partially used pack wheneveryou desire with no adverse affect on thebattery pack.5. Foreign materials of a conductivenature such as, but not limited to, steelwool, aluminum foil, or any buildup ofmetallic particles should be kept awayfrom charger cavities. Always unplug thecharger from the power supply when thereis no battery pack in the cavity. Unplugcharger before attempting to clean.6. Do not freeze or immerse charger inwater or any other liquid.WARNING: Shock hazard. Do notallow any liquid to get inside charger. Neverattempt to open the battery packfor any reason. If the plastichousing of the battery packbreaks or cracks, return to aservice center for recycling.AA1A2Installing and Removing theBattery PackWARNING: Make certain thesafety key is removed toprevent actuation beforeremoving or installing battery.To install battery pack: Depress the battery port cover releasebutton (14) and pull the battery portcover (15) up to expose the battery port(10) as shown in figure B. Slide the battery (16) into the batteryport until it is fully seated and anaudible click is heard (figure C). Makesure battery pack is fully seated andfully latched into position. Close the battery port cover. Ensure thecover is fully latched before starting mower.BState of charge indicatorThe battery is equipped with a stateof charge indicator. This can be usedto display the current level of chargein the battery while in the mower andduring charging. It does not indicatetool functionality and is subject tovariation based on product components,temperature and end-user application.1514CChecking state of charge during use: Press the state of charge indicatorbutton (A1). The four LEDs (A2) will illuminateindicating the percent of charge in thebattery. See chart in figure A. If LED light does not illuminate, chargebattery.816
The arrow must be lined up with 1, 2, or 3for operation. Close the handle height adjust levers(7) as shown in Figure F. As you closeeach, make sure the teeth are engagedas shown in Figure G. If the connection between the handleand lever is too tight or loose, open thelever and adjust the depth of the leverby turning the lever. Close it again untilthe teeth are fully clasped and eachlever stays securely closed.To remove battery pack: Open the battery port cover (15) asdescribed above. Depress the battery release button (17)on the battery pack and pull batterypack out of tool as shown in figure D.DF17184BATTERY STORAGEAn extra battery can be stored using thebattery storage compartment (11). Lift the storage compartment cover andslide the battery into the compartmentas shown in Figure E. Battery in thiscompartment will not actuate the mower.197EGThis product can accept any of the batteriesand chargers listed in the chart below.LI-ION Battery Packs and ChargersDescription Cat. #ATTACHING UPPER HANDLE (Figure H) Remove the upper-handle attachmentlevers (5), nuts (20), and washers (21)from the handle. Line up the holes on the bottom of theupper handle (3) with the holes on thetop of the lower handle (4).Batteries: LI-IONLBX36LBXR36LBXR2036Chargers: LI-IONLCS36LCS436HAssemblyWARNING: Before assembly, make5sure the bail handle is released and thesafety key is removed.ATTACHING LOWER HANDLE Lift lower handle (4) into place makingsure the arrow (18) on the base of themower lines up with 1, 2, or 3 on the baseof the handle (19) (inset of Figure F)CAUTION: Ensure each side of thelower handle is set on the same number.3492120
NOTE: Make sure the cord is located onthe front of both handles. If it is not it mayresult in the cord tangling and the inabilityto easily store the mower (Figure I). From the outsideof the upperhandle (3), slidethe lever boltthrough the holes. Slide the washerover the bolt of thelever and looselyassemble theentire assemblywith the nut. Rotate the upperhandle into itsoperating position. Close the lever. If it is too tight or tooloose, open the lever and the nut toadjust the clamping. Check the leversby closing them. They should be tightenough so the handles are held firmly,but loose enough so the levers can befully closed. Adjust by opening the leverand turning the nut until the handles aresecured.Bagging Ensure the side discharge attachment(27) (Figure M) and the mulching insert(26) (Figure L) are removed from themower before bagging. Lift the rear door cover (9) and placethe grass collection bag (8) onto themower so the bag hooks (24) rest onthe lugs (25) as shown in Figure K.Then lower the rear door cover.IK24259Mulching Ensure the side discharge attachment (27)and the collection bag (8) are not attached. Lift the rear door cover (9) and slide themulching insert (26) fully into the moweras shown in Figure L. Ensure the rear door cover fully closesbefore turning mower on.SECURING THE MOTOR CABLE(FIGURE J)CAUTION: Attach cable sothat it does not becomestretched or pinched in thejoints of the handles duringuse or folding. This can causedamage to the cord.The motor cable (22) has to be fixed tothe handles using the cable restraints (23)that are already attached to the handle.To clip the cable to the handle: Place the handles in operating position,see “Attaching Lower Handle” section. Run the cable up the front of the lowera
necessary replace with blAcK decKeR recommended parts only. 9. Mower blades are sharp. Wrap the blade or wear gloves, and use extra caution when servicing them. 10.Maintain or replace safety and instruction labels, as necessary. This class b digital apparatus complies with canadian iceS
