Transcription
JDJJordan Dental Journal, Vol. 18, No. 1, 2012Clinical Digital Photography in Orthodontics:Professional Photographic Records in Daily Practice.Shadi S. Samawi BDS, MMedSci (Orth), MOrthRCSED* Specialist Orthodontist* Private Practice - Amman, Jordan.Correspondence:Dr. Shadi SamawiE-mail: info@sdoc.joAbstractIn recent years, Clinical Photography has grown to become a very important aid and requirement forproper clinical diagnosis, treatment planning and case documentation in Orthodontics and Dentistryin general. The advent of mainstream digital photography a little over a decade ago with its widespread appeal, cost-effectiveness and relative ease of use, along with an increased emphasis on smileesthetics and overall facial harmony - particularly in Orthodontics - has largely contributed to itsincreased relevance to every-day practice.This article will present an overview of the significance of clinical digital photography in every-dayorthodontic practice, a general description of some relevant equipment as well as present an outlineof requirements and best-practices for achieving proper high quality photographic records in a clinicalsetup.Keywords: photography, digital photography, clinical photography, orthodontics, records.Received: March 2013, Published: May 2013Introductionneed for proper clinical photographic records ofthe orthodontic patient has become even moreThe Significance of Clinical Photographyessential for proper treatment-planning andfollow-up.1With more and more emphasis from theorthodontic community on the achievement ofClinical photographs allow the orthodontist tobalanced facial harmony and smile esthetics forcarefully evaluate the existing patient's soft-our patients - in addition to the traditional goalstissue patterns during the treatment planningof a well-aligned and functional dentition - thestage.2 Lip morphology and tonicity, the smile arcwww. jd j. jd a. o rg. j o20
JDJJordan Dental Journal, Vol. 18, No. 1, 2012and the degree of incisal show upon smiling andsuitable digital camera setup, one or two highoverall smile esthetics can all be assessed fromcapacity memory cards, and a computer with avarious angles at any time. Thus, they allow us toreasonably-sized hard disk setup for processing,study the patient in a so called “social” setting,storage and back-up purposes.and all without the patient ever being present.Such information greatly aids the orthodontist inOne of the main advantages of digitalformulating the best possible treatment plan forphotography is the ability to enhance, or “post-each patient, and monitoring any changes inprocess” your images. Even if some images aresubsequent follow-ups.still not suitably aligned, rotated, or the color,brightness or saturation etc. is not up toNeedless to say, the need for photographicstandard, it is usually relatively easy to adjustrecords for purposes of research and publication,those using a suitable image-editing software onlecturing and for teaching presentations hasyour computer, before saving the images in thealways been present. In addition, the growingpatient’s file. 1,5importance for the need for such records formedico-legal reasons cannot be ignored.2,3However, it is vital not to overlook the ethicalissues raised by such enhancement proceduresGoing for a digital camera is the obvious choiceand as such, any photo manipulation beyond thein this digital age. One of the major reasons is thebasic general improvement of the properties ofrelative ease of use of such cameras, along withthe original image as described in this article isthe ability to repeat or delete unsuitable imagesnot advised and is considered - by all means -on the spot. There is no need to wait until theethically and professionally unacceptable, andfilm is developed to check your photos. Anymay ultimately lead to legal ramifications.problems can be easily rectified immediately.Another important advantage is the issue ofRecommended Equipment“running cost”; Digital camera setups are costeffective; eliminating the cost of photographicThere are several types of digital camerasfilm, developing costs and hassles, as well asavailable on the market today. Most compactsolving the issue of “physical storage” of slidescameras i.e “Point and Shoot” cameras availableand photographs of large numbers of patients.3,4today have sufficient image quality andAll that is required is a one-time investment in asophistication to produce reasonable clinicalwww. jd j. jd a. o rg. j o21
JDJJordan Dental Journal, Vol. 18, No. 1, 2012dental photographs, although at the expense ofbuild quality and thus would be a solid long-termproper illumination of the scene due toinvestment for the practice. Many DSLRs nowlimitations of their built-in Single-point Flashcome with High Definition (HD) video recordingunits. However, their results are oftencapabilities as well, that may prove useful ininconsistent and require too much time and trialcertain clinical situations. An entry-level DSLRand error to get the desired outcome. The idealcamera is recommended for clinical photography,camera setup that is best-suited andas it will produce the highest quality results whilerecommended for clinical photography is abeing a more cost-effective option than otherDigital Single Lens Reflex camera setup (DSLR)high-end DSLRs.with a suitable Ring Flash unit.3,6,7 The minimumaccepted image resolution that would provide usB. The Lenswith high quality photos for screen presentationor 4x6 prints - if desired - would be around 4Although zoom lenses can generally be used forMegapixels. However, current cameras canclinical photography, the recommended lens toproduce much higher-resolution photos than thisuse is a dedicated Macro lens e.g. a 100mm focalminimum requirement, therefore it can belength Macro lens.generally determined that any current camerawith a resolution of 8 Megapixels or higherMacro Lens vs Macro Functionwould be more than adequate for orthodonticrecord-taking purposes. This setup is describedMacro photography refers to close-upin more detail in the following sections.photography; the classical definition that theimage projected on the "film plane" (i.e film or aA. The Digital Cameradigital sensor) is the same size as the subject.Most Point-&-Shoot digital cameras have a built-A DSLR provides full manual control over allin Macro function that is actually very good forexposure parameters in photography, in additiondental photography purposes. However, ato the usual automatic and semi-automaticdedicated Macro lens attached to a DSLR cameraprograms available on most cameras today.provides even better close-up photos usually withTherefore, they allow maximum flexibility andhigher definition and better focus, and is by farcustomization for producing the highest possiblethe superior choice.8quality of digital images.7 They are of a superiorwww. jd j. jd a. o rg. j o22
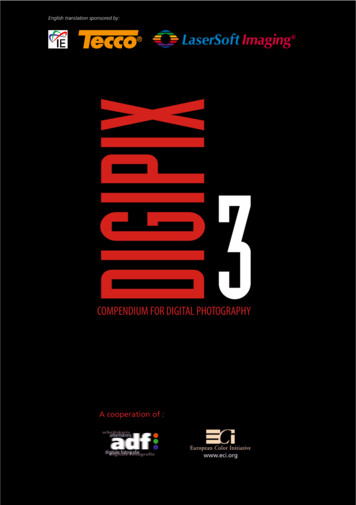
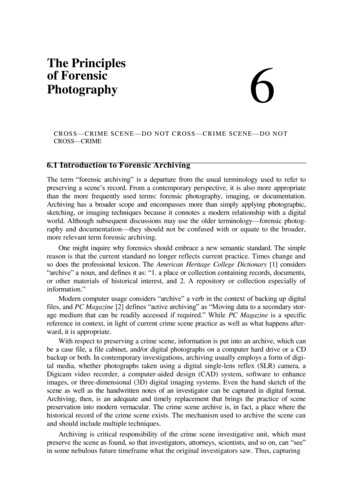
Jordan Dental Journal, Vol. 18, No. 1, 2012JDJC. The FlashRing Flash vs Point FlashThe Single Point Flash built into most compactdigital cameras and some DSLR may occasionallyproduce fairly good light distribution when usedfor clinical photographs, but the results are veryinconsistent and largely depend on cameraorientation and pre-existing lighting conditionsin the clinic. Dark distracting shadows, whichFigure 1 Canon MR-14EX TTL Macro Ring Lite Flash(Canon USA)may obstruct important details frequently occur.These are often irreparable even by using imageediting software, and will detract from the finalquality of the image, and possibly theinformation gained from it. In contrast, Adedicated Ring Flash - eliminates almost allshadows by providing a more even distribution oflight during extra and intra-oral photographs(Figure 1), and thus the quality of the image isenhanced due to overall better illumination.Ring Flash for orthodontic photography.1,3,4,7Figure 2 Large and Small Double-ended CheekRetractors and Medium-sized, Front-silver coated DentalMirror.D. RetractorsThere are two sets of double-ended retractors;Therefore, it is highly recommended to use aone set with a regular and small size either end.The recommended cheek retractors to be usedThese are mainly used for intra-oral occlusalfor best results in clinical photography are twoshots (mirror shots). The other set has a narrowpairs of variable-size double-ended retractorsend and a wide end on the other. These are usedshown (Figure 2).1,3for intra-oral frontal and buccal shots.www. jd j. jd a. o rg. j o23
JDJJordan Dental Journal, Vol. 18, No. 1, 2012Although other types of retractors are availableresulting in haziness or a “Double-Image”. Also,on the market, it is accepted by many that thislight reflection is not on par with the front-selection presents an ideal set to be used forsilvered mirrors, leading to a dimmed, darkenedclinical photography, as they greatly facilitateimage as an end-result. Therefore front-coatedtaking almost any kind of intra-oral photographssilvered mirrors are highly recommended overwith clarity and with the largest possible field ofother types (Figure 2).1,3vision. Smaller one-piece orthodontic bondingretractors are generally not a good choice forIt is generally preferred to use long-handledorthodontic purposes, especially for buccal andmirrors (see Image) as they allow better controlocclusal shots, as their retraction potential is veryand handling by the clinician during the occlusallimited, and it can often prove to be a “painfulshots. Different sizes can be found for use withexperience” for the patient.9different patients depending on age and mouthopening size, with medium-sized mirrorsIt is a wise long-term investment to buy goodgenerally being fit for use with most patients.quality retractors to ensure durability andreliability, with recurrent disinfectionMirrors with no handles may also be usedprocedures.successfully but are trickier to handle, especiallywhen juggling an expensive digital camera in theE. Dental Photography Mirrorsother hand.Many types of mirrors may be used for clinicalIt is important to mention that the previouslyphotography, ranging from front-silveredmentioned equipment are not - by any means -mirrors to highly polished Stainless Steel mirrorsthe only recommended equipment for theof various shapes and sizes. Many authorities inpurposes of clinical photography, nor are theythe field recommend front-coated silverednecessarily the best for all clinicians, and shouldmirrors as they offer the best image quality andbe considered as a basic recommendation that -light distribution over other types of mirrors.in the author’s personal opinion and experience -With front-silvered mirrors, no “ghost” image, orrepresents the simplest, most cost-effective and“double-layering” occurs. In contrast, when usingeasy-to-use setup that will produce the highestglass or rear-coated silvered mirrors, “ghosting”quality professional results in a consistentcan severely affect the quality of the image,fashion.www. jd j. jd a. o rg. j o24
Jordan Dental Journal, Vol. 18, No. 1, 2012How Many Photographs Do We Need?JDJexposure as it determines the other variablesautomatically. The aperture (F number) is bestThere is no “standard” set of clinical photographsset to f22 or higher; this will ensure a high depththat is universally approved as a rule of thumb.of field and focus throughout the various extraHowever, it can generally be accepted - based onand intra-oral photographs.1,2,3 The use of a Ringmany practitioners’ opinions - that a completeflash is essential in this case to ensure proper“Clinical Photographic Set” for any orthodonticlighting and illumination of the scene. Clinicianspatient at any stage of treatment, that wouldwith a good understanding of photographicenable the clinician to obtain maximum benefitexposure principles may choose to use the Fulland information, should include a minimum ofManual setting (M) and control all the exposurenine photographs; four extra-oral, and fivevariables themselves as they see fit.8intraoral photographs per set, with a minimumof two sets; Pre and Post-treatment sets.It is important to note that these are only generalrecommendations and some trial and error mayHowever, a clinician may also choose to takeadditional views, as needed to document thestill be required depending on the existingclinical lighting and situation.entire case in further detail.Extra-oral Clinical PhotographsClinical Photographic TechniqueThey are usually the first and simplestGeneral Camera Settingsphotographs to take. They require properpositioning of the patient and clinician inAs mentioned earlier, DSLRs allow maximumcontrol and customization of camera settings toachieve the best possible results. In most cases, itis recommended to set the camera dial toAperture Priority Mode (A or Av, depending onfront of a suitable plain background; inaddition to the digital camera setup itself. Itis recommended to use a plain-white or darkblue background or alternatively a large wall-camera brand). Aperture Priority mode allowsmounted light box behind the patient’s head,the photographer to control the aperturein order to maintain the best definition of thedimension, through which light enters the lens,soft tissue profile of the patient with nowhile leaving the camera to balance the bestdistractions in the background.3,7www. jd j. jd a. o rg. j o25
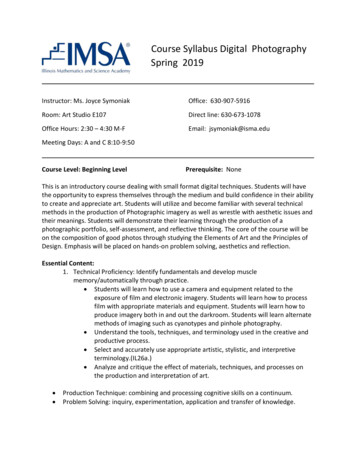
JDJJordan Dental Journal, Vol. 18, No. 1, 2012Standardizing extra-oral photographs byhead in the Natural Head Position, eyesmaintaining a fixed distance between thelooking straight at the camera and the teethpatient and the camera is preferred as itand lips relaxed in the rest position. Thewould provide a consistent magnificationwhole of the patient’s face should be clearlyfactor and add a professional appearance tovisible. Ensuring that the inter-pupillary linethe photos. This may be done by using ais horizontally leveled is vital (Figure 3).tripod set at a fixed marked distance from thebackground and marking a line on the floorThe camera should be held in the verticalat a certain distance from the backgroundportrait orientation for this and all extra-oralwhere patients should consistently standphotographs and the photograph taken at 90while being photographed.degrees to the facial midline for best results,while ensuring proper framing of the entireExtra-oral photos consist of the followinghead and neck.four photographs, taken in the followingsequence:2. Face-Frontal (Smiling)1. Face-Frontal (lips relaxed).The same principles apply as in the first2. Face-Frontal (Smiling).photograph with the important exception3. Profile (Lips relaxed).that the patient should be smiling in a natural4. (45 ) Profile (also known as 3/4 Profile -relaxed manner with the anterior teethSmiling).clearly visible, in order to properly showcaseoverall smile esthetics from the front (FigureThese four shots provide the clinician with4).maximum possible information about thepatient’s facial and soft tissue features,3. Profile (Lips relaxed)proportions, and overall smile esthetics.The profile view has an extremely highdiagnostic value for the orthodontist. The1. Face-Frontal (lips relaxed)patient is required to turn to bodily to theirThe patient should stand at the markedleft thus having their right profile visible todistance form the background with theirthe clinician. Ideally, the whole of the rightwww. jd j. jd a. o rg. j o26
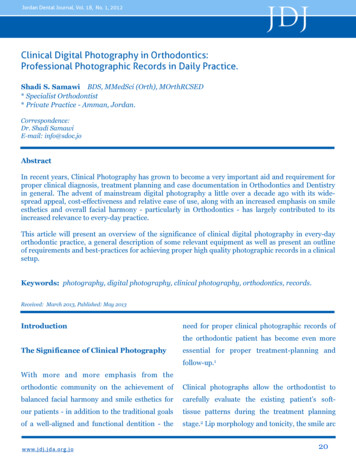
JDJJordan Dental Journal, Vol. 18, No. 1, 2012Figure 3:Full-faceFrontal - Lipsat Rest.Figure 4:Full-faceFrontal Smiling.Figure 5:Right ProfileView - Lips atRest.Figure 6:3/4 Profile Smiling View.side of the face should be clearly visible withhere is particularly important, as it willno obstructions such as hair, hats or scarfs.eliminate any shadowing of the border of theThe head should be in the Natural Headpatient’s profile onto the background, whichPosition, with their eyes fixed horizontally -can very distracting and considerablypreferably at a specific point at eye-level, orcompromise the quality of the photo and theat the reflection of their own pupils in ainformation gained from it.mirror (Figure 5). The use of a Ring flashwww. jd j. jd a. o rg. j o27
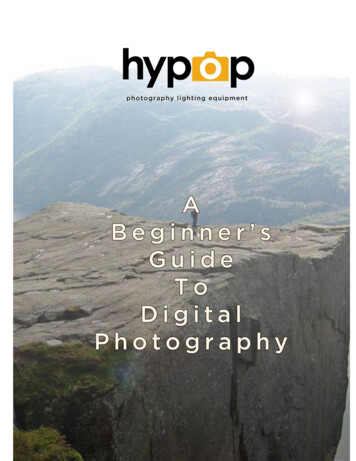
JDJJordan Dental Journal, Vol. 18, No. 1, 20124. (45 ) Profile (also known as 3/4There are five essential intra-oralProfile - Smiling)photographs - taken in the followingFrom the Profile photo position, the patientsequence:is asked to turn their heads slightly to their1. Frontal - in occlusionright - about 3/4 of the way, hence the name -2. Right Buccal (in occlusion)while keeping their body still in the previous3. Left Buccal (in occlusion)“Profile Shot” position i.e. Facing forward.4. Upper Occlusal (mirror)They are then instructed to look into the5. Lower Occlusal (mirror)camera, and then smile. It is essential thatthe patient’s teeth show clearly when smiling,1. Frontal (in occlusion)otherwise the photograph would be ofThe patient is seated in the dental chair withminimum benefit (Figure 6).head raised to the clinician’s elbow level. Thedental assistant stands behind the patientThis shot conveys the patient as if in “socialand uses the larger set of retractors frominteraction”, and can provide valuabletheir wider ends to retract the patient's lipsinformation regarding the smile esthetics’sideways and outward, away from the teethchanges pre and post-treatment.and gingivae. Maximum field of view isrequired for visualization of all teeth andIntra-oral Clinical Photographsassociated tissues. The photo should be taken90 to the facial mid-line & central incisors.Intra-oral photos require the proper cheekWith the occlusal plane properly leveledretractors, dental photography mirrors, asaccording to the patient’s existing occlusion.well as a well-trained assistant if possible - inThe Ring-Flash will greatly aid in producing aaddition to the camera setup. They requirequality photograph by ensuring the bestmore attention to detail to produce excellentpossible illumination with no shadows,results.especially in the deeper parts of the oralcavity and buccal vestibules (Figure 7).www. jd j. jd a. o rg. j o28
JDJJordan Dental Journal, Vol. 18, No. 1, 20122. Right Buccal (in occlusion)molar is visible if possible, while the assistantHere, the assistant flips the right retractor tomaintains hold of the left retractor, withoutthe narrower side, while the left retractorundue stretching. Again, the shot is taken 90 remains in place as for the previous frontalto the canine-premolar area for bestshot. The patient is asked to turn their headvisualization of the buccal segmentto their left so their right side will be facingrelationship, as this is very important inthe clinician (Figure 8).orthodontic assessment. A useful tip wouldbe for the clinician to fully stretch the rightThe clinician holds the right retractor andretractor just before taking the shot tostretches it to the extent that the last presentminimize any discomfort for the patient, andFigure 7Figure 8Frontal View - In Occlusion.Right Buccal View - In Occlusion.www. jd j. jd a. o rg. j oFigure 9 Left Buccal View - In Occlusion.29
JDJJordan Dental Journal, Vol. 18, No. 1, 2012Figure 11Figure 10Upper Occlusal View - Mirror.achieve maximum visibility of the lastpresent molar, if possible.3. Left Buccal (in occlusion)The assistant now switches the retractorswith the narrow end on the photo side(patient’s left) and the wide end on the other(patient’s right). The same principles as forthe right buccal shot apply. The clinicianshould move their body slightly to the rightwhile holding the retractor on the photo side,to ensure the photo is taken at 90 degrees tothe canine-premolar area, while the patientturns their head all the way to their right(Figure 9).Lower Occlusal View - Mirror.4. Upper Occlusal (mirror)The assistant now switches to the smallerretractor set and with the patient’s mouthheld open, the retractors are inserted in a “V”shape to retract the upper lips sideways andaway from the teeth. The clinician inserts themirror with its wider end inwards to capturemaximum width of the arch posteriorly, andpulls it slightly downwards so that the wholeupper arch is visible to the last present molar(Figure 10).The shot must be taken 90 to the plane ofthe mirror for best visibility and no visualdistortion. The mid-palatal raphe is used as aguide to level the palate in the photo.Minimal retractor visibility in the image isrecommended, and no fingers should bevisible in the final photo, if possible.www. jd j. jd a. o rg. j o30
JDJJordan Dental Journal, Vol. 18, No. 1, 20125. Lower Occlusal (mirror)esthetics, or a close-up view of the overjetThe assistant now lowers the smallerfrom one side may be taken to demonstrateretractors into a Reverse “V” shape to retractthe amount of incisor overjet and overbitethe lower lips sideways and away from thepresent. Close-ups focusing on certainteeth. The clinician would now lift the mirroraspects of existing appliances, brackets orupwards so he/she may visualize thearch-wires and associated auxiliaries may bereflection of the lower arch, while the patientindividually taken as needed, although manyis be asked to “lift their chin up” slightly.clinicians prefer to crop the necessary detailsIdeally, the shot should be taken 90 to theout of the complete photographic setplane of the mirror, with the last molardescribed earlier, provided that they arepresent visible. An important issue heretaken using a high resolution setting, to avoidwould be the tongue position of the patientany deterioration in image quality uponwhile taking the photo. It is best to ask thecropping.10patient to “roll back” their tongue behind themirror so that it won’t interfere with theHelpful Tips for Best Resultsvisibility of any teeth, particularly in theposterior area (Figure 11).It is recommended that all photographicrecords be taken before impression-taking, toAdditional Photographic Viewseliminate the possibility of impressionmaterial being stuck between the teeth or onThere are several other views that may bethe face during photographic record-taking.3,7taken by the clinician to fully document thecase at hand, depending on his or her needs.Wetting the retractors just before insertionFunctional Occlusion views may be taken byeases their proper positioning in the mouththe orthodontist to demonstrate caninewith minimum patient discomfort.guidance or Group Function of the occlusionto supplement existing records. A close-up ofThe direction of pull of the retractors isthe lips and mouth upon smiling may bealways sideways and slightly forward andtaken for closer examination of overall smileoutward, away from the gingival tissues.www. jd j. jd a. o rg. j o31
JDJJordan Dental Journal, Vol. 18, No. 1, 2012This maximizes the field of view andReferencesminimizes patient discomfort.1. Sandler J, Murray A; Digital Photography inWhen taking occlusal views with the mirror,Orthodontics. Journal of Orthodontics, 2001,28:197-201slightly warming the mirror in warm water2. Mizrahi E; Orthodontic Pearls: A Selection ofprior to insertion in the mouth helps preventPractical Tips and Clinical Expertise; 2004, Taylor &“Fogging” of the mirrors which wouldFrancis Group. (Sandler J, Murray A; Ch 4:prevent a clear image from being obtained.1,9Orthodontic Photography)3. Sandler J, Murray A; Current Products andPractice: Clinical Photographs - The Gold Standard.With some patients, profuse salivary flow andJournal of Orthodontics, 2002, 29:158-67“frothing” can affect the quality of the image4. Sandler J, Murray A; Recent Developments inbeing taken, thus a saliva ejector can be usedClinical Photography. British Journal OfOrthodontics, 1999, 26: 269-72to eliminate saliva prior to taking each5. Mah J, Ritto K; The Cutting Edge. Journal ofphotograph.3Clinical Orthodontics, 2002, 36: 11; 619-6256. Palomo J, Wolf G, Hans M; Use of DigitalPost-ProcessingPhotography in the Case Orthodontic Clinic. Am JOrthod Dentofacial Orthop 2004; 126: 381-5Once all photographic records are obtained,7. Terry D.A, Snow S.R, Mclaren E.A; Contemporarythey should be downloaded to the computerDental Photography: Selection and Application.and an initial back-up of the original filesFunctional Esthetics & Restorative Dentistry, 2008;performed onto a separate computer, hardSeries 1, No. 1.8. Mastering Digital SLR Photography: The Seriousdisk or suitable removable media prior toPhotographer’s Guide to High Quality Digital SLRpost-processing the photos for finalPhotography, Busch D, 2005, Thomson Publishing.archiving, to ensure the originals are always9. Mckeown H.F, Sandler P.J, Murray A.M; How toavailable in case of a computer or hard diskavoid common errors in clinical photography.Journal of Orthodontics, 2005, 32: 43-54failure or if something goes wrong during10. Aperture: Digital Photography Fundamentals.post-processing.10 This will be the subject of2005. Apple Inc.another article.www. jd j. jd a. o rg. j oView publication stats32
Keywords: photography, digital photography, clinical photography, orthodontics, records. need for proper clinical photographic records of the orthodontic patient has become even more essential for proper treatment-planning and follow-up.1 Clinical photographs allow the orthod