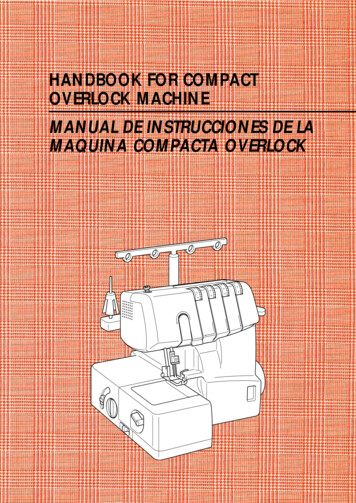
Transcription
ncbc brother cover EngPANTONE 285KKNOWING YOURSEWING MACHINESEWING BASICSUTILITY STITCHESAPPENDIXComputerized Sewing d in ChinaOperation Manual
FOR USERS IN THE UK, EIRE, MALTA AND CYPRUS ONLYIf this machine is fitted with a three-pin non-rewireable BS plug then please read the following.IMPORTANTIf the available socket outlet is not suitable for the plug supplied with this equipment, it should be cutoff and an appropriate three-pin plug fitted. With alternative plugs an approved fuse must be fitted inthe plug.NOTEThe plug served from the main lead must be destroyed as a plug with bared flexible cords ishazardous if engaged in a live socket outlet. In the event of replacing the plug fuse, use a fuseapproved by ASTA to BS 1362, i.e. carrying themark, rating as marked on plug.Always replace the fuse cover, never use plugs with the fuse cover omitted.WARNINGDO NOT CONNECT EITHER WIRE TO THE EARTH TERMINAL WHICH IS MARKED WITH THELETTER ‘E’, BY THE EARTH SYMBOLOR COLOURED GREEN OR GREEN AND YELLOW.The wires in this main lead are coloured in accordance with the following code:BlueNeutralBrownLiveAs the colours of the wiring in the main lead of this appliance may not correspond with the colouredmarkings identifying the terminals in your plug, proceed as follows.The wire which is coloured blue must be connected to the terminal which is marked with the letter‘N’ or coloured black or blue.The wire which is coloured brown must be connected to the terminal which is marked with the letter‘L’ or coloured red or brown.1
CONGRATULATIONS ON CHOOSING OUR MACHINEYour machine is one of the most advanced computerized household sewing machines. To fullyenjoy all the features, we suggest that you study the manual before using the machine.PLEASE READ BEFORE USING THIS MACHINEFor safe operation1. Be sure to keep your eye on the needle while sewing. Do not touch the hand wheel, thread takeup lever, needle, or other moving parts.2. Remember to turn off the power switch and unplug the cord when: Operation is completed Replacing or removing the needle or any other parts A power failure occurs during use Maintaining the machine Leaving the machine unattended3. Do not store anything on the foot controller.4. Plug the machine directly into the wall. Do not use extension cords.For a longer service life1. When storing this machine, avoid direct sunlight and high humidity locations. Do not use orstore the machine near a space heater, iron, halogen lamp, or other hot objects.2. Use only neutral soaps or detergents to clean the case. Benzene, thinner, and scouring powderscan damage the case and machine, and should never be used.3. Do not drop or hit the machine.4. Always consult the operation manual when replacing or installing any assemblies, the presserfeet, needle, or other parts to assure correct installation.For repair or adjustmentIn the event a malfunction occurs or adjustment is required, first follow the troubleshooting table inthe back of the operation manual to inspect and adjust the machine yourself. If the problem persists,please consult your local authorized Brother dealer.For additional product information and updates, visit our web site at www.brother.comThe contents of this manual and specifications of this product are subject to change without notice.2
CONTENTS1. KNOWING YOUR SEWING MACHINE .5NAMES OF MACHINE PARTS AND THEIR FUNCTIONS . 5The main parts . 5Needle and presser foot section . 6Operation buttons . 6Operation panel . 7Flat bed attachment . 7ACCESSORIES .8Optional accessories . 8USING YOUR SEWING MACHINE .9Power supply precautions . 9Power supply . 9Foot controller . 10Sewing speed controller (for models equipped with the start/stop button) . 10Changing the needle stop position . 10THREADING THE MACHINE . 11Winding the bobbin . 11Lower threading . 14Upper threading . 16Drawing up the lower thread . 19REPLACING THE NEEDLE . 20Needle precautions . 20Needle types and their uses . 20Checking the needle . 21Replacing the needle . 21Sewing with a twin needle . 23REPLACING THE PRESSER FOOT . 24Replacing the presser foot . 24Removing the presser foot holder . 252. SEWING BASICS .26SEWING . 26General sewing procedure . 26Selecting stitching . 27Starting to sew . 28Thread tension . 29USEFUL SEWING TIPS . 30Trial sewing . 30Changing the sewing direction . 30Sewing curves . 30Sewing thick fabrics . 30Sewing thin fabrics . 31Sewing stretch fabrics . 31Using a free-arm style . 313
————————3. UTILITY STITCHES .32OVERCASTING STITCHES . 32BASIC STITCHING . 33Basic stitching . 33BLIND HEM STITCHING . 34BUTTONHOLE SEWING . 35Button sewing . 38ZIPPER INSERTION . 40SEWING STRETCH FABRICS AND ELASTIC TAPE . 41Stretch stitching . 41Elastic attaching . 41APPLIQUÉ, PATCHWORK AND QUILT STITCHING . 42Appliqués . 42Patchwork (crazy quilt) stitching . 43Piecing . 43Quilting . 44Free-motion quilting . 45REINFORCEMENT STITCHING . 46Triple stretch stitching . 46Bar tack stitching . 46DECORATIVE STITCHING . 48Fagoting . 49Scallop stitching . 49Smocking . 50Shell tuck stitching . 50Joining . 51Heirloom stitching . 514. APPENDIX .52STITCH SETTINGS . 52Utility stitches . 52MAINTENANCE . 57Cleaning the machine surface . 57Cleaning the bobbin case . 57TROUBLESHOOTING . 59ERROR MESSAGES . 62Operation beep (for models equipped with the operation beep) . 62INDEX . 634
1 KNOWING YOUR SEWING MACHINE1NAMES OF MACHINE PARTS AND THEIR FUNCTIONSThe main partsa Bobbin winder (page 11)This winds the thread onto the bobbin for use as thelower thread.j Operation panel (page 7)This is used to select the stitch and specify the varioussettings.b Spool pin (pages 11 and 16)This holds the spool of thread.k HandwheelUsed to manually raise and lower the needle.c Hole for extra spool pin (page 23)This holds a second spool of thread for sewing with twoneedles.l Main power and sewing light switch (page 9)You can turn the main power and sewing light switchon and off.d Upper tension-control dial (page 29)This controls the tension of the upper thread.m Jack/socket connector (page 9)Insert the plug on the power supply cord into the jack/socket connector.e Thread guide (pages 11 and 16)This is used when winding the thread onto the bobbinand then threading the machine.f Thread take-up lever (page 17)g Thread cutter (page 29)Pass the threads through the thread cutter to cut them.h Flat bed attachment with accessory compartment(pages 7 and 31)i Operation buttons (page 6)The operation buttons differ depending on the sewingmachine model.n Foot controller jack/socket (page 10)Plug in the foot controller plug.o Feed dog position lever (pages 38 and 45)Use the feed dog position lever to lower the feed dogs.p Presser foot lever (page 16)Used to raise and lower the presser foot.q Foot controller (page 10)You can use this to control the sewing speed, and tostart and stop sewing.5
KNOWING YOUR SEWING MACHINE ��———————Needle and presser foot sectiond Presser foot holder screwUse the presser foot holder screw to hold the presserfoot holder in place.e Presser footThe presser foot applies pressure consistently on thefabric as the sewing takes place. Attach the appropriatepresser foot for the selected stitching.f Feed dogsThe feed dogs feed the fabric in the sewing direction.g Quick-set bobbin (for models equipped with the quickset bobbin)You can start sewing without pulling up the bobbin thread.h Bobbin coverOpen the bobbin cover to set the bobbin.a Buttonhole leverLower the buttonhole lever when sewing buttonholesand bar tacks.b Needle threader (for models equipped with the needlethreader) (page 17)i Needle plateThe needle plate is marked with guides for sewingstraight seams.j Needle bar thread guidePass the upper thread through the needle bar thread guide.k Needle clamp screwUse the needle clamp screw to hold the needle in place.c Presser foot holderThe presser foot is installed onto the presser foot holder.Operation buttonsThe operation buttons help you to easily perform various basic sewing machine operations.The operation buttons differ depending on the sewing machine model.a Presser foot leverRaise and lower the presser foot lever to raise and lowerthe presser foot.b Reverse/reinforcement stitch buttonPress the reverse/reinforcement stitch button to sewreverse stitches. Reverse stitches are sewn by keepingthe button pressed down to sew in the oppositedirection. For details, refer to “Sewing reinforcementstitches” (page 29). Buttons provided on some modelsc Start/stop button(for models equipped with thestart/stop button)Press the start/stop button to start or stop sewing. Themachine sews at a slow speed at the beginning ofsewing while the button is depressed. When sewing isstopped, the needle is lowered in the fabric. For details,refer to “Starting to sew” (page 28).d Needle position button(for models equipped withthe needle position button)Press the needle position button to raise or lower theneedle. Pressing the button twice sews one stitch.e Sewing speed controller (for models equipped with thesewing speed controller)Slide the sewing speed controller to adjust the sewingspeed.6
Operation panelThe operation panel, located on the front of thesewing machine, allows you to select a stitch andspecify how the stitch will be sewn.Flat bed attachmentThe accessories are stored in a compartment insidethe flat bed attachment.1Slide the flat bed attachment to the left toa open it.a LCD (Liquid crystal display)The selected stitch (1), presser foot that should be used(2), stitch length in millimeters (3), and stitch width inmillimeters (4) are displayed.b Stitch selection keysPress the stitch selection keys, and then select thenumber for the stitch that you wish to use. For details,refer to “Selecting stitching” (page 27).c Stitch length adjustment keyPress this key to adjust the stitch length. (Press the “–”side to reduce the stitch length; press the “ ” side toincrease the stitch length.)d Stitch width adjustment keyPress this key to adjust the stitch width. (Press the “–”side to reduce the stitch width; press the “ ” side toincrease the stitch width.)a Flat bed attachmentb Storage compartmentNote Put the accessories in the bag, and thenstore the bag inside the compartment. If theaccessories are not in a bag, they may fallout, and be lost or damaged.7
KNOWING YOUR SEWING MACHINE ��———————ACCESSORIESThe following accessories are stored in the flat bed attachment. We have designed these accessories to help yoube able to carry out most sewing tasks.Note(For U.S.A. only) Foot controller: Model TThis foot controller can be used on the following machine models:CS-100, CS-6000, CS-6000i, CS-5100, CS-4000, BC-2500, BC-2300, BC-2100, ES-2400, ES-2200,ES-2000, ES-2410, ES-2210, ES-2010, ES-2420, ES-2220, ES-2020, EX-660, CE-4000, BC-1000, HS-1000 The screw of the presser foot holder is available through your authorized dealer. (Part code: 11 1 needle90/14 1 needle100/16 1 needleNo.Part Name12345678Buttonhole foot “A”Overcasting foot “G”Monogramming foot “N”Zipper foot “I”Zigzag foot “J” (on machine)Blind stitch foot “R”Button fitting foot “M”Seam ripperPart CodeNo.Part NameU.S.A. / Canada OthersXC2691-0319 Bobbin (4)XC3098-03110 Needle setX53840-33111 Twin needleX59370-02112 Cleaning brushXC3021-03113 ScrewdriverXC4051-03114 Extra spool pinX59375-12115 Foot controllerX54243-001Part CodeU.S.A. / 476-021X55467-021130920-021XD0501-021 (EU area)XC8816-021 (Other areas)Optional accessories1.No.182.Part NameWalking Foot2Quilting Foot31/4-Inch QuiltingFoot3.Part CodeU.S.A. / -002F001N:SA125XC1944-0024.No.Part Name4Quilting guide5Eyelet punch5.Part CodeU.S.A. / CanadaOthersF016N:SA132XC2215-002135793-001
USING YOUR SEWING MACHINEPower supply precautions1Be sure to observe the following precautions concerning the power supply.WARNING Use only regular household electricity for the power source. Using other power sources may result infire, electric shock, or damage to the machine. Turn off the main power and remove the plug in the following circumstances: When you are away from the machine After using the machine When the power fails during use When the machine does not operate correctly due to a bad connection or a disconnection During electrical stormsCAUTION Do not use extension cords or multi-plug adapters with many other appliances plugged in to them. Fireor electric shock may result. Do not touch the plug with wet hands. Electric shock may result. When unplugging the machine, always turn off the main power first. Always grasp the plug to remove it fromthe outlet. Pulling on the cord may damage the cord, or lead to fire or electric shock. Do not allow the power cord to be cut, damaged, modified, forcefully bent, pulled, twisted, or bundled.Do not place heavy objects on the cord. Do not subject the cord to heat. These things may damage thecord and cause fire or electric shock. If the cord or plug is damaged, take the machine to yourauthorized dealer for repairs before continuing use. Unplug the power cord if the machine is not to be used for a long period of time. Otherwise a fire mayresult.c switch to “{”.To turn off the machine, set the main powerPower supplyaInsert the plug into a wall outlet.X The sewing lamp goes off when themachine is turned off.Notea Main power switchb Jack/socket connectorbSet the main power switch to “I”.X The sewing lamp comes on when themachine is turned on. If a power outage occurs while the sewingmachine is being operated, turn off thesewing machine and unplug the powersupply cord. When restarting the sewingmachine, follow the necessary procedure tocorrectly operate the machine.(For U.S.A. only) This appliance has a polarized plug (oneblade wider than the other). To reduce therisk of electric shock, this plug is intendedto fit in a polarized outlet only one way. Ifthe plug does not fit fully in the outlet,reverse the plug.If it still does not fit, contact a qualifiedelectrician to install the proper outlet. Donot modify the plug in any way.9
KNOWING YOUR SEWING MACHINE ��———————Foot controllerInsert the foot controller plug into its jack/socket onthe rear side of the sewing machine.Sewing speed controller(for models equipped withthe start/stop button)Slide the sewing speed controller to the left ora right to select the desired sewing speed.Slide the sewing speed controller to the left tosew at a slower speed, or slide the speedcontroller to the right to sew at a faster speed.a Foot controller jack/socketCAUTION When connecting the foot controller, be sureto turn off the sewing machine in order toprevent the machine from accidentally beingstarted.When you press the foot controller down lightly, themachine will run at a low speed. When you pressharder, the machine’s speed will increase. When youtake your foot off the foot controller, the machinewill stop.Slowera Sewing speed controller The speed set using the sewing speedcontroller is the foot controller’s maximumsewing speed.Changing the needle stop positionNormally, the sewing machine is set to leave the needle inthe fabric when sewing is stopped. Instead, the machine canbe set to leave the needle raised when sewing is stopped.aTurn off the sewing machine.FasterYou should make sure that nothing is placed on thefoot controller when the machine is not in use.b key) on the left and turn on the sewing machine.Hold down the “–” side ofCAUTION Do not allow pieces of cloth and dust to buildup on the foot controller. Doing so couldcause a fire or an electric shock.(stitch selectionAfter turning on the sewing machine, releasethe “–” side of(stitch selection key).Note When the foot controller is plugged in, thestart/stop button cannot be used to start orstop sewing (only for models equipped withthe start/stop button).X The needle stop position changes to theraised position.Memo Perform the same operation to change theneedle stop position to the lowered position.10
THREADING THE MACHINEWinding the bobbin1This section describes how to wind the thread onto the bobbin. For details on the fast bobbin winding, see page 13.a Pre-tension diskb Bobbin winder shaftc BobbinCAUTION Only use bobbins (part code: SA156, SFB: XA5539-151) that have been designed for this sewingmachine. Using other bobbins may cause damage to the machine. We designed the bobbin that comes with this machine. If you use bobbins from other models, themachine will not work properly. Only use the bobbin that comes with this machine or bobbins of thesame type (part code: SA156, SFB: XA5539-151).Actual size11.5 mm(7/16 inch)This modelPull up the spool pin as far as possible, anda then put a spool of thread on this pin.bOther modelsPut the bobbin onto the bobbin winder shaftd and slide the bobbin winder shaft to the right.Turn the bobbin clockwise, by hand, until thespring on the shaft slides into the groove ofthe bobbin.Pass the thread around the pre-tension disk.CAUTION If the spool of thread is not in the right place,the thread may tangle on the spool pin.1c the bobbin from the inside of the bobbin.Pass the end of the thread through the hole on2a Spring on the shaftb Groove of the bobbineTurn on the sewing machine.11
KNOWING YOUR SEWING MACHINE ��———————While holding the end of the thread, gently(start/stop button) (for models equipped with thestart/stop button) to wind the thread aroundthe bobbin a few times. Then stop themachine.f press the foot controller or pressPress the foot controller or press(start/i stop button) (for models equipped with thestart/stop button) to start.Note If the sewing machine is to be operatedusing the foot controller, connect the footcontroller before turning on the machine. When the foot controller is plugged in, thestart/stop button cannot be used to start orstop sewing (only for models equipped withthe start/stop button).j spinning slowly, take your foot off the footWhen the bobbin seems full and beginscontroller or press(start/stop button) (formodels equipped with the start/stop button).Cut the thread, slide the bobbin winder shaftk to the left and remove the bobbin.Slide the sewing speed controller back to itsl original position (for models equipped withthe sewing speed controller).MemogTrim the excess thread above the bobbin.CAUTION Make sure you follow the instructionscarefully. If you do not cut the threadcompletely, and the bobbin is wound, whenthe thread runs low it may tangle around thebobbin and cause the needle to break. When the sewing machine is started or thehandwheel is turned after winding thethread around the bobbin, the machine willmake a clicking sound; this is not amalfunction. The needle bar does not move when youslide the bobbin winding shaft to the right.CAUTION Not winding the bobbin properly may causethe thread tension to loosen, and may breakthe needle.Slide the sewing speed controller to the righth (to set the speed to fast). (For modelsequipped with the sewing speed controller.)1a Wound evenlyb Wound poorlya Sewing speed controller122
For models equipped with the fast bobbinwinding systemSlide the sewing speed controller to the rightf (to set the speed to fast) (for models equippedwith the sewing speed controller).Follow steps 1 through 2 of the procedure ina “Winding the bobbin” to pass the threadaround the pre-tension disk (page 11).1b so that the spring on the shaft fits into thePlace the bobbin on the bobbin winder shaftnotch in the bobbin.a Sewing speed controllergTurn on the sewing machine.Press the foot controller or press(start/h stop button) (for models equipped with thestart/stop button) to start.a Notchb Bobbin winder shaft springcSlide the bobbin winder shaft to the right.Note If the sewing machine is to be operatedusing the foot controller, connect the footcontroller before turning on the machine. When the foot controller is plugged in, thestart/stop button cannot be used to start orstop sewing (only for models equipped withthe start/stop button).While holding the thread that wraps around thed pre-tension disk with your left han
sewing machine, allows you to select a stitch and specify how the stitch will be sewn. a LCD (Liquid crystal display) The selected stitch (1), presser foot that should be used (2), stitch length in millimeters (3), and stitch width