Transcription
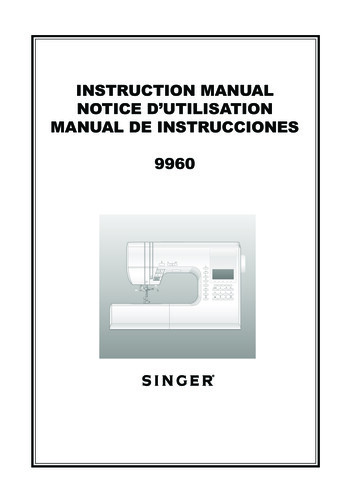
INSTRUCTION MANUALNOTICE D’UTILISATIONMANUAL DE INSTRUCCIONES9960
INSTRUCTION MANUALThis sewing machine is intended for household use.This sewing machine is not intended for use by young children or infirm persons withoutsupervision.IMPORTANT SAFETY INSTRUCTIONSWhen using a sewing machine, basic safety precautions should always be followed,including the following.Read all instructions before using.DANGER- To reduce the risk of electric shock:Never leave unattended when plugged in. Always unplug this machine from the electricoutlet immediately after using and before cleaning.reduce the risk of burns, fire, electric shock,WARNING or- Toinjuryto persons:1. Do not allow to be used as a toy. Close attention is necessary when this sewingmachine is used by or near children.2. Use this sewing machine only for its intended use as described in this manual. Use onlyattachments recommended by the manufacturer as contained in this manual.3. Never operate this sewing machine if it has a damaged cord or plug, if it is not workingproperly, if it has been dropped or damaged, or dropped into water. Return the sewingmachine to the nearest authorized dealer or service center for examination, repair,electrical or mechanical adjustment.4. Never operate the sewing machine with any air openings blocked. Keep ventilationopenings of the sewing machine and foot controller free from the accumulation of lint,dust, and loose cloth.5. Never drop or insert any object into any opening.6. Do not use outdoors.7. Do not operate where aerosol (spray) products are being used or where oxygen is beingadministered.8. To disconnect, turn the power switch to the off position (symbol “O”), then remove plugfrom outlet.9. Do not unplug by pulling on cord. To unplug, grasp the plug, not the cord.10. Keep fingers away from all moving parts. Special care is required around the sewingmachine needle.11. Always use the proper needle plate. The wrong plate can cause the needle to break.12. Do not use bent needles.13. Do not pull or push fabric while stitching. It may deflect the needle causing it to break.14. Switch the sewing machine off (symbol “O”) when making any adjustments in theneedle area, such as threading needle, changing needle, threading bobbin, or changingpresser foot.15. Always unplug sewing machine from the electrical outlet when removing covers,lubricating, or when making any other user servicing adjustments mentioned in theinstruction manual.16. Handle the foot controller with care and avoid dropping it on the floor. Be sure not toplace anything on top of it.17. Use only the handle to lift and move the machine.18. Do not expose the machine or machine case to sunlight directly. Also, do not keep it in avery warm or damp place.SAVE THESE INSTRUCTIONSServicing should be performed by an authorized service representative.2SINGER is a registered Trademark of The Singer Company Ltd.
CONTENTSIMPORTANT SAFETY INSTRUCTIONS . 2MODEL 9960 . 8FOR EUROPEAN AND SIMILAR TERRITORIES: . 8MAIN PARTS . 10ACCESSORIES . 12DUST COVER . 12EXTENSION TABLE . 14a. REMOVING THE EXTENSION TABLE . 14b. OPENING THE ACCESSORY CASE . 14CHANGING THE PRESSER FOOT . 14A. Changing the presser foot . 14B. Removing the presser foot holder . 14INSERTING THE NEEDLE . 16FABRIC, THREAD AND NEEDLE TABLE . 16CONNECTING THE MACHINE . 18FOOT CONTROLLER . 18FUNCTION OF EACH PART . 20A.B.C.D.E.F.G.H.I.J.START/STOP BUTTON .REVERSE STITCH BUTTON .NEEDLE UP-DOWN / SLOW BUTTON .SPEED CONTROL BUTTON .PRESSER FOOT LIFTER .THREAD CUTTER BUTTON .DROP FEED LEVER .THREAD CUTTER .TOP COVER .HAND WHEEL .20202020202222222222EXTRA WIDE TABLE . 22CONTROL PANEL . 24A.B.C.D.E.F.G.H.I.J.K.L.M.L.C.D. DISPLAY .L.C.D. CONTRAST CONTROL .PATTERN CHART .DIRECT STITCH SELECTION BUTTONS .UTILITY STITCH BUTTON .DECORATIVE & LETTER STITCH BUTTON .FUNCTION BUTTONS .EDIT BUTTON .CLEAR BUTTON .SCROLL BUTTONS .CURSOR BUTTONS .TACK BUTTON .TWIN NEEDLE BUTTON .24242424242424242626262626TO TURN OFF THE AUDIBLE BEEP . 26BOBBIN SETTING . 28A.B.C.D.REMOVING THE BOBBIN .SETTING SPOOL OF THREAD ON SPOOL PIN .WINDING THE BOBBIN .INSERTING THE BOBBIN .28282830THREADING THE MACHINE . 32A.B.C.D.E.PREPARING TO THREAD MACHINE .SETTING SPOOL OF THREAD ON SPOOL PIN .THREADING THE UPPER THREAD .THREADING THE NEEDLE EYE .DRAWING UP THE BOBBIN THREAD .3232323434STARTING TO SEW . 36A.B.C.D.E.F.G.START AND END OF SEAM .REVERSE STITCHING .AUTO TACK STITCH .TURNING CORNERS .SEWING HEAVY FABRIC .SEWING OVER OVERLAPPED AREAS .WIDTH OF SEAM ALLOWANCE .36383840404040THREAD TENSION . 42SELECTING UTILITY STITCH PATTERN . 44A.B.C.D.E.DIRECT STITCH PATTERN .SELECTING OTHER UTILITY STITCH PATTERNS .MIRROR/REVERSE STITCH .ELONGATION .SETTING STITCH WIDTH AND LENGTH .4444444646WHERE TO USE EACH STITCH . 48STRAIGHT STITCH SEWING . 50A. Straight Stitch . 50B. Straight Stitch With Auto-lock Stitch (Pattern No. 3, 4) . 50BASTING . 52A. ATTACHING THE DARING/ EMBROIDERY FOOT . 52B. BASTING . 52ELASTIC STITCH SEWING . 54QUILTING . 54A. Joining the pieces of fabric . 54B. Quilting . 54C. Hand Look Quilting Stitch (No. 8) . 54ZIGZAG STITCH SEWING . 56MULTI-STITCH ZIGZAG . 56FREE ARM SEWING . 56OVERCASTING-OVERLOCKING . 58A. USING THE OVERCASTING FOOT . 58B. USING THE GENERAL PURPOSE FOOT . 58C. NOTE: . 58BLIND HEM STITCHING . 60PATCH WORK . 62APPLIQUE . 62INSERTING ZIPPERSCENTERED INSERTION . 64LAPPED INSERTION . 66To stitch around the zipper tab: (Diagram A) . 66BUTTONHOLE SEWING . 68BOUND BUTTONHOLE . 72EYELET . 74AUTOMATIC BAR-TACK AND DARNING . 76SEWING ON BUTTONS . 78A. Thread Shank . 78NARROW HEMMING . 80CORDING . 80A. SINGLE CORDING . 80B. TRIPLE CORDING . 80CONTINUOUS DECORATIVE PATTERN . 82A. SEWING THIN FABRICS . 82USING THE EVEN-FEED FOOT . 82A. ATTACHING THE EVEN-FEED FOOT . 82B. SEWING . 82DARNING/FREE-HAND EMBROIDERY . 84A.B.C.D.ATTACHING THE DARING/ EMBROIDERY FOOT .DARING .FREE-HAND EMBROIDERY .After darning or free-hand embroidery .84848484TWIN NEEDLE SEWING . 86DECORATIVE & LETTER STITCH SEWING . 88A. SELECTING DECORATIVE & LETTER STITCH (selectingmode) .B. SHIFTING THE CURSOR .C. TO CHECK SELECTED PATTERNS .D. INSERTING PATTERN .E. TO DELETE PATTERN .F. EDITING OF EACH PATTERN .G. TO RECALL THE SELECTED PATTERNS .H. SEWING THE SELECTED PATTERNS .I. TO SEW PATTERN FROM BEGINNING .888890909092949696DECORATIVE AND LETTER STITCH CHART 98ADJUSTING THE FORWARD AND REVERSE STITCHES 98MAINTENANCE . 100CLEANING . 100Messages on LCD . 102HELPFUL HINTS . 1043
NOTICE D’UTILISATIONLa machine à coudre est exclusivement destinée à l’usage domestique.Cette machine à coudre n’a pas conçue pour être utilisée par de jeunes enfants ni des personneshandicapées sans supervision.CONSIGNES DE SÉCURITÉ IMPORTANTESIl est important d’observer des précautions de sécurité élémentaires lors de l’utilisation de lamachine à coudre et notamment celles qui suivent.Veuillez lire l’ensemble de la notice avant l’utilisation.DANGER– Pour réduire les risques de décharge électrique :Ne laissez jamais la machine branchée sans surveillance. Débranchez toujours lamachine immédiatement après l’usage et avant le 14.15.16.17.18.– Pour réduire les risques de brûlure,d’incendie, de décharge électrique et de blessures corporelles :Ne permettez pas que la machine à coudre soit utilisée comme un jouet. L’étroite surveillance d’unadulte est nécessaire quand la machine est utilisée par des enfants ou en présence d’enfants.N’utilisez la machine à coudre que pour l’usage prescrit dans la présente notice. N’utilisez que lespièces conseillées par le constructeur et indiquées dans la présente notice.N’utilisez jamais la machine à coudre si une fiche ou un fil électrique est défectueux, si la machinene fonctionne pas correctement, si la machine est tombée ou endommagée, ni si elle a étéimmergée. Retournez la machine au distributeur agréé ou au centre de service après-vente leplus proche pour tout examen, réparation, réglage électrique et mécanique.N’utilisez jamais la machine si une aire d’aération est obstruée. Veillez à ce que les ouverturesdestinées à la ventilation de la machine ainsi que la pédale restent dégagées de peluches, depoussière et de fibres de tissus.Veillez à ne rien laisser tomber ni insérer dans les ouvertures d’aération.N’utilisez pas la machine en plein air.N’utilisez pas la machine dans les lieux où des aérosols sont utilisés ou de l’oxygène administré.Pour déconnecter la machine, tournez le bouton d’alimentation en position d’arrêt (O), puisdébranchez la fiche électrique.Ne débranchez pas la machine en tirant sur le câble d’alimentation. Pour débrancher, saisissez lafiche et non pas le câble.Ne placez pas vos doigts près des parties en mouvement. Il est nécessaire de faireparticulièrement attention dans la zone de l’aiguille de la machine à coudre.N’utilisez que la plaque à aiguille correcte. Une autre plaque à aiguille pourrait casser l’aiguille.N’utilisez pas d’aiguilles tordues.Ne tirez pas et ne poussez pas le tissu pendant la couture. Ceci pourrait tordre l’aiguille et la casser.Arrêtez la machine avant d’effectuer tout ajustement et réglage dans la zone de l’aiguille, parexemple pour enfiler l’aiguille, changer d’aiguille, enfiler la canette ou changer de pied presseur.Veillez à toujours débrancher la machine avant de retirer des couvercles, de lubrifier la machineet d’effectuer toute opération d’entretien mentionnée dans la notice d'utilisation.Maniez la pédale avec soin et évitez de la faire tomber. Veillez à ne rien poser dessus.Pour soulever ou déplacer la machine, utilisez toujours la poignée.N’exposez pas la machine ni la housse de protection à la lumière directe du soleil. De même,n’entreposez pas la machine dans un endroit très chaud ni très humide.CONSERVEZ CETTE NOTICE D’UTILISATIONLa maintenance de la machine doit être assurée exclusivement par un professionnel agréé.4SINGER est une marque déposée par The Singer Company Ltd.
TABLE DES MATIÈRESCONSIGNES DE SÉCURITÉ IMPORTANTES . 4MODÈLE 9960 . 9POUR LES TERRITOIRES EUROPÉENS ET ASSIMILÉS : . 9PIÈCES PRINCIPALES . 11ACCESSOIRES . 13HOUSSE DE PROTECTION SOUPLE . 13PLATEAU D’EXTENSION . 15a. DÉGAGER LE PLATEAU D’EXTENSION . 15b. OUVRIR LE COMPARTIMENT À ACCESSOIRES . 15CHANGEMENT DE PIED PRESSEUR . 15A. Changer de pied presseur . 15B. Ôter le support du pied presseur . 15MISE EN PLACE DE L’AIGUILLE . 17TABLEAU DES TISSUS, FILS ET AIGUILLES 17BRANCHEMENT DE LA MACHINE . 19PEDALE DE CONTRÔLE . 19FONCTION DES PIÈCES ET TOUCHES . 21A. TOUCHE MARCHE / ARRÊT . 21B. TOUCHE COUTURE ARRIERE . 21C. TOUCHE AIGUILLE POSITION HAUTE - BASSE / COUTURELENTE . 21D. TOUCHE CONTRÔLE DE VITESSE . 21E. RELEVEUR DE PIED PRESSEUR . 21F. TOUCHE COUPE-FIL . 23G. LEVIER DES GRIFFES . 23H. COUPE-FIL . 23I. CAPOT SUPERIEUR . 23J. VOLANT . 23TABLE D’EXTENSION . 23ÉCRAN D’AFFICHAGE . 25A. ÉCRAN LCD .B. MOLETTE DE RÉGLAGE DU CONTRASTE .C. TABLEAU DES POINTS .D. TOUCHE DE SELECTION DIRECTE DES POINTS .E. TOUCHE POINTS UTILITAIRES .F. TOUCHE POINTS DECORATIFS ET LETTRES .G. TOUCHES FONCTIONS .H. TOUCHE EDIT .I. TOUCHE ANNULATION .J. TOUCHE DE DEFILEMENT .K. TOUCHES DE CURSEUR .L. BOUTON DE COMMANDE D’ARRÊT .M. TOUCHE AIGUILLE DOUBLE .25252525252525252727272727POUR SUPPRIMER L’INDICATEUR SONORE 27CANETTE . 29A.B.C.D.RETIRER LA CANETTE .MISE EN PLACE DE LA BOBINE SUR LA TIGE À BOBINEBOBINAGE DE LA CANETTE .MISE EN PLACE DE LA CANETTE .29292931ENFILAGE DE LA MACHINE . 33A.B.C.D.E.PRÉPARATION EN VUE DE L’ENFILAGE .MISE EN PLACE DE LA BOBINE SUR LA TIGE À BOBINEENFILAGE DU FIL D’AIGUILLE .ENFILAGE DU FIL DANS LE CHAS DE L’AIGUILLE .REMONTER LE FIL DE CANETTE .3333333535DÉBUT DE LA COUTURE . 37A. DÉBUT ET FIN DE LA COUTURE .B. COUTURE ARRIERE .C. POINT D’ARRÊT AUTOMATIQUE .D. COUTURE DES ANGLES .E. COUTURE DE TISSUS ÉPAIS .F. COUTURE DES SURÉPAISSEURS .G. LARGEUR DES RABATS .37393941414141TENSION DU FIL . 43SÉLECTION DES POINTS UTILITAIRES . 45A.B.C.D.E.MODELE DE POINTS .SECTIONNER D’AUTRES POINTS UTILITAIRES .POINT MIROIR / INVERSE .ALLONGEMENT .PARAMETRER LA LONGUEUR ET LA LARGEUR DE POINT .4545454747DESCRIPTION DES POINTS . 49COUTURE AU POINT DROIT . 51A. Point droit . 51B. Point droit avec point d’arrêt automatique (Modèles No. 3, 4)51FAUFILAGE . 53A. MISE EN PLACE DU PIED BRODERIE ET REPRISAGE . 53B. FAUFILAGE . 53COUTURE DE POINTS ÉLASTIQUES . 55QUILTING . 55A. Assemblage des morceaux de tissu . 55B. Quilting . 55C. Point de quilting, apparence fait main (n 8) . 55COUTURE AU POINT ZIGZAG . 57POINT ZIGZAG MULTIPLE . 57COUTURE AVEC BRAS LIBRE . 57SURJET - SURFILAGE . 59A. AVEC LE PIED DE SURJET . 59B. AVEC LE PIED UNIVERSEL . 59C. REMARQUE : . 59COUTURE D’OURLETS INVISIBLES . 61PATCHWORK . 63APPLIQUE . 63FERMETURE À GLISSIÈRE- POSE BORD À BORD . 65- POSE SOUS PATTE . 67A. OUVRIR LA FERMETURE À GLISSIÈRE PENDANT LA COUTURE67COUTURE DE BOUTONNIÈRES . 69BOUTONNIERE PASSEPOILEE . 73OEILLET . 75ARRÊT ET REPRISAGE AUTOMATIQUES . 77COUTURE DE BOUTONS . 79A. TIGE DE FIL . 79OURLET ROULÉ . 81CORDONNETS . 81A. CORDONNETS SIMPLES . 81B. CORDONNETS TRIPLES . 81SÉQUENCE DE MOTIFS DÉCORATIFS . 83A. SUR LES TISSUS LÉGERS . 83UTILISATION DU PIED POUR ENTRAÎNEMENTSYNCHRONISÉ . 83A. MISE EN PLACE DU PIED POUR ENTRAÎNEMENT SYNCHRONISÉ . 83B. COUTURE . 83REPRISAGE / BRODERIE . 85A.B.C.D.MISE EN PLACE DU PIED BRODERIE ET REPRISAGE .REPRISAGE .BRODERIE .APRÈS LE REPRISAGE ET LA BRODERIE .85858585COUTURE AVEC AIGUILLE JUMELÉE . 87COUTURE DE LETTRES ET POINTS DÉCORATIFS . 89A.B.C.D.E.F.G.H.I.SELECTION POINT DECORATIFS ET LETTRES .FAIRE DEFILER LE CURSEUR .VERIFIER LES MODELES SELECTIONNES .INSERER DES MODELES .SUPPRIMER UN MODELE .EDITION DE CHAQUE MODELE .RETROUVER LES MODELES SELECTIONNES .COUDRE LES MODELES SELECTIONNES .POUR COUDRE LES MODELES AU DEBUT .898991919193959797TABLEAU DES LETTRES ET POINTS DÉCORATIFS . 99AJUSTER LES POINTS ENDROITS ET ENVERS . 99ENTRETIEN . 101NETTOYAGE . 101Messages sur écran LCD . 103SOLUTION AUX PROBLÈMES COURANTS . 1055
MANUAL DE INSTRUCCIONESEsta máquina de coser está diseñada sólo para uso doméstico.Esta máquina de coser no está diseñada para ser utilizada por niños pequeños o personas enfermassin la debida supervisiónNORMAS DE SEGURIDAD IMPORTANTESCuando utilice la máquina de coser, debe seguir siempre unas normas básicas deseguridad, incluyendo las siguientes.Lea todas las instrucciones antes de utilizar su máquina.PELIGRO- Para reducir el riesgo de descarga eléctrica:La máquina nunca debe dejarse sola y encendida. Desenchufe siempre la máquina dela red inmediatamente después de usarla y antes de 3.14.15.16.17.18.- Para reducir el riesgo dequemaduras, fuego, cortocircuito o daños personales:No permita que se emplee como un juguete. Tenga un cuidado especial cuando la máquina seausada por niños o si éstos se encuentran cerca de ella.Utilice esta máquina de coser correctamente, tal como se describe en este manual. Use solo losaccesorios recomendados por el fabricante que aparecen el manual.Nunca trabaje con esta máquina de coser si tiene el cable o el enchufe dañados, si no funcionaadecuadamente, si ha sido golpeada o dañada o si se ha caído al agua. Lleve la máquina alcomerciante o al centro de reparaciones autorizado más próximo para que la examinen, lareparen o realicen su ajuste eléctrico o mecánico.Nunca trabaje con la máquina con alguna de las salidas de aire bloqueadas. Mantenga lasventilaciones de la máquina abiertas y el regulador de velocidad libre de acumulación dehilachas, polvo y trozos de tela.Nunca deje caer ni inserte ningún objeto en las aberturas.No la utilice en el exterior.No trabaje donde se hayan utilizado aerosoles o donde se esté administrando oxígeno.Para desconectar, gire el botón de encendido a la posición de apagado (O) y despuésdesenchufe de la red.No desenchufe la máquina tirando del cable. Para desenchufarla, tire del enchufe, no del cable.Mantenga los dedos alejados de todas las partes giratorias. Es necesario que tenga especialcuidado con la aguja de la máquina de coser.Utilice siempre la placa de aguja apropiada. Una placa incorrecta puede causar la rotura de laaguja.No utilice agujas dobladas.No tire o empuje el tejido mientras cose. Puede deformar la aguja y romperla.Desconecte la máquina de coser cuando esté haciendo ajustes en el área de la aguja, comoenhebrando la aguja, cambiándola, enhebrando la canilla o cambiando el prensatelas.Desenchufe siempre la máquina de la red eléctrica cuando retire las cubiertas, la lubrique, orealice cualquier otro servicio de ajuste mencionado en el manual de instrucciones.Maneje el pedal con cuidado y evite que golpee el suelo. Asegúrese de no situar nada sobre él.Utilice el asa solamente para levantar y mover la máquina.No exponga la máquina o la cubierta de la máquina directamente a la luz del sol. Tampoco laguarde en un lugar muy caliente o húmedo.CONSERVE ESTAS INSTRUCCIONESLas reparaciones deben ser realizadas únicamente por un servicio representativo autorizado.6SINGER es una marca registrada de The Singer Company Ltd.
ÍNDICENORMAS DE SEGURIDAD IMPORTANTES . 6MODELO 9960 . 9PARA EUROPA Y TERRITORIOS EQUIPARABLES: 9PARTES PRINCIPALES . 11ACCESORIOS . 13CUBIERTA . 13EXTENSIÓN . 15a. RETIRADA DE LA EXTENSION . 15b. APERTURA DEL COMPARTIMENTO DE ACCESORIOS . 15CÓMO CAMBIAR EL PRENSATELAS . 15A. Cómo cambiar el prensatelas . 15B. Cómo retirar el portaprensatelas . 15INSERCION DE LA AGUJA . 17TABLA DE TEJIDOS, HILOS Y AGUJAS . 17CONEXIÓN DE LA MAQUINA . 19PEDAL DE CONTROL . 19FUNCIÓN DE CADA UNA DE LAS PARTES . 21A.B.C.D.E.F.G.H.I.J.BOTÓN INICIO / PARO .BOTÓN DE PUNTADA REVERSA .BOTÓN AGUJA ARRIBA / LENTO .BOTÓN DE CONTROL DE VELOCIDAD .PALANCA ALZAPRENSATELAS .BOTÓN CORTADOR DE HILO .PALANCA DE ARRASTRE .CORTADOR DE HILO .CUBIERTA SUPERIOR .VOLANTE MANUAL .21212121212323232323TABLA EXTENSORA EXTRA ANCHA . 23PANEL DE CONTROL . 25A. PANTALLA LCD .B. CONTROL DE CONTRASTE DE LA PANTALLA LCD .C. TABLA DE PUNTADAS .D. BOTONES DE SELECCIÓN DE PUNTADA DIRECTA .E. BOTÓN DE PUNTADA UTILITARIA .F. BOTÓN DE PUNTADA DECORATIVA Y DE LETRAS .G. BOTONES DE FUNCIÓN .H. BOTÓN DE EDICIÓN .I. BOTÓN BORRAR .J. BOTONES DE PAGINACIÓN .K. BOTONES DE CURSOR .L. BOTÓN DE REFUERZO TACK .M. BOTÓN DE AGUJA DOBLE .25252525252525252727272727PARA APAGAR EL INDICADOR AUDIBLE . 27AJUSTE DE LA CANILLA . 29A.B.C.D.CÓMO SACAR LA CANILLA .COLOCACIÓN DEL CARRETE DE HILO
Return the sewing machine to the nearest authorized dealer or service center for examination, repair, electrical or mechanical adjustment. 4.Never operate the sewing machine with any air openings blocked. Keep ventilation openings of the sewing machine and foot controller f