Transcription
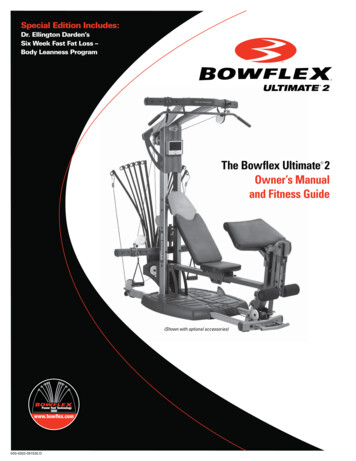
The Bowflex Blaze Home GymOwner’s Manualand Fitness Guide PN 001-6902 Rev B (8/2006)
Table of ContentsSafety RequirementsSafety Warning LabelsGet to Know Your MachineHow to Use Your MachinePower Rod ResistanceAdjusting/Understanding The ResistanceHooking Power Rod Unit to CablesSafetyWhen You Are Not Using Your GymHow to Use Your MachineThe Workout BenchRemoving the BenchFlat Bench45 Incline BenchLeg ExtensionFree-Sliding SeatStoring Your Bowflex Blaze Home GymMaintenance and CareHow to Use Your MachineAccessories and EquipmentUsing Your Leg Press Belt andSquat Bar PulleysDefine Your GoalsWarm Up / Cool Down57101111111111111212121212121212121313Chest ExercisesShoulder Horizontal AdductionBench PressDecline Bench PressIncline Bench PressDecline Chest FlyIncline Chest FlyResisted PunchLying Cable Crossover181818191920202121Shoulder ExercisesRear Deltoid RowsStanding Lateral Shoulder RaiseSeated Shoulder PressFront Shoulder RaiseShoulder ExtensionShoulder ShrugScapular ProtractionScapular DepressionLying Front Shoulder RaiseReverse FlyShoulder Rotator CuffShoulder Rotator CuffSeated Lateral Shoulder RaiseScapular Retraction222222232324242525262627272828Back ExercisesLying Lat PulldownsLow Back ExtensionPulldowns29292930141617Narrow Pulldowns with HandgripsLying Lat FlyLying Narrow Lat PulldownsSeated Lat RowsStiff-Arm PulldownBent Over Row303131323233Arm ExercisesTriceps PushdownSingle Arm PushdownFrench PressLying Triceps ExtensionCross Triceps ExtensionLying 45o Triceps ExtensionSeated Triceps ExtensionStanding Biceps CurlSeated Biceps CurlLying Biceps CurlSeated Wrist ExtensionStanding Wrist CurlReverse CurlSeated Wrist CurlStanding Wrist Extension“Rope” l ExercisesReverse CrunchResisted Reverse CrunchSeated (Resisted) Ab CrunchSeated (Resisted) Oblique Ab CrunchTrunk Rotation424242434344Leg ExercisesLeg ExtensionSquatLying Leg ExtensionAnkle EversionAnkle InversionStanding Hip ExtensionStanding Hip ExtensionStanding Hip AbductionSeated Hip AdductionSeated Hip AbductionStanding Leg KickbackLeg PressProne Leg Curl4545454646474748484949505152Muscle ChartUS Warranty Information5354Bowflex Body Leanness ProgramThe Workouts5766Contact Information773
Product Specifications:Product Weight195 lbs. (88 kg)Product Dimensions90" L x 38" W x 83" H (229 cm L x 97 cm W x 211 cm H)Folded Footprint52" L x 38" W x 83" H (132 cm L x 97 cm W x 211 cm H)Workout Area100" L x 78" W (254 cm L x 198 cm W)Number of ExercisesOver 60Power Rod Resistance210 lbs. (95 kg)Power Rod Upgradability310 lbs. (141 kg.)410 lbs. (186 kg.)User Weight Limit300 lbs. (136 kg)Regulatory Approvals:Meets:EN957-1 Class HEN957-2 Class HMeets:ASTM F2276-05ASTM F2216-05 USUS 4
Safety RequirementsIMPORTANT SAFETY INSTRUCTIONSThe following definition applies to the word “Warning” found throughout this manual: Used to call attention to POTENTIAL hazards that couldresult in personal injury or loss of life.READ ALL INSTRUCTIONSBEFORE USING THE MACHINE. Always read and follow the Warning andSafety labels attached to your Bowflex Blaze home gym. Do not remove these labels. If you need replacement labels,please call a Nautilus Representative at 1 (628-8458). 800-NAUTILUS Read the owner’s manual and follow itcarefully before using the machine. Parents and others in charge of childrenshould be aware of their responsibility,because the natural play instinct and thefondness for experimenting of children canlead to situations and behavior for which thetraining equipment is not intended.Never allow children to use the Bowflex Blaze home gym unsupervised. To doso could result in injury. If children areallowed to use the equipment, their mentaland physical development should be takeninto account. They should be controlledand instructed on the correct use of theequipment. Never use dumbbells or other weightequipment to incrementally increase theweight resistance. Use only the Power Rod unit that came with your Bowflex Blaze home gym. Set up and use your Bowflex Blaze home gym on a hard, level surface. Do not wear any loose or dangling clothingor jewelry while using the Bowflex Blaze home gym. Stand clear of all movingcomponents. Before beginning any exercise programconsult your physician or health careprofessional. Only he or she can determinethe exercise program that is appropriate foryour particular age and condition. If youexperience any light-headedness, dizziness,or shortness of breath while exercising, stopthe exercise and consult your physician. This machine is meant for individualconsumer use only, and is not meant for useby institutions. This equipment is under no circumstancessuitable as a children’s toy. Inspect your machine for any worn orloose components prior to use. Tighten orreplace any worn or loose components priorto use. Pay close attention to cables, or beltsand their connections.Maximum user weight for the Bowflex Blaze home gym is 300 pounds (136 kg).For your safety, do not use or allow others touse the Bowflex Blaze home gym if theyweigh in excess of 300 pounds (136 kg). Allow a workout area of at least 8’4” L x6’6” W(2.6 m x 2 m) of free space for safe5
Safety Requirementsoperation of the Bowflex Blaze homegym. 6 Keep your body weight centered on themachine, seat, or base frame platform whileexercising.When hooking up Power Rod caps, do notstand directly looking over the top of therods. Stand off to the side while attachingrods. When using the Bowflex Blaze homegym for standing leg exercises, always graspthe Lat Tower on your machine for stability.Never attempt to exercise with moreresistance than you are physically able tohandle. Keep cables and Power Rod unit boundwith the rod binding strap when not in use. Before exercising, make sure the cable pulleysystem is properly secured, properly attached,and in perfect working condition. Keep out of the path of the Power Rod unit when exercising and make certain thatobservers also stand clear of the Bowflex Blaze home gym when the Power Rod unit is in use. Never move or adjust the seat while sitting onit. Never stand on the seat.
Safety Warning LabelsThe following safety warnings are located on the Bowflex Blaze exercise machine. Please readall safety precautions and warning information prior to using your product. Be sure to replaceany warning label if damaged, illegible, or missing. If you need replacement labels, please call aNautilus Representative at 1-800-NAUTILUS (628-8458).Label 1Label 2Label 3Label 5Label 4Home Gym7
Safety Warning LabelsThe following safety warnings are located in site specific areas on the unit. Please review andunderstand the safety warning labels and their locations on the unit prior to use.If you do not have, or cannot find, or need to replace a warning label please call 1-800-NAUTILUS(1-800-628-8458) to obtain a new label.Label 1: Please make sure all users read, understand, andfollow the warning labels on the home gym. SeeFigure 1 for general use safety label.Location: The warning label in Figure 1 is located on the backof the lat tower.Label 2: See figure 2 for “Caution” safety label.Location: Left and right side of rod box.Figure 28
Safety Warning LabelsLabel 3: See Figure 3 for “Caution” safety label. Avoid crush hazardwhen folding the bench.Location: Top of the seat rail bracket.Figure 3Label 4: See Figure 4 for “Caution” safety label. Stay clearof the leg when folding the leg extension.Location: Back of rear leg of leg extension.Figure 4Label 5: See Figure 5 for “Caution” safety label.Location: Back of the lower lat tower, below chest bar.Figure 59
Get to Know Your MachineCONGRATULATIONS on your commitment toimproving your health and fitness! With the Bowflex Blaze home gym, you have everything you need toexceed all of your physical fitness, strength and healthexpectations!The Bowflex Blaze home gym’s exceptionalresistance and quality is unmatched by any other singlepiece of home fitness equipment available. You will notbelieve the amazing results your body will get with theBowflex Blaze home gym!Please take your time to read through the entire manualand follow it carefully before attempting to use yourBowflex Blaze home gym. Also locate and read allwarning labels that are posted on the machine. It’simportant to understand how to properly perform eachexercise before you do so using Power Rod Resistance.With all of the fitness choices available today, finding thebest workout equipment for your needs can be veryconfusing. Everyone at Nautilus would like to thank youfor selecting the Bowflex Blaze home gym.Bowflex Blaze home gym is the finest home fitnessproduct available, and you’re just about to prove it toyourself.Home GymLat Cable StorageBent Lat BarUpperLat TowerPower Rod UnitLat Bar PulleyRod CapsRod HookLeg AttachmentWorkout PlacardCableRod BoxChest BarPulleySquat BarSquat Platformand Pulleys10Bench
How to Use Your MachinePower Rod ResistanceSafetyPower Rod rods are made from a specialcomposite material. Your rods are sheathed witha protective black rubber coating. Each rod ismarked with its weight rating on the “Rod Cap”.When hooking thePower Rod caps tothe cable hooks, donot stand directly overthe tops of the rods.Stand off to one sidewhen connecting anddisconnecting thePower Rod unit fromthe cables.Adjusting AndUnderstandingThe ResistanceThe standardBowflex Blaze home gym comes with210 pounds (95 kg)of resistance (onepair of 5 lb. (2.25 kg)rods, two pair of 10 lb.(4.5 kg) one pair of30 lb. (13.5 kg) rods,and one pair of 50 lb.(22.5 kg) rods).If you upgraded to a 310 lb. (140 kg) or 410 lb.(186 kg) capacity you will have an additionalone or two pair of 50 lb. (22.5 kg) rods,respectively.Hooking the Power Rod Unit to the CablesWhen You Are Not Using Your Bowflex Blaze Home GymDisconnect the cables from the Power Rod unitwhen you are not using your Bowflex Blaze home gym. Use therod binding strapincluded withyour machineto bind all the rodstogether at the top.You can also placeyour cables andgrips through thestrap to keep themout of the way.You may use one rodor several rods incombination, to create yourdesired resistance level.To hook multiple rods upto one cable, bend theclosest rod toward thecable and place the cablehook through that rod cap.You can then hook up thenext closest rod throughthe same cable hook.Hooking up the closest rodfirst prevents rods fromcrossing over the top of one another.To order additional50 lb. (22.5 kg) Power Rod setsplease call1-800-NAUTILUS(1-800-628-8458)11
How to Use Your MachineThe Workout BenchYour Bowflex Blaze home gym has a numberof seat and bench positions: flat bench forward,flat bench back, 45 incline and free-sliding seatextension.To adjust the seat, pull out the Seat Rail Knob, thenslide the seat to one of the three locking holes onthe Seat Rail.Release the Seat Rail Knob to secure when finished.Removing the Bench:The Bench easily attaches and releases from theSeat. To attach the Bench, insert the half hingeon the end of the Bench into the half hinge onthe seat. To remove the Bench, lift up on the longportion and pull away from seat.Flat Bench:The Flat bench position is used formost exercises. You may lock thebench into a Back (closest to PowerRod unit) or Forward (farthestfrom Power Rod unit) position toaccommodate height/reach needs.45 Incline Bench:Start with a flat bench, following theabove instructions to release andmove the seat and bench. Lift thebench while sliding the seat towardthe Power Rod unit until the benchback is resting against the Lat Tower.Leg Extension:Refer to page A-12 of the AssemblyManual for instructions on installingthe Leg Extension Seat.Free-Sliding Seat:Remove the Bench, pull out the Seat Rail Knob,give it half a turn and release to place the Seat in a“free sliding” position for Aerobic Rowing.Storing Your Bowflex Blaze Home GymFolding your Bowflex Blaze home gym forstorage is easy.1) Lock the Seat and Bench into the flat position.2) Remove all Power Rod resistance and then12bind the Power Rod unit with the rod bindingstrap.3) Ensure that the Leg Extension Lock-out Pin isinstalled. (Refer to page A-9 for instructions.)4) Remove the Seat Rail Knob from the seat rail.5) Tilt the bench toward the Power Rod unit.6) While holding the Rear Leg with one hand,disengage the seat Rail Pull Pin to allow theRear Leg to fold against the Seat Rail. (Seefigure 8b on page A-7.)7) Secure the bench by inserting the Seat RailKnob into the hole in the side of the Seat RailBracket.Maintenance and Care of Your Bowflex Blaze Home GymInspect your machine for any wornor loose components prior to use.Tighten or replace any worn or loosecomponents prior to use. Pay closeattention to cables, or belts and theirconnections.Clean the bench with a non-abrasivehousehold cleanser after each use.This will keep it looking new. Do notuse automotive cleaner, which canmake the bench too “slick.”Review all warning notices. Thesafety and integrity designed intoa machine can only be maintainedwhen the equipment is regularlyexamined for damage and repaired.It is the sole responsibility of theowner to ensure that regularmaintenance is performed. Wornor damaged components shall bereplaced immediately or the equipment removedfrom service until the repair is made. Onlymanufacturer supplied components shall be used tomaintain/repair the equipment.If you have any questions regarding your Bowflex Blaze home gym, please call our CustomerService Department at 1-800-NAUTILUS (628-8458)or by mail at: 16400 SE Nautilus Dr., Vancouver,Washington, USA 98683.
How to Use Your MachineAccessories and EquipmentHand Grips:The Hand Grips fit snugly around your hand, ankle, or wrist. Attach the pulleycable clips to the D-Rings on the Hand Grips to attach them to the cables.Standard Grip: Grasp the grip and cuff together to form agrip without inserting your hand through the cuff portion.Most of the exercises you perform utilize this grip. TheStandard Grip also is used for Hammer Grip exercises, whenyou need to hold the Hand Grip vertically for greater wristsupport.Hand Cuff Grip: Slip your hand through the cuff portion ofthe grip so that the foam pad rests on the back of your hand.Then grasp the remainder of the grip that is sitting in yourpalm. This method of gripping is great for exercises like frontshoulder raises or any exercise where your palm is facingdown.Ankle Cuff Grip: The cuff opening can be made larger toaccommodate the ankle. Place your hand in the cuff and slideit away from the grip. Insert your foot or ankle and tighten bysliding the grip back toward the cuff.Lat Cross Bar: The Lat Cross Bar enhances exercises that work back, shoulders and tricepsSafety:muscles. Before using the Lat Cross Bar, make sure that all fasteners are in place andtightened. Make sure that the Lat Tower cables are securely fastened to the regular Bowflex cables and the Bent Lat Bar, Squat Bar or Hand Grips. Always use the Bent Lat Bar holders to support the Bent Lat Bar, or remove thebar when not in use. Do not hang from or attempt to perform “chin ups” from the Lat Cross Bar. Never pull on the Bent Lat Bar unless there is resistance attached to it.Leg Extension: Designed to add more effective exercises that target your legs, thighs, calves, etc.Safety: Before using the Leg Extension, make sure that all fasteners are in place andtightened. Make sure that the Extension’s cables are securely fastened to the regular cables. When installing the Leg Extension Seat always ensure that the Support TubeBracket Hooks fully engage with the Roller Tube Spacers. Always use the supplied Lockout Pin to secure the Leg Extension Pivot Tube tothe Rear Leg when not in use.Accessory Basket:The Accessory Basket, which hooks onto the Chest Bar,provides convenient storage for the Squat Bar and smallaccessories.Grips manufactured under license agreement with Hands-On Sports & Gym Accessories, Inc. Patent #475652713
How to Use Your MachineWorkout Placard:The Workout Placard, which snaps onto the Lat Tower, displaysworkout descriptions for easy reference while you’re exercising.Additional workout cards fit easily onto this placard. Simply slidethe workout card into the grooves located on either side of theplacard.Using Your Leg Press Belt and Squat Bar PulleysLeg Press Belt:The Leg Press Belt is used for the Leg Press exercise. With the Bowflex seat adjusted to the “free sliding” position (springlock seat pin unlocked), the hand grips removed, and the desiredamount of resistance hooked up, sit on the seat and position the legpress belt around your hips. Slide forward to the pulleys and place your feet through the right andleft openings under the rod cables. Attach the rod cables to the D-rings on the Leg Press Belt so that thebelt is taut. Place hands on vertical main frame and push yourself back whileplacing feet, one at a time, onto the pulley frame. Grasp belt near where it’s attached to the cables and begin to pressback.Squat Bar Pulleys:Used with Squat Harnesses and Squat Bar to perform Squat, Bent Rows andother exercises.Safety: Always check fasteners, hooks, cables and each workout tofunctioning. Remove workout bench and lock seat into closest position to the PowerRod unit. Always wear shoes with non-skid soles when using the Squat BarPulleys. Fasten each squat cable to a D-ring on each squat harness to thecorresponding D-ring on the squat bar using a snap hook. You can now add Power Rod resistance and adjust the squat strapsto your height using adjuster buckles. Always adjust tension of the squat harness in such a manner that itwill not cause a hazard.14
Define Your GoalsYour body will do what you train it to do. That’s why it’s important to define your goals and focus them.Here are some fitness components that will help you define your goals and choose your fitness program.Muscle Strength is the maximum force that youcan exert against resistance at one time. Yourmuscle strength comes into play when you pick upa heavy bag of groceries or lift a small child. It isdeveloped when a localized muscle is worked bothpositively (concentric) and negatively (eccentric) ata resistance—great enough so you can perform onlyfive to eight repetitions of the exercise before themuscle fails. Each set of repetitions is followed by arest interval that typically runs three times longerthan the set. Later, between exercise sessions, themuscle overcompensates for the stress and usuallyincreases in both strength and size.Muscle Endurance is the ability to perform repeatedcontractions. It comes into play when you crosscountry ski or work on your feet all day. Endurancetraining addresses the slow twitch, endurance musclefibers, which depend on oxygen for energy. Todevelop muscle endurance, use low resistance andhigh repetitions about 15-20 repetitions in each set,three sets to each exercise, working the muscle onlyto fatigue.Muscle Power is the combination of strength andspeed of the muscular contraction. This is oftenmisinterpreted as a) being directly associatedwith certain skill or sport and/or b) meaningthat you must move fast. Load is actually a moreimportant factor than speed when attempting toimprove power. When training to achieve muscularpower, pick a resistance that fatigues you in the 35 repetition range. When performing these reps,it is more important to think of contracting themuscles faster rather than attempting to move faster.Performing sport simulation exercises usually resultsin a deterioration of the motor pattern or skill. Thebiomechanically sound method of improving powerin your sport is to train for power using the correctjoint movements, as described in this manual. Thenpractice the skill associated with your sport, learningto apply this newly achieved power.Body Composition is the ratio of fat weight (fat)to lean weight (muscles, bones and tissue). As youage, the ratio shifts. The fat weight increases andthe lean weight decreases. Training for musclestrength will generally increase muscle size andaerobic conditioning will help burn extra calories.Performing these two forms of exercise, either atdifferent times or together, will create the greatestchanges in body fat weight.Balanced Strength and alignment are the result ofequal strength developed in all parts of the body. Itcomes into play in your standing and sitting posture,and in your ability to perform just about any activitysafely and effectively. An over-development of theback will round the shoulders; weak or stretchedabdominals can cause lower back pain. You wanta balance of muscle strength in front and back. Inaddition, you need a balance of strength betweenyour middle, lower, and upper body.Flexibility is the ability of a muscle or group ofmuscles to move the joint through a full rangeof motion. Flexibility comes into play when youexecute an overhand serve or stretch for the topshelf in the kitchen. It is a cooperative movement ofopposite muscle groups. When a muscle contracts,its opposite muscle group must relax for the actionto occur. Increased flexibility means an increasedrange of motion, made possibly by this simultaneouscontracting and relaxing. Good flexibility isimportant in protecting the body from injury andcan be achieved through the balanced strengthtraining programs that are included in this manual.Cardiovascular Endurance is the ability of theheart and lungs to supply oxygen and nutrients toexercising muscles over an extended period of time.It comes into play when you jog a mile or ride abike. It is a critical component of overall fitness andhealth.15
Define Your GoalsDesign Your Own ProgramYou may want to design your own personalprogram specifically geared to your goals andlifestyle. Designing a program is easy, as long asyou follow the guidelines below.Understand fitness and its components:Improperly designed programs can bedangerous. Take some time to review thismanual as well as other fitness guides.Know your current fitness level: Before youstart any fitness program you should consulta physician who will help you determine yourcurrent abilities.Identify your goals: Goals are critical tochoosing and designing an exercise programthat fits and enhances your lifestyle, but so isstrategy. It’s important not to rush the processand try to accomplish too much too soon.That will lead to setbacks and discouragement.Instead, set a seriesof smaller achievable goals.Select complementary exercises: Be sure topair exercises that address compound jointmovements and single joint movements.In addition, select exercises that addresscomplementary muscle groups.Put first things first: During each session, firstwork muscle groups that need the most training.Remember your cardiovascular component: Anyfitness program must contain a cardiovascularfitness component to be complete. Socomplement your resistance training withaerobic exercise suchas walking, running, or bicycling.16Training variables: When designing your ownprogram there are several variables that, whenmixed properly, will equal the right fitnessformula for you. In order to find out the bestformula, you must experiment with severalcombinations of variables.The variables are as follows: Training Frequency: The number oftimes you train per week. We recommenddaily activity but not daily training of thesame muscle group. Training Intensity: The amount ofresistance used during your repetition. Training Volume: The number ofrepetitions and sets performed. Rest intervals: The time you rest betweensets and the time you rest betweenworkouts.Once you’ve established a base of fitness, followthese basic principles: Isolate muscle groups: Focus work onspecific muscle groups. Progressive Loading: The gradualsystematic increase of repetitions,resistance and exercise period.
Define Your GoalsWorking OutBreathingA workout begins in your mind’s eye. With concentration and visualization, you can approachyour workout with a positive, constructive attitude. A good pre-workout mental routine is to sitand relax so that you can focus on what you areabout to do and think about achieving your endgoal.The most important part of breathing duringexercise is, quite simply, that you do it. Breathingin or out during the actual performance is notdependent upon the direction of air flow relativeto exertion. It is, in fact, a mechanical processthat changes the position of your spine as your ribcage moves. Here are some tips for breathing:Warming UpWe recommend that you warm up by doinglight stretching and performing light exerciseson the Bowflex Blaze home gym.Cooling DownAn essential part of the exercise routine is thecool down. Gradually reduce the level of exerciseintensity so that blood does not accumulate inone muscle group but continues to circulate ata decreasing rate. Remember to gradually moveyourself into a relaxed state.1) Be cautious when you are concentrating orexerting effort. This is when you will probablyhold your breath. DO NOT hold your breath.Do not exaggerate breathing. Depth ofinhalation and exhalation should be naturalfor the situation.2) Allow breathing to occur naturally; don’t forceit.Warm Up / Cool DownAerobic Rowing—Warm Up or Cool DownMuscles Worked:STARTFINISHPectoralis Major, Latissimus Dorsi,Anterior Deltoids, Quadriceps, andHamstringsBench Position:Removed, Free Sliding SeatAccessory:HandgripsPulleys:Chest BarSuccess Tips Maintain good spinal alignment. Keepchest lifted. Bend from the hip during movement,not from the waist.StartAction Remove the Bench, and placethe Seat in the free-slidingposition. Attach resistance, and sitfacing the Power Rod unit. Brace your feet against theChest Bar. Initiate movement byextending your knees whilesimultaneously bending yourarms and pinching yourshoulder blades together. Control the return to the Startposition by slowly bendingyour legs.17
Chest ExercisesChest Fly—Shoulder Horizontal Adduction (elbow stablized)Muscles Worked:FINISHSTARTPectoralis Major and Anterior DeltoidBench Position:45o inclineAccessory:HandgripsPulleys:Chest BarSuccess Tipso Maintain a 90-180 angle between yourarms and torso during the exercise. Keep your chest muscles tightened.Limit and control your range ofmotion. Keep your knees bent, feet on floor,and your head back against the Bench. To improve your pectoralis involvement, keep your shoulder bladespinched together throughout theupward and downward movements.StartAction Grasp the Handgrips in bothhands. Open your arms into a wideposition while maintaininga bend in your elbows. Startwith your elbows and forearms below chest level, palmsforward. Raise your chest, pinchshoulder blades together, andmaintain a slight, comfortablearch in lower back. Maintaining the slight bend inyour elbow, slowly bring yourarms together. Rotate your wrists and forearms upward. Slowly return to the Startposition, stopping before theupper arms/elbows movebehind the bench.Bench Press—Shoulder Horizontal Adduction (and elbow extension)Muscles Worked:STARTFINISHPectoralis Major, Deltoids, and TricepsBench Position:45o inclineAccessory:HandgripsPulleys:Chest BarSuccess Tips Maintain a 90o angle between yourupper arms and torso throughout themotion. Keep your chest muscles tightened.Limit and control your range ofmotion. Keep your knees bent, feet on floor,and your head back against the bench. Keep your shoulder blades pinchedtogether, and maintain good spinalalignment.18StartAction Grasp the Handgrips in bothhands. Raise your upper arms untilthey are in line with yourshoulders. Bend your elbows until yourforearms are in line withthe cables. Keep your wristsstraight. Raise your chest, pinchshoulder blades together, andmaintain a slight, comfortablearch in lower back. Press your hands forward,straightening your arms whilemoving your hands together. Return to the Start position, keeping your wrists atshoulder width and in linewith the cables, stoppingbefore the upper arms/elbowsmove behind the bench.
Chest ExercisesDecline Bench Press—Shoulder Horizontal Adduction (and elbow extension)Muscles worked:STARTFINISHPectoralis Major, Deltoids, and TricepsBench Position:45o inclineAccessory:HandgripsPulleys:Chest Baro Maintain a 90 angle between yourupper arms and torso at the start ofthe motion and slightly less than 90o atthe finish. Keep your knees bent, feet on floor,and your head back against Bench. Do not let your elbows travel behindyour shoulders. Keep your shoulder blades pinchedtogether, and maintain good spinalalignment.ActionStartSuccess Tips Slowly press your hands Grasp the Handgrips in bothforward, straightening yourhands, cables travel beneatharms while moving your handsyour arms, forearms alignedto the center and downward,with cables.at least 10o below your shoul Bend your elbows back, keepingders. Do not lock your elbows.your forearms at a 90o anglefrom your torso. Elbows should Slowly return to the startingposition, keeping your wristsbe 10o (5-6" or 13-15 cm) lowersteady and your movementsthan the standard Bench Pressslow and controlled.position. Raise your chest, pinch shoulderblades together, and maintain acomfortable arch in lower back.Incline Bench Press—Shoulder Horizontal Adduction (and elbow extension)Muscles worked:STARTFINISHPectoralis Major, Deltoids, and TricepsBench Position:45o inclineAccessory:HandgripsPulleys:Chest BarSuccess Tipso Maintain a 90 angle between yourupper arms and torso at the start ofthe motion and slightly less than 90o atthe finish. Keep your knees bent, feet on floor,and your head back against bench. Do not let your elbows travel behindyour shoulders. Keep your shoulder blades pinchedtogether, and maintain good spinalalignment.StartAction Grasp the Handgrips in both Slowly press your hands forhands.ward, straightening your armsand moving your hands
The Workouts 66 Contact Information 77. 4 Regulatory Approvals: Product Weight 195 lbs. (88 kg) Product Dimensions 90" L x 38" W x 83" H (229 cm L x 97 cm W x 211 cm H) . so could result in injury. If children are allowed to use the equipment, their mental and physical developmen
