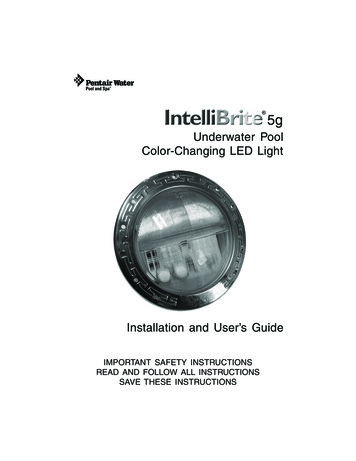
Transcription
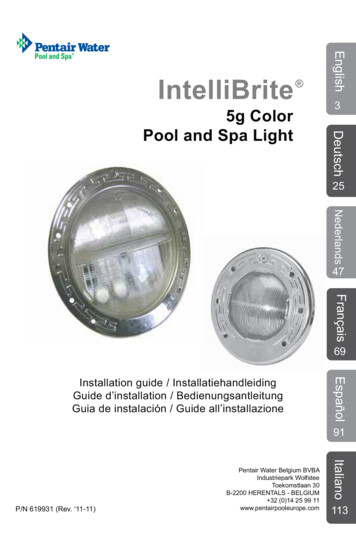
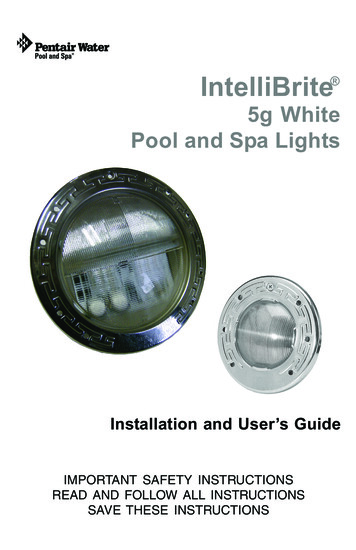
IntelliBrite 5g WhitePool and Spa LightsInstallation and User’s GuideIMPORTANT SAFETY INSTRUCTIONSREAD AND FOLLOW ALL INSTRUCTIONSSAVE THESE INSTRUCTIONSIntelliBrite 5g White Pool Light and White Spa Light Installation and User’s Guide
Technical SupportPhone: (800) 831-7133 - Fax: (800) 284-4151Web sites: www.pentairpool.com and www.staritepool.com:ContentsIMPORTANT WARNING AND SAFETY INSTRUCTIONS. iIntelliBrite Underwater White Pool and Spa Light . 1Operating IntelliBrite lights using a wall switch . 1Using an External Transformer for Multiple IntelliBrite 12 VAC Lights . 1Troubleshooting . 2Replacing the IntelliBrite White Pool and Spa Light Assembly(in an existing pool) . 3Installing the IntelliBrite White Pool and Spa Light Fixture(new pool construction) . 6Installing the IntelliBrite White Pool and Spa Light Fixture(after electrical requirements are met). 7Replacing the IntelliBrite White Pool Light Circuit Board Assembly(in an existing pool). 9Replacing the IntelliBrite White Pool Light Circuit Board AssemblyWith New Gasket . 11Wide and Narrow Angle Lens Adjustment. . .14IntelliBrite White Pool Light Replacement Kit Part Numbers .15Replacing the IntelliBrite White Spa Light Face ring and Gasket(P/N 640045) or Gasket and Lens (640046) . .17IntelliBrite White Spa Light Replacement Kit Part Numbers . 21 2011 Pentair Water Pool and Spa, Inc. All rights reserved.1620 Hawkins Ave., Sanford, NC 27330 (919) 566-800010951 West Los Angeles Ave., Moorpark, CA 93021 (805) 553-5000IntelliBrite , IntelliTouch , EasyTouch , SunTouch and Pentair Water Pool and Spa areregistered trademarks of Pentair Water Pool and Spa, Inc. and/or its affiliated companies inthe United States and/or other countries. Unless noted, names and brands of others thatmay be used in this document are not used to indicate an affiliation or endorsement betweenthe proprietors of these names and brands and Pentair Water Pool and Spa, Inc. Thosenames and brands may be the trademarks or registered trademarks of those parties orothers.P/N 619921 Rev D - 08/10/11IntelliBrite 5g White Pool Light and White Spa Light Installation and User’s Guide
iIMPORTANT WARNING AND SAFETY INSTRUCTIONSSERIOUS BODILY INJURY OR DEATH CAN RESULT IF THIS LIGHTIS NOT INSTALLED AND USED CORRECTLY.INSTALLERS, POOL OPERATORS AND POOL OWNERS MUSTREAD THESE WARNINGS AND ALL INSTRUCTIONS BEFOREUSING THE POOL AND/OR SPA LIGHT.Most states and local codes regulate the construction, installation, andoperation of public pools and spas, and the construction of residentialpools and spas. It is important to comply with these codes, many of which directlyregulate the installation and use of this product. Consult your local building and healthcodes for more information.IMPORTANT NOTICE - Attention Installer: This Installation and User’sGuide (“Guide”) contains important information about the installation,operation and safe use of this underwater pool and spa light. This Guideshould be given to the owner and/or operator of this equipment.Before installing this product, read and follow all warning noticesand instructions in this Guide. Failure to follow warnings andinstructions can result in severe injury, death, or property damage.Call (800) 831-7133 for additional free copies of these instructions. Please refer towww.pentairpool.com for more information related to this products.RISK OF ELECTRICAL SHOCK OR ELECTROCUTION:IntelliBrite White Pool and Spa lights REQUIRE HIGH VOLTAGEWHICH CAN SHOCK, BURN, OR CAUSE DEATH.BEFORE WORKING ON INTELLIBRITE LIGHTS! Always disconnectpower to the pool and/or spa lights at the circuit breaker from thelight before servicing the light. Failure to do so could result indeath or serious injury to service person, pool users or othersdue to electric shock.This underwater light must be installed by a licensed or certified electrician or aqualified pool professional in accordance with the National Electrical Code (NEC),NFPA 70 or the Canadian Electrical Code (CEC), CSA C22.1. All applicable localinstallation codes and ordinances must also be adhered to. Improper installation willcreate an electrical hazard which could result in death or serious injury to pool users,installers or others due to electrical shock, and may also cause damage to property.Always disconnect the power to the pool light at the circuit breaker before servicing thelight. Failure to do so could result in death or serious injury to serviceman, pool usersor others due to electrical shock.READ AND FOLLOW ALL INSTRUCTIONS IN THIS MANUAL.Important Safety Information for Pentair Water Pool and Spa(“Pentair”) Niche and Light Installation All Niche and Light installations must conform with all codes. If local codesmandate a cord seal, use Pentair Water Pool and Spa plastic niches(P/N 79206600 and P/N 79206700) and Cord Seal Kit (P/N 670044). Under no circumstances replace lights by splicing wire under water orbehind niche.IntelliBrite 5g White Pool Light and White Spa Light Installation and User’s Guide
iiIMPORTANT WARNING AND SAFETY INSTRUCTIONSRISK OF ELECTRIC SHOCK AND INJURY. USE ONLY THEINSTALLATION METHOD SPECIFIED BELOW.Location ofLuminaire UsePentair Water Pool and Spa Fountain Fixture* Required Installation Method(P/N 560001 and P/N 560000)Swimming Pooland SpaWet-Niche Swimming Pool(or Spa) Luminaire (Light)Fixture Housing (Forming Shell) ONLY.DO NOT USE Fountain Fixture Stand.FountainWet-Niche Submersible Luminaire (Light)swimming Pool (or Spa) Luminair (Light)Fixture Housing (Forming Shell) orFountain Fixture Stand.(*) Note: Wet-niche luminaires complying with requirements for both uses may bareboth the Listed Wet-Niche Submersible Luminaires UL Mark. A luminaire not bearingthe corresponding UL Listing Mark is not considered by UL to have been producedunder UL’s Listing and Follow-Up Service for the associated usage location.CAUTION - The Pentair IntelliBrite light fixture must only be used with Pentair WaterPool and Spa fixture housings (niches). If the IntelliBrite light fixture is installed intoother niches, the installation will not carry U.L. approval and will void all warranties.NOTICE: The external flexible cable or cord of this luminaire cannot be replaced; ifthe cord is damaged, the luminaire shall be destroyed.For countries in compliance with International ElectromechnicalCommission (IEC) regulatory standards: The light fixture must beinstalled by a licensed or certified electrician or a qualified pool service person, inaccordance with IEC 364-7-702 and all applicable local codes and ordinance. Improperinstallation will create an electrical hazard, which could result in death or serious injuryto pool user, installer or other due to electrical shock and may also cause damage to theproperty.Salt is an inherently corrosive material. While the levels of salt requiredfor proper operation of an electronic chlorine generator are relativelylow when compared to sea water and other salt solutions, placing any amount of salt inyour pool increases the likelihood of corrosion or other deterioration of pool equipmentand any surfaces used in and around your pool. Metal parts and certain natural andman-made surfaces are particularly susceptible to corrosion and deterioration whenused in and around salt water pools. Pentair Water Pool and Spa does not represent orotherwise guarantee that the proper use of an electronic chlorine generator will preventcorrosion or other deterioration of pool equipment and any surfaces used in and aroundyour pool. Consult your experienced pool professional, who should be able to adviseyou on the proper material selection, installation techniques for those materials, and theproper use, care and maintenance of those materials for your specific pool type andlocation in order to minimize the corrosion and deterioration that is inherent in andaround salt water pools.IntelliBrite 5g White Pool Light and White Spa Light Installation and User’s Guide
1IntelliBrite 5g White Pool and Spa Lights OverviewThis manual describes how to install the IntelliBrite 5g white underwater pool light andthe white spa light. The IntelliBrite white lights provides brilliant white light for aspectacular effect in your pool and spa. The unique IntelliBrite 5g pool light lensgeometry (pool light only) provides a choice between two light beam shapes; widercoverage with less intensity, or narrower coverage with more intensity. For moreinformation, see page 14.Operating Pool and Spa Lights Using a Wall Switch (12 VAC)The white pool and spa lights can be manually controlled using a standard wall-mountlight switch. Multiple IntelliBrite lights can be connected via a junction box to a singleswitch so that all lights can be switched on and off together. IntelliBrite lights can also beautomatically controlled via Pentair IntelliTouch , EasyTouch and SunTouch automation systems. For more information refer to the IntelliTouch User’s Guide (P/N521075), EasyTouch User’s Guide (P/N 521044), and SunTouch User’s Guide (P/N520785).Using an External Transformer for Multiple IntelliBrite 12 VAC LightsWhen using multiple IntelliBrite 12 VAC lights on a 300 Watt transformer, it isrecommended that no more than three IntelliBrite pool lights and one (1) IntelliBrite Spalight be used. It is also recommended not to exceed 100 feet of total cable run betweenthe transformer and light. Note: For long cable lengths, set transformer to 14 VAC (seediagram below).300 WattTransformer12 Gauge(minimum)J Box100 ft.150 ft. max. for spa light300 WattTransformer12 Gauge(minimum)J Box200 ft. max. for pool lightIntelliBrite 5g White Pool Light and White Spa Light Installation and User’s Guide
2IntelliBrite 5g White Pool Light models:There are two IntelliBrite 5g White Pool light models: IntelliBrite 5g White Pool Light, 120 VAC with integrated12 VAC transformer, 50 ft. cord length - Other cord lengths are availablefrom 30 ft. (9.14 m) to 250 ft. (76.2 m). IntelliBrite 5g White Pool Light, 12 VAC requires 120 VAC to 12 VACtransformer), 50 ft. cord length - Other cord lengths are available from 30ft. (9.14 m) to 150 ft. (45.72 m).IntelliBrite White Spa Light modelsThere are two IntelliBrite White Spa light models: IntelliBrite White Spa Light, 120 VAC, with integrated 12 VAC transformer,50 ft. cord length - Other cord lengths are available from 30 ft. (9.14 m) to250 ft. (76.2 m). IntelliBrite White Spa Light, 12 VAC, (requires 120 VAC to 12 VACtransformer), 50 ft. cord length - Other cord lengths are available from 30ft. (9.14 m) to 150 ft. (45.72 m).Note: For IntelliBrite 5g white pool and spa white light replacement parts list,see page 15-16 and 21-22.TroubleshootingProblemCause/ActionThe light will not illuminate.Check the GFCI ground fault wiring and reset if necessar y.Light does not function properly.Check the light wiring connection to the junction box at the pool sideand to the AC power switch.Be sure that there is proper AC power applied to the light.IntelliBrite 5g White Pool Light and White Spa Light Installation and User’s Guide
3Replacing the IntelliBrite 5g White Pool and SpaLight Assembly(in an existing pool or spa)Risk of Electrical Shock or Electrocution!This underwater light must be installed by a licensed or certifiedelectrician or a qualified pool professional in accordance withthe National Electrical Code and all applicable local codes andordinances. Improper installation will create an electrical hazardwhich could result in death or serious injury to pool users,installers or others due to electrical shock, and may also causedamage to property.Always disconnect the power to the pool light at the circuitbreaker before servicing the light. Failure to do so could result indeath or serious injury to serviceman, pool users or others dueto electrical shock.Verify that the pool and spa meets the requirements of the current National ElectricalCode and all local codes and ordinances. A licensed or certified electricianmust install the electrical system to meet or exceed those requirements beforethe underwater light is installed. Some of the requirements of the NationalElectrical Code which the pool’s electrical system must meet are as follows: The lighting circuit has a Ground Fault Circuit Interrupter (GFCI) for linevoltage models, and has an appropriately rated circuit breaker. The Junction Box (or, for 12 volt models, the low voltage transformer) islocated at least eight (8) inches (20.3 cm) above ground level and at least48 inches (1.219 m) from the edge of the pool; see Figure 1 on page 7. The light fixture and all metal items within five (5) feet (1.524 m) of the poolare properly electrically bonded. The wet niche is properly installed so that the top edge of the underwaterlight’s lens is at least 18 inches below the surface of the water in the pool;see Figure 1 on page 7. The wet niche is properly electrically bonded and grounded via the No.8 AWG ground connector located at the rear of the niche; see Figure 1on page 7.Note: The pool and spa electrical system can be verified with a Pooland Spa Electrical Qualification Test Kit. The test kit is available fromPentair. The electrical system inspector using this kit must beperformed by trained and certified personnel. . To be certain that the pool’s electrical system meets all applicablerequirements, the electrician should also consult the localbuilding department. Use only Pentair wet niches to insure proper bonding andgrounding connections.IntelliBrite 5g White Pool Light and White Spa Light Installation and User’s Guide
4Replacing the IntelliBrite 5g White Pool and SpaLight Assembly(After Electrical Requirements Are Met)The following removal and installation instructions describe how to remove andinstall the IntelliBrite pool and spa white light assembly. Also use theseinstructions after completing the following light replacement procedure: IntelliBrite White Spa Light and Face Ring Gasketand Lens Removal and Installation instructions, onpage 17.Failure to bring the pool or spa’s electrical system up to code requirementsbefore installing the underwater light will create an electrical hazard whichcould result in death or serious injury to pool users, installers, or others due toelectrical shock, and may also cause damage to property.1.WARNING! Switch off main electrical switch or circuit breaker, and theswitch which operates the IntelliBrite underwater light.2.To remove light fixture assembly from the pool. Remove the specialbronze pilot screw at top of face ring. Remove the IntelliBrite light assemblyfrom the niche and place it on the deck.3. Cut the cord about 12 inches (30.5 cm) from the back of the lightassembly.4. Remove Junction Box cover, disconnect the light fixture wires, andpull the cord through the conduit. Tip: Before pulling the cord, tapethe new cord to the existing cord, This might make it easier tofeed the new cord through the conduit (see following step).5. Feed the new light fixture cord through the conduit from the niche tothe Junction Box. Note: Depending on the length of the conduit,special tools may be required to pull the cord through the conduit.6. Leave at least four (4) feet of cord to coil around the light fixture; seeFigure 1 on page 7. This four (4) feet (1.2192 m) of cord coiled aroundthe light allows the light to be serviced after the pool is filled withwater.7. Cut the cord at the Junction Box, leaving at least size (6) inches ofcord to make connections.8. Strip six (6) inches (15.2 cm) of the outer cord jacket from the cord toexpose the three insulated conductors. Be careful not to damage theinsulation on the three (3) inner conductors). Strip a 1/2” of insulation offthe three conductors. Be careful not to damage the copper conductor.IntelliBrite 5g White Pool Light and White Spa Light Installation and User’s Guide
59. Connect all three conductors to the corresponding circuit wires in theJunction Box (black wire to power, white wire to common, and greenwire to ground) and secure the Junction Box cover in place.10. Install the IntelliBrite light assembly into the niche and tighten the specialbronze pilot screw.Use only the special pilot screw provided with thisunderwater light. This screw mounts and electrically grounds the housingsecurely to the mounting ring and wet niche. Failure to use the screwprovided could create an electrical hazard which could result in death orserious injury to pool users, installers or others due to electrical shock.Pilot screw (bronze)IntelliBrite 5g White Pool LightPilot screw (bronze)IntelliBrite Spa Light11. Final check for proper IntelliBrite light operation: Switch on themain switch or circuit breaker to the system, and the switch thatoperates the IntelliBrite underwater light itself. The light shouldilluminate when power is applied. If not recheck the installation stepsstarting with Step 1 (page 4).IntelliBrite 5g White Pool Light and White Spa Light Installation and User’s Guide
6INTELLIBRITE 5G WHITE POOL AND SPA LIGHT FIXTUREINSTALLATION (NEW POOL CONSTRUCTION)The following describes how to install the IntelliBrite pool and spa white lightfixture. Read page 3 before starting the installation procedure.BEFORE STARTING: The following steps 1-7 (page 7-8) describe the tasks thatmust be completed by the electrician before the IntelliBrite light fixture isinstalled. See Figure 1 diagram on page 7.Be sure that the pool or spa meets the requirements of the current NationalElectrical Code (N.E.C.) Article 680-22 and all local codes and ordinances. Alicensed or certified electrician must install the electrical system to meet orexceed those requirements before the underwater light is installed. Some of therequirements of the National Electrical Code which the pool’s electrical systemmust meet are as follows: The lighting circuit has a Ground Fault Circuit Interrupter (GFCI) for linevoltage models, and has an appropriately rated circuit breaker.The Junction Box (or, for 12 volt models, the low voltage transformer) islocated at least eight (8) inches (20.3 cm) above ground level and atleast 48 inches (1.219 m) from the edge of the pool; see Figure 1 onpage 7.The light fixture and all metal items within five (5) feet (1.524 m) of thepool are properly electrically bonded.The wet niche is properly installed so that the top edge of theunderwater light’s lens is at least 18 inches below the surface of thewater in the pool; see Figure 1 on page 7.The wet niche is properly electrically bonded and grounded via theNo. 8 AWG ground connector located at the rear of the niche; seeFigure 1 on page 7.Note: The pool or spa electrical system can be verified with a Pool and SpaElectrical Qualification Test Kit. The test kit is available from Pentair Water Pooland Spa . The electrical system inspection using this kit must be performed bytrained and certified personnel. Note: To be certain that the pool or spaelectrical system meets all applicable requirements, the electrician shouldalso consult the local building department. Use only Pentair Water Pool andSpa wet niches to insure proper bonding and grounding connections.IntelliBrite 5g White Pool Light and White Spa Light Installation and User’s Guide
7INSTALLING THE INTELLIBRITE 5G WHITE POOL AND SPA LIGHTFIXTURE(AFTER ELECTRICAL REQUIREMENTS ARE MET)ite White light (after electrical requirements are met)To install the IntelliBrite light fixture:1. Route light cable through conduit to Junction Box, leaving at least four (4)feet of cable at the light fixture to coil around the light (this allows the light tobe serviced after the pool is filled with water). See Figure 1 below.Figure 1.2.3.Cut the cable at the Junction Box, leaving at least six (6) inches (2.4 cm) ofcord to make connections.Strip back six (6) inches (2.4 cm) of the outer cord jacket to expose thethree insulated conductors (be careful not to damage the insulation on thethree (3) inner conductors). Strip a 1/2” of insulation off the threeconductors. Be careful not to damage the copper conductor.4.Connect all three (3) conductors to the corresponding circuit wires in theJunction Box and secure the Junction Box cover in place.IntelliBrite 5g White Pool Light and White Spa Light Installation and User’s Guide
85.Install the IntelliBrite light assembly into the niche and tighten the specialbronze pilot screw.Use only the special pilot screw provided with thisunderwater light. This screw mounts and electrically grounds the housingsecurely to the mounting ring and wet niche. Failure to use the screwprovided could create an electrical hazard which could result in death orserious injury to pool users, installers or others due to electrical shock.Pilot screw (bronze)IntelliBrite 5g White Pool LightPilot screw (bronze)IntelliBrite Spa Light6.Fill the pool until the underwater light is completely submerged in waterbefore operating the light.7.Final check for proper light operation: To check for proper operation,switch on the main switch or circuit breaker, and the switch that operatesthe IntelliBrite underwater light itself. The light should illuminate whenpower is applied. If not recheck the installation steps starting with Step 1(page 7)FOR INTELLIBRITE WHITE POOL AND SPA LIGHT REMOVAL ANDINSTALLATION INSTRUCTIONS SEE: Replacing the IntelliBrite 5g White Pool and Spa LightAssembly instructions, on page 4. Replacing the IntelliBrite White Spa Light Face Ring andGasket or Gasket and Lens instructions, on page 17.IntelliBrite 5g White Pool Light and White Spa Light Installation and User’s Guide
9REPLACING THE INTELLIBRITE 5G WHITE POOL LIGHT CIRCUITBOARD ASSEMBLY (IN AN EXISTING POOL)When replacing or reassembling the IntelliBrite White Pool Circuit Board,the Gasket (P/N 79101600) or Gasket and Lens (619864Z) MUST ALSO BEREPLACED - SEE PAGE 15 FOR PART NUMBERSRemoval and Installation of IntelliBrite 5g White Light Circuit BoardDANGER!RISK OF ELECTRICAL SHOCK OR ELECTROCUTIONAlways disconnect power to the pool light at the circuitbreaker before servicing the light. Failure to do so couldresult in death or serious injury to installer, service person,pool users, or others due to electrical shock.1.2.Turn off main electrical switch or circuit breaker, as well as the switchwhich operates the IntelliBrite light itself.Before starting make sure that you have a new lens gasket (P/N 79101600)and a IntelliBrite 5g white pool light circuit board assembly (P/N 619875Z 300w, P/N 619916Z-400W, P/N 619917Z- 500w) ready to install(see page 15).Replace the light circuit board assembly with the same type andwattage. Failure to replace the light circuit board assembly withthe same type will damage the light assembly and may cause an electrical hazardresulting in death or serious injury to pool users, installers, or others due toelectrical shock, and may also cause damage to property.Always install a new lens gasket (P/N 79101600) wheneverdisassembling the IntelliBrite light assembly. Failure to do somay permit water to leak into the assembly which could cause:(a) an electrical hazard resulting in death or serious injury to pool users,installers, or others due to electrical shock, or(b) breakage of the lens, which likewise could result in serious injury to poolusers, installers, or bystanders, or in damage to property.3.REMOVING THE INTELLIBRITE 5G WHITE POOLLIGHT ASSEMBLY: Remove the pilot screw at topof face ring, remove the light assembly from theniche. Place the assembly on the deck. Note: It isnot necessary to drain down the pool.4.Unwind the cord from the base of the light housing.Pilot screw (bronze)IntelliBrite 5g White Pool LightBe sure to keep the pilot screw from the IntelliBrite light. This screwmounts and electrically grounds the housing securely to themounting ring and wet niche. Failure to use the screw provided could create anelectrical hazard which could result in death or serious injury to pool users, installersor others due to electrical shock.IntelliBrite 5g White Pool Light and White Spa Light Installation and User’s Guide
10REPLACING THE INTELLIBRITE WHITE POOL LIGHT CIRCUIT BOARDASSEMBLY (IN AN EXISTING POOL) (Continued)5.6.7.Place a cloth on the groundto protect the lens. Turn thelight over so the lens isresting on the cloth. Using a¼" nut driver and a #3Phillips screwdriver, removethe nut uni-tension wireclamp. Place the nut asidefor reinstallation.Remove the face ringand wire clamp from thelight housing.With the light resting onits base, carefully pry offthe gasket to remove thelens. Set the lens asidefor installation later.Discard the gasket.Note: A NEW LENSGASKET(P/N 79101600) MUSTBE USED EACH TIMETHE LIGHT ISREASSEMBLED.See page 15 forReplacement Kit partnumbers.GasketLensuni-tensionwire clamp:Remove nutand screwFace ringNote: Note the current position of the lens at the pilot screw (12 o’clock)position, before removing it from the fixture. “W” on the lens indicates wideangle, “N” indicates narrow angle. For more information, see page 13.8.Using a ¼" nut driver, carefully remove the four retainer nuts from the lightassembly (see illustration on next page). Place the nuts aside forreinstallation.9. Unplug the two connector plugs from the circuit board. Lift up the circuitboard and remove it from the light housing base.10. Carefully lift off the old thermal strips from the base of the light housingbase and discard. Continue on next page.IntelliBrite 5g White Pool Light and White Spa Light Installation and User’s Guide
11Retaining nut (4x)Circuit boardconnector plugscircuit boardThermalstrip (2x)Light housingCircuit boardstud (4x)11. Place the two new thermal strips (provided) over the circuit board studs inthe base of the light housing.12. Place the light circuit board over the base studs and seat the circuit boardon top of the thermal strips. Be sure the two connecting wires are notcaught between the housing and the edge of the circuit board.13. Using a ¼" nut driver, tighten each of the four (4) retaining nuts to a torque valueof 6.0 (minimum) to 8.0 (maximum) in-lbs to secure the circuit board. DO NOTOVERTIGHTEN THE CIRCUIT BOARD NUTS.INSTALLING THE INTELLIBRITE WHITE POOL LIGHT ASSEMBLYWITH NEW GASKET (see illustration on next page)Be sure to install ALL of the four (4) retaining nuts. Thesenuts ensure proper electrical ground. Failure to install all of the retainingnuts could create an electrical hazard which could result in death or seriousinjury to pool users, installers or others due to electrical shock.14. Connect the two connector plugs to the circuit board terminals.Continue on next page.IntelliBrite 5g White Pool Light and White Spa Light Installation and User’s Guide
12Retaining nut (4x)Circuit boardconnector plugscircuit boardThermalstrip (2x)Light housingCircuit boardstud (4x)15. Install NEW GASKET ONTO LENS: Stretch the gasket around thecircumference of the lens. Be sure the gasket is installed evenly around thelens.16. ALIGN LENS/GASKET ONTO LIGHT HOUSING:a) With the light housing resting on its base, place the lens/gasket on top ofthe light housing.b) Rotate the lens/gasket to align the letter “W” (“WIDE” angle) on the lenswith the brass nut in the housing (see diagram on page 13 for brass nutlocation).Note: The IntelliBrite light lens ships from the factory in the ‘WIDE’ (W) angleposition. To use the “NARROW” angle light beam, rotate the lens/gasket toalign the letter “N” on lens. Note: For more information about using the “WIDE”and NARROW angle lens, see page 14.17. INSTALL FACE RING: Place the face ring on top of the lens/gasket/housing.Rotate the face ring so the pilot screw hole is aligned in the 12 O’clockposition, with the lens letter “W” (or “N”) and the brass nut in the housing. Also,verify the “TOP” position arrow indicator label (see page 14) on the rear of thehousing is aligned with the pilot screw on the face ring.IntelliBrite 5g White Pool Light and White Spa Light Installation and User’s Guide
ALIGNPILOT SCREW(12 O’clock)“W” ON LENSALIGN13BRASS NUTWAlign letter “W” (“WIDE”angle) on lens/gasket withpilot screw hole on face ringand brass nutFor “NARROW” angle lightbeam, rotate “N” to 12O’clock positionN18. INSTALL UNI-TENSION CLAMP: With the hook ends of the circular uni-tensionclamp pointing down, spread the clamp and place it in the “U” recesses of thelocking levers. Be sure the hook ends of the clamp are located between the pairof locking levers as shown below and that the wire clamp is properly engagedwith all of the lock levers.19. Place a cloth on the ground to protect the lens. Turn the light over so the lens isresting on the cloth. Be sure the orientation of the wire clamp and the boltconnection is positioned at 45 .20. Tighten the bolt and nut until the distance between the ends of the clamp equals¼-inch or less. Continue on next page.¼-in or less Uni-tensionclampLockleverTOP“TOP” label(use to align lighthousing with pilotscrew on face ring PILOTSCREW45 Position the wire clamp (nut and bolt) about 45 between the PILOT SCREW and LOCK LEVER.IntelliBrite 5g White Pool Light and White Spa Light Installation and
IntelliBrite 5g White Pool Light and White Spa Light Installation and User’s Guide For countries in compliance with International Electromechnical Commission (IEC) regulatory standards: The light fixture must b