Transcription
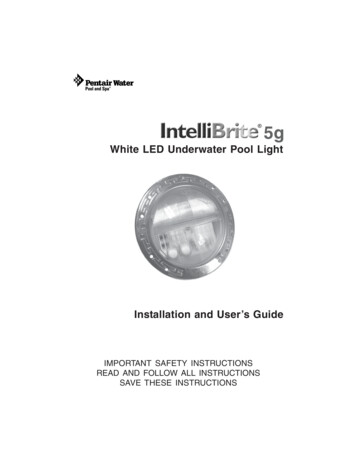
Underwater Pool and SpaWhite LED LightInstallation and User’s GuideIMPORTANT SAFETY INSTRUCTIONSREAD AND FOLLOW ALL INSTRUCTIONSSAVE THESE INSTRUCTIONSIntelliBrite Pool and Spa White LED Light Installation and User’s Guide
Technical SupportPhone: (800) 831-7133 - Fax: (800) 284-4151Web sites: visit www.pentairpool.com and www.staritepool.com:IMPORTANT WARNINGS AND SAFETY PRECAUTIONSIntelliBrite Underwater Pool and Spa White LED LightOperating the IntelliBrite lights using a wall switchUsing an External Transformer for Multiple IntelliBrite 12 VAC LightsTroubleshootingIntelliBrite Pool or Spa White LED Light InstallationInstalling the IntelliBrite White LED Light Fixture (new pool construction)Installing the IntelliBrite White LED Light(after electrical requirements are met)Replacing the IntelliBrite Pool White LED Light AssemblyIntelliBrite Pool White LED Light Replacement Kit Part NumbersReplacing the IntelliBrite Spa White LED Light Face ring and Gasket(P/N 640045) or Gasket and Lens (640046)IntelliBrite Spa White LED Light Replacement Kit Part NumbersReplacing the IntelliBrite Pool or Spa White LED Light Fixture(in an existing pool)Replacing the IntelliBrite Pool or Spa White LED Light Assembly(after electrical requirements are met)i111222351011151617 2009 Pentair Water Pool and Spa, Inc. All rights reserved.1620 Hawkins Ave., Sanford, NC 27330 (919) 566-800010951 West Los Angeles Ave., Moorpark, CA 93021 (805) 553-5000IntelliBrite , IntelliTouch , EasyTouch , SunTouch and Pentair Water Pool and Spa areregistered trademarks of Pentair Water Pool and Spa, Inc. and/or its affiliated companies inthe United States and/or other countries. Unless noted, names and brands of others thatmay be used in this document are not used to indicate an affiliation or endorsement betweenthe proprietors of these names and brands and Pentair Water Pool and Spa, Inc. Thosenames and brands may be the trademarks or registered trademarks of those parties orothers.P/N 619838 Rev B - 10/07/09IntelliBrite Pool and Spa White LED Light Installation and User’s Guide
iWARNINGS AND IMPORTANT SAFETY PRECAUTIONSSERIOUS BODILY INJURY OR DEATH CAN RESULT IF THIS PUMPAND SAND FILTER IS NOT INSTALLED AND USED CORRECTLY.INSTALLERS, POOL OPERATORS AND POOL OWNERS MUSTREAD THESE WARNINGS AND ALL INSTRUCTIONS BEFOREUSING THE POOL AND/OR SPA LED LIGHT.Most states and local codes regulate the construction, installation, andoperation of public pools and spas, and the construction of residentialpools and spas. It is important to comply with these codes, many of which directlyregulate the installation and use of this product. Consult your local building and healthcodes for more information.IMPORTANT NOTICE - Attention Installer: This Installation and User’sGuide (“Guide”) contains important information about the installation,operation and safe use of this underwater pool and spa light. This Guideshould be given to the owner and/or operator of this equipment.Before installing this product, read and follow all warning noticesand instructions in this Guide. Failure to follow warnings andinstructions can result in severe injury, death, or property damage.Call (800) 831-7133 for additional free copies of these instructions. Please refer towww.pentairpool.com for more information related to this products.RISK OF ELECTRICAL SHOCK OR ELECTROCUTION:INTELLIBRITE POOL AND SPA WHITE LED LIGHTS REQUIRE HIGHVOLTAGE WHICH CAN SHOCK, BURN, OR CAUSE DEATH.BEFORE WORKING ON INTELLIBRITE POOL AND SPA WHITE LEDLIGHTS! Always disconnect power to the pool and/or spa lights atthe circuit breaker from the light before servicing the light. Failureto do so could result in death or serious injury to service person,pool users or others due to electric shock.This underwater light must be installed by a licensed or certified electrician or aqualified pool professional in accordance with the National Electrical Code (NEC),NFPA 70 or the Canadian Electrical Code (CEC), CSA C22.1. All applicable localinstallation codes and ordinances must also be adhered to. Improper installation willcreate an electrical hazard which could result in death or serious injury to pool users,installers or others due to electrical shock, and may also cause damage to property.Always disconnect the power to the pool light at the circuit breaker before servicing thelight. Failure to do so could result in death or serious injury to serviceman, pool usersor others due to electrical shock.READ AND FOLLOW ALL INSTRUCTIONS IN THIS MANUAL.Important Safety Information for Pentair Niche and Light Installation All Niche and Light installations must conform with all codes. If local codesmandate acord seal, use Pentair Water Pool and Spa plastic niches (P/N 79206600 andP/N 79206700). Under no circumstances replace lights by splicing wire under water orbehind niche.IntelliBrite Pool and Spa White LED Light Installation and User’s Guide
iiWARNINGS AND IMPORTANT SAFETY PRECAUTIONSRISK OF ELECTRIC SHOCK AND INJURY. USE ONLY THEINSTALLATION METHOD SPECIFIED BELOW.Location ofLuminaire UsePentair Water Pool and Spa Fountain Fixture* Required Installation Method(P/N 560001 and P/N 560000)Swimming Pooland SpaWet-Niche Swimming Pool(or Spa) Luminaire (Light)Fixture Housing (Forming Shell) ONLY.DO NOT USE Fountain Fixture Stand.FountainWet-Niche Submersible Luminaire (Light)swimming Pool (or Spa) Luminair (Light)Fixture Housing (Forming Shell) orFountain Fixture Stand.(*) Note: Wet-niche luminaires complying with requirements for both uses may bareboth the Listed Wet-Niche Submersible Luminaires UL Mark. A luminaire not bearingthe corresponding UL Listing Mark is not considered by UL to have been producesunder UL’s Listing and Follow-Up Service for the associated usage location.CAUTION - The Pentair Water Pool and Spa IntelliBrite LED light fixture must only beused with Pentair Water Pool and Spa fixture housings (niches). If the IntelliBrite LEDlight fixture is installed into other niches, the installation will not carry U.L. approval andwill void all warranties.Salt is an inherently corrosive material. While the levels of salt requiredfor proper operation of an electronic chlorine generator are relativelylow when compared to sea water and other salt solutions, placing any amount of salt inyour pool increases the likelihood of corrosion or other deterioration of pool equipmentand any surfaces used in and around your pool. Metal parts and certain natural andman-made surfaces are particularly susceptible to corrosion and deterioration whenused in and around salt water pools. Pentair Water Pool and Spa does not represent orotherwise guarantee that the proper use of an electronic chlorine generator will preventcorrosion or other deterioration of pool equipment and any surfaces used in and aroundyour pool. Consult your experienced pool professional, who should be able to adviseyou on the proper material selection, installation techniques for those materials, and theproper use, care and maintenance of those materials for your specific pool type andlocation in order to minimize the corrosion and deterioration that is inherent in andaround salt water pools.IntelliBrite Pool White LED Light modelsThere are two IntelliBrite Pool LED light models: IntelliBrite Pool White LED Light, 120 VAC, with integrated 12 VACtransformer, 50 ft. cord length* (P/N 600101). IntelliBrite Pool White LED Light, 12 VAC, (requires 120 VAC to 12 VACtransformer), 50 ft. cord length* (P/N 600104)(*) cord length vary from 30 ft. to 100 ft.IntelliBrite Spa LED Light modelsThere are two IntelliBrite Spa LED light models: IntelliBrite Spa White LED Light, 120 VAC, with integrated 12 VACtransformer, 50 ft. cord length* (P/N 640051) IntelliBrite Spa White LED Light, 12 VAC, (requires 120 VAC to 12 VACtransformer), 50 ft. cord length* (P/N 640054)(*) cord length vary from 30 ft. to 100 ft.IntelliBrite Pool and Spa White LED Light Installation and User’s Guide
1 IntelliBrite Underwater Pool and Spa White LED Light OverviewThis manual describes how to installation and setup the IntelliBrite underwater pool andspa white LED (light-emitting diode) light. The IntelliBrite pool and spa light providesbrilliant white light for spectacular effects for your pool and spa. The unique IntelliBritelens geometry provides a wider beam for greater underwater light reflection providingincreased light intensity.IntelliBrite LED lights are fully compatible with Pentair Water Pool and Spa IntelliTouch ,EasyTouch and SunTouch automation system. For more information refer to theIntelliTouch User’s Guide (P/N 520102), EasyTouch User’s Guide (P/N 520584), andSunTouch User’s Guide (P/N 520785).Operating IntelliBrite White Pool or Spa LED lightsThe IntelliBrite pool and spa white LED lights can be manually controlled using astandard wall-mount light switch. Multiple IntelliBrite lights can be connected via ajunction box to a single switch so that all lights can be switched on and off together.Using an External Transformer for Multiple IntelliBrite 12 VAC LightsWhen using multiple IntelliBrite 12 VAC LED lights on a 300 Watt transformer, it isrecommended that no more than two (2) IntelliBrite pool lights and one (1) IntelliBriteSpa light be used. It is also recommended not to exceed 100 feet of total cable runbetween the transformer and light (see diagram below).300 WattTransformerJ Box12 Gauge(minimum)100 ft.If a longer cable run is necessary, it is recommended that separate 100 Watttransformers be used for each light with no more than 200 feet of total cable run betweenthe transformer and light (see diagram below).100 WattTransformerJ Box12 Gauge(minimum)200 ft.IntelliBrite Pool and Spa White LED Light Installation and User’s Guide
2TroubleshootingUse the following tips to help to resolve problems that might occur whileoperating the LED light.ProblemCause/ActionThe light will not illuminate.Check the ground fault wiring and reset if necessary.Light does not function properly.Check the light wiring connection to the junction box at the pool sideand to the AC power switch.Be sure that there is proper AC power applied to the light.IntelliBrite Pool and Spa White LED Light InstallationThe following describes how to install the IntelliBrite pool and spa white LED light fixture.Read through pages 2 through 7 before starting the installation procedure.BEFORE STARTING: The following steps 1-6 (page 3-4) describe the tasks that mustbe completed by the electrician before the IntelliBrite light fixture is installed. SeeFigure 1 diagram.Be sure that the pool or spa meets the requirements of the current National ElectricalCode (N.E.C.) Article 680-22 and all local codes and ordinances. A licensed orcertified electrician must install the electrical system to meet or exceed thoserequirements before the underwater light is installed. Some of the requirements ofthe National Electrical Code which the pool’s electrical system must meet are asfollows: The lighting circuit has a Ground Fault Circuit Interrupter (GFCI) forline voltage models, and has an appropriately rated circuit breaker.The Junction Box (or, for 12 volt models, the low voltagetransformer) is located at least 8 inches above the maximum waterlevel of the pool and at least 48 inches from the edge of the pool;see Figure 1.The light fixture and all metal items within 5 feet of the pool areproperly electrically bonded.The wet niche is properly installed so that the top edge of theunderwater light’s lens is at least 18 inches below the surface ofthe water in the pool; see Figure 1. (Not more than 20" depth inCanada.)The wet niche is properly electrically bonded and grounded via theNo. 8 AWG ground connector located at the rear of the niche; seeFigure 1.IntelliBrite Pool and Spa White LED Light Installation and User’s Guide
3Note: The pool or spa electrical system can be verified with a Pool and Spa ElectricalQualification Test Kit. The test kit is available from Pentair Water Pool and Spa . Theelectrical system inspection using this kit must be performed by trained and certifiedpersonnel. .To be certain that the pool or spa electrical system meets all applicablerequirements, the electrician should also consult the local buildingdepartment. Use only Pentair Water Pool and Spa wet niches to insure properbonding and grounding connections.Installing the IntelliBrite White LED light(after electrical requirements are met)ite White LED light (after electrical requirements are met)1.Feed cord through conduit to Junction Box, leaving at least four (4) feet ofcord at the light fixture to coil around the light; see Figure 1. The four (4) feetof cord around the light allows the light to be serviced after the pool is filledwith water.Figure 1.2.3.4.Cut the cord at the Junction Box, leaving at least six (6) inches of cord tomake connections.Strip back six (6) inches of the outer cord jacket to expose the threeinsulated wires (be careful not to damage the insulation on the three (3)inner wires).Connect all three (3) wires to the corresponding circuit wires in the JunctionBox and secure the Junction Box cover in place.IntelliBrite Pool and Spa White LED Light Installation and User’s Guide
4Never operate this underwater light for more than ten (10)seconds unless it is totally submerged in water. Without total submersion,the light assembly will get extremely hot, which may result in serious burnsor in breakage of the lens. This may result in serious injury to poolusers, installers, or bystanders, or in damage to property.5.Install the IntelliBrite light assembly into the niche and tighten the specialbronze pilot screw.Use only the special pilot screw provided with thisunderwater light. This screw mounts and electrically grounds the housingsecurely to the mounting ring and wet niche. Failure to use the screwprovided could create an electrical hazard which could result in death orserious injury to pool users, installers or others due to electrical shock.Pilot screwIntelliBrite Pool White LED LightPilot screwIntelliBrite Spa White LED Light6.Fill the pool until the underwater light is completely submerged in waterbefore operating the light for more than ten (10) seconds.7.Final check for proper light operation: To check for proper operation,switch on the main switch or circuit breaker, and the switch that operatesthe IntelliBrite underwater light itself. The light should illuminate whenpower is applied. If not recheck the installation steps starting with Step 1(page 3)FOR INTELLIBRITE POOL AND SPA WHITE LED LIGHT REMOVALAND INSTALLATION INSTRUCTIONS SEE: IntelliBrite Pool White LED Light Removal and Installationinstructions, on page 5. IntelliBrite Spa White LED Light Removal and Installationinstructions, on page 11.IntelliBrite Pool and Spa White LED Light Installation and User’s Guide
5Replacing the IntelliBrite Pool White LED Light AssemblyDANGER!RISK OF ELECTRICAL SHOCK OR ELECTROCUTIONAlways disconnect power to the pool light at the circuit breakerbefore servicing the light. Failure to do so could result in deathor serious injury to installer, serviceman, pool users, or othersdue to electrical shock.1.Turn off main electrical switch or circuit breaker, as well as the switchwhich operates the IntelliBrite LED underwater light itself.2.Before starting make sure that you have a new lens gasket (P/N 79101600)and a IntelliBrite LED pool light assembly (P/N 619834Z) ready to install.Replace the LED light assembly with the same type and wattage.Failure to replace the LED light assembly with the same type willdamage the LED light assembly and may cause an electrical hazard resulting indeath or serious injury to pool users, installers, or others due to electrical shock,and may also cause damage to property.Always install a new lens gasket (P/N 79101600) wheneverdisassembling the IntelliBrite LED light assembly. Failure to doso may permit water to leak into the assembly which could cause:(a) an electrical hazard resulting in death or serious injury to pool users,installers, or others due to electrical shock, or(b) breakage of the lens, which likewise could result in serious injury to poolusers, installers, or bystanders, or in damage to property.Pilot screw3.REMOVING THE INTELLIBRITE LED LIGHT: Remove the pilot screw at topof face ring, remove the light assembly from the niche. Place the assemblyon the deck. Note: It is not necessary to drain down the pool.Be sure to keep the pilot screw from the IntelliBrite LEDunderwater light. This screw mounts and electrically grounds thehousing securely to the mounting ring and wet niche. Failure to use the screwprovided could create an electrical hazard which could result in death or seriousinjury to pool users, installers or others due to electrical shock.IntelliBrite Pool and Spa White LED Light Installation and User’s Guide
64.5.6.Using a ¼" nut driver and a #3 Phillips screwdriver, remove the nut unitension wire clamp. Place the nut aside for reinstallation.Remove the face ring and wire clamp from the light housing.Spring clamp: Remove nut and screwWith the light resting on its base, carefully pry off the gasket to remove thelens. Discard the gasket. A NEW LENS GASKET (P/N 79101600) MUST BEUSED EACH TIME THE LIGHT IS REASSEMBLED. See page 10 forreplacement kit part numbers.Light housingFace ringGasket and lens7.8.Using a ¼" nut driver, carefully remove the four retainer nuts from the LEDlight assembly. Place the nutsaside for reinstallation.Unplug the LED light assembly connector and remove the assembly fromthe housing.Retaining nut (4x)Unplug the LED lightassembly connector toremove the light assemblyfrom its housingIntelliBrite Pool and Spa White LED Light Installation and User’s Guide
79.INSTALLING THE INTELLIBRITE LED LIGHT WITH NEW GASKET: Installa new gasket (P/N 79101600, see page 10) during reassembly of theIntelliBrite LED light. A NEW LENS GASKET MUST BE USED EACH TIMETHE LIGHT IS REASSEMBLED.10. Clean the inside surface containing the four mounting studs with isopropylalcohol. Be sure to keep the underside of the new IntelliBrite LED assemblyclean.Clean this surface before installing thelight assembly11. Connect the IntelliBrite LED light plug to the connector in the light housing.Lower the LED light assembly into the light housing. Be sure that there are nowires caught between the housing and the back of the light assembly.12. Orientate the light assembly so that the word “Pentair” on the circuit boardis positioned at the top (where cable exits) as shown below.CableTop of light housingwhere cable exitsThe word “Pentair”on the circuit boardis positioned at thetopRetaining nut (4x)13. With the housing resting on its base, carefully align the four screws holes ofthe light assembly and the housing base. Using a ¼" nut driver, secure thelight assembly in place with the four (4) retaining nuts.IntelliBrite Pool and Spa White LED Light Installation and User’s Guide
814. Install the new gasket onto the lens:a) With the light housing resting on its base, place the lens then the gasket on top of thelight housing.b) Place the face ring on top of the gasket. Make sure that the lens and gasket arecentered correctly on the light housing.c) Aligning the face ring and lens: Align the face ring and lens so that the letter “O” inthe word “TOP” (and the small arrow above it) on the surface of the lens points to the pilotscrew hole on the face ring.d) Aligning the lens position with the LEDs: While looking through the front of the lens,slightly rotate the lens until the vertical lines on the lens are in focus with the four (4) rowsof LEDs below.Align letter “O” inthe word “TOP”on lens with pilot screw hole onTOPface ringAlign vertical lineon lens with rowsof LEDs underlens15. With the hook ends of the circular uni-tension clamp pointing down, spread theclamp and place it in the “U” recesses of the locking levers. Be sure the hookends of the clamp are located between the pair of locking levers as shownbelow and that the wire clamp is properly engaged with all of the lock levers.16. Place a cloth on the ground to protect the lens. Turn the light over so the lens isresting on the cloth. Be sure the orientation of the wire clamp and the boltconnection is positioned at 45 .17. Tighten the bolt and nut until the distance between the ends of the clamp equals¼-inch or less.Lock lever45 Position wire clamp nut and boltabout 45 between Pilot screwand lock levers.Tighten nut and bolt so that distance betweenends of clamp equals ¼-inch or less.IntelliBrite Pool and Spa White LED Light Installation and User’s Guide
9GasketLensBoltUni-tensionwire clampHook endsNut and washerLock lever(x6)Pilot screw18. PROCEED TO “Replacing the IntelliBrite White LED LightAssembly (in an existing pool or spa)” on page 16 for pool lightassembly installation instructions.IntelliBrite Pool and Spa White LED Light Installation and User’s Guide
10IntelliBrite Pool White LED Light Replacement KitPilot screw withPart Numberscaptive gum washerFace ringUni-tensionwire clampassemblyLensGasketIntelliBrite LEDPool light assemblyNote: A 120 VAC to 12 VAC externaltransformer is required for the 12 VACmodel IntelliBrite LED Pool light. Seepage ii for more information.Kit Part ace Ring assembly, stainless steel.- Uni-tension wire clamp assembly.- Gasket, 8-3/8 in. diameter, off white.Replacement Lens Kit.- Gasket, 8-3/8 in. diameter, off white.- Lens, IntelliBrite, Pool, 8-3/8 in. diameter, tempered.Replacement Kit (light assembly, white LED).- Uni-tension wire clamp assembly.- Gasket, 8-3/8 in. diameter, off white.Pilot screw, with captive gum washer.Gasket, 8-3/8 in. diameter, off white.Note: The 120 Volt IntelliBrite White light has an integrated 12 Volt transformer.IntelliBrite Pool and Spa White LED Light Installation and User’s Guide
11Replacing the IntelliBrite Spa White LED Light Face ring andGasket (P/N 640045) or Gasket and Lens (640046) see page 15Note: When replacing an IntelliBrite Spa White LED lightassembly, a new spa light assembly includes a lightengine, lens, gasket and face ring (for part light assemblypart numbers, see page ii).DANGER!RISK OF ELECTRICAL SHOCK OR ELECTROCUTIONAlways disconnect power to the pool light at the circuit breakerbefore servicing the light. Failure to do so could result in deathor serious injury to installer, pool professional, pool users, orothers due to electrical shock.1.Turn off main electrical switch or circuit breaker, as well as the switchwhich operates the IntelliBrite LED underwater light itself.Replace the LED light assembly with the same type and wattage.Failure to replace the LED light assembly with the same type willdamage the LED light assembly and may cause an electrical hazard resulting indeath or serious injury to pool users, installers, or others due to electrical shock,and may also cause damage to property.Always install a new lens gasket (see page 15 for kit partnumbers) whenever disassembling the IntelliBrite LED lightassembly. Failure to do so may permit water to leak into the assembly which couldcause: (a) an electrical hazard resulting in death or serious injury to pool users,installers, or others due to electrical shock, or (b) breakage of the lens, whichlikewise could result in serious injury to pool users, installers, or bystanders, or indamage to property.Pilot screwIntelliBrite Spa White LED Light2.REMOVING THE INTELLIBRITE LED LIGHT: Remove the pilot screw at topof face ring, remove the light assembly from the niche. Place the assemblyon the deck. Note: It is not necessary to drain down the pool.Be sure to keep the pilot screw from the IntelliBrite LEDunderwater light. This screw mounts and electrically grounds thehousing securely to the mounting ring and wet niche. Failure to use the screwprovided could create an electrical hazard which could result in death or seriousinjury to pool users, installers or others due to electrical shock.IntelliBrite Pool and Spa White LED Light Installation and User’s Guide
124.5.Using a number three (3) Phillips head screwdriver loosen the screw andremove uni-tension wire clamp from the face ring.Remove the face ring and wire clamp from the light housing and setaside for installation later.Note: A 120 VAC to 12 VAC externaltransformer is required for the 12 VACmodel IntelliBrite LED Spa light. Seepage 9 for more information.Loosen the Phillips screw toremove wire clampNote: The IntelliBrite Spa Lightfixture is a sealed light assemblywhich is replaceable. The lens,gasket and face ring can beremoved from the sealed lightassembly for replacement. Seepage 15 for replacement kit partnumbers.6.7.IntelliBrite spa light fixture with lens,gasket and face ring attachedWith the light assembly resting on its base, carefully pry off the gasket torelease the lens. Discard the gasket. A NEW LENS GASKET MUST BEUSED EACH TIME THE SPA LED LIGHT IS REASSEMBLEDDisconnect the IntelliBrite Spa LED light assembly cable from the junctionbox and discard the light assembly.IntelliBrite Spa White LED LightAssemblyFace Ring(uni-tension wire clamp notshown)Lens(Discard old gasket)IntelliBrite Pool and Spa White LED Light Installation and User’s Guide
138.INSTALLING THE INTELLIBRITE SPA LED WHITE WITH NEW GASKET:Install a new gasket during reassembly of the IntelliBrite spa LED whitelight. A NEW LENS GASKET MUST BE USED EACH TIME THE LIGHT ISREASSEMBLED.9.Install the new gasket onto the lens:a) With the light housing resting on its base, place the lens then thegasket on top of the light housing.b) Place the face ring on top of the gasket. Make sure that the lens andgasket are centered correctly on the light housing.c) Aligning the face ring and lens: Align the face ring and lens so that theletter “O” in the word “TOP” and the small arrow above it) on the surface ofthe lens points to the pilot screw hole on the face ring.d) Aligning the lens position with the LEDs: While looking through thefront of the lens, slightly rotate the lens until the vertical lines on the lensare in focus with the four (5) rows of LEDs below.Pilot screwAlign letter “O” inthe word “TOP”on lens with pilotscrew hole onface ring TOPAlign vertical lineon lens with rowsof LEDs underlensIntelliBrite Pool and Spa White LED Light Installation and User’s Guide
1410. With the hook ends of the circular uni-tension wire clamp pointing down, spreadthe clamp and place it in the “U” recesses of the locking levers. Be sure thehook ends of the wire clamp are located between the pair of locking levers asshown below and that the clamp is properly engaged with all of the lock levers.11. Place a cloth on the ground to protect the lens. Turn the light over so the lens isresting on the cloth. Tighten the bolt and nut until the distance between the endsof the clamp equals ¼-in or less.12. PROCEED TO “Replacing the IntelliBrite White LED Light Assembly (inan existing pool or spa)” on page 16 for spa light assembly installationinstructions.Orientation of bolt and wire clampTighten nut and bolt about 90 fromthe Pilot Screw between the lock levers.IntelliBriteSpa lightassemblyGasketLensHook endsLock lever(x4)Uni-tensionwire clampScrew andboltFace ringPilot screwIntelliBrite Pool and Spa White LED Light Installation and User’s Guide
15IntelliBrite Spa Light Replacement Kit NumbersPilot screwFace RingCaptive gumwasherUni-tensionwire clampLensGasketKit Part No.640045DescriptionFace ring assembly, stainless steel- Uni-tension wire clamp assembly- Gasket, 4 in diameter, off white640046Gasket, 4 in diameter, off white- Lens, IntelliBrite, Spa, 4 in diameter, tempered79104800Pilot screw, with captive gum washer79108500- Gasket, 4 in diameter, off whiteNote: A 120 VAC to 12 VAC external transformer is required for the 12 VAC modelIntelliBrite LED Spa light. See page ii for more information.IntelliBrite Pool and Spa White LED Light Installation and User’s Guide
16Replacing the IntelliBrite Pool or SpaWhite LED Light Assembly(in an existing pool or spa)Risk of Electrical Shock or Electrocution!This underwater light must be installed by a licensed or certifiedelectrician or a qualified pool professional in accordance withthe National Electrical Code and all applicable local codes andordinances. Improper installation will create an electrical hazardwhich could result in death or serious injury to pool users,installers or others due to electrical shock, and may also causedamage to property.Always disconnect the power to the pool light at the circuitbreaker before servicing the light. Failure to do so could result indeath or serious injury to serviceman, pool users or others dueto electrical shock.Verify that the pool and spa meets the requirements of the current NationalElectrical Code and all local codes and ordinances. A licensed or certifiedelectrician must install the electrical system to meet or exceed thoserequirements before the underwater light is installed. Some of the requirementsof the National Electrical Code which the pool’s electrical system must meet areas follows: The lighting circuit has a Ground Fault Circuit Interrupter (GFCI) for linevoltage models, and has an appropriately rated circuit breaker. The Junction Box (or, for 12 volt models, the low voltage transformer) islocated at least eight (8) inchesabove ground level and at least 48 inches from the edge of the pool; seeFigure 1 on page 3. The light fixture and all metal items within five (5) feet of the pool areproperly electrically bonded. The wet niche is properly installed so that the top edge of the underwaterlight’s lens is at least 18 inches below the surface of the water in the pool;see Figure 1 on page 3. The wet niche is properly electrically bonded and grounded via the No.8 AWG ground connector located at the rear of the niche; see Figure 1.Note: The pool and spa electrical system can be verified with a Pool andSpa Electrical Qua
IntelliBrite Pool and Spa White LED Light Installation and User’s Guide 300 Watt Transformer J Box 12 Gauge (minimum) 100 ft. 1 IntelliBrite Underwater Pool and Spa White LED Light Overview This manual describes how to installation and setup the IntelliBrite underw


