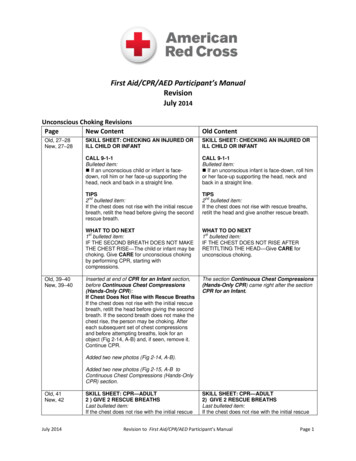
Transcription
First Aid/CPR/AED Participant’s ManualRevisionJuly 2014Unconscious Choking RevisionsPageNew ContentOld, 27–28New, 27–28Old, 39–40New, 39–40Old ContentSKILL SHEET: CHECKING AN INJURED ORILL CHILD OR INFANTSKILL SHEET: CHECKING AN INJURED ORILL CHILD OR INFANTCALL 9-1-1Bulleted item: If an unconscious child or infant is facedown, roll him or her face-up supporting thehead, neck and back in a straight line.CALL 9-1-1Bulleted item: If an unconscious infant is face-down, roll himor her face-up supporting the head, neck andback in a straight line.TIPSnd2 bulleted item:If the chest does not rise with the initial rescuebreath, retilt the head before giving the secondrescue breath.TIPSnd2 bulleted item:If the chest does not rise with rescue breaths,retilt the head and give another rescue breath.WHAT TO DO NEXTst1 bulleted item:IF THE SECOND BREATH DOES NOT MAKETHE CHEST RISE—The child or infant may bechoking. Give CARE for unconscious chokingby performing CPR, starting withcompressions.WHAT TO DO NEXTst1 bulleted item:IF THE CHEST DOES NOT RISE AFTERRETITLTING THE HEAD—Give CARE forunconscious choking.Inserted at end of CPR for an Infant section,before Continuous Chest Compressions(Hands-Only CPR):If Chest Does Not Rise with Rescue BreathsIf the chest does not rise with the initial rescuebreath, retilt the head before giving the secondbreath. If the second breath does not make thechest rise, the person may be choking. Aftereach subsequent set of chest compressionsand before attempting breaths, look for anobject (Fig 2-14, A-B) and, if seen, remove it.Continue CPR.The section Continuous Chest Compressions(Hands-Only CPR) came right after the sectionCPR for an Infant.Added two new photos (Fig 2-14, A-B).Added two new photos (Fig 2-15, A-B toContinuous Chest Compressions (Hands-OnlyCPR) section.Old, 41New, 42July 2014SKILL SHEET: CPR—ADULT2 ) GIVE 2 RESCUE BREATHSLast bulleted item:If the chest does not rise with the initial rescueSKILL SHEET: CPR—ADULT2) GIVE 2 RESCUE BREATHSLast bulleted item:If the chest does not rise with the initial rescueRevision to First Aid/CPR/AED Participant’s ManualPage 1
Old, 42New, 43Old, 43New, 44Old, 63--65New, 64breath, retilt the head before giving the secondbreath. If the second breath does not make thechest rise, the person may be choking. Aftereach subsequent set of chest compressionsand before attempting breaths, look for anobject and, if seen, remove it. Continue CPR.breath, retilt the head and give another rescuebreath.WHAT TO DO NEXTndDeleted 2 bulleted item.WHAT TO DO NEXTnd2 bulleted item:IF BREATHS DO NOT MAKE THE CHESTRISE AFTER RETILTING THE HEAD—GiveCARE for unconscious choking.SKILL SHEET: CPR—CHILD2 ) GIVE 2 RESCUE BREATHSLast bulleted item:If the chest does not rise with the initial rescuebreath, retilt the head before giving the secondbreath. If the second breath does not make thechest rise, the person may be choking. Aftereach subsequent set of chest compressionsand before attempting breaths, look for anobject and, if seen, remove it. Continue CPR.SKILL SHEET: CPR—CHILD2) GIVE 2 RESCUE BREATHSLast bulleted item:If the chest does not rise with the initial rescuebreath, retilt the head and give another rescuebreath.WHAT TO DO NEXTndDeleted 2 bulleted item.WHAT TO DO NEXTnd2 bulleted item:IF BREATHS DO NOT MAKE THE CHESTRISE AFTER RETILTING THE HEAD—GiveCARE for unconscious choking.SKILL SHEET: CPR—INFANT2 ) GIVE 2 RESCUE BREATHSst1 bulleted item:Tilt the head back and lift the chin up to aneutral position.SKILL SHEET: CPR—INFANT2 ) GIVE 2 RESCUE BREATHSst1 bulleted item:Tilt the head back and lift the chin up.Last bulleted item:If the chest does not rise with the initial rescuebreath, retilt the head before giving the secondbreath. If the second breath does not make thechest rise, the infant may be choking. Aftereach subsequent set of chest compressionsand before attempting breaths, look for anobject and, if seen, remove it. Continue CPR.Last bulleted item:If the chest does not rise with rescue breaths,retilt the head and give another rescue breath.WHAT TO DO NEXTndDeleted 2 bulleted item.WHAT TO DO NEXTnd2 bulleted item:IF BREATHS DO NOT MAKE THE CHESTRISE AFTER RETILTING THE HEAD—GiveCARE for unconscious choking.Caring for a Conscious Choking Adult orChild Who Becomes UnconsciousIf a conscious choking adult or child becomesunconscious, carefully lower the person to theground, open the mouth and look for an object.If an object is seen, remove it with your finger. Ifno object is seen, open the person’s airway bytilting the head and try to give 2 rescue breaths.If the chest does not clearly rise, begin themodified CPR technique used for anunconscious choking person, which is describednext.Caring for a Conscious Choking Adult orChild Who Becomes UnconsciousIf the adult or child becomes unconscious,carefully lower him or her to the ground andbegin CPR, starting with compressions. (Seepages 42 and 43.)Deleted Caring for an Unconscious ChokingAdult or Child section.July 2014Revision to First Aid/CPR/AED Participant’s ManualPage 2
Caring for a Conscious Choking Infant WhoBecomes UnconsciousIf the infant becomes unconscious, carefullyplace him or her on a firm, flat surface andbegin CPR, starting with compressions. (Seepage 44.)Deleted Caring for an Unconscious ChokingInfant section.Caring for an Unconscious Choking Adult orChildIf you determine that an adult or a child isunconscious, not breathing and the chestdoes not rise with rescue breaths, retilt thehead and try another rescue breath. If the cheststill does not rise, assume that the airwayis blocked. To care for an unconscious chokingadult or child, perform a modified CPRtechnique: Locate the correct hand position for chestcompressions. Use the same technique that isused for CPR. Give chest compressions. Compress anadult’s chest 30 times to a depth of at least 2inches (Fig. 4-11, A). Compress a child’s chest30 times to a depth of about 2 inches.Compress at a rate of at least 100 chestcompressions per minute; the 30 chestcompressions should take about 18 seconds tocomplete. Look for a foreign object (Fig. 4-11, B). Openthe person’s mouth. (Remove the CPRbreathing barrier if you are using one.) If yousee an object, remove it with a finger (Fig. 4-11,C). Give 2 rescue breaths (Fig. 4-11, D).If the chest does not clearly rise, repeat cyclesof chest compressions, foreign objectcheck/removal and 2 rescue breaths. Do notstop except in one of these situations:o The object is removed and the chestclearly rises with rescue breaths.o The person starts to breathe on his or herown.o Another trained responder or EMSpersonnel take over.o You are too exhausted to continue.o The scene becomes unsafe.If the breaths make the chest clearly rise,quickly check for breathing. Care for theconditions you find.Caring for a Conscious Choking Infant WhoBecomes UnconsciousIf a conscious choking adult or child becomesunconscious, carefully lower the infant to theground, open the mouth and look for an object.If an object is seen, remove it with your littlefinger. If no object is seen, open the infant’sairway by retilting the head and try to give 2rescue breaths. If the chest does not clearlyrise, begin a modified CPR technique used foran unconscious choking infant, which isdescribed next.Caring for an Unconscious Choking InfantIf you determine that an infant is unconscious,not breathing and the chest does not rise withrescue breaths, retilt the head and try anotherrescue breath. If the chest still does not rise,assume that the airway is blocked. To care forJuly 2014Revision to First Aid/CPR/AED Participant’s ManualPage 3
an unconscious choking infant: Locate the correct hand and finger positionfor chest compressions. Use the sametechnique that is used for CPR. Give 30 chest compressions at a rate of atleast 100 chest compressions per minute (Fig.4-12, A). Each compression should be about1½ inches deep. Look for a foreign object (Fig. 4-12, B). If theobject is seen, remove it with your little fi nger(Fig. 4-12, C). Give 2 rescue breaths (Fig. 4-12, D). If thebreaths do not make the chest clearly rise,repeat cycles of chest compressions, foreignobject check/removal and rescue breaths. Donot stop except in one of these situations:o The object is removed and the chestclearly rises with rescue breaths.o The infant starts to breathe on his or herown.o Another trained responder or EMSpersonnel take over.o You are too exhausted to continue.o The scene becomes unsafe.If the breaths make the chest clearly rise,quickly check for breathing. Care for theconditions you find.Old, 66New, 65SKILL SHEET: CONSCIOUS CHOKING—ADULTWHAT TO DO NEXTnd2 bulleted item:Carefully lower the person to the ground andbegin CPR, starting with compressions.SKILL SHEET: CONSCIOUS CHOKING—ADULTWHAT TO DO NEXTnd2 bulleted item:Carefully lower the person to the ground andgive CARE for an unconscious choking adult,beginning with looking for an object.Old, 67New, 66SKILL SHEET: CONSCIOUS CHOKING—CHILDWHAT TO DO NEXTnd2 bulleted item:Carefully lower the child to the ground andbegin CPR, starting with compressions.SKILL SHEET: CONSCIOUS CHOKING—CHILDWHAT TO DO NEXTnd2 bulleted item:Carefully lower the child to the ground and giveCARE for an unconscious choking child,beginning with looking for an object.Old, 68New, 67SKILL SHEET: CONSCIOUS CHOKING—INFANTWHAT TO DO NEXTnd2 bulleted item:Carefully place the infant on a firm, flat surface,and begin CPR, starting with compressions.SKILL SHEET: CONSCIOUS CHOKING—INFANTWHAT TO DO NEXTnd2 bulleted item:Carefully lower the infant onto a firm, flatsurface, and give CARE for an unconsciouschoking infant, beginning with looking for anobject.Deleted SKILL SHEET: UNCONSCIOUSCHOKING—ADULT.Deleted SKILL SHEET: UNCONSCIOUSCHOKING—CHILD AND INFANT.SKILL SHEET: UNCONSCIOUS CHOKING—ADULTSKILL SHEET: UNCONSCIOUS CHOKING—CHILD AND INFANTOld , 69Old, 70July 2014Revision to First Aid/CPR/AED Participant’s ManualPage 4
AED RevisionsPageNew ContentOld, 46New, 47AED PRECAUTIONS6th bulleted item:The person should not be in a pool or puddle ofwater when the responder is operating an AED.Other RevisionsPageNew ContentOld, iv–vNew, iv–vOld, 35New, 35Old, 82New, 79Old, 175–181New, 172–178July 2014Table of ContentsUpdatedLast bulleted item:When you come up, you should release allpressure on the chest but do not take hands offthe chest.FOCUS ON PREPAREDNESSPOISON CONTROL CENTERSNational Poison Control Center hotline iscorrectly listed as 1-800-222-1222.IndexUpdatedOld ContentAED PRECAUTIONS6th bulleted item:Do not use an AED on a person who is incontact with water. Move the person and AEDaway from puddles of water or swimming poolsor out of the rain before defibrillating.Old ContentTable of ContentsLast bulleted item:When you come up, you should release allpressure on the chest but do take hands off thechest.FOCUS ON PREPAREDNESSPOISON CONTROL CENTERSNational Poison Control Center hotline isincorrectly listed as 1-800-122-1222.IndexRevision to First Aid/CPR/AED Participant’s ManualPage 5
Table of ContentsCHAPTER1SKILL SHEET:SKILL SHEET:SKILL SHEET:CHAPTER2SKILL SHEET:SKILL SHEET:SKILL SHEET:CHAPTER3SKILL SHEET:SKILL SHEET:ivAbout This ManualviiHealth Precautions and Guidelines During TrainingviiiBefore Giving Care and Checking an Injured or Ill PersonYour Role in the EMS SystemDisease Transmission and PreventionTaking Action: Emergency Action StepsChecking a Conscious PersonShockChecking an Unconscious PersonIncident StressPutting It All TogetherRemoving GlovesChecking an Injured or Ill AdultChecking an Injured or Ill Child or Infant12581416172223242527Cardiac Emergencies and CPR 29BackgroundHeart AttackCardiac ArrestPutting It All 424344AED 45When the Heart Suddenly FailsUsing an AEDAED PrecautionsHow to Use an AED—AdultsHow to Use an AED—Children and InfantsSpecial AED SituationsOther AED ProtocolsAED MaintenancePutting It All TogetherAED—Adult or Child Older Than 8 Years or Weighing More than 55 PoundsAED—Child and Infant Younger Than 8 Years or Weighing Less than 55 PoundsFirst Aid/CPR/AED Participant’s Manual4646464748485050505153
CHAPTER4SKILL SHEET:SKILL SHEET:SKILL SHEET:CHAPTER5Breathing Emergencies55BackgroundRespiratory Distress and Respiratory ArrestChokingPutting It All TogetherConscious Choking—AdultConscious Choking—ChildConscious Choking—Infant56576064656667Sudden Illness68Sudden IllnessSpecific Sudden IllnessesPoisoningPutting It All TogetherCHAPTER669707680Environmental Emergencies81Heat-Related Illnesses and Cold-Related EmergenciesBites and StingsPoisonous PlantsLightningPutting It All TogetherCHAPTER7SKILL SHEET:SKILL SHEET:CHAPTER8SKILL SHEET:SKILL SHEET:SKILL SHEET:SKILL SHEET:8285959697Soft Tissue Injuries98WoundsBurnsSpecial SituationsPutting It All TogetherControlling External BleedingUsing a Manufactured Tourniquet99106109113114115Injuries to Muscles, Bones and Joints116BackgroundTypes of InjuriesPutting It All TogetherApplying an Anatomic SplintApplying a Soft SplintApplying a Rigid SplintApplying a Sling and Binder117118126127129131133First Aid/CPR/AED Table of Contentsv
CHAPTER9Special Situations and Circumstances 135Children and InfantsEmergency ChildbirthOlder AdultsPeople With DisabilitiesLanguage BarriersCrime Scenes and Hostile SituationsPutting It All TogetherCHAPTER10SKILL SHEET:CHAPTER11SKILL SHEET:APPENDIXAsthma 148AsthmaPutting It All TogetherAssisting With an Asthma InhalerAnaphylaxis and Epinephrine Auto-InjectorsAnaphylaxisPutting It All TogetherAssisting with an Epinephrine Auto-InjectorInjury Prevention and Emergency PreparednessInjuriesPutting It All 58160161168Sources169Index172First Aid/CPR/AED Participant’s Manual
SKILL SHEETCHECKING AN INJUREDOR ILL CHILD OR INFANTAPPEARS TO BE UNCONSCIOUSTIP: Use disposable gloves and other PPE. Get consent froma parent or guardian, if present.AFTER CHECKING THE SCENE FOR SAFETY, CHECK THE CHILD OR INFANT.CHECK FOR RESPONSIVENESSTap the shoulder and shout, “Are you okay?”For an infant, you may flick the bottom of the foot.CALL 9-1-1If no response, CALL 9-1-1 or the local emergency number. If an unconscious child or infant is face-down, roll him or her face-up supporting the head,neck and back in a straight line.If ALONE, give about 2 minutes of CARE, then CALL 9-1-1.If the child or infant responds, CALL 9-1-1 or the local emergency number for any life-threateningconditions and obtain consent to give CARE.CHECK the child from head to toe and ask questions to find out what happened.OPEN THE AIRWAYTilt head back slightly, lift chin.Continued on next pageCHAPTER1 Before Giving Care and Checking an Injured or Ill Person27
SKILL SHEET continuedCHECK FOR BREATHINGCHECK for no more than 10 seconds. Occasional gasps are not breathing. Infants have periodic breathing, so changes inbreathing pattern are normal for infants.GIVE 2 RESCUE BREATHSIf no breathing, give 2 rescue breaths. Tilt the head back and lift the chin up. Child: Pinch the nose shut, then make a complete sealover child’s mouth. Infant: Make complete seal over infant’s mouth and nose. Blow in for about 1 second to make the chest clearly rise. Give rescue breaths, one after the other.TIPS: If you witnessed the child or infant suddenly collapse, skiprescue breaths and start CPR. If the chest does not rise with the initial rescue breath,retilt the head before giving the second breath.QUICKLY SCAN FOR SEVERE BLEEDINGWHAT TO DO NEXT 28IF THE SECOND BREATH DOES NOT MAKE THE CHEST RISE—The child or infant may bechoking. Give CARE for unconscious choking by performing CPR, starting with compressions.IF THERE IS NO BREATHING—Perform CPR or use an AED (if AED is immediately available).IF BREATHING—Maintain an open airway. Monitor breathing and for any changes in condition.First Aid/CPR/AED Participant’s Manual
FIGURE 2-7 Place your other hand directly on top ofthe first hand. Try to keep your fingers off of the chestby interlacing them or holding them upward.your other hand directly on top of the first handand try to keep your fingers off of the chest byinterlacing them or holding them upward (Fig. 2-7).If you feel the notch at the end of the sternum,move your hands slightly toward the person’s head.If you have arthritis in your hands, you can givecompressions by grasping the wrist of the handpositioned on the chest with your other hand(Fig. 2-8). The person’s clothing should notinterfere with finding the proper hand position oryour ability to give effective compressions. If it does,loosen or remove enough clothing to allow deepcompressions in the center of the person’s chest. Give 30 chest compressions. Push hard, push fastat a rate of at least 100 compressions per minute.Note that the term “100 compressions per minute”refers to the speed of compressions, not the numberof compressions given in a minute. As you givecompressions, count out loud, “One and two andthree and four and five and six and ” up to30. Push down as you say the number and come upas you say “and.” This will help you to keep a steady,even rhythm.Give compressions by pushing the sternumdown at least 2 inches (Fig. 2-9, A). The downwardand upward movement should be smooth, notjerky. Push straight down with the weight ofyour upper body, not with your arm muscles.This way, the weight of your upper body willcreate the force needed to compress the chest.Do not rock back and forth. Rocking results inless-effective compressions and wastes muchneeded energy. If your arms and shoulderstire quickly, you are not using the correctbody position.After each compression, release the pressure onthe chest without removing your hands or changinghand position (Fig. 2-9, B). Allow the chest toreturn to its normal position before starting thenext compression. Maintain a steady down-and-uprhythm and do not pause between compressions.Spend half of the time pushing down and halfof the time coming up. When you press down, thewalls of the heart squeeze together, forcing theblood to empty out of the heart. When you comeup, you should release all pressure on the chest,but do not take hands off the chest. This allowsthe heart’s chambers to fill with blood betweencompressions.BAFIGURE 2-8 If you have arthritis in your hands, youcan give compressions by grasping the wrist of thehand positioned on the chest with your other hand.FIGURE 2-9, A–B To give chest compressions: A, Push straight downwith the weight of your body. B, Release, allowing the chest to returnto its normal position.CHAPTER2 Cardiac Emergencies and CPR35
Continue cycles of 30 chest compressions and 2 rescuebreaths. Do not stop CPR except in one of thesesituations: You find an obvious sign of life, such asbreathing.An AED is ready to use.Another trained responder or EMS personneltake over.You are too exhausted to continue.The scene becomes unsafe. If at any time you notice the child begin to breathe,stop CPR, keep the airway open and monitor breathingand for any changes in the child’s condition until EMSpersonnel take over.CPR for an InfantContinue cycles of 30 chest compressions and 2rescue breaths. Do not stop CPR except in one of thesesituations:If during your check you find that the infant is notbreathing, begin CPR by following these steps: Find the correct location for compressions.Keep one hand on the infant’s forehead tomaintain an open airway. Use the pads of twoor three fingers of your other hand to give chestcompressions on the center of the chest, justbelow the nipple line (toward the infant’s feet).If you feel the notch at the end of the infant’ssternum, move your fingers slightly toward theinfant’s head.AGive 30 chest compressions using the pads ofthese fingers to compress the chest. Compressthe chest about 1½ inches. Push hard, push fast(Fig. 2-13, A). Your compressions should besmooth, not jerky. Keep a steady rhythm.Do not pause between each compression.When your fingers are coming up, release pressureon the infant’s chest completely but do not let yourfingers lose contact with the chest. Compress at a rateof at least 100 compressions per minute.After giving 30 chest compressions, give 2 rescuebreaths, covering the infant’s mouth and nosewith your mouth (Fig. 2-13, B). Each rescuebreath should last about 1 second and make thechest clearly rise. You find an obvious sign of life, such asbreathing.An AED is ready to use.Another trained responder or EMS personnel takeover.You are too exhausted to continue.The scene becomes unsafe.If at any time you notice the infant begin to breathe,stop CPR, keep the airway open and monitor breathingand for any changes in the infant’s condition until EMSpersonnel take over.BFIGURE 2-13, A–B To perform CPR on an infant: A, Place the pads of two or three fingers in the center of the infant’s chest and compress the chestabout 1½ inches. B, Give 2 rescue breaths, covering the infant’s mouth and nose with your mouth.CHAPTER2 Cardiac Emergencies and CPR39
If Chest Does Not Risewith Rescue BreathsContinuous Chest Compressions(Hands-Only CPR)If the chest does not rise with the initial rescue breath,retilt the head before giving the second breath. If thesecond breath does not make the chest rise, the personmay be choking. After each subsequent set of chestcompressions and before attempting breaths, lookfor an object (Fig 2-14, A-B) and, if seen, remove it.Continue CPR.If you are unable or unwilling for any reason to performfull CPR (with rescue breaths), give continuous chestcompressions after checking the scene and the personand calling 9-1-1 or the local emergency number(Fig 2-15, A-B). Continue giving chest compressionsuntil EMS personnel take over or you notice an obvioussign of life, such as breathing.AABFIGURE 2-14, A–B After each subsequent set of chest compressionsand before attempting breaths, look for an object and, if seen, removeit. Note: Do not attempt to remove an object if you do not see one.A, Adult. B, Infant.40First Aid/CPR/AED Participant’s ManualBFIGURE 2-15, A–B A, Check the person. B, Give chest compressions.
SKILL SHEETCPR—ADULTNO BREATHINGAFTER CHECKING THE SCENE AND THE INJURED OR ILL PERSON:GIVE 30 CHEST COMPRESSIONSPush hard, push fast in the center of the chest atleast 2 inches deep and at least 100 compressionsper minute.TIP: The person must be on a firm, flat surface.GIVE 2 RESCUE BREATHS Tilt the head back and lift the chin up.Pinch the nose shut then make acomplete seal over the person’s mouth.Blow in for about 1 second to make thechest clearly rise.Give rescue breaths, one after the other.If chest does not rise with the initial rescue breath,retilt the head before giving the second breath.If the second breath does not make the chest rise, theperson may be choking. After each subsequent set ofchest compressions and before attempting breaths, look for an object and, if seen, remove it.Continue CPR.DO NOT STOPContinue cycles of CPR. Do not stop except in one of these situations: You find an obvious sign of life, such as breathing. An AED is ready to use. Another trained responder or EMS personnel take over. You are too exhausted to continue. The scene becomes unsafe.TIP: If at any time you notice an obvious sign of life, stopCPR and monitor breathing and for any changes in condition.WHAT TO DO NEXT 42USE AN AED AS SOON AS ONE IS AVAILABLE.First Aid/CPR/AED Participant’s Manual
SKILL SHEETCPR—CHILDNO BREATHINGAFTER CHECKING THE SCENE AND THE INJURED OR ILL CHILD:GIVE 30 CHEST COMPRESSIONSPush hard, push fast in the center of the chest about2 inches deep and at least 100 compressions per minute.TIP: The child must be on a firm, flat surface.GIVE 2 RESCUE BREATHS Tilt the head back and lift the chin up.Pinch the nose shut then make a completeseal over the child’s mouth.Blow in for about 1 second to make thechest clearly rise.Give rescue breaths, one after the other.If chest does not rise with the initial rescue breath,retilt the head before giving the second breath.If the second breath does not make the chest rise, thechild may be choking. After each subsequent set ofchest compressions and before attempting breaths, look for an object and, if seen, remove it.Continue CPR.DO NOT STOPContinue cycles of CPR. Do not stop except in one of these situations: You find an obvious sign of life, such as breathing. An AED is ready to use. Another trained responder or EMS personnel take over. You are too exhausted to continue. The scene becomes unsafe.TIP: If at any time you notice an obvious sign of life, stopCPR and monitor breathing and for any changes in condition.WHAT TO DO NEXT USE AN AED AS SOON AS ONE IS AVAILABLE.CHAPTER2 Cardiac Emergencies and CPR43
SKILL SHEETCPR—INFANTNO BREATHINGAFTER CHECKING THE SCENE AND THE INJURED OR ILL INFANT:GIVE 30 CHEST COMPRESSIONSPush hard, push fast in the center of the chest about1½ inches deep and at least 100 compressionsper minute.TIP: The infant must be on a firm, flat surface.GIVE 2 RESCUE BREATHS Tilt the head back and lift the chin up to aneutral position.Make a complete seal over the infant’smouth and nose.Blow in for about 1 second to make thechest clearly rise.Give rescue breaths, one after the other.If chest does not rise with the initial rescue breath,retilt the head before giving the second breath.If the second breath does not make the chest rise, theinfant may be choking. After each subsequent set of chest compressions and before attemptingbreaths, look for an object and, if seen, remove it. Continue CPR.DO NOT STOPContinue cycles of CPR. Do not stop except in one of these situations: You find an obvious sign of life, such as breathing. An AED is ready to use. Another trained responder or EMS personnel take over. You are too exhausted to continue. The scene becomes unsafe.TIP: If at any time you notice an obvious sign of life, stopCPR and monitor breathing and for any changes in condition.WHAT TO DO NEXT 44USE AN AED AS SOON AS ONE IS AVAILABLE.First Aid/CPR/AED Participant’s Manual
and infants up to 8 years old or weighing less than55 pounds.Do not touch the person while the AED isanalyzing. Touching or moving the person mayaffect analysis.Before shocking a person with an AED, make surethat no one is touching or is in contact with the personor any resuscitation equipment.Do not touch the person while the device isdefibrillating. You or someone else could be shocked.Do not defibrillate someone when aroundflammable or combustible materials, such as gasolineor free-flowing oxygen.Do not use an AED in a moving vehicle. Movementmay affect the analysis.The person should not be in a pool or puddle of waterwhen the responder is operating an AED.Do not use an AED on a person wearing anitroglycerin patch or other medical patch on thechest. With a gloved hand, remove any patches fromthe chest before attaching the device.Do not use a mobile phone or radio within 6 feetof the AED. Radiofrequency interference (RFI)and electromagnetic interference (EMI), as well asinfrared interference, generated by radio signals candisrupt analysis.HOW TO USE ANAED—ADULTSDifferent types of AEDs are available, but all aresimilar to operate and have some common features,such as electrode (AED or defibrillation) pads, voiceprompts, visual displays and/or lighted buttons toguide the responder through the steps of the AEDAoperation. Most AEDs can be operated by followingthese simple steps: Turn on the AED.Expose the person’s chest and wipe the bare chestdry with a small towel or gauze pads. This ensuresthat the AED pads will stick to the chest properly.Apply the AED pads to the person’s bare, dry chest.(Make sure to peel the backing off each pad, one at atime, to expose the adhesive surface of the pad beforeapplying it to the person’s bare chest.) Place one padon the upper right chest and the other pad on the leftside of the chest (Fig. 3-3, A).Plug the connector into the AED, if necessary.Let the AED analyze the heart rhythm (or push thebutton marked “analyze,” if indicated and promptedby the AED). Advise all responders and bystanders to“stand clear” (Fig. 3-3, B). No one should touch theperson while the AED is analyzing because this couldresult in faulty readings.If the AED advises that a shock is needed:{ Make sure that no one, including you, is touchingthe person.{ Say, “EVERYONE, STAND CLEAR.”{ Deliver the shock by pushing the “shock” button,if necessary. (Some models can deliver theshock automatically while others have a “shock”button that must be manually pushed to deliverthe shock.)After delivering the shock, or if no shock is advised:{ Perform about 2 minutes (or 5 cycles) of CPR.{ Continue to follow the prompts of the AED.If at any time you notice an obvious sign of life, such asbreathing, stop performing CPR and monitor the person’sbreathing and any changes in the person’s condition.BFIGURE 3-3, A–B To use an AED on an adult: Turn on the AED. A, Apply the pads to the person’s bare, dry chest. Place one pad on the upper rightchest and the other pad on the left side of the chest. B, Advise everyone to “stand clear” while the AED analyzes the heart rhythm. Deliver a shock bypushing the shock button if indicated and prompted by the AED.CHAPTER3 AED47
To give chest thrusts: Place the infant in a face-up position.Place one hand and forearm on the child’s back,cradling the back of the head, while keeping yourother hand and forearm on the front of the infant.Use your thumb and fingers to hold the infant’sjaw while sandwiching the infant between yourforearms (Fig. 4-10, A).{ Turn the infant onto his or her back.Lower your arm that is supporting the infant’s backonto your opposite thigh. The infant’s head shouldbe lower than his or her chest, which will assist indislodging the object.Pl
July 2014 Revision to First Aid/CPR/AED Participant’s Manual Page 5 AED Revisions Page New Content Old Content Old, 46 AED PRECAUTIONS New, 47 6th bulleted item: The person should not be in a pool o


