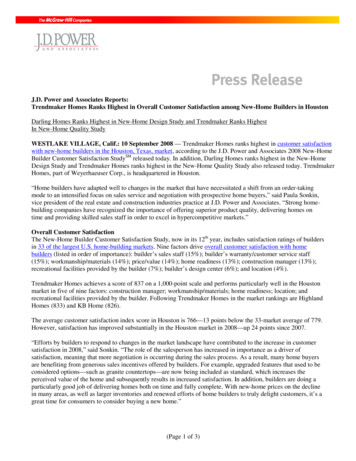
Transcription
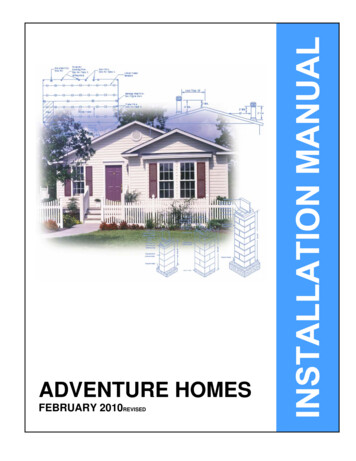
ADVENTURE HOMESFEBRUARY 2010REVISED
NOTE:CONSUMER INFORMATION CARDS“Keep this booklet with your manufactured home. Title VI ofHousing and Development Act of 1974 provides you withprotection against certain const. and safety hazards in yourmanufactured home. To help assure your protection, themanufacturer of your manufactured home needs theinformation which these cards, when completed and mailed,will supply. If you bought your home from a dealer, please besure that your dealer has completed and mailed a card foryou. If you acquired your home from someone who is not adealer you should promptly fill out and send a card to themanufacturer. It is important that you keep this booklet andgive it to any person who buys the manufactured home fromyou”
Table of Contents#02Table of ContentsINTRODUCTION .3Conforms toHUD MHCSS3/3/10IMPORTANT NOTICES . 3SAFETY . 3RESOURCES . 3FEDERAL PREEMPTION. 4DEFINITIONS . 4ENGINEER’S STAMP. 5SYMBOLS USED IN THE MANUAL . 6ABBREVIATIONS. 6ALTERNATIVE FOUNDATION SYSTEMS . 6DISPLAY AND STORAGE OF THE HOME . 6GETTING STARTED.9STEP 1. LOCATE THE DATA PLATE . 9STEP 2. CONFIRM WIND ZONE. 9STEP 3. CONFIRM THERMAL ZONE. 10STEP 4. CONFIRM ROOF-LOAD ZONE. 11STEP 5. CHECK LOCAL CODES AND SECURE PERMITS. 13PREPARE THE SITE .14STEP 1. PLAN SITE ACCESS . 14STEP 2. DETERMINE HOME LOCATION AND LAYOUT . 14STEP 3. CLEAR AND GRADE THE SITE. 15STEP 4. DETERMINE SOIL CONDITION . 15STEP 5. DETERMINE SOIL-BEARING CAPACITY AND FROST LINE. 16STEP 6. DETERMINE GROUND ANCHOR HOLDING CAPACITY. 17INSTALL FOOTINGS.19STEP 1. DESIGN POINT LOAD SUPPORTS . 19STEP 2. DESIGN FRAME SUPPORTS (Homes without Perimeter Blocking) . 21STEP 3. DESIGN FRAME AND PERIMETER SUPPORTS (Homes with Perimeter Blocking) . 23STEP 4. SELECT FOOTING MATERIALS. 25STEP 5. SIZE FOOTINGS . 25STEP 6. INSTALL FOOTINGS . 29INSTALLATION MANUALCONSTRUCT FOUNDATIONS .32STEP 1. OBTAIN A FOUNDATION DESIGN . 32STEP 2. EXCAVATE . 32STEP 3. CONSTRUCT THE FOOTING OR SLAB . 32STEP 4. CONSTRUCT THE PERIMETER WALL . 32STEP 5. INSTALL INTERIOR SUPPORTS . 33STEP 6. WATERPROOF FOUNDATION WALL . 33STEP 7. BACKFILL AND GRADE . 33SET THE HOME.34STEP 1. PREPARE FOR SET . 34STEP 2. POSITION HOME SECTION . 34STEP 3. LIFT HOME. 34STEP 4. CONSTRUCT PIERS. 36COMPLETE MULTI-SECTION SET.40STEP 1. INSTALL MARRIAGE LINE ANCHORS . 40i1069/3/2009 4:24 PM
Table of ContentsSTEP 2. REMOVE PROTECTIVE SHIPPING MATERIALS. 40STEP 3. COMPLETE HINGED ROOF. 40STEP 4. REPAIR OR INSTALL MARRIAGE LINE GASKET . 43STEP 5. POSITION ADDITIONAL HOME SECTIONS. 44STEP 6. CONNECT FLOORS . 45STEP 7. CONNECT ROOF. 46STEP 8. CONNECT WALLS . 49STEP 9. ATTACH TAG UNITS . 51STEP 10. REMOVE TEMPORARY ITEMS. 52STEP 11. FASTEN HOME TO FOUNDATION . 52STEP 12. BACKFILL AND GRADE . 52STEP 13. BUILD STAIRS. 52COMPLETE ROOF AND EXTERIOR WALLS.53STEP 1. COMPLETE ROOF. 53STEP 2. COMPLETE TAG UNIT ROOF. 55STEP 3. COMPLETE SIDE WALLS . 57CONNECT CROSSOVERS.58STEP 1. CONNECT DUCTS. 58STEP 2. CONNECT ELECTRICAL CROSSOVERS . 60STEP 3. INSTALL ELECTRICAL BONDING . 61STEP 4. CONNECT WATER LINES. 62STEP 5. CONNECT DRAIN, WASTE, AND VENT LINES . 62STEP 6. CONNECT GAS LINES . 64STEP 7. CONNECT TELEPHONE AND CABLE TV WIRING . 64COMPLETE THE INTERIOR .65INSTALLATION MANUALSTEP 1. ALIGN MARRIAGE WALLS. 65STEP 2. FINISH GYPSUM BOARD. 65STEP 3. COMPLETE WALL AND CEILING FINISHES . 65STEP 4. COMPLETE CARPET . 66STEP 5. COMPLETE TRIM . 66STEP 6. INSTALL SHIP LOOSE ITEMS . 66INSTALL STABILIZING SYSTEM .67STEP 1. DETERMINE ANCHOR LOCATIONS . 67STEP 2. DETERMINE TIE-DOWN CONFIGURATION. 73STEP 3. SELECT ANCHORS. 73STEP 4. INSTALL ANCHORS. 74STEP 5. INSTALL STRAPS . 75STEP 6. TIGHTEN AND ADJUST STRAPS. 78CONNECT UTILITIES .79STEP 1. CONNECT ELECTRICAL SERVICE. 79STEP 2. CONNECT WATER SERVICE . 82STEP 3. CONNECT GAS SERVICE. 85STEP 4. CONNECT OIL SERVICE. 86PREPARE APPLIANCES AND EQUIPMENT .88INSTALL AIR CONDITIONER OR HEAT PUMP . 88PREPARE HEATING SYSTEM . 89INSTALL REMOTE HEATING AND COOLING EQUIPMENT . 89PREPARE VENTILATION SYSTEM . 90#029/3/2009 4:24 PMiiConforms toHUD MHCSS3/3/10107
Table of ContentsPREPARE FUEL-BURNING APPLIANCES. 90PREPARE SMOKE ALARMS . 92PREPARE FIREPLACES . 92PREPARE KITCHEN AND BATH APPLIANCES / FIXTURES. 94INSTALL EXTERIOR LIGHTING. 95INSTALL CEILING FANS AND LIGHTING . 95TEST ELECTRICAL SYSTEM. 96COMPLETE EXTERIOR WORK .97STEP 1. REPAIR AND SEAL BOTTOM BOARD . 97STEP 2. INSTALL GROUND MOISTURE RETARDER . 97STEP 3. INSTALL SKIRTING. 98STEP 4. ASSEMBLE OPTIONAL WIND PROTECTION SHUTTERS . 99STEP 5. COMPLETE SITE-BUILT STRUCTURES . 100PREPARE HOME FOR OCCUPANCY .101STEP 1. VERIFY ALTERNATIVE CONSTRUCTION (A/C) INSPECTION. 101STEP 2. COMPLETE INSPECTION CHECKLIST. 101STEP 3. COMPLETE ENERGY STAR CHECKLIST. 101STEP 4. CLEAN THE HOME. 101INSTALLATION MANUALCOMPLETE INSTALLATION CHECKLIST .102#02Conforms toHUD MHCSS3/3/10iii1089/3/2009 4:24 PM
Using the ManualThis manual is organized into a series of steps that will take you through the entire installation process using only those pagesrequired for the specific home being installed. First, review the entire manual, including the Introduction chapter. As you read it,identify sections of the manual that you will need; identify other documents or information you will need; construct lists of toolsand materials required for your particular installation; and make sure you have everything you need before starting work.After reviewing the entire manual, refer to the sequence of installation steps in the table below. Identify the pathway for yourinstallation and follow the arrows downward. Select either Single Section Home or a Multi-Section Home and choose the column corresponding to the home’s foundation type, either Pier and Ground Anchor or Load-Bearing Perimeter Wall (seeDefinitions, p. 4). Then complete the work in each of the sections starting with Getting Started.If using an alternative (proprietary) foundation system, the installation process will change from that described in this manual.Consult the system manufacturer directions for instructions. See page 6 for alternative foundation system criteria.SINGLE SECTION HOMEPier and Ground AnchorINSTALLATION MANUALGetting Started (p. 9) Prepare the Site (p. 14) Install Footings (p. 19) Set the Home (p. 34) Install Stabilizing System(p. 67) Connect Utilities (p. 79) Prepare Appliances andEquipment (p. 88) Complete Under theHome and Site BuiltStructures (p. 97) Prepare Home forOccupancy (p. 101) Complete InstallationChecklist (p. 102)Getting Started (p. 9) Prepare the Site (p. 14) Construct Foundation(p. 32) Connect Utilities (p. 79) Prepare Appliances andEquipment (p. 88) Complete Under theHome and Site BuiltStructures (p. 97) Prepare Home forOccupancy (p. 101) Complete InstallationChecklist (p. 102)Pier and Ground AnchorGetting Started (p. 9) Prepare the Site (p. 14) Install Footings (p. 19) Set the Home (p. 34) Complete Multi-SectionSet (p. 40) Complete Roof and Exterior Walls (p. 53) Connect Crossovers(p. 58) Complete Interior (p. 65) Install Stabilizing System(p. 67) Connect Utilities (p. 79) Prepare Appliances andEquipment (p. 88) Complete Under theHome and Site BuiltStructures (p. 97) Prepare Home forOccupancy (p. 101) Complete InstallationChecklist (p. 102)Load-Bearing PerimeterWallGetting Started (p. 9) Prepare the Site (p. 14) Construct Foundation(p. 32) Complete Roof and Exterior Walls (p. 53) Connect Crossovers(p. 58) Complete Interior (p. 65) Connect Utilities (p. 79) Prepare Appliances andEquipment (p. 88) Complete Under theHome and Site BuiltStructures (p. 97) Prepare Home for Occupancy (p. 101) Complete InstallationChecklist (p. 102)DisclaimerThe Manufactured Housing Research Alliance, its members, consultants, contractors and representatives make no representations, warrantyor guarantee, express or implied, as to the accuracy or appropriateness of any materials or information in this manual for use in a specifichome, nor assume any liability for the use of the information, methods, or materials contained herein, or for damages arising from any suchuse.Copyright 2008 Manufactured Housing Research AllianceISSN 1529-3424page 1 intentionally omitted2Load-Bearing PerimeterWallMULTI-SECTION HOME9/3/2009 4:24 PM
IntroductionThis installation manual contains instructions that must be followed for the proper installation of the home. It complies withthe HUD Model Manufactured Home Installation Standards. Please read all instructions and any other documents (including addendum pages and supplements) that may apply to the specific home prior to commencing site work or installation.This installation manual covers permits and site work through final inspection of the installation. It covers both single andmulti-section homes installed over pier and anchor, load bearing crawl space walls and basement foundations. It containsinstructions, including specifications and procedures, for the set and hookup of manufactured homes to be used as singlefamily dwellings.The importance of correct installation cannot be over-emphasized. Correct installation is absolutely essential to homeowner satisfaction and the structural integrity of the home. All instructions must be followed to provide the customer with asafe, quality home.No manual can cover all circumstances that may exist for certain home designs or building sites. For questions, furtherclarification, or if you encounter conditions at the site or in the design of the home or its foundation not covered by thismanual, please contact the manufacturer (see Resources, p. 3), a registered engineer, or registered architect.Supplemental addendum pages may be included with this manual. Supplements include requirements not covered in thismanual or that supersede the manual instructions.Once the home installation is complete, leave this manual with the home.IMPORTANT NOTICESThe home manufacturer is not responsible for installation or for the materials supplied by the set-up crew at thetime of installation. The installer may be responsible for any deviations from the installation instructions of thismanual. To keep the home in compliance with its warranty, the home installation must follow the procedures described inthis manual or other procedures approved by the manufacturer. Deviation from the instructions in this manualmay void the home’s warranty. Any alterations or changes to the home shall be approved by a registered engineer or registered architect and may still be subject to warranty violations. When an installer does not provide support and anchorage in accordance with the approved manufacturer's installation instructions, or encounters site conditions (such as areas that are subject to flood damage or highseismic risk) or other conditions that prevent the use of the instructions provided in this manual, the installermust obtain special site-specific instructions from the manufacturer or use a design approved by a registeredengineer or registered architect. The installer must possess a valid installation license as a manufactured home installer. If the installer identifies failures of the home to comply with the Federal Manufactured Home Construction andSafety Standards (the HUD Code), the installer must notify the manufacturer and retailer.SAFETYThere are potential hazards associated with the installation of a manufactured home. Home installers are licensed, and asexperienced professionals, should recognize these hazards, be qualified to work with them, and be capable of providingsafe work practices and equipment that minimize the risks of injury.Only qualified persons should install a manufactured home. As qualified professionals in the field of manufactured homeinstallation, installers are the experts and must be aware of the hazards and conditions faced. Warnings are publishedthroughout this manual as reminders. These reminders may not cover all hazards, all potential hazards, or all possibleconsequences of improper or unsafe installation practices.Construction crews should be trained in the skills required and be supervised by experienced personnel. Installers shouldregularly inspect work performed by crews and subcontractors.INSTALLATION MANUAL Obey OSHA regulations, particularly those related to home construction, such as Title 29 Code of Regulations Part 1926.For copies of OSHA regulations, call (202) 512-1800 or visit www.osha.gov on the web.RESOURCESManufacturer contact information:ADVENTURE HOMES of Garrett, IN. LLC1119 Fuller Dr.Garrett, IN. 46738Telephone: (260) 357-19639/3/2009 4:24 PM3
FAX: (260) 357-1969Website: WWW.adventurehomes.netOffice of Regulatory Affairs and Manufactured HousingUS Department of Housing and Urban Development451 Seventh Street, SW, Room 9164Washington, DC 20410-8000Telephone: (202) 708-6423 or (800) 927-2891FAX: (202) 708-4213State Administrative AgenciesA list of SAAs may be found on the web at www.hud.gov or by contacting the Office of Regulatory Affairs andManufactured Housing.FEDERAL PREEMPTIONThis home was engineered, constructed, and inspected in conformance with the Federal Manufactured Home Construction and Safety Standards of the US Department of Housing and Urban Development (24 CFR Part 3280, commonly referred to as the “HUD Code”) in effect on the date of manufacture. These Standards set forth minimum requirements forthe design and construction of manufactured homes designed to be used as dwellings.Individual states, counties and cities shall have no authority to establish standards regarding the construction or safety ofa manufactured home. A metal certification label is affixed to each section of the home to certify that it has been constructed and inspected to comply with these Standards. The design plans and in-plant construction of all homes are inspected by independent third party agencies to assure compliance with the Standards.The installation of the home and any alterations made to the home shall conform to the requirements of the FederalManufactured Home Construction and Safety Standards and the HUD Model Manufactured Home Installation Standards.These installation instructions are minimum requirements. Applicable local or state laws may have more stringent installation requirements than outlined in this manual and must be followed. Consult with the local authority having jurisdiction(LAHJ) for regulations that may require licenses and/or permits or which may affect procedures described in this manual.DEFINITIONSANCHOR ASSEMBLY. Any device or other means designed to transfer loads to the ground.ANCHORING EQUIPMENT. Ties, straps, cables, turnbuckles, chains, and other approved components, including tensioning devices that are used to secure a manufactured home to anchor assemblies.ANCHORING SYSTEM. A combination of anchoring equipment and anchor assemblies that will, when properly designedand installed, resist the uplift, overturning, and lateral forces on the manufactured home.BASEMENT. A load-bearing perimeter wall foundation that includes habitable space (finished or unfinished, heated orunheated) partly or completely below grade.CRAWLSPACE. The space underneath the home’s floor system, enclosed with either load- or non-load bearing perimeterwalls. The ground may be covered with a concrete slab or by a plastic ground cover. Crawlspace walls must bevented.INSTALLATION MANUALCROSSOVERS. Utility interconnections between sections of multi-section homes, including heating and cooling ducts,electrical circuits, and water pipes, drain plumbing, and gas lines.DATA PLATE. An information sheet located at the main electrical panel, in the utility room, in a bedroom closet, or in acabinet in the kitchen. It contains a unique identification number and identifies the wind zone, roof load zone, and climatic zone for which the home was constructed.DIAGONAL TIE. A tie intended to resist horizontal or shear forces, but which may resist vertical, uplift, and overturningforces.FOOTING. That portion of the support system that transmits loads directly to the soil.GROUND ANCHOR. A specific anchoring assembly device designed to transfer home loads to the ground.H-BEAM. Steel H-beams are often used to support a home over a basement or crawlspace. They span across the foundation from sidewall to sidewall, typically with an intermediate support pier and footing (typically in the center point resulting in a line of piers under the centerline of a double section home).INFORMATION PACKET. A set of important documents provided with the home including warranties, information on highwind coverage, and other features of the specific home.2/26/2010 2:24 PM4
INSTALLATION LICENSE. The proof that an installer meets the requirements for installing manufactured homes underthe HUD-administered installation program.LABELED. Equipment or materials to which has been attached a label, symbol, or other identifying mark of a certifiedtesting laboratory, inspection agency, or other an organization concerned with product evaluation. The label indicatescompliance with nationally recognized standards or tests to determine suitable usage in a specified manner.LISTED OR CERTIFIED. Included in a list published by a nationally recognized testing laboratory, inspection agency, orother organization concerned with product evaluation that maintains periodic inspection of production of listed equipment or materials, and whose listing states either that the equipment or material meets nationally recognized standards or has been tested and found suitable for use in a specified manner.LOAD-BEARING PERIMETER WALL FOUNDATION. A support system for the home whereby the home is mechanicallyfastened to a structural wall(s) that transfers gravity, lateral, and uplift loads to the ground.LOCAL AUTHORITY HAVING JURISDICTION (LAHJ). The state, city, county, municipality, utility, or organization thathas local responsibilities that must be complied with during the installation of a manufactured home.MUST. Indicates a mandatory requirement.N/A. Indicates not applicable.PIER. That portion of the support system between the footing and the manufactured home, exclusive of shims. Types ofpiers include, but are not limited to: (1) manufactured steel stands; (2) pressure-treated wood; (3) manufactured concrete stands; (4) concrete blocks; and (5) portions of foundation walls.PIER AND GROUND ANCHOR FOUNDATION. A support system for the home that employs piers under the chassis andother locations to support gravity loads and employs ground anchors and tie downs (the stabilizing system) to resistlateral and uplift loads.PERIMETER BLOCKING. Regularly spaced piers supporting the sidewalls and marriage line of the home. Some homesrequire perimeter blocking in addition to supports under the home’s frame.QUALIFIED. Has the necessary knowledge and skills gained from experience and training that will allow performance ofthe job safely, competently, and in accordance with all applicable codes, standards, rules, and regulations. Meets allnecessary qualification tests including any license and certification requirements that may be in effect in the areawhere the home will be installed.RAMADA. Any freestanding roof or shade structure, installed or erected over a manufactured home or any portionthereof.SHOULD. Indicates a recommendation that is
Once the home installation is complete, leave this manual with the home. IMPORTANT NOTICES The home manufacturer is not responsible for installation or for the materials supplied by the set-up crew at the time of installation. The installer may be responsible for any deviations from the
